(Warning: this is a pretty technical post. If you aren’t interested in Photoshop construction techniques for devore, feel free to skip it.)
The previous proof-of-concept sample was interesting, but I noticed that the burnout sections were very unstable. Partly that’s because they’re gauzy and made up of slippery threads, but partly it’s because I didn’t pay any attention to the interlacement of the burnout sections when designing the pattern. Holly Brackmann had mentioned to me that it is possible to burn out one structure to reveal another, so that’s what I set out to do this morning.
First I constructed the devore overlay in Photoshop:
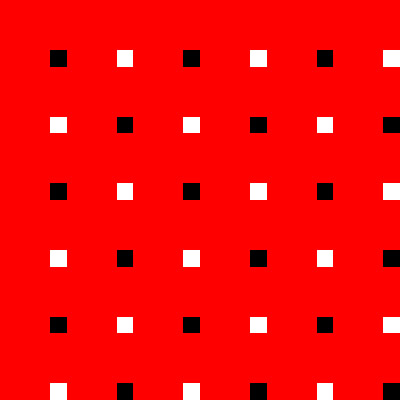
Since the metallic occurs every fourth thread, when the tencel is burned away, this pattern in the liftplan, on a straight draw threading, will result in a plain weave of metallic threads. (Black indicates a lifted warp thread, white a lowered one.) The remainder of the liftplan – the red sections – can be anything at all; it doesn’t matter since those threads will be burned away.
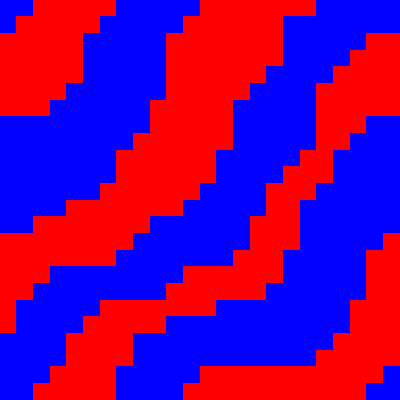
So then I set about designing the red sections. First I came up with a basic pattern, an undulating series of lines, which would tile together gracefully:
Now I had to construct a fill pattern that would satisfy the devore overlay requirement. So I took an 8×8 thread section (8×8 being the repeat length for the plain weave devore), and put in the devore overlay:

Then I had to come up with a pattern that would have the black and white squares in appropriate places. An 8-end satin happened to work:
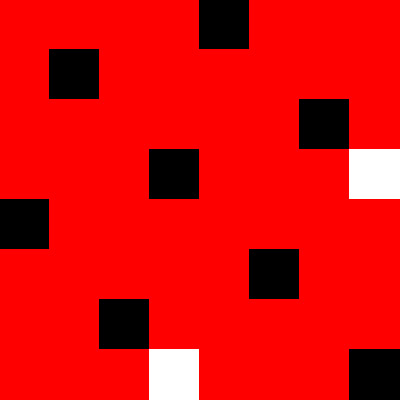
(The red sections would later be converted to white for an 8-end, 1-7 satin.)
This would have worked fine except that I was threaded up at a sett appropriate for 4-1 twill. If I just used the satin, the base fabric would be too sleazy. So I added an extra interlacement to the satin:
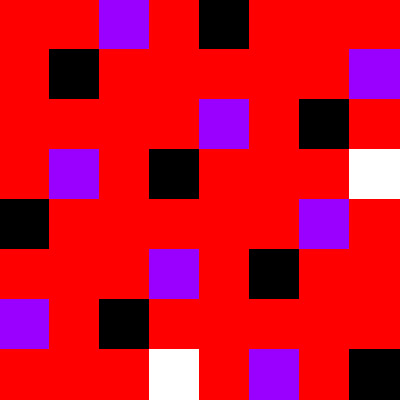
This gave me the required number of interlacements. It may have other structural issues – I need to weave it up to know for sure – but it gave me a useful pattern to work with, so I went with it.
I then constructed an equivalent pattern, warp-dominant:

And I filled it into my overall pattern:
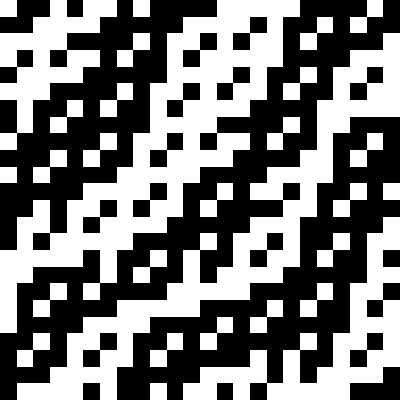
Here is the pattern with the devore overlay visible:
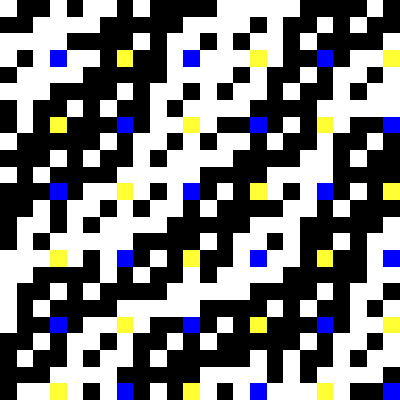
There are still a few things I haven’t worked out about this pattern yet. I’m pretty sure that my two patterns do not produce clean-cut boundaries, so there may be extra floats. But it will do for the next set of experiments.
Not wanting to use up my laboriously dyed shades of yarn for the Fine Threads Study Group, I’ve dyed another 100g of yarn in dark green. I’m waiting for it to finish dyeing; I’m hoping to dry it overnight and be weaving tomorrow!

I love the way you’ve developed this structure. It’s like poetry.