I’m not quite sure where the last two days went – it seems like I should have accomplished more, considering how hard I’ve been working! But I have set up, labeled, and dyed my samples for discharge tests, covering 22 dyes: ten colors of Cibacron F (the eight “pure” colors plus two mixes) and twelve colors of Procion MX dyes. I haven’t touched the acid dyes on silk yet, and if I do them, it will be a totally separate process. I do intend to get there eventually.
Anyway, I have done nine swatches of each color, for a total of 198 swatches. Each swatch is roughly 5×7, and is labeled with the name of the color. I plan to use eight of the swatches for each color (the ninth is an extra), covering:
- no discharge
- Immersion discharge in Thiox solution
- Immersion discharge in Thiox with shibori (to see how the edges come out when the fabric is tied beforehand)
- Immersion with bleach
- Immersion with bleach and shibori
- Jacquard discharge paste (a rectangle to show the solid results, and a detailed image to show how that looks)
- Thiox discharge paste (ditto)
- Bleach gel – liquid dishwasher detergent with bleach (ditto)
This will show me how the color discharges in just about any method I might use.
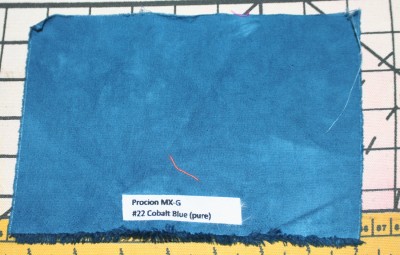
Here is a finished sample (this one came out a little uneven since I mistakenly soaked it in soda ash before putting it into the dyebath):

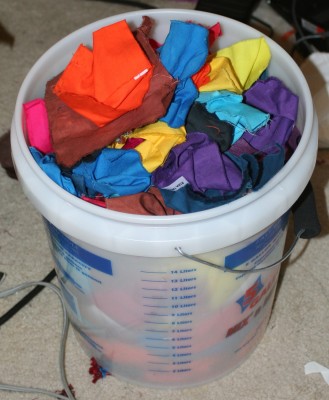
Here is my giant bucket o’ samples, which I will iron and put neatly into order this morning:

A word about the labels. (I am very proud of my labels!) I needed to be able to label the fabrics before dyeing, with a label that would survive dyeing and discharge both. This meant that paper labels were right out, along with anything printed with inkjet or permanent marker (which might not survive the discharge bath). So how to do the labels?
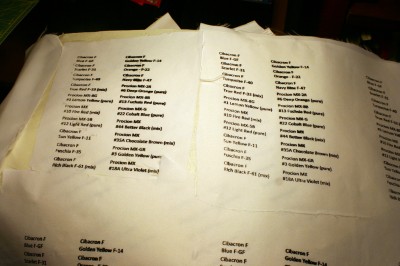
Thermofax to the rescue! I typed up my labels in neat order, printed them out, and ran them through the Thermofax to make a screen. I then screen printed in black ink on white polyester fabric (which does not take fiber-reactive dyes) to produce sheets of painted labels in white polyester:

I then ironed the polyester labels to sheets of Heat’N’Bond, cut out the labels, and ironed them onto to each swatch individually. Now my swatches are permanently labeled! (The one thing that may not work is a boiling-water bath, which will probably re-melt the glue. So for the Thiox discharge bath, I may have to just dip the top part of the swatch in.)
Hmm. 198 swatches = 198 labels, each individually cut and ironed on. Not to mention twenty-two dyebaths afterwards! I think I understand now why this took so long!
I will now have to do another set of labels, this time to cover the various processes and materials I intend to use. This will also be incredibly laborious, but I don’t see a better alternative. So I better quit whining and get back to work. 🙂
Today I plan to work on quilting, though. I’m a bit behind in my piecing, and the new lesson – with more squares to make – just opened, so I need to play catch-up. I also have a metal clay class this afternoon, on carving stamps to make textures in metal clay. I figure it will double nicely as a lesson in carving stamps generally, which interests me because stamping is one of the surface design techniques I intend to sample. And I am interested in metal clay, too.
Off to cut up some quilt pieces! (And iron a Big Bucket o’ Samples!)

Love the giant bucket o’ samples! And the labels are wonderful. I’d probably just have used a permanent marker to number each one and made a chart to keep track of them all, but your way you won’t have to look things up later on, just read the labels. Very cool.