I’m considering changing my dye methodology for my 1500+ samples. I timed some steps, did some calculations, and discovered that the rearranging and relabeling of skeins between dyebaths takes a lot more time than expected. The total amount of time required for each skein comes out to almost 10 minutes a skein! That is, at least in theory, pretty close to the amount of time required for individual dyebaths. And individual dyebaths would be of more practical use since I wouldn’t have to do three dyebaths to replicate the color in the sample.
So I have been working on developing and refining my methodology for individual samples. It’s been…complicated. Here’s my basic setup:
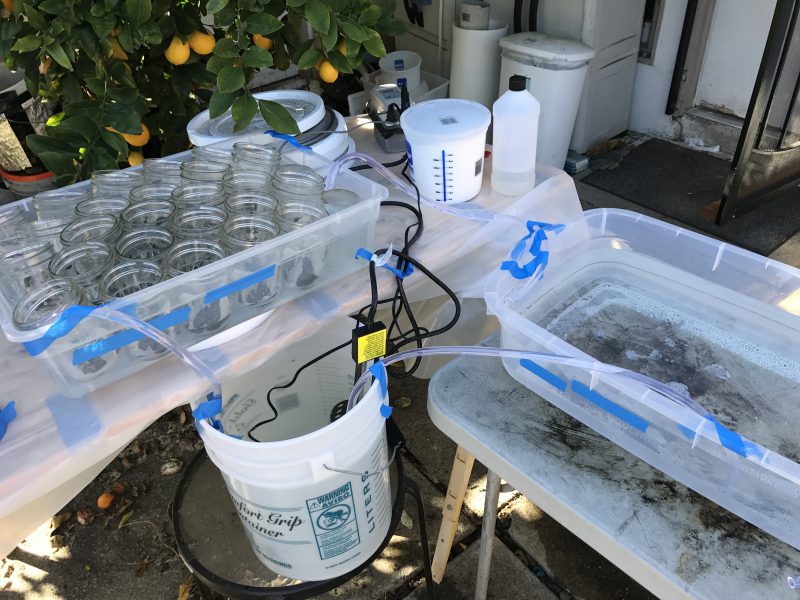
The dyebath needs to be kept at about 90F, which is difficult to do when working with small jars for individual dyebaths. So I am putting glass pint canning jars into a pair of circulating water baths. (The right-hand water bath has no jars in this photo – I was still setting up.)
A bucket below the jars contains a pump and a bucket heater (to maintain the temperature).
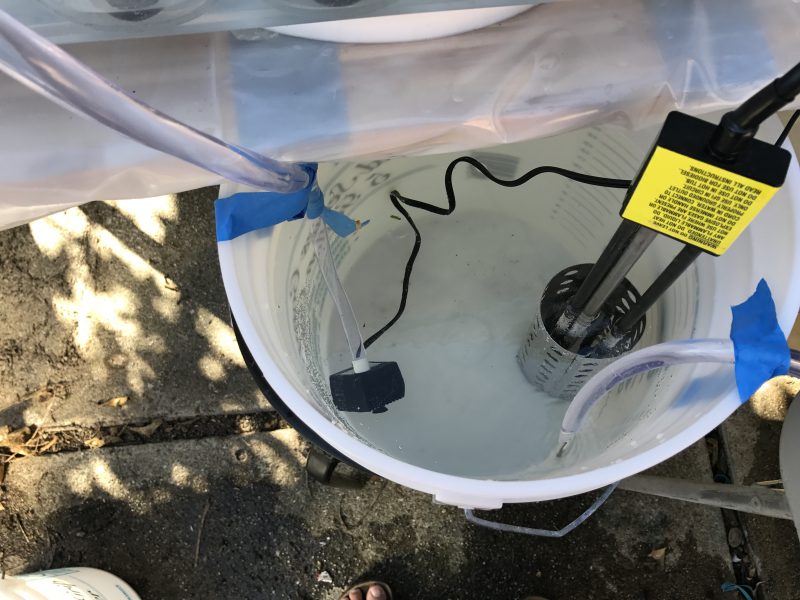
The pump (meant for a small fountain) pushes the water up the tube on the left, into the first water bath:
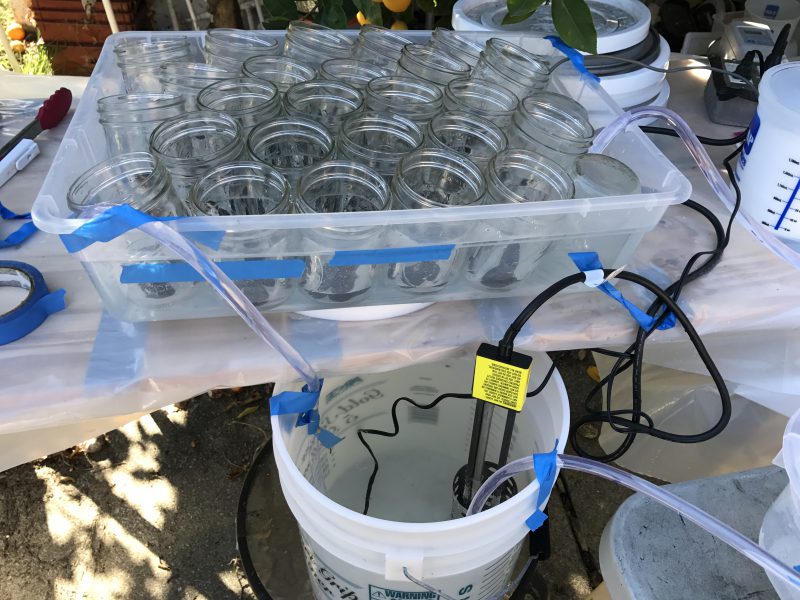
Water is coming up from the bucket through the left-hand tube. A clear tube on the right side siphons water out of the bath and into the next circulating water bath. Because the pump and siphon are on opposite sides of the container, water moves through the entire container, keeping the temperature even. A temperature probe (the cord taped to the back right corner of the water bath) controls the heater in the bucket and keeps the temperature of the bath at 90F.
The second circulating water bath is a bit simpler. It’s located a few inches below the first water bath, so gravity pulls water through the siphon in the first water bath down into the second bath. A second siphon at the opposite end of the container pulls the water down and into the bucket, to be pumped up again. (Here the inlet hose is in top right, and the siphon to the bucket is in the bottom left corner.
It’s an elegant solution, but also quite fussy. The siphons have to remove water from each circulating bath at the same rate that the pump is pumping it in, which is a bit tricky. I accidentally flooded my first set of skeins when I made a small adjustment, walked away to check my email for a few minutes, and came back to find the water bath overflowing! Lesson learned: if you’re doing something for the first time, for heaven’s sake don’t walk away from it and assume it will work!
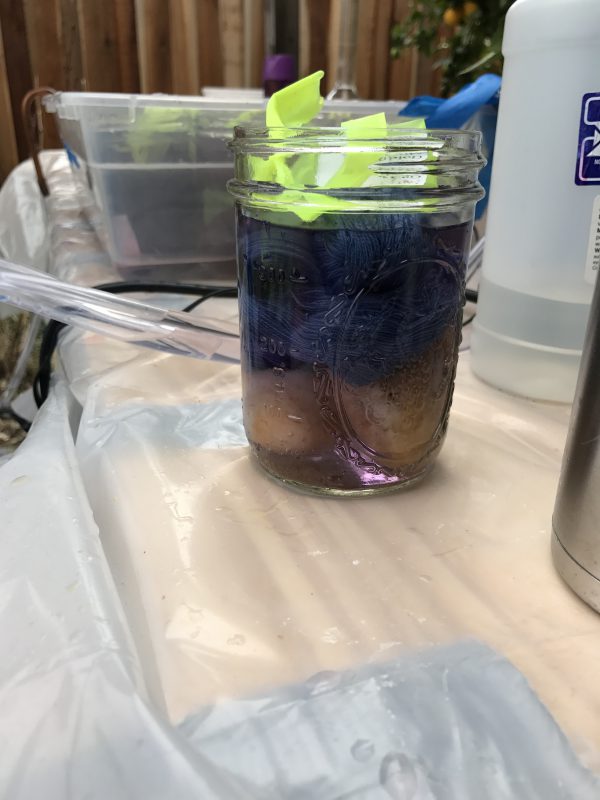
I found initially that the jars, when empty, tended to float. So I stuck rocks into them to weigh them down. (No, those are not potatoes in the bottom!) It worked, but I have some better ideas for next time.
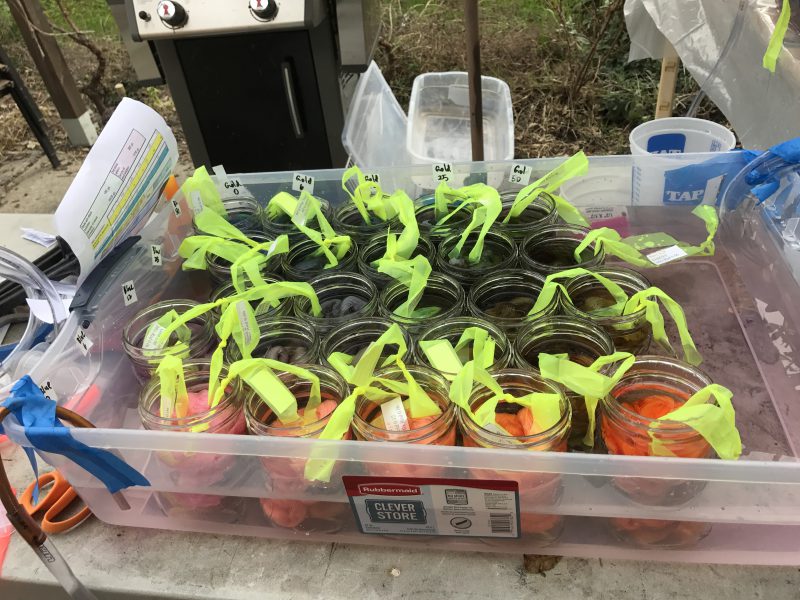
Here’s what it looks like with 50 individual dyebaths going:
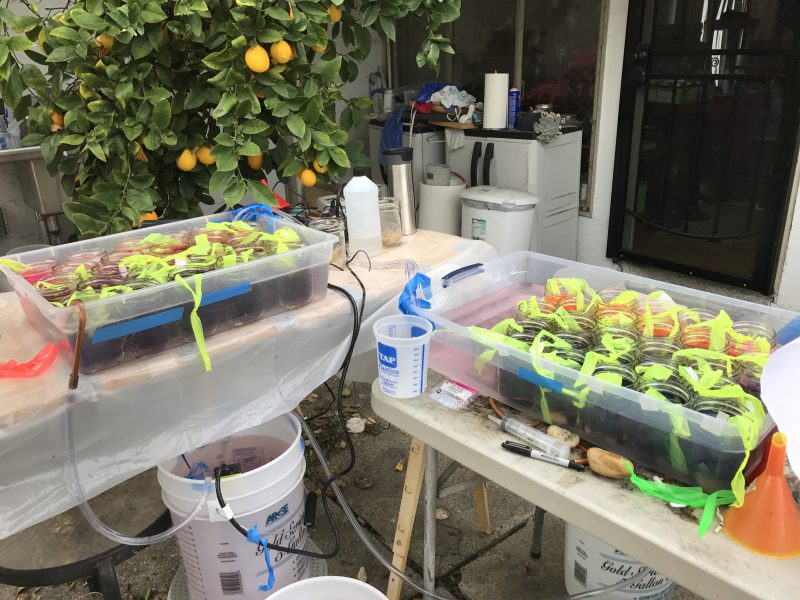
Each dyebath has a different concentration of Gold, Mixing Red, and Navy Blue.
Because of the difficulty of measuring small amounts of dye and other dyebath additives, I made up stock solutions of dye, salt, and soda ash, and measured out the amounts with syringes (tested for accuracy). Here is Kaye (my dyeing buddy) adding soda ash solution to one of the dyebaths. She’s holding the skein up above the dyebath as she adds the soda ash solution with the syringe.
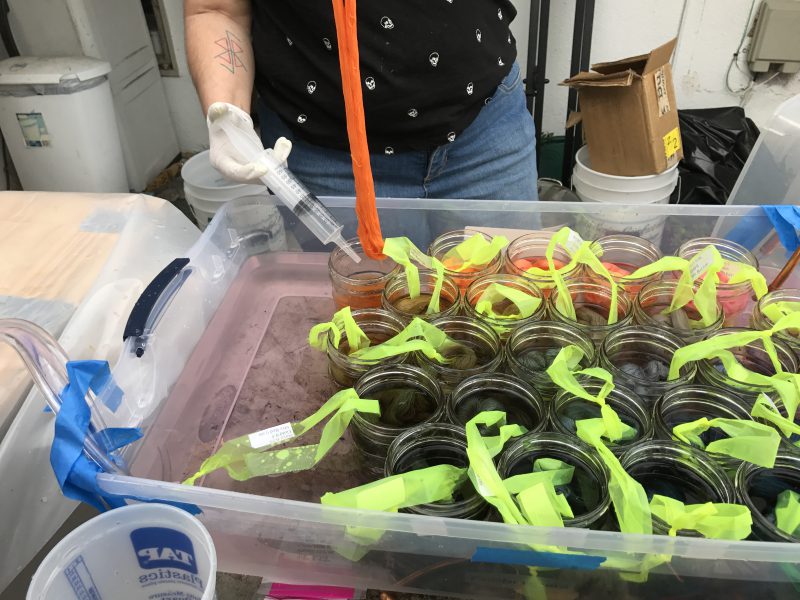
As you can see, this method is much fussier and more error-prone than the sequential-dyebath method. However, it will enable me to reproduce the results with a single dyebath. And, if I decide to sell color plates of my samples, they will be much more useful to buyers if they don’t have to do three dyebaths to achieve the same results. So I am continuing to experiment and refine the process, to see if I can make individual dyebaths work. So far I’ve botched three sets of skeins, but I’m learning something with every dyebath, and I’m confident I can figure it out, though it may take me a few more weeks. When you’re doing something new, you’ll inevitably run into snags – this is just giving me more snags than most.
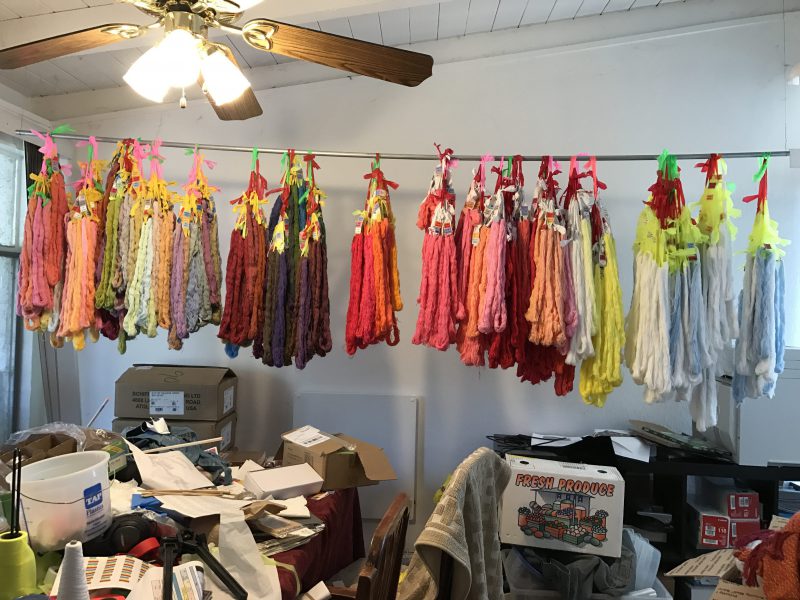
Meanwhile, Mike has very kindly put together a skein-drying and storage rack in the dining room, turning an untidy pile of skeins into a beautiful curtain of color.
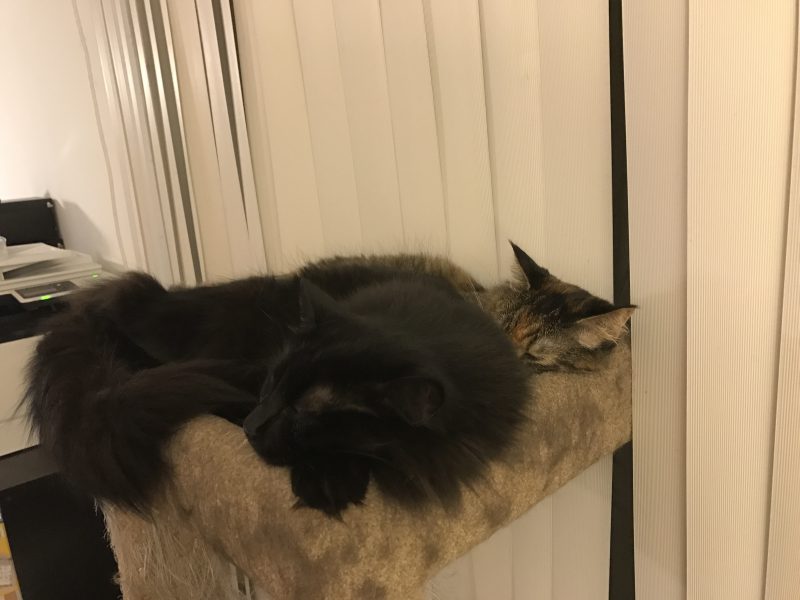
Thankfully, this is what the cats think of it:
And that’s it for now! I’m hoping to have pretty pictures of a successful batch soon. Stay tuned!

Consider low water immersion dyeing. That works well for me.
Hi Elizabeth,
I’ve tried that but have never managed to get a level shade with it (which I need in order to dye my yarn accurately). Do you have any suggestions for getting more level results with LWI techniques?
TO WATCH YOU FIGURE THIS ALL OUT IS AMAZING AND FUN TO SEE.
Tien,
As a pharmacist, I occasionally need to make a very tiny dose which is usually accomplished by making successive dilutions or titrations.
Would this technique be useful to you for this project?
Hi Linda,
Great idea! That’s what I’m doing with my stock solutions…I’m mixing the dye solutions up at 1% and then diluting to 0.1% to make measuring easier and more accurate. That’s what you were suggesting, right? (Not sure about the titration part.)
Titration is a pharmacy term….sorry. We use it as short-hand for serial dilution.
What you are doing reminds me so much of mixing IV’s (intravenous). The trick is to create a routine that you always follow that, if interrupted, you can look at and know exactly where you are when you return. It will make it faster and more accurate. Labeling is also critical. Look at gardening type labels for the skeins. For the bottles of various concentrations try labeling the empty bottles first. If they are filled, then you know it has been done. If you can, prep all the colors ahead, then dye the skeins. Each part needs a different thought process and sequence. You need lots of space!
Hi Linda,
Looks like I’m doing most of that already! I need to write up my protocol so I have it documented. The one thing I haven’t yet figured out is a quick way to make sure I know where I am if I get interrupted. It isn’t obvious because every jar has a different water level until all the dye is added. I’m thinking I may set up an abacus or something and move beads back and forth as I put in the various solutions.
[WORDPRESS HASHCASH] The poster sent us ‘0 which is not a hashcash value.
Hi Tien,
When I was making batch IV’s with, perhaps more than one ingredient, all of them clear, and using a syringe filled with enough to make the entire batch, I would lay my bags in opposite directions when they were complete relative to how I laid them out to start with. If I was interrupted, I would set the bag down in a different direction, predetermined to tell me where in the process I was. I could also use the position of the syringe. I didn’t try to add a counter or tally into the process for two reasons – 1, I might forget to mark it, and 2 I was working in a sterile environment and could not place any extraneous item in the hood. I suggest you look at your process and see if my “placement” technique would work for what you do. If you are working with a partner, come up with a process that you both can read so either one of you can pick up and continue.
Hope that helps!
Thanks, Linda! I think I may try putting down the syringe with the tip over the jar I just finished. I’ve also just ordered a child’s abacus and will play with that as well. Will post about the results!
AMAZING! Thanks for sharing all of your efforts!!! A few questions, if I may: what are the strips made of (that, I think, you lift the yarn out of the dye with)? Once you lift it out of the dye bath, do you let it drip over the bath? I’m assuming they are not dripping when they are hanging in your dining room! I’m struggling with the fabric I dye becoming streaked/dyeing unevenly when I hang it to dry over a hanger . . . THANKS AGAIN!
Hi Julia,
The stripes are flagging tape, a thin (and cheap!) polyester ribbon.
When I remove it from the dyebath, I put it through two cold rinses, a hot soak with detergent, and a second hot soak before spinning them out in the washer to remove nearly all the water. If your fabric is becoming streaked when you hang it to dry, then you haven’t washed out all the dye beforehand. However, it’s much more likely that your fabric dyed streaky and you just didn’t notice it until it dried – that’s very easy to do (says the voice of experience).
The first cold rinse is critical – you want to get all the soda ash out so you don’t get drips and backstaining (I’m assuming you’re dyeing cotton with fiber-reactive dyes and soda ash). I pull the yarn out, stripping out part of the water as I go, and put it straight into cold water. I let it soak for a few minutes, then transfer to a second cold water bath and let soak for several hours. THEN, several hours in hot water and detergent, followed by a final hot rinse.
Impressed, but I noting something in your write up which bothered me.
You say that you make up a stock solution of dye, soda ash and salt. FR dyes hydrolyse in the presence of each of these, and this reduces the number of unhydrolysed dye molecules left to react with the fibre. The reaction is quite fast (say, a half life of 30 mins) so any differences in timings between dissolving the dye and adding the fibre will change the concentration of dye to WoG,
If possible I would make the salt and Soda Ash solutions first, then add the dye, stir and IMMEDIATELY add to the fibre.
HTH
Hi Ian!
Sorry, my bad! They’re actually three separate stock solutions – one of soda ash, one of salt, and one of dye. (Actually three separate dye stock solutions, one for each color.) My protocol is to add water and salt first, then dye, then immediately add the skeins. I mix up the dye stock solution immediately before starting the process, so the dye doesn’t hydrolyze. Soda ash solution goes in over a twenty minute period starting twenty minutes after the skeins are added. But I agree that wasn’t clear from my description!
Excellent!