Yeah, I know. I start by saying “Less fiber content” and next thing you know, I’m posting about dyeing? But hey – that’s what I was up to last weekend. That’s my story, and I’m sticking to it.
My wardrobe, as you may or may not know, consists almost exclusively of tie-dyed clothing. This isn’t because I’m a ‘60s child (I wasn’t born in the ‘60s), nor because I’m a Grateful Dead fan. It’s mostly a practical choice: when you are a five-foot-tall woman with exceptionally wide shoulders, you can pretty much guarantee that nothing off the rack is going to fit.
(How exceptionally wide? The average shoulder width for an American woman is 14.4 inches, and for a man it’s 16.1 inches. Mine are 17.5 inches shoulderbone to shoulderbone – plus all that muscle from powerlifting. I’m basically a freakishly short female linebacker.)
To accommodate my odd dimensions, I buy white T-shirts and white men’s shirts from Dharma Trading Company and dye them so they don’t all look identical. This strategy has worked beautifully for me for many years. 🙂
But then I got a fabulous tattoo covering most of my right arm.
My original theory was that I’d get the tattoo and then wear T-shirts when I wanted to cover it up, and tank tops when I wanted to show it off. As soon as I got the tattoo, though, I realized, “Why the *#& would I ever want to hide this??? I’m going to wear tank tops all year round!!”
Of course the only problem with this theory was that I didn’t actually have any tank tops. Dharma Trading to the rescue! I dyed eight tank tops the weekend after I got the tattoo. Whew! Disaster averted.
But a girl likes to have some variety. So last weekend I dyed eight more, plus a T-shirt for Jamie, who (much to my relief) has FINALLY relented and allowed me to dye something for her.
Here’s what came out of the dyepots (pardon the less-than-perfect photos; I was in a rush):
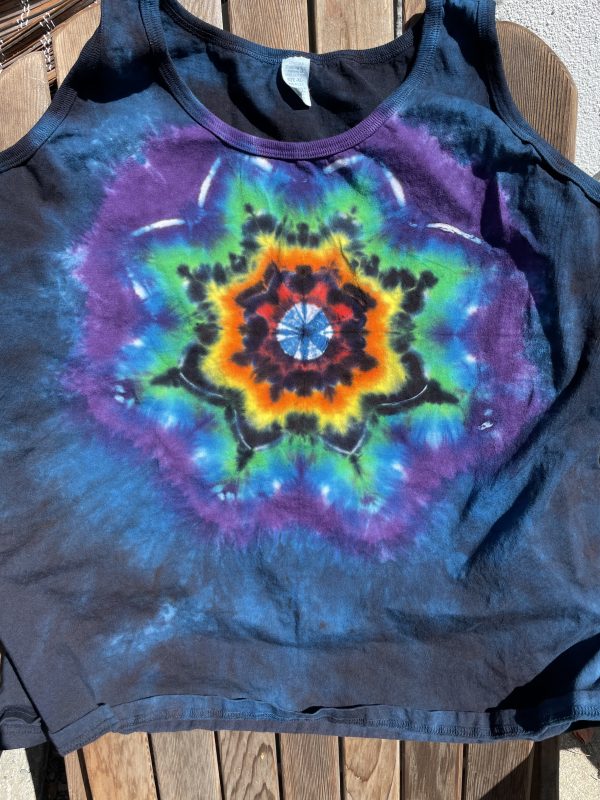
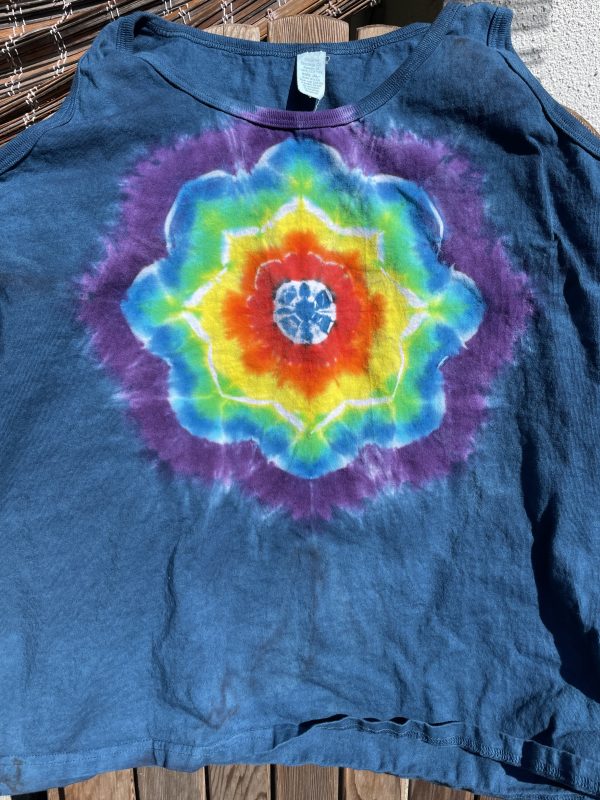
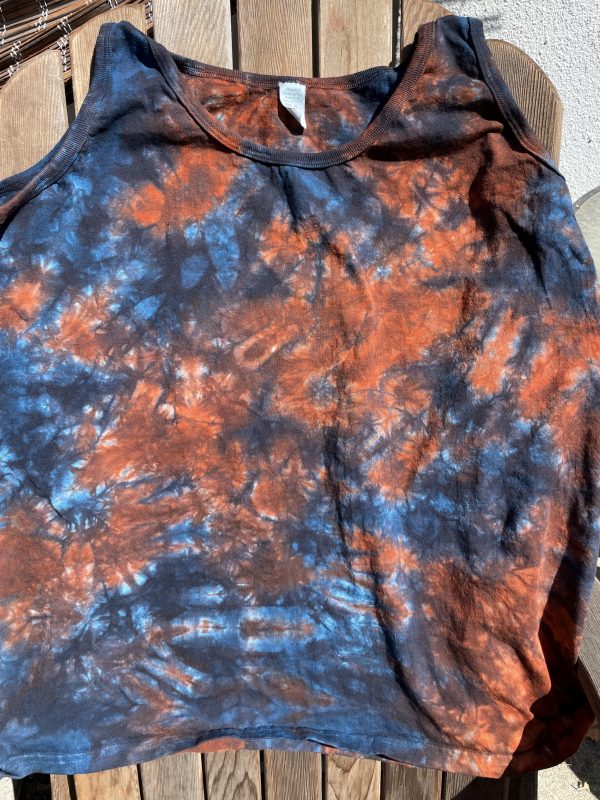
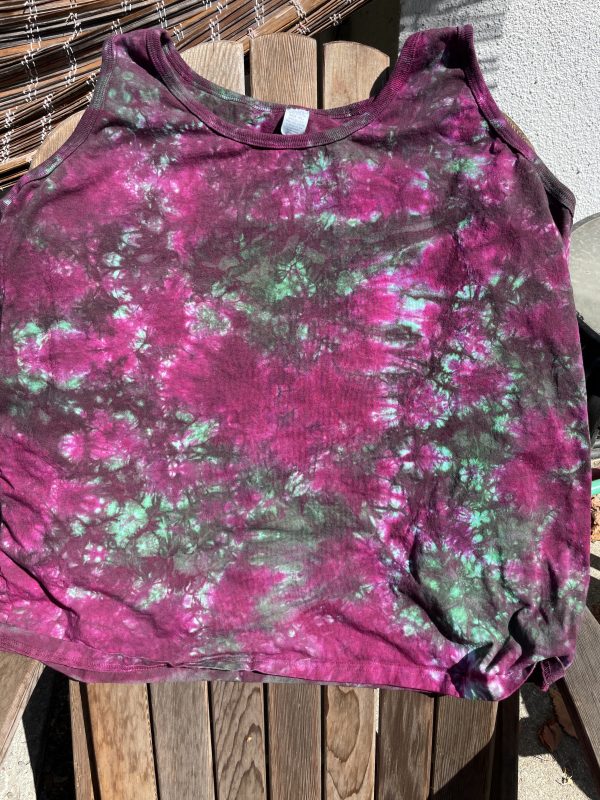
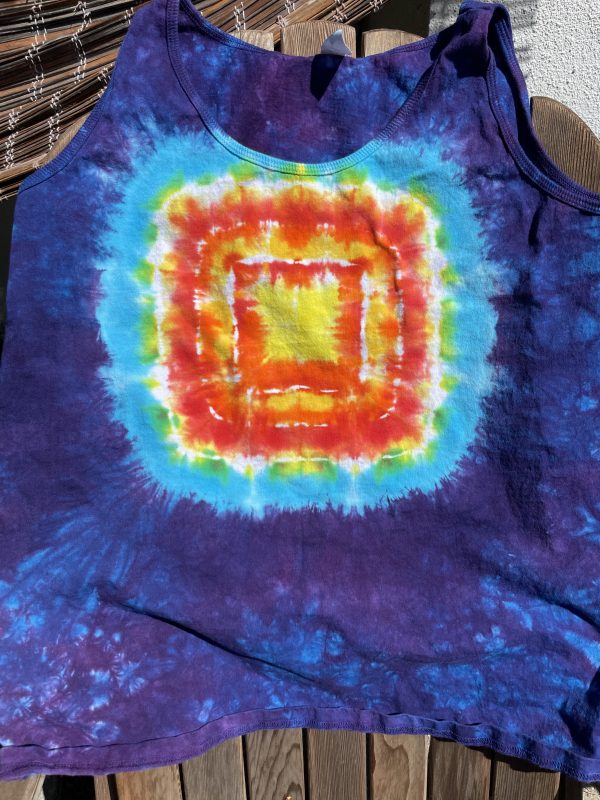
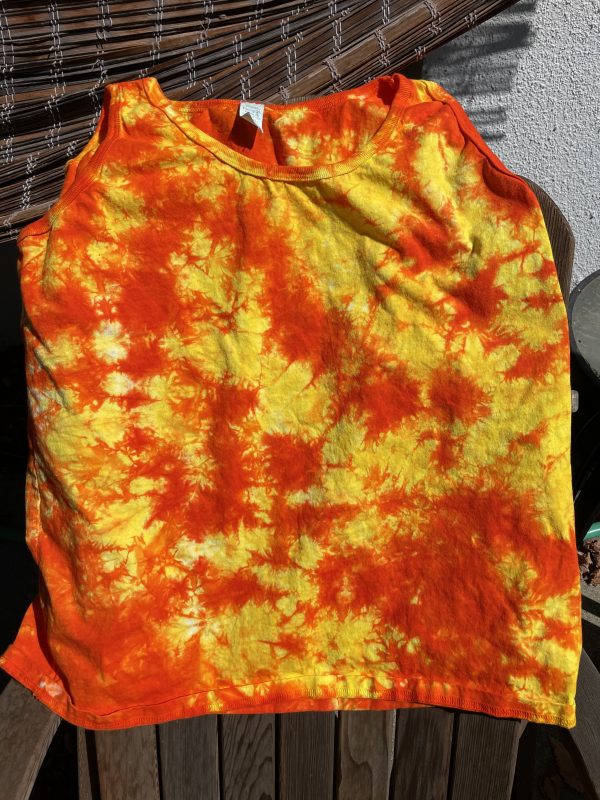
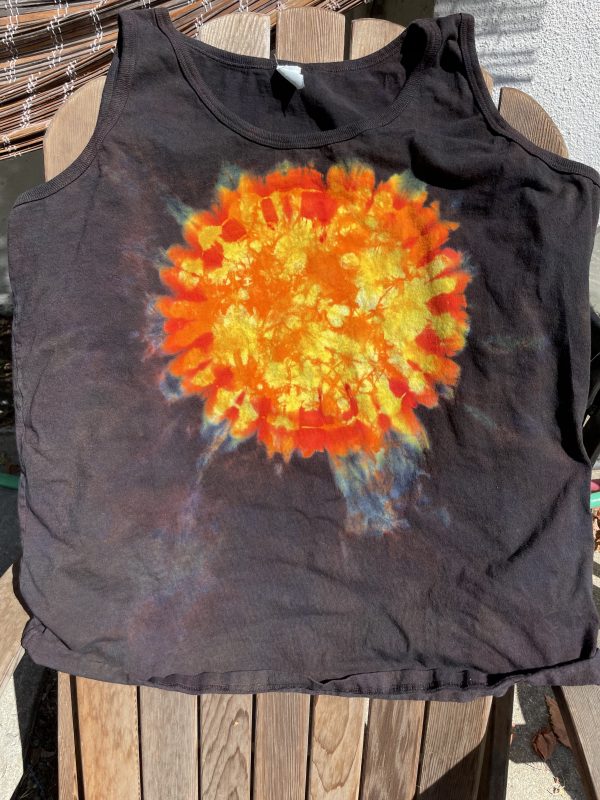
The last tank top is actually double dyed. That is to say, it’s actually been dyed twice. The first time it was dyed like the second to last one (the orange and yellow flame pattern). Unfortunately, it got a stain on it, so of course the only thing to do was overdye the stain. So I tied it up in a circle pattern, put red around the edges, and dyed the outside black.
Preventing the dye from getting where you don’t want it is a bit of a tricky process – dye has a way of splashing and seeping in very inconvenient ways, especially when it’s something like black on yellow where mistakes would be VERY obvious. (The dye gods are capricious!)
To protect against this, I used a method called “capping” which is just a fancy way of saying “stick the part you don’t want contaminated into a plastic bag and then tie the bag on tightly before applying more dye. I actually capped it twice, once to keep the flame-patterned dye from getting contaminated with red and once to keep the red area from getting contaminated with black.
Here’s what it looked like when fully capped and dyed:
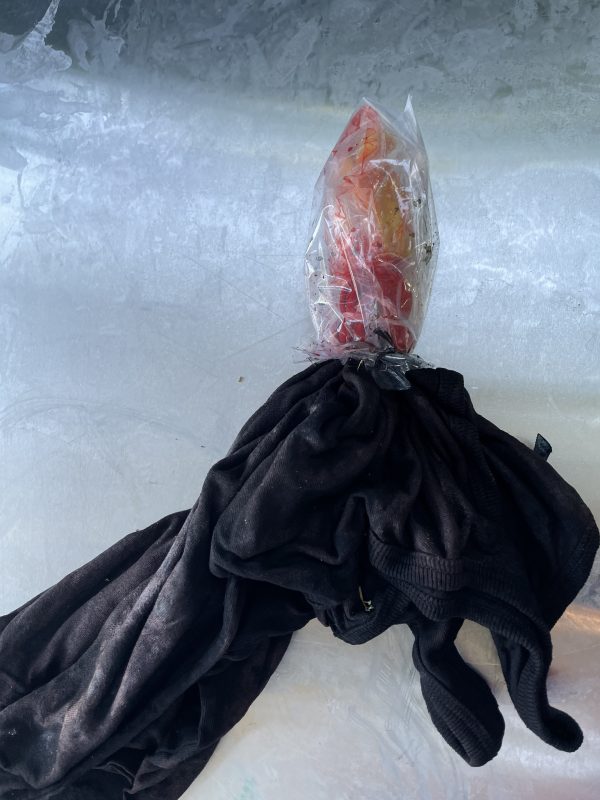
And here’s what it looked like when it was partially uncapped:
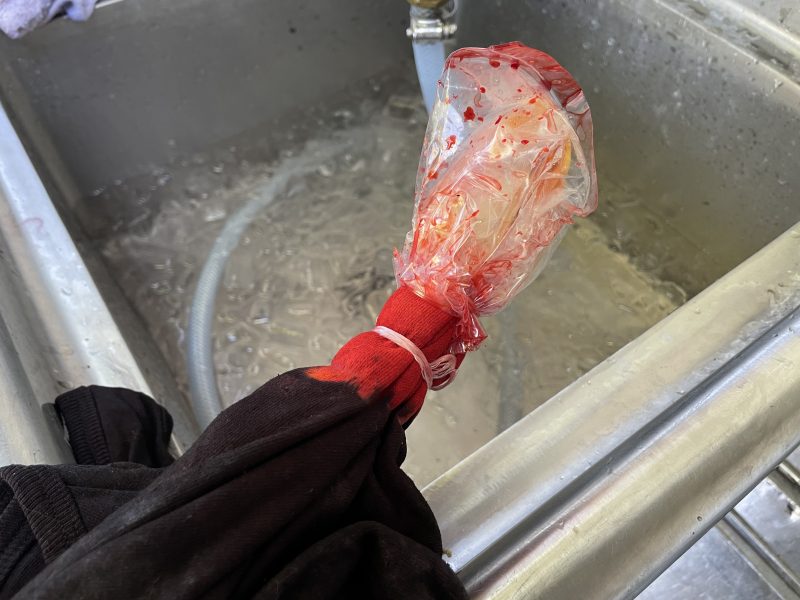
Here the first plastic bag has been removed to reveal the red portions but the orange-and-yellow is still protected.
You might be wondering about the sink full of water with ICE floating in it that appears in the background of the photo. The ice is the secret to keeping your tie-dyes bright when you’re rinsing out the dye.
There’s a potentially dangerous moment when you dunk your beautiful multicolor tie-dye into the water. With fiber-reactive dyes, there’s always a lot more dye than the fabric can actually react with, and the moment you plunge the fabric into the water, a ton of loose dye comes off into the water…and can potentially stain your beautiful shirt.
However, if the water is freezing cold, the dye can’t react. That’s because the dye reaction requires alkalinity, moisture, dye, and some heat to take place. The fabric has soda ash (alkalinity) and dye in it, so if you put it in warm water, all four dye reaction components are present. If you put it in ice water, though, there’s not enough heat for the dye to react, and the loose dye can’t stain the fabric.
At the same time, the first rinse bath rinses out the soda ash that gives the dye the alkalinity it needs to react. So after the ice water rinse, all the other rinses are safe to do in room temperature or warm water for as long as you like. In fact, it’s recommended to soak overnight in cold water to make the rinse-out process as easy as possible. The rinse water will turn super-dark with loose dye – but it all comes out. No dye reacts with the fabric. All because of that first ice-water rinse!
Better living through chemistry!
I have another dye day scheduled next weekend – some friends from waaaaaay back in high school are coming over and we’re going to do more tie-dyes together. Since it’s starting to get cooler, I may do some sweatshirts, and maybe some T-shirts and tank tops for Jamie.

Wonderful!!
Very cool dye work
Great Ideas. Did some ice dyeing with guild last year.
Protecting your hard work is important too.
And you can show off your hard work in thy gym.
Will this be a class at the next Convergence?
Love your posts! Interesting, fun to read and great content!
Those are stunning!