Tien Chiu

  • Home
  • About
    • Honors, Awards, and Publications
  • Online Teaching
  • Gallery
  • Essays
  • Book
  • Blog
  • Dye samples
You are here: Home / Archives for All blog posts / drawing

March 6, 2016 by Tien Chiu

Tools for the drawing-impaired

I don’t have much drawing skill. This can be a serious handicap, since without skills it’s difficult and time-consuming create a design sketch – even at a crude level, it takes many iterations for me to figure things out. However, I’ve discovered that there are tons of tools to help. Here are a few of them.

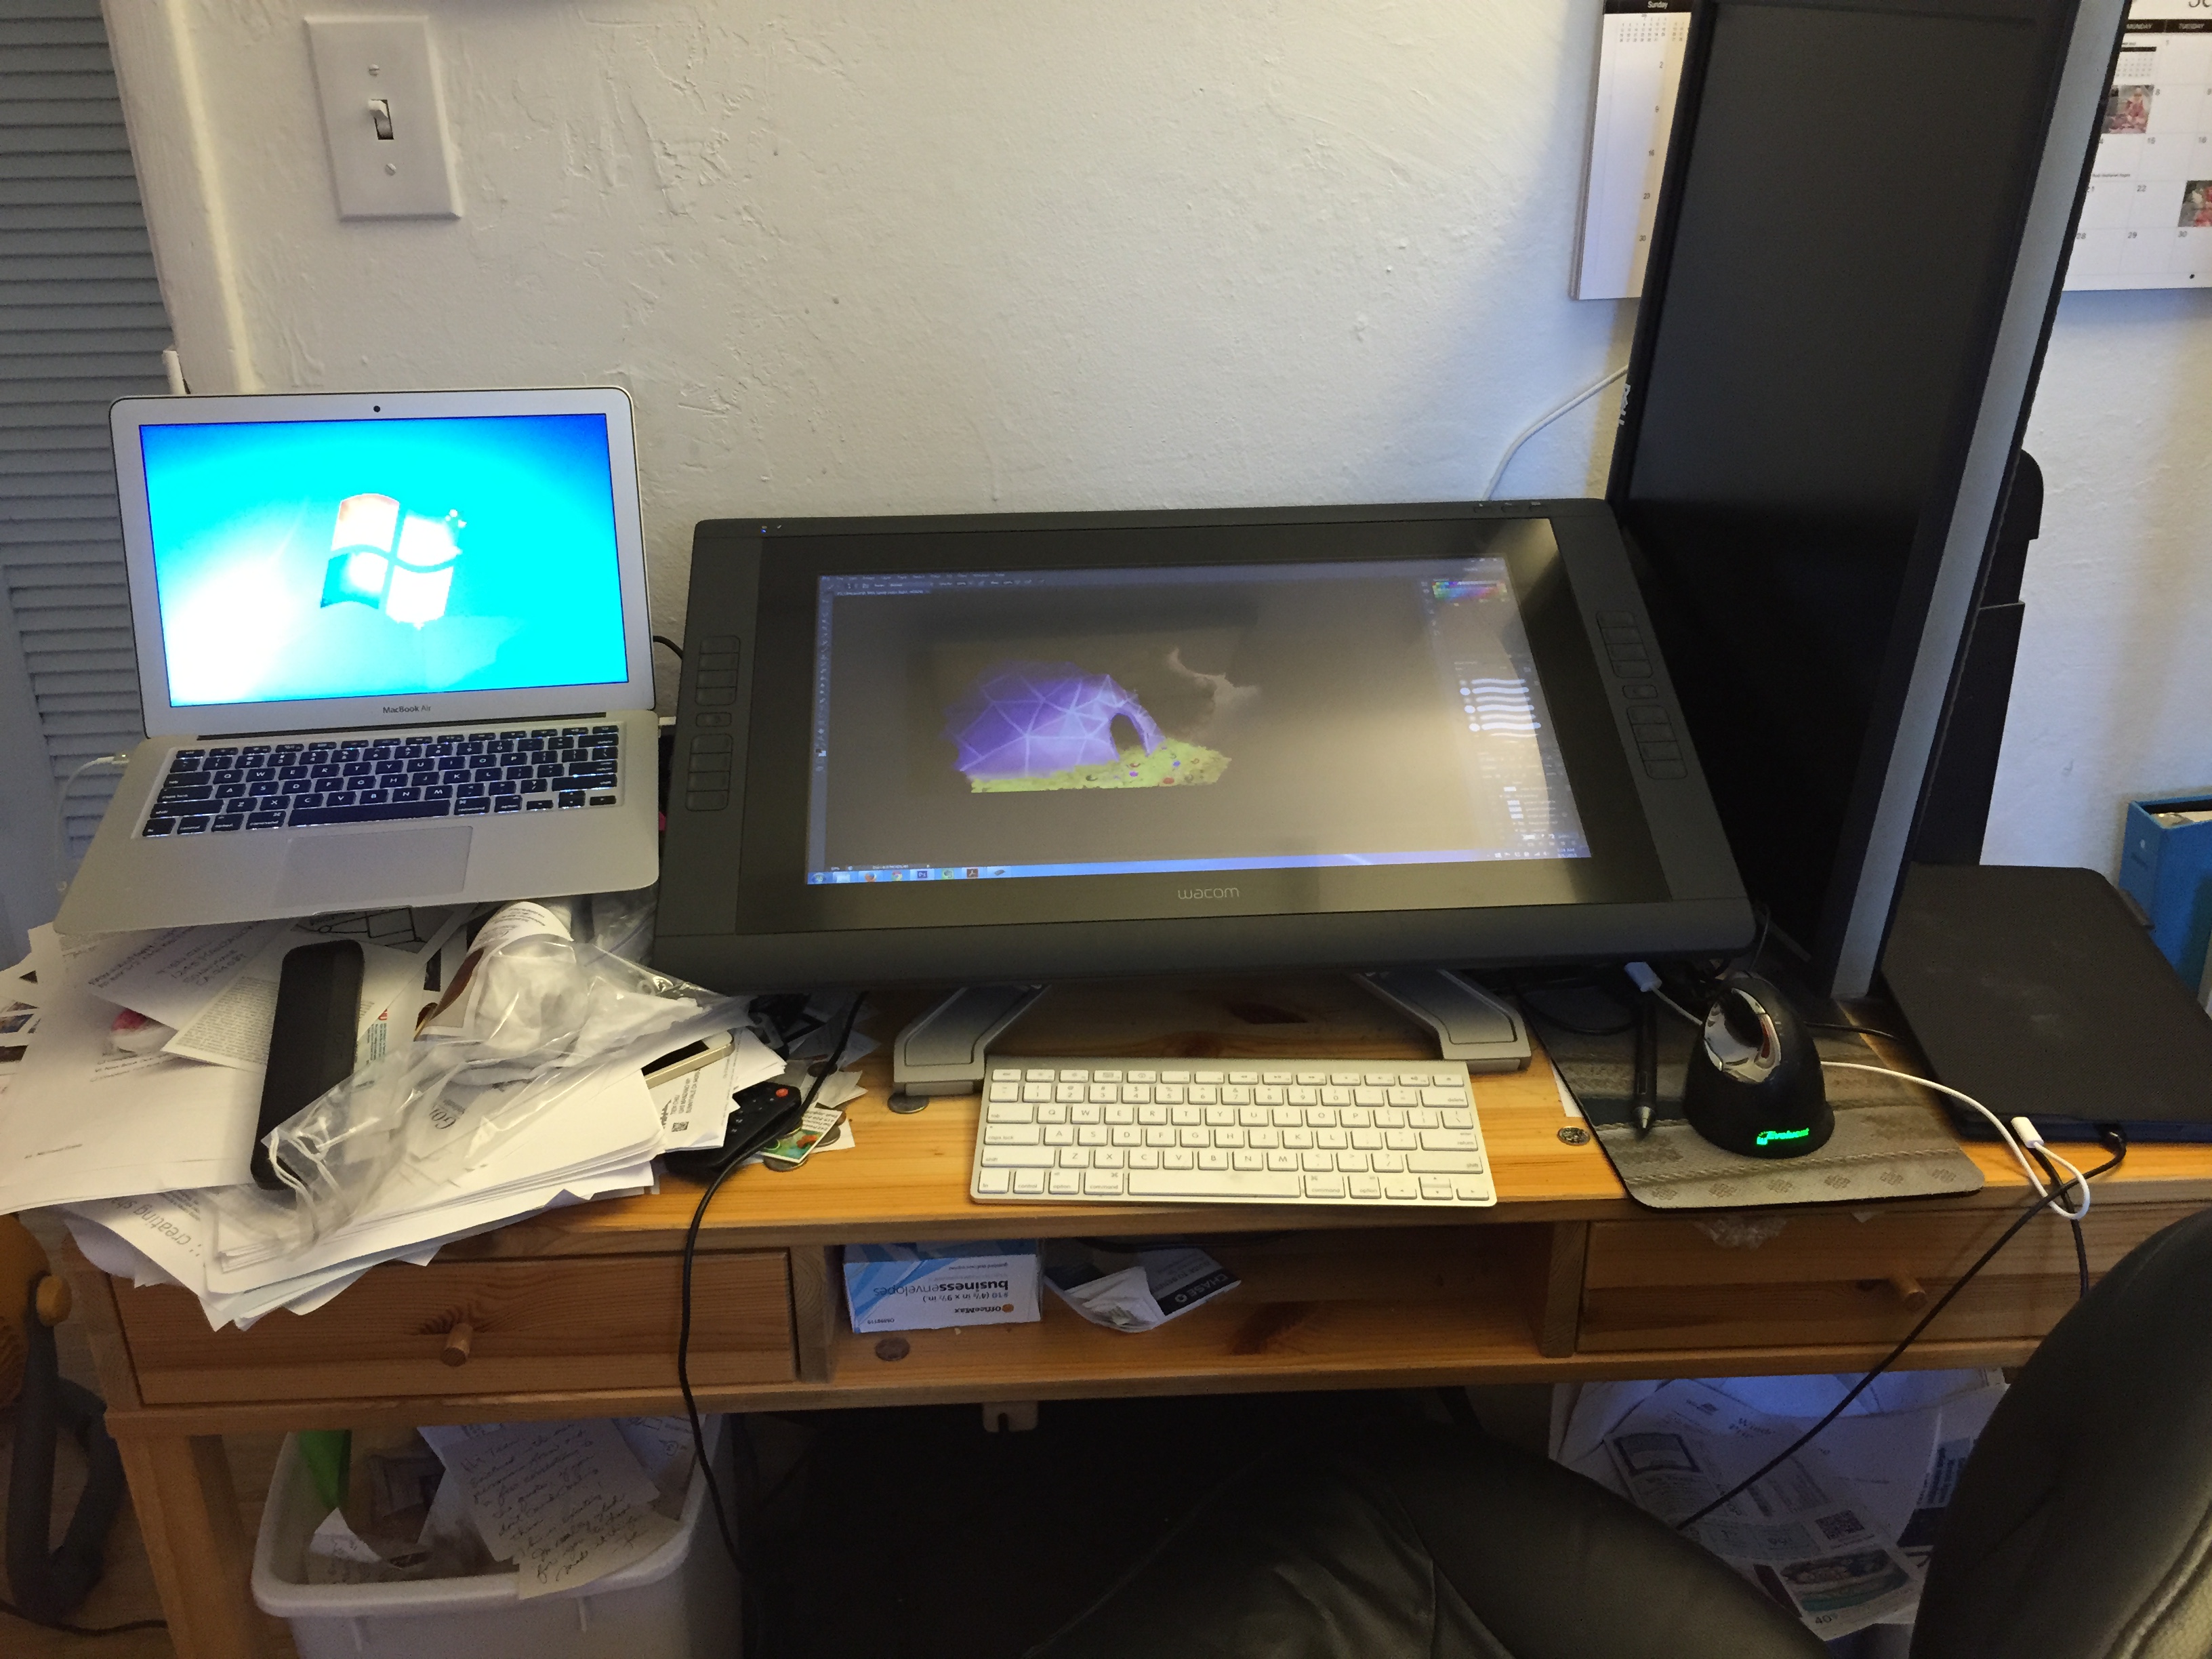
First, Photoshop. OMG does it make sketching ideas easier. Screw up something? Just hit “undo”. Not sure about a set of changes? Put them on a different layer and experiment with the layer. Got a couple of inspirational images? Tuck them into the file and refer to them, trace them, rotate them, resize them – change them however you want. There is a substantial learning curve but it is well worth the effort – that digital painting class was the best investment I ever made. (You’ll want a drawing tablet to make the most of Photoshop sketches.)

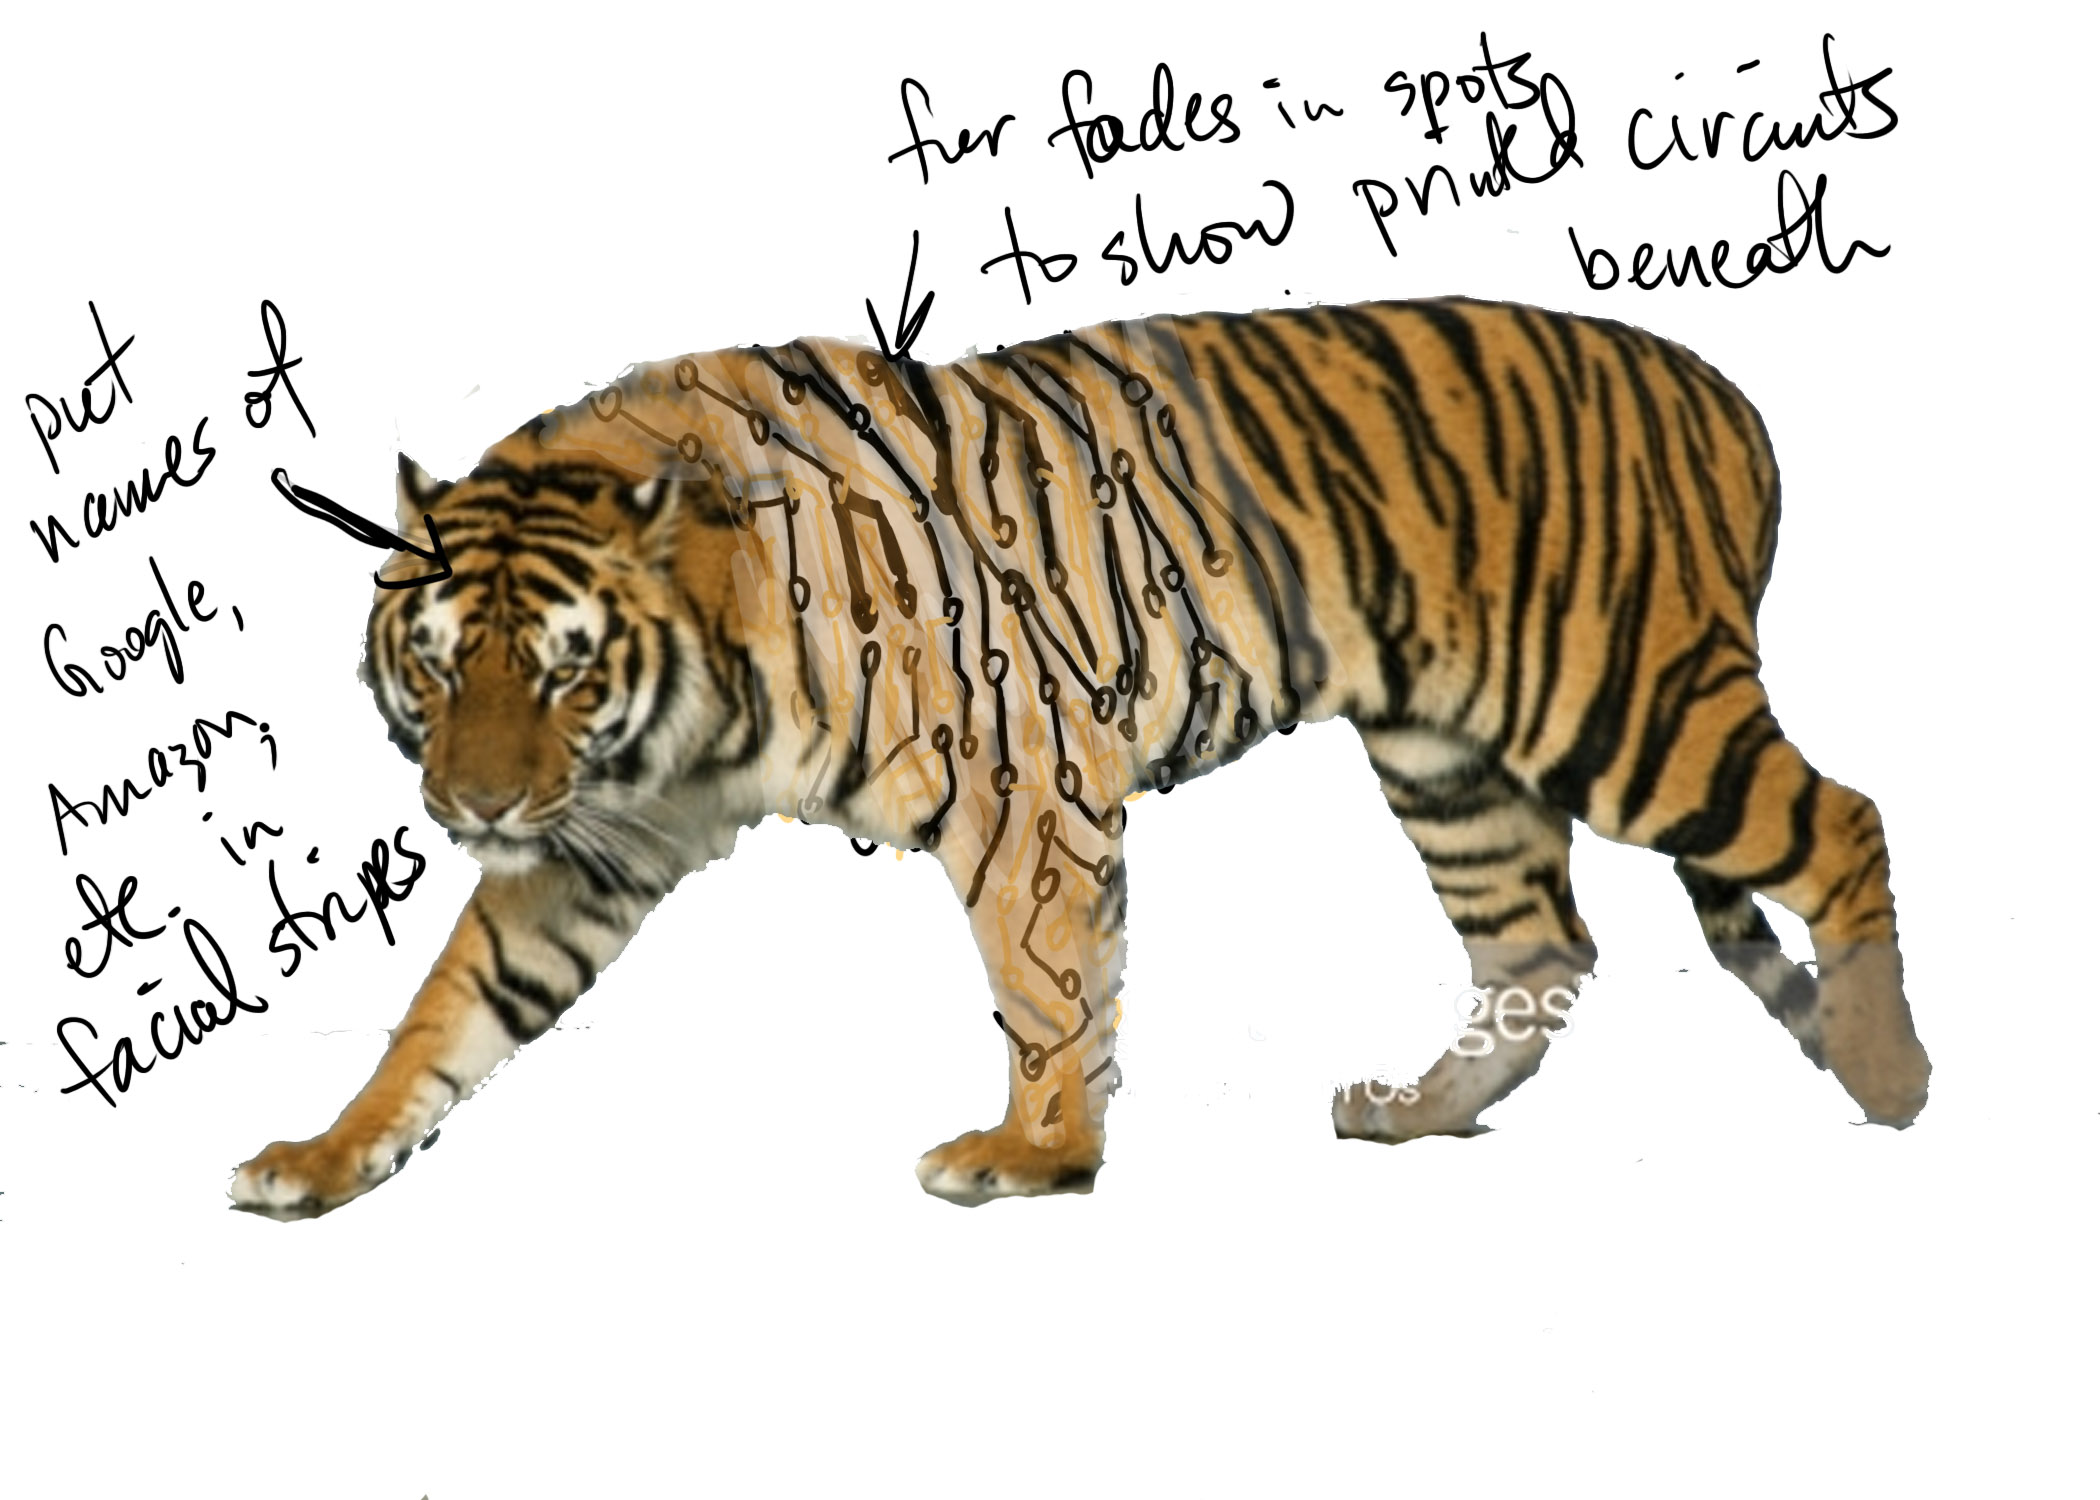
Second, Google image search. For a quick sketch, I use Google image search to find a roughly accurate photo, and build on it. For example, on this sketchbook page, I wanted to test out the idea of a tiger that was partly a real tiger, and partly circuitry. Sketching a “real” tiger would have taken hours, given my drawing skills. But it took only about 30 seconds to find a tiger image that I could sketch over:

circuit board tiger
circuit board tiger

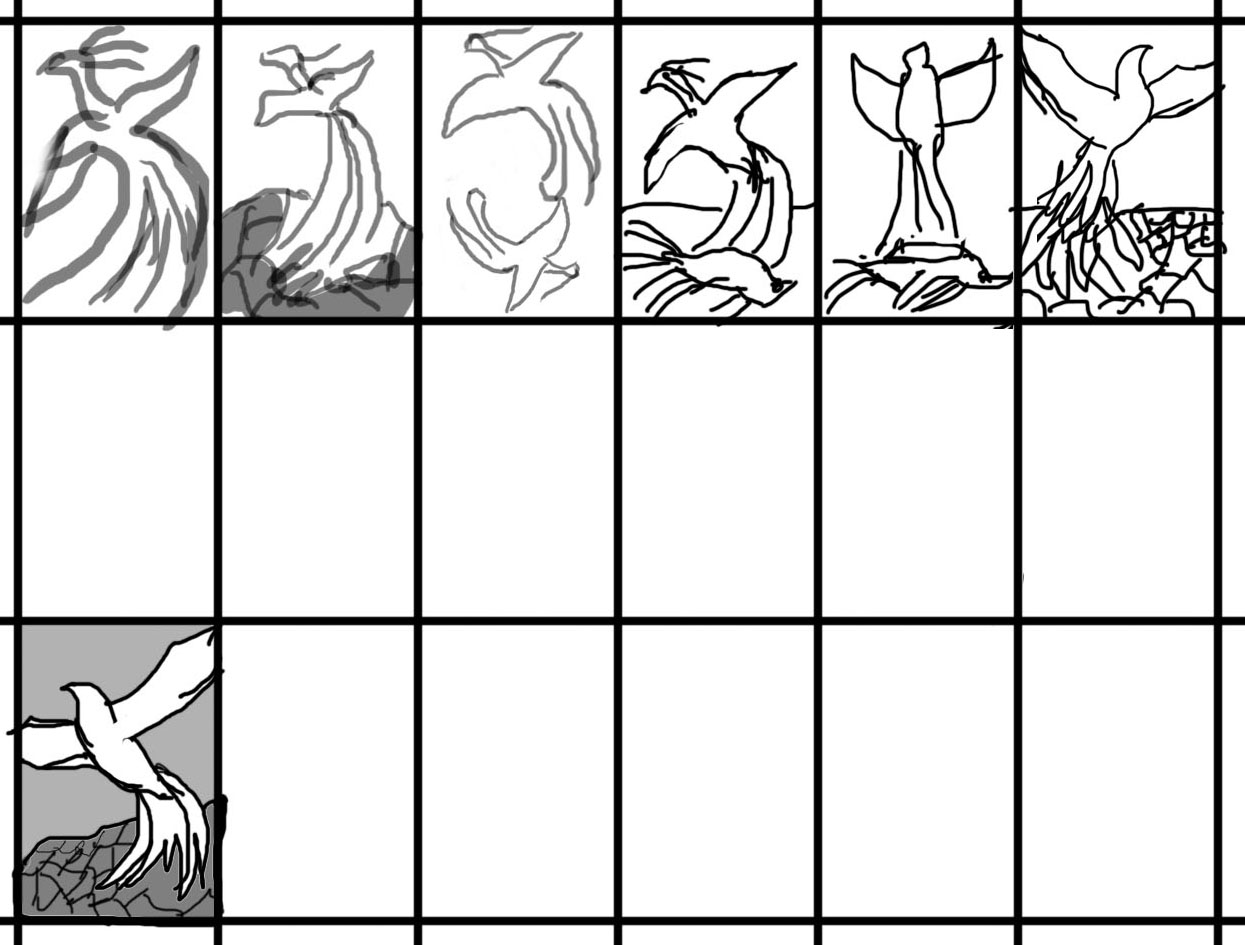
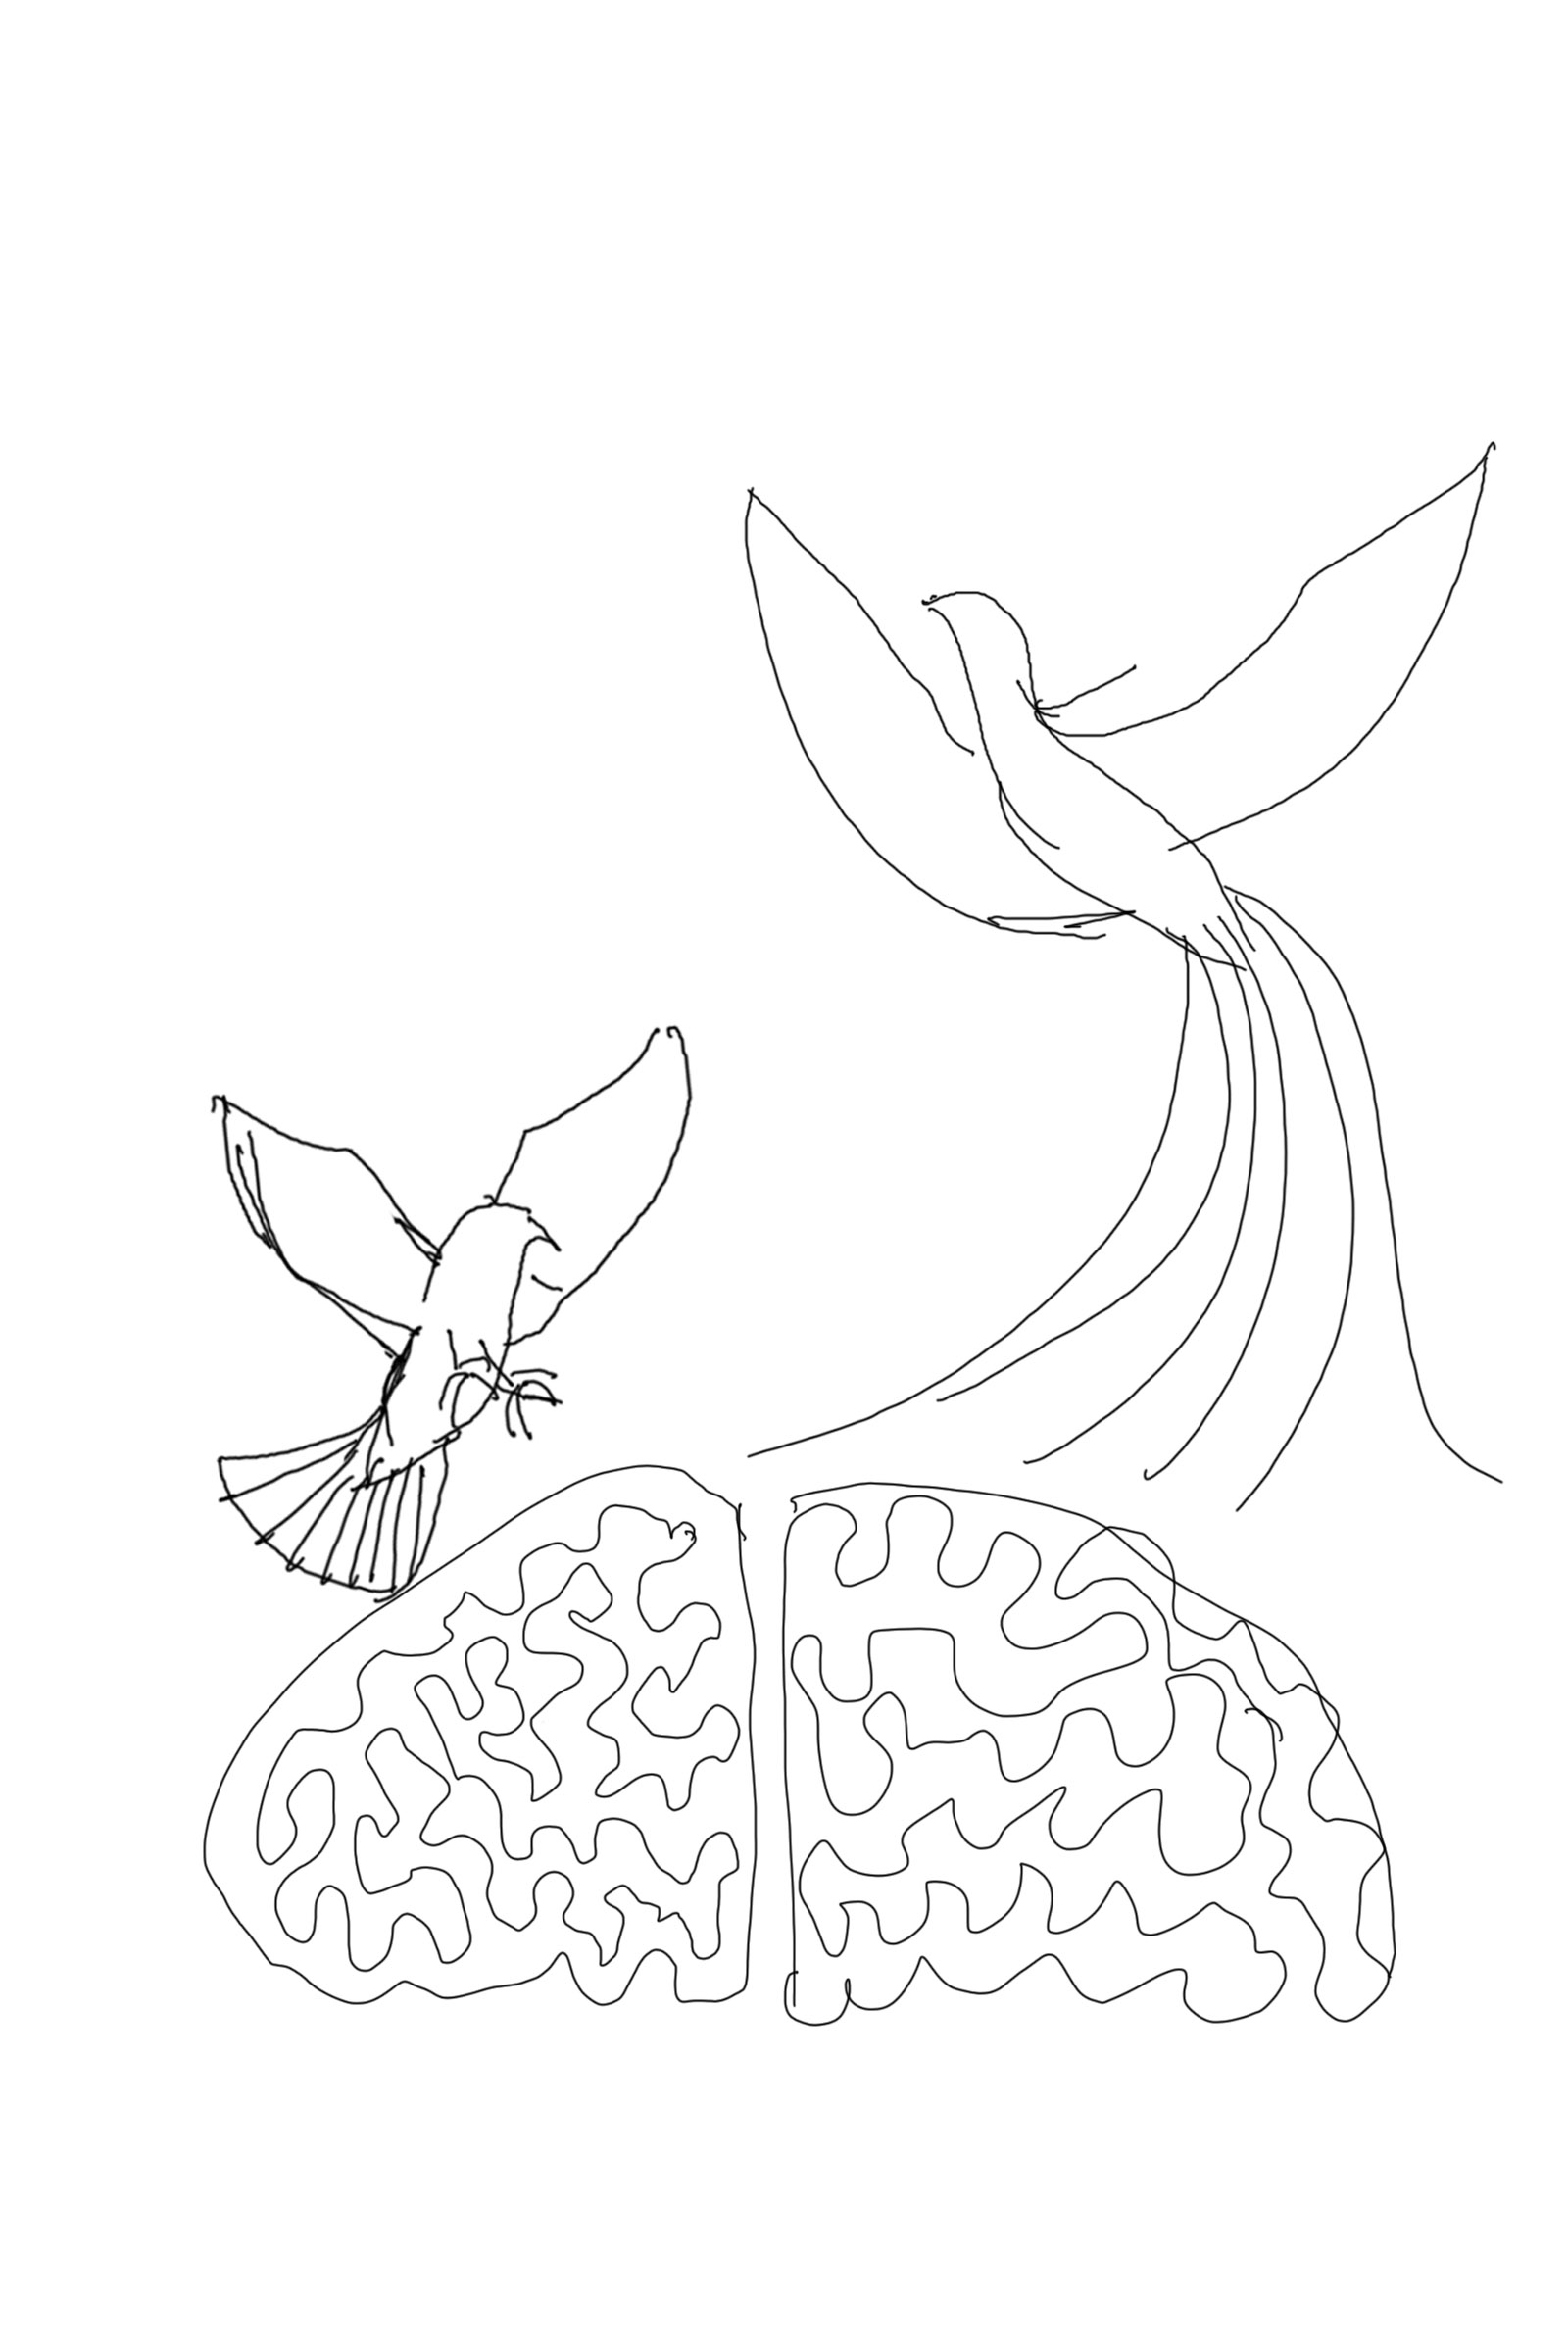
Google image search is also good for finding possible poses. For example, the basic pose for the phoenix can be found in this drawing by Christos Karapanos. My phoenix looks nothing like his phoenix, of course, but having a basic pose to work with made drawing my phoenix a lot easier.

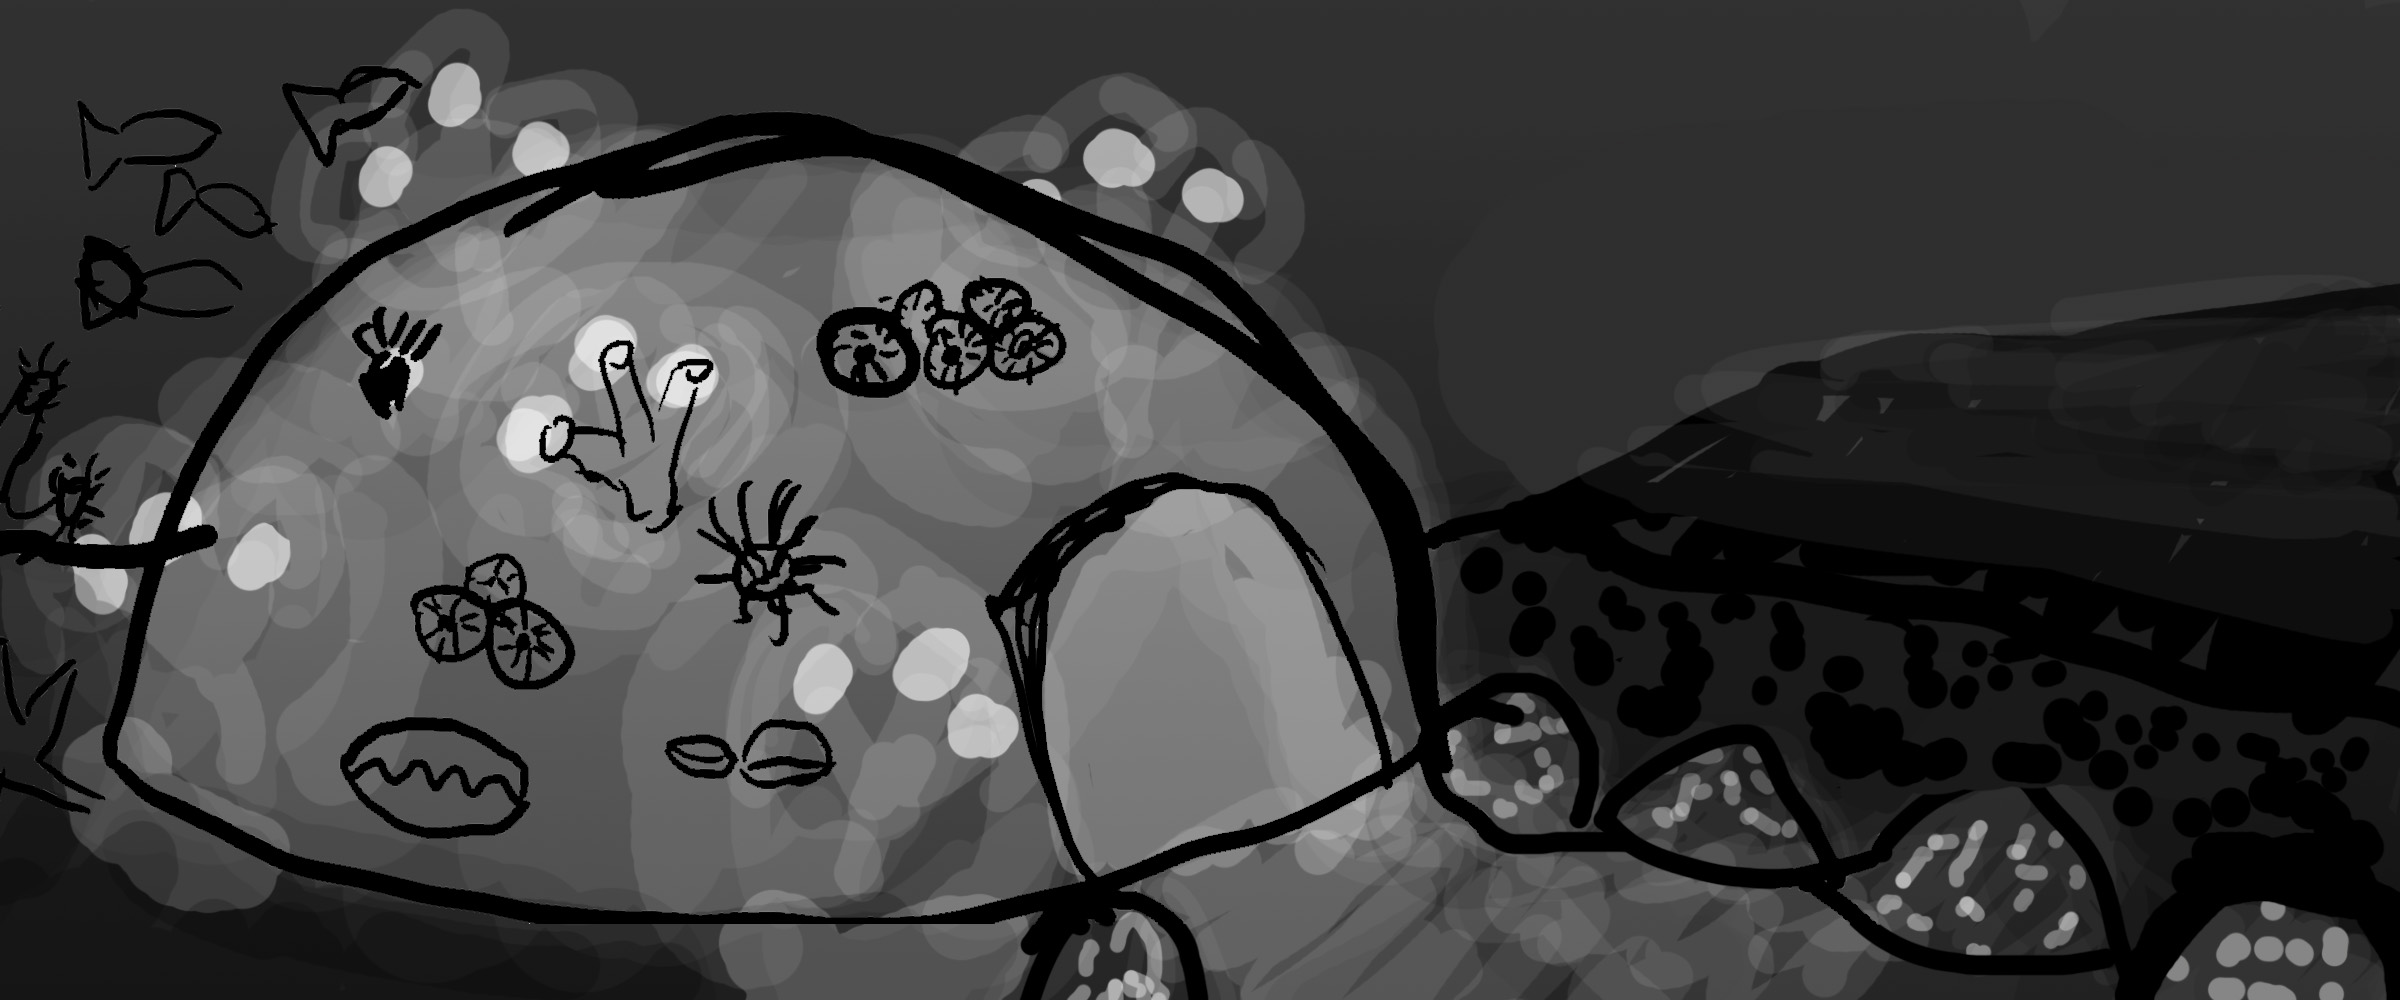
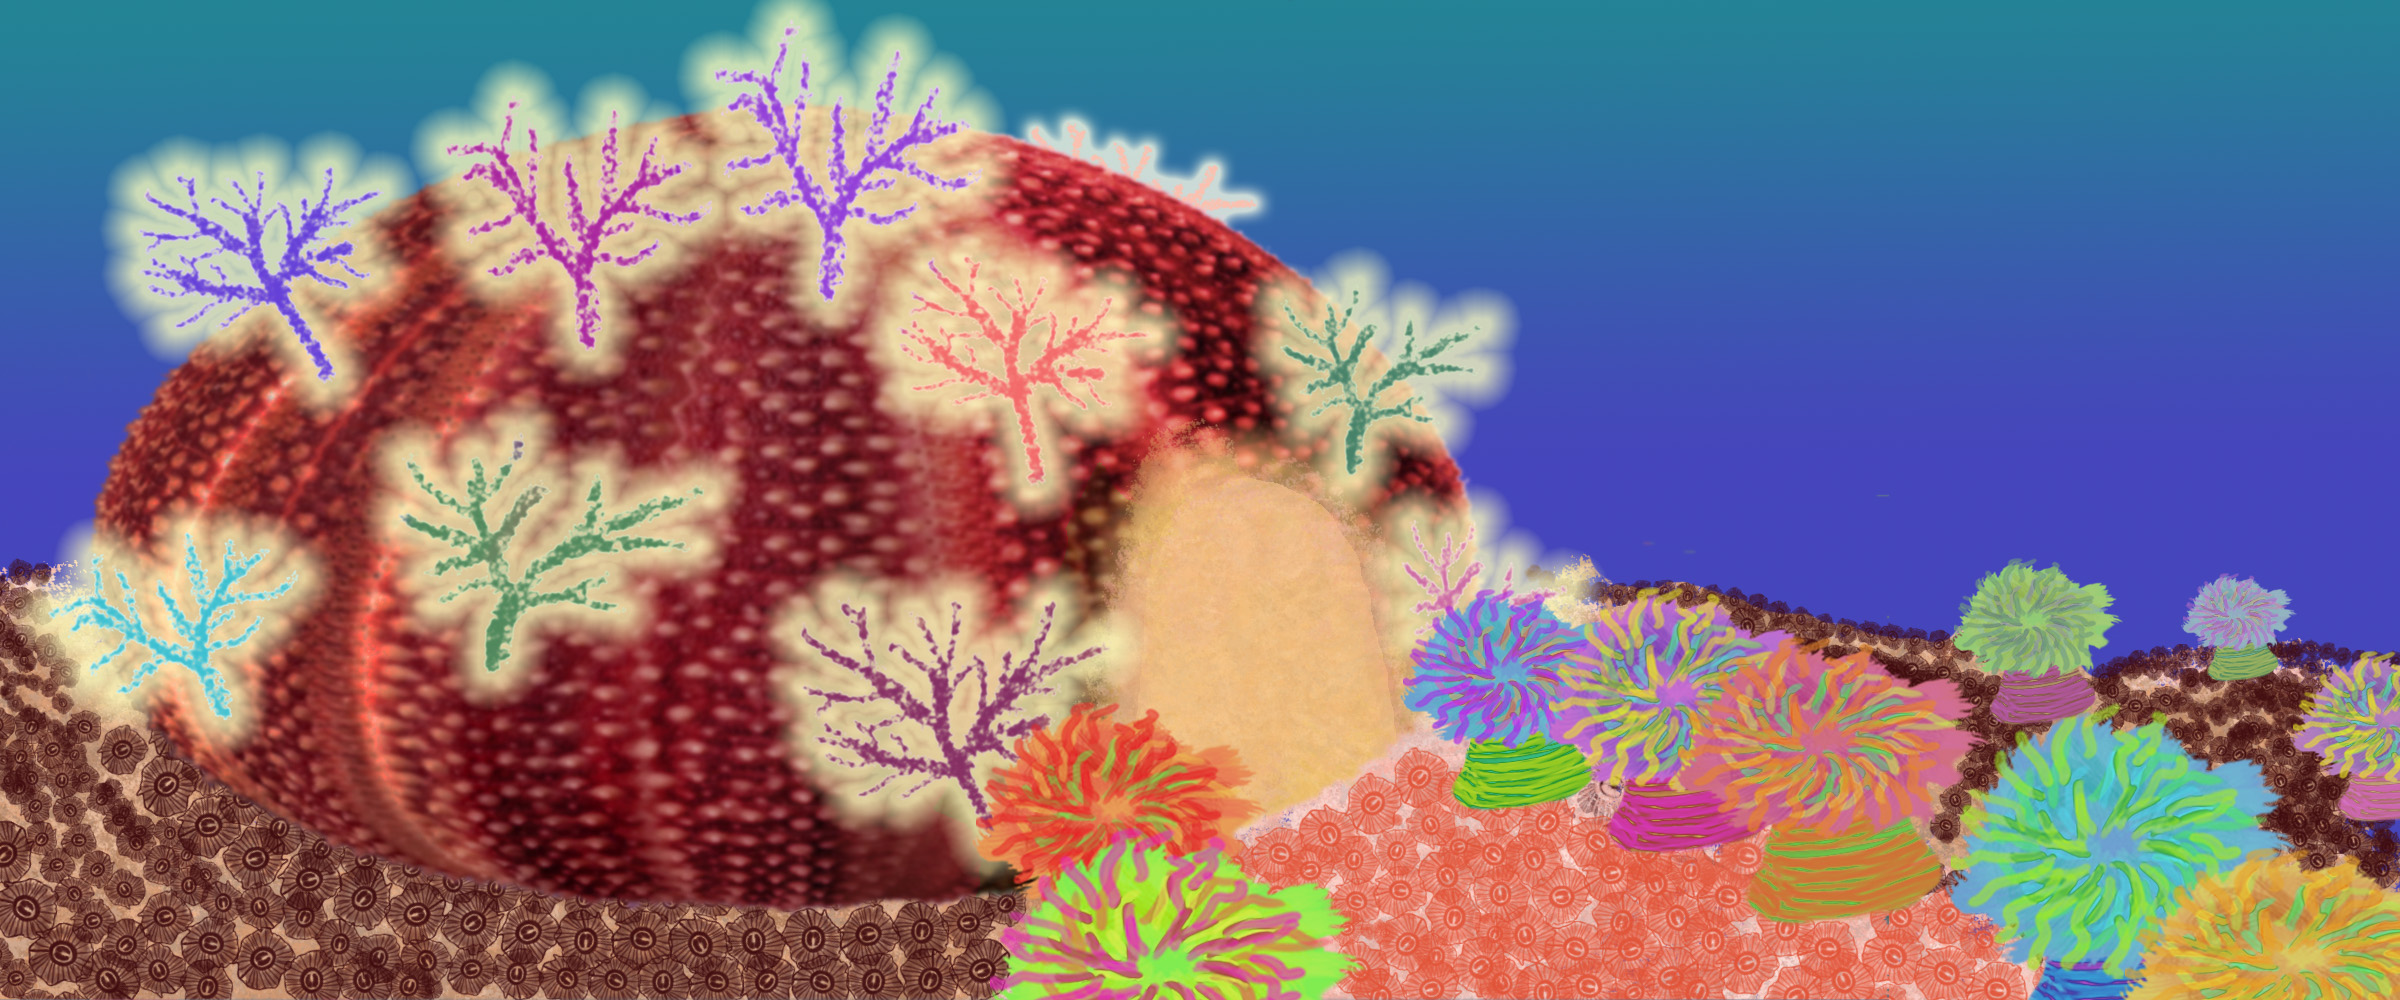
Third, modeling software. I created this sketch recently:

2.26.2016 - bipolar bats
2.26.2016 – bipolar bats

The left-hand sketch is my own work. I’m shocked that I managed to get the figure looking vaguely human, but this is the full extent of my drawing skills. I tried to depict the figure in a three-quarter view, and failed completely. I had planned to get an artist’s wooden mannequin to help me figure things out, but while doing online searches for mannequins, discovered ArtPose, an amazing Android/iOS app that provides a 3D-modeled mannequin that you can pose however you like. You can show the musculature, make the mannequin fatter or thinner, rotate the view however you like, and so on. The figure on the right is done by ArtPose. Eureka! What an wonderful tool for the anatomy and perspective-impaired. Instead of spending hours figuring out a crude sketch of a pose, I can just pose the ArtPose mannequin, twist and turn the camera angle and lighting however I like, then take a quick snapshot. Or three snapshots, or five! All in just a few minutes. I can use it as the basis for my final design, too.

Those are my main tools so far, but I’m always on the hunt for good ones. What are your favorite tools? Leave a comment, and tell me all about it.

Filed Under: All blog posts, drawing

August 19, 2015 by Tien Chiu

Phoenixes in space!

I’ve been playing with a few more ideas the past week – so far the best is a ghostly phoenix rising up from a giant black hole. Here’s the photo that inspired the sketch (made by the federal government (NASA) and thus not subject to copyright):

Artist's conception of a black hole
Artist’s conception of a black hole

This offered some wonderful possibilities. The phoenix could rise out of the blue cone of light above the black hole, and thematically it would be perfect, since a black hole is the ultimate symbol of death. (A black hole exerts such a strong gravitational pull that nothing escapes it – not even light.) The black hole could also be a symbol of rebirth – some people have speculated that it might be an entry-point to another universe. Of course, since nothing survives the trip into/out of a black hole, we’ll never know.

So I tried some rough sketches, of which this is my favorite:

rough sketch of a phoenix rising out of a black hole

Here the phoenix rises out of the cone of light around the black hole, and stretches its ghostly wings towards a galaxy just visible in the top right corner. A small space probe observes it from the bottom right corner.

What I like about the composition:

  • The lines of the phoenix have tremendous drama – I can practically feel it rising up out of the void.
  • The black hole (once it’s rendered more completely) provides a great launching pad for the phoenix but is tucked back enough into the bottom left corner that the phoenix still dominates.
  • Having something in the foreground (in this case, the space probe) gives a sense of depth and scale that would otherwise be missing. This phoenix is the size of a solar system (at least); having a small man-made object in the foreground gives a sense of just how tiny we are in a vast universe.

Things I don’t like:

  • Focal point in this version is the black hole, as it’s the area of highest contrast. I’ll need to fix that by adding interest to the phoenix head. I think the black hole should be an important element, but not dominate.
  • Something about the proportions and cropping of the photo feels wrong, though I haven’t yet put my finger on what.
  • Still not certain what goes in the bottom right. I want something in the foreground to create depth and give a sense of scale; the space probe is the best so far. I tried a planet, and found that it was difficult to render the planet at the scale I wanted without creating unpleasant tangents (places where two elements are just barely touching) with the black hole. I tried a person, but people are way too interesting; it drew attention away from the rest of the composition. Spaceship didn’t work because it’s really hard to make just the front third of a spaceship look like a spaceship. Space probe seemed to work best, but I welcome more ideas!

This piece still has composition problems, but conceptually I like it, so I’ll be developing it further in the next week or so. Plan is to weave it with highlights of real gold thread in the phoenix, and maybe even add some fiber optic cable to make parts of the composition glow.

I might also add some beads. In which case, I’d surely need help. Thankfully, Fritz is ever available to assist….here is a photo of him helping my mom with her beading project, while she was visiting.

Fritz helping my mom with her beading


Filed Under: All blog posts, drawing Tagged With: jacquard phoenix

August 13, 2015 by Tien Chiu

Concept sketch

I’m working up concept sketches for my next piece. Technically, there are two pieces in queue ahead of it, but they are relatively mechanical – weaving a project directly from a photo. Not very original, but appropriate gifts to the people who made it possible for me to buy and weave on a jacquard loom.

After that, I want to do some phoenix pieces, since I have had phoenixes on the brain for the last few years. Maybe that will clear out some of my obsession. Or maybe not. Anyway, I thought the design process might interest you, so here’s what I’ve been working on:

I started with thumbnails, which are very small sketches intended to help you work out layout. I wanted a theme of rebirth. The legendary phoenix is a bird that dies in fire every 100 years, and is reborn from its own ashes, so it’s quite appropriate.  I sketched a couple possible layouts:

thumbnail sketches of a phoenix being reborn

I wasn’t in love with any of them: the ones with phoenixes rising from lava (the cracked earth) felt hackneyed, and the ones with a dead bird at the bottom felt clumsily literal. After looking through lots of images of phoenixes on Google, I realized that it would be very difficult to do something with phoenixes rising from fire that hadn’t been done many times before. I wanted something a bit more original.

At that point, I realized I was ahead of myself: I was doing layout without a concept. So I started doing larger, more free-form drawings to brainstorm ideas. Here’s the best one:

rough sketch of a phoenix and crow/bipolar disorder

Here we have a rendition of bipolar disorder: the phoenix rising on the left side symbolizes the fires of mania, the black crow descending symbolizes depression and death. In this interpretation, both birds represent destructive, though opposing, forces.

I love the symbolism in this sketch, and have set it aside for later development. However, I want something more upbeat as a first project, so I’m still looking. I think what I need to do is brainstorm a set of ideas/words around rebirth, and then use that set of ideas (perhaps with my Design Poker exercise) to brainstorm more images.

One thing I have realized is that my concept sketches are going to look like a six-year-old’s drawings for quite some time (if not forever). And that’s OK. I learned in my digital painting class that I’m perfectly capable of turning a crude sketch into something much more sophisticated, once I commit to the idea. And the idea of a concept sketch is to express the idea, not to be a finished painting. So I feel a lot less self-conscious now about the crudeness of my concept sketches. This, in turn, makes them a lot more fun. 🙂

Meanwhile, Christmas arrived early yesterday, in the form of a box from Bluster Bay Woodworks. I had emailed Terry to ask whether lacewood would work for a shuttle, and he said no, but leopardwood looked quite similar and would work well. So he made me a Honex-tensioned end-feed shuttle from leopardwood, and I was so enchanted that I asked him to make me a Swedish boat shuttle and a mini boat shuttle out of the same wood. I also got two more mini boat shuttles out of exotic woods (curly boxwood and granadillo). A few weeks later, this wonderful collection of shuttles arrived on my doorstep (click to enlarge):

new Bluster Bay shuttles, top view

That really doesn’t do justice to the leopardwood or the curly boxwood, so here is another photo. I love the golden glints in the leopardwood:

new Bluster Bay shuttles

I love Bluster Bay shuttles – they are beautiful and a joy in the hand – and I’m particularly fond of their Honex-tensioned end feed shuttles. So these are a welcome addition to my collection.

And the cats? My mom left on Tuesday, after a delightful week and a half. In order to pack for the trip home, however, she first had to empty her suitcase of cats. Here’s Fritz, trying to stow away:

Fritz waiting to be packed

Alas, we foiled Fritz’s attempt to visit exotic places, and he’s still here at home with us. (Thank goodness!)

(Fritz and Tigress may appear somewhat less frequently in these blog posts, by the way. I’m going to try to write a bit more frequently, so there isn’t quite as much packed in each update – which means I may not have a photo for every post. Rest assured, though, that they are doing well and will continue to appear regularly. Wouldn’t want to deprive you of the real stars of the show!)

Filed Under: All blog posts, drawing, textiles, weaving Tagged With: jacquard phoenix

August 6, 2015 by Tien Chiu

Preparing for the TC-2

Now that the digital painting class is over, we’re starting preparations for the TC-2 (my incoming jacquard loom). According to the shipping manifest, it should arrive in the port of San Francisco in about two and a half weeks (August 25); it will probably take 1-3 more days to reach my door. So – just in case that schedule slips – the loom assembly party will be September 5. My friend Dave, who is expert in both electrical and mechanical engineering, has graciously agreed to lead the assembly, and is reading his way through the TC-2 manual. (Which is remarkably thorough; it even includes the schematics of the electrical systems, which is much appreciated by both Dave and my husband, Mike.)

Meanwhile, Mike is preparing to rewire the electrical circuits in the garage. The TC-2 is power-hungry (especially the vacuum pump), so two 220-volt, 20-amp circuits are going in for the loom. (Don’t worry; Mike is quite competent with electrical work. I’d probably burn the house down if I tried it, but he won’t. 🙂 ) Mike is also installing lighting – six four-foot LED strip lights that should provide excellent lighting throughout the garage, and especially above both looms. And we’ve ordered leveling casters to make Emmy, my 40-shaft AVL, easier to move.

And me? I’m reading about how to operate the TC-2, and thinking about the second project to come off the loom. (The first one I already know about – it’s a gift for someone.) Since I’ve been stuck on phoenixes the last few years, of course it will have to be a phoenix…either a wall hanging or a panel to decorate the sides of my new loom. I need to decide the dimensions of the piece. That will allow me to take the first step in design: Sketching thumbnails. These are tiny, 1.5-inch sketches showing the layout of the drawing. They are kept deliberately small so you can’t draw any details; instead, you’re looking at the division of space and the arrangement of elements within the drawing.

Once I’ve settled the thumbnails, perspective, and lighting (the latter done via more small sketches), I’ll need to figure out the pixel dimensions of the image I’ll be creating. At this point I’ll have to choose a weave structure and yarn, because that allows me to calculate how many threads I’ll be using. First I’ll calculate the sett, then use that to determine how many threads I need to get to the right dimensions. Then I’ll divide the number of threads by the # of threads in a design unit of the structure (in summer and winter, for example, each design unit is 4 threads). That will give me the number of design units (aka pixels) I can use in my design, which in turn tells me the pixel dimensions. (Whew!)

I’m going to try to keep things relatively simple for the first phoenix, mostly because I expect it will take me some time to get used to the loom and to designing in Arahweave. So I will probably pick a fairly simple weave structure to start with. I need to do a lot more thinking first, though!

But I do have a really cool toy on which to paint my designs. Here’s my new-to-me tablet/display, a Wacom Cintiq 22HD (in the center, and pardon the mess on my desk):

Wacom Cintiq 22HD monitor/tablet

A “regular” drawing tablet, like the one I’ve been using, is just a black tablet without a display. To draw using one of those tablets, you have to draw while looking at your screen, not the hand doing the drawing. It’s basically drawing by remote, and it makes it challenging to get precise results. But the display/tablets allow you to actually draw on the display, just like you would with an iPad. This makes it possible to get much nicer results.

The display/tablets are much more expensive, though – the one I just got retails for $1800(!) plus tax and shipping if purchased new. But I got super-lucky and found one on Craigslist for just pennies on the dollar. It was missing a power cord and the stylus (which is why it was so cheap), but after replacing both, it works just fine. So I’m feeling pretty psyched about that.

So that’s where we are now: clearing space in the garage, rewiring the electrical circuits, preparing the loom assembly team, and getting ready to design my first project. Exciting times!

Speaking of exciting, my mom is visiting. Which means exotic luggage. So of course the cats had to investigate. Here’s the scene about five minutes after her arrival, and about two seconds after she unzipped the first bag:

Exotic new luggage to explore!

We did eventually have to explain to Tigress that it’s not nice to go digging through someone else’s underwear (!), and gently shooed her away so my mom could zip up her luggage again. But I’m sure this will be a recurring theme for the next few days.

Filed Under: All blog posts, drawing, textiles, weaving Tagged With: jacquard loom

July 31, 2015 by Tien Chiu

Finished my digital painting class!

Yesterday I finished and turned in the final project for my digital painting class. Remember the seascape with glowing coral? Well, it made a right angle turn and turned into a dragon’s cave. No, really! The finished painting looks like this:

dragon's lair - digital painting
digital painting of a dragon’s lair

Now how, you might ask, did I get to the dragon’s cave from this original sketch?

revised sketch for painting project

Well, I was zipping happily along for a couple of days, using a sea-urchin shell as the dome, painting glowing coral, and some brightly colored sea anemones. Then I went to sleep Monday night, woke up on Tuesday, and realized I had painted the most horrifyingly kitschy scene imaginable – almost as bad as those cutesy “collectible figurines”.

Here’s what it looked like on Tuesday morning:

half finished seascape painting

This clearly would not do. So I tossed out everything except the concept and placement of the dome. I decided to do a sea cave, so I grabbed a photo of some lava rock, made a Photoshop brush out of it, changed the color scheme a bit, and painted this rough sketch:

rough sketch of dragon's lair
rough sketch of dragon’s lair

I was quite pleased with my Photoshop brush – it reminded me of a coral reef. I was trying to figure who might live inside the dome, and then I thought, “Pirates!” So I made it a treasure cave:

treasure cave
treasure cave

After looking at it a bit, though, I decided that the cave blended into the background too much. Also, the pearls looked very contrived. So I dug back through my lessons to find the handout on drawing crystals, and I created a crystal cave:

almost completed crystal cave

I showed this to Lieven, my critique partner, and he commented that the crystal looked rather opaque, and perhaps I should reduce the opacity a bit. So I turned down the opacity and made a few more tweaks to arrive at the finished version:

dragon's lair - digital painting
finished painting of dragon’s lair

You can see that in the finished painting, the dome looks more translucent (though not as much as I would like).

Anyway, the last class was yesterday afternoon. I’m sad it’s over – not only did I learn tons, but the class really pushed me to step outside of my artistic boundaries and get over the “But I can’t draw!” mindset. And, of course, the drawing was lots of fun too, and I’m definitely planning to continue.

To celebrate the ending of the class, I’ve just bought myself a fantastic new digital painting tool. It’s a Wacom 22HD drawing tablet – it acts as both a monitor and a drawing tablet, so you can “draw” directly onto the surface of the tablet. They are unspeakably expensive if purchased new, but I lucked into a used one on Craigslist for literally pennies on the dollar (from a failing startup). It’s got a big scratch down the far right side, but I think it should still be usable. Assuming it’s working or repairable, I’ll have a really nice tablet to use for my digital designs. I’ll know for sure once a replacement power cable arrives.

Meanwhile, Mike left yesterday to attend a family reunion in Illinois. Of course, since he was going to be gone for a couple of days, he needed to pack. Which, in turn, gave our noble cats the opportunity to protect his luggage. Here’s Tigress, trying to decide whether to continue defending his luggage against all comers, or to go chase a moth. Sometimes life presents us with tough choices!

Tigress guarding Mike's luggage
Tigress guarding Mike’s luggage

Filed Under: All blog posts, drawing Tagged With: digital painting

Next Page »

Subscribe to Blog via Email

Information resources

  • Dye samples
    • Procion MX fiber-reactive dye samples on cotton
    • How to "read" the dye sample sets
    • Dye sample strategy - the "Cube" method
  • How-Tos
    • Dyeing and surface design
    • Weaving
    • Designing handwoven cloth
    • Sewing

Blog posts

  • All blog posts
    • food
      • chocolate
    • musings
    • textiles
      • dyeing
      • knitting
      • sewing
      • surface design
      • weaving
    • writing

Archives

Photos from my travels

  • Dye samples
    • Procion MX fiber-reactive dye samples on cotton
    • How to "read" the dye sample sets
    • Dye sample strategy - the "Cube" method
  • Travels
    • Thailand
    • Cambodia
    • Vietnam
    • Laos
    • India
    • Ghana
    • China

Travel Blog

Entertaining miscellanies

© Copyright 2016 Tien Chiu · All Rights Reserved ·


Loading Comments...