Tien Chiu

  • Home
  • About
    • Honors, Awards, and Publications
  • Online Teaching
  • Gallery
  • Essays
  • Book
  • Blog
  • Dye samples
You are here: Home / Archives for All blog posts / textiles / sewing

January 12, 2014 by Tien Chiu

Finished the quilt top!

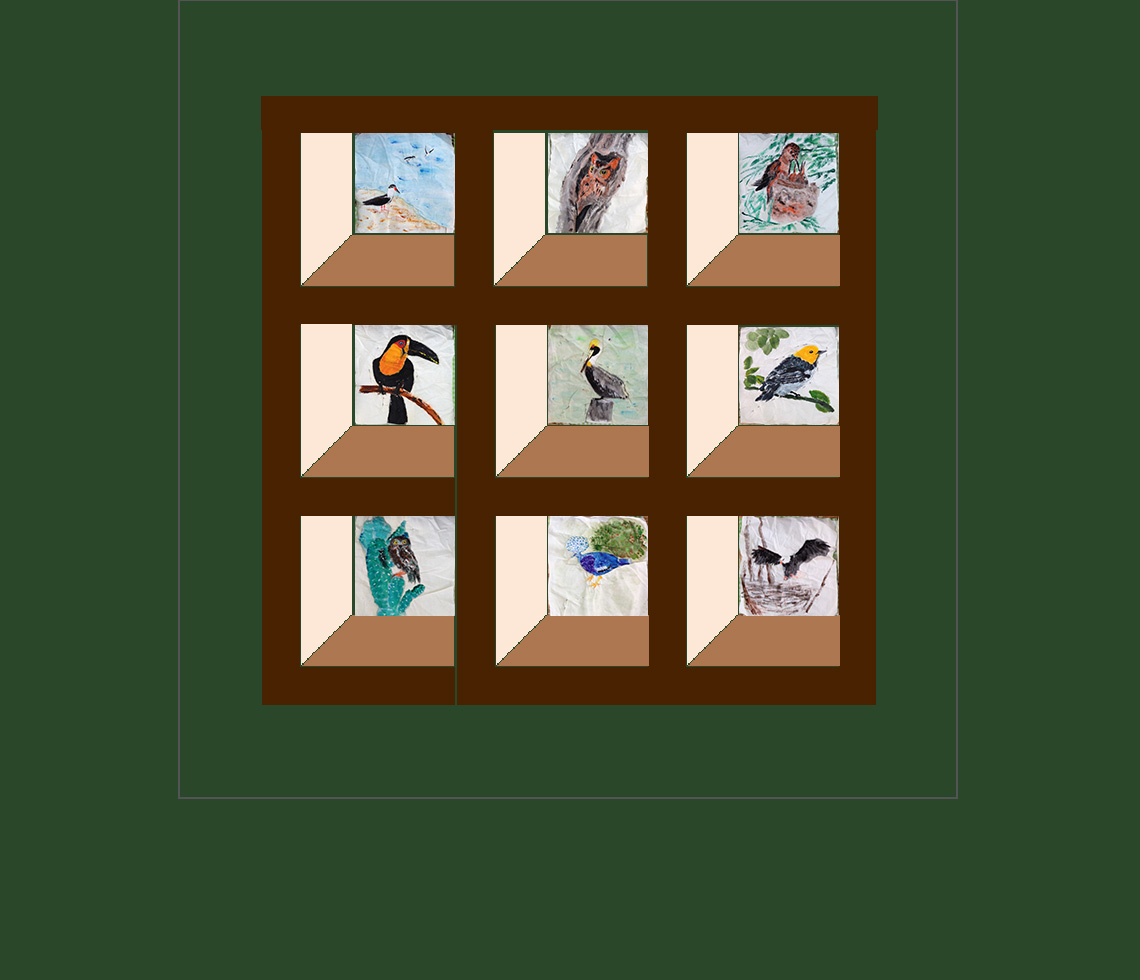
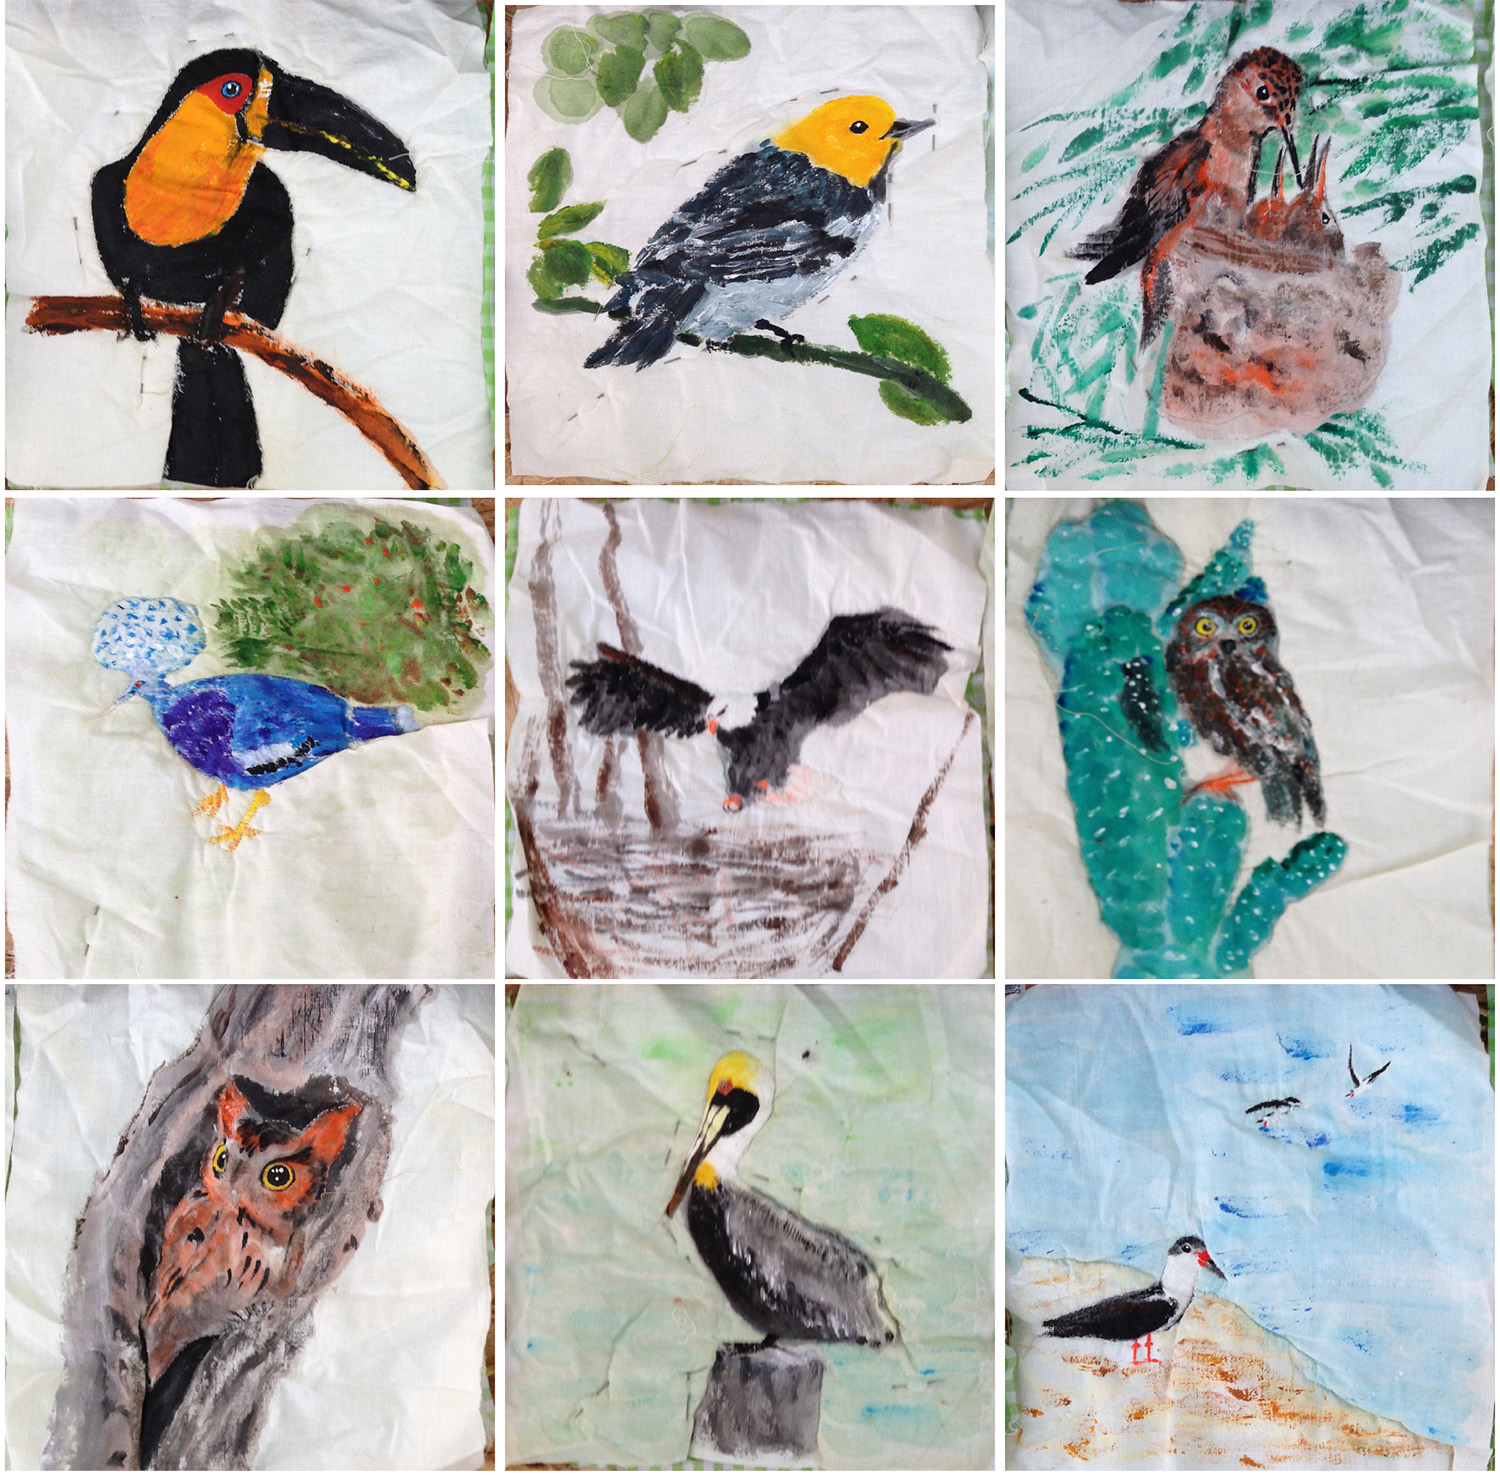
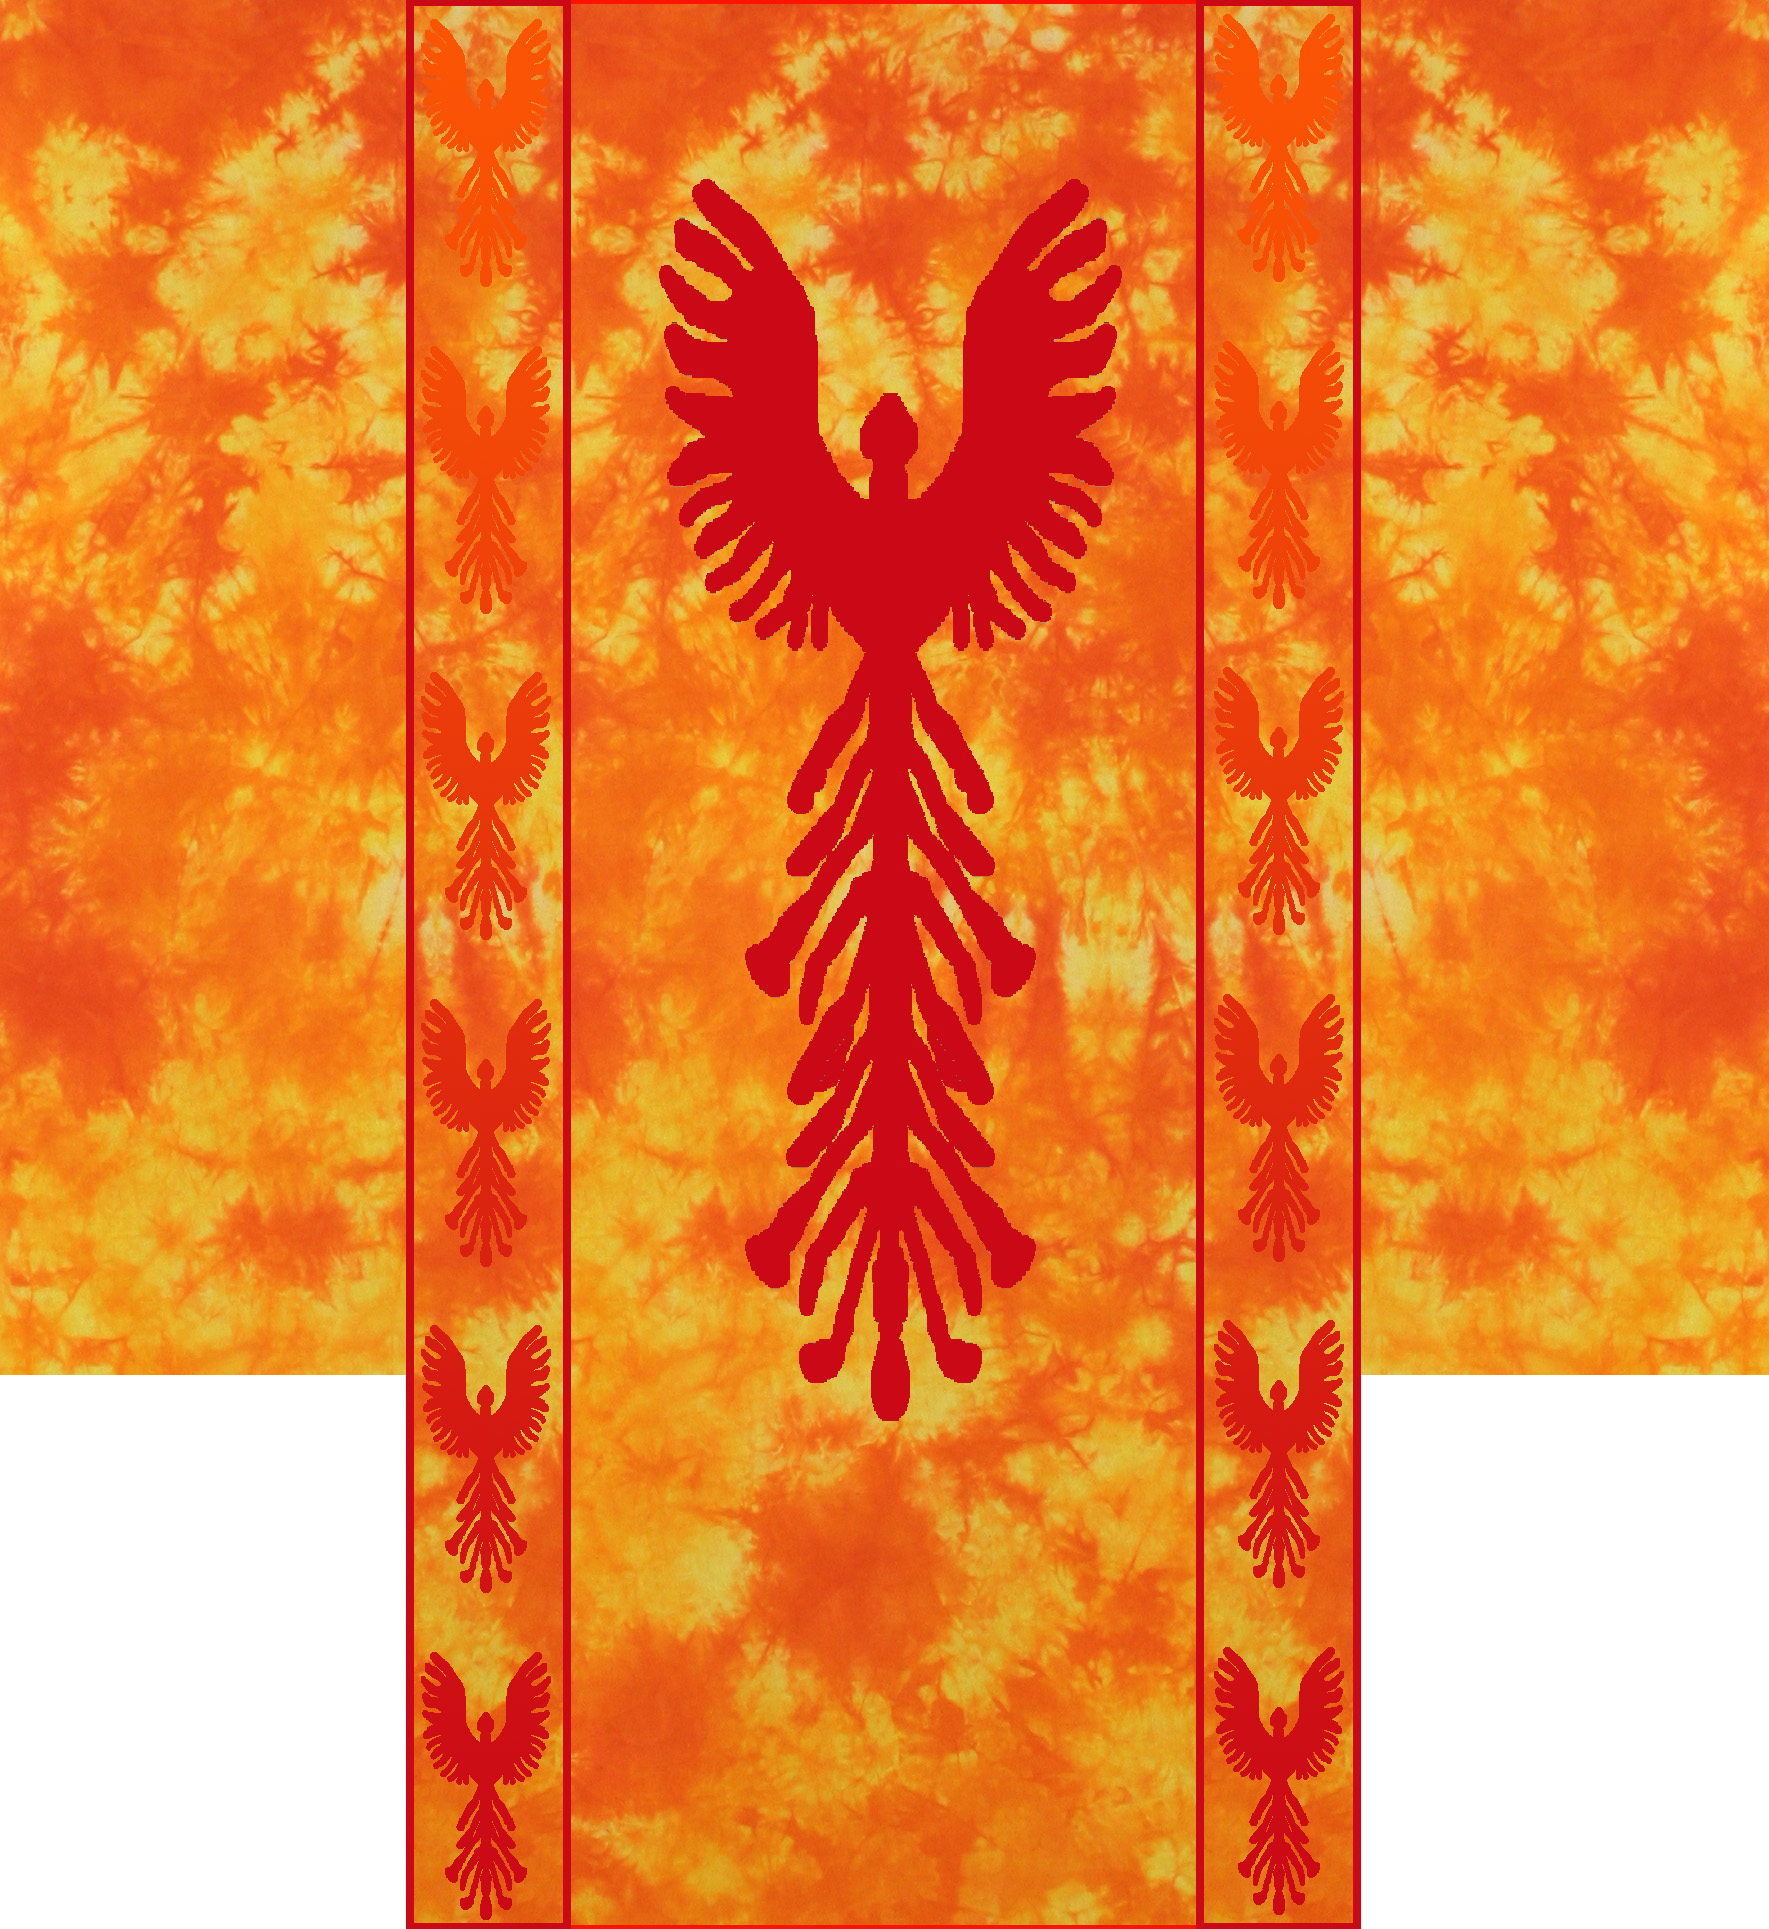
I mentioned in my previous post that my mother and I completed the quilt top. Here it is:

Attic Windows quilt top, center panel complete

I’m very happy with how it turned out – it’s beautiful and focuses attention on the birds.

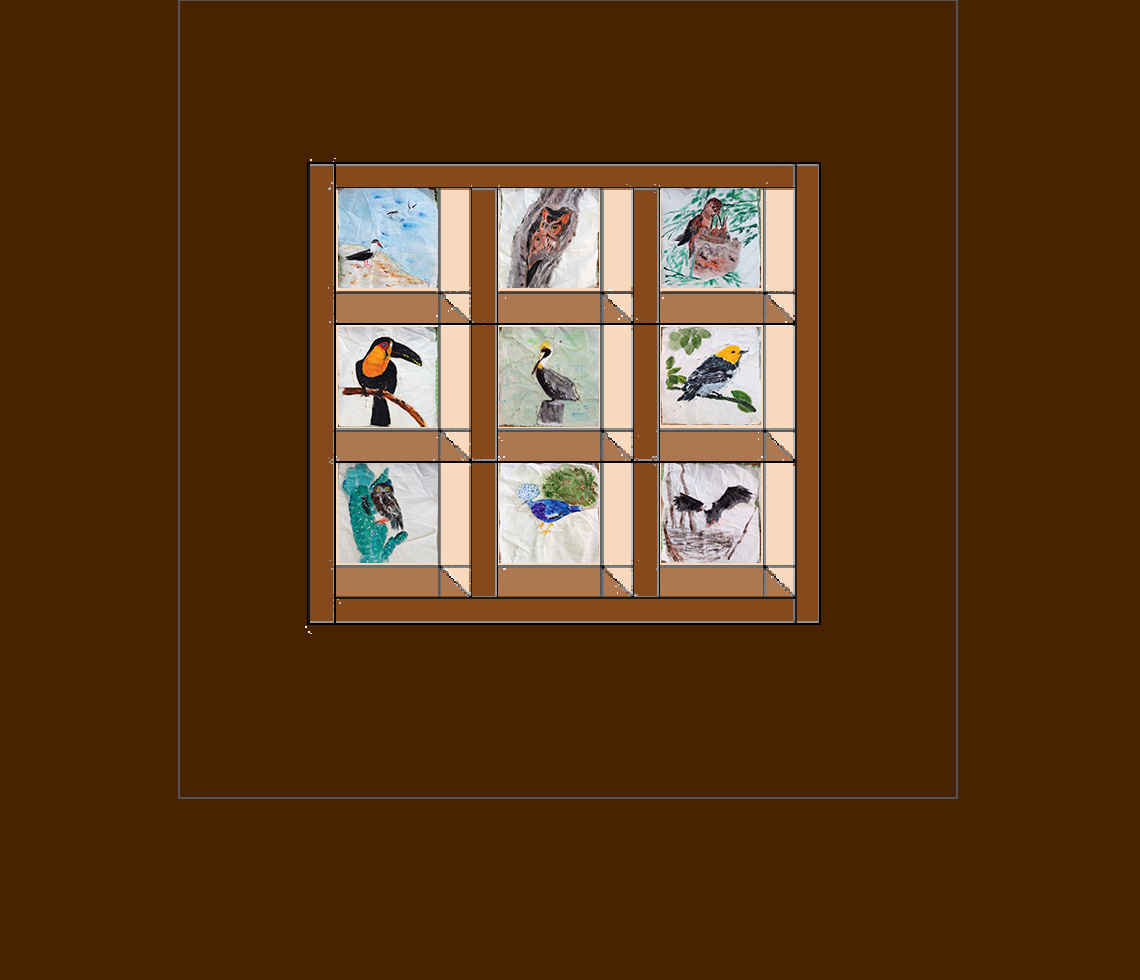
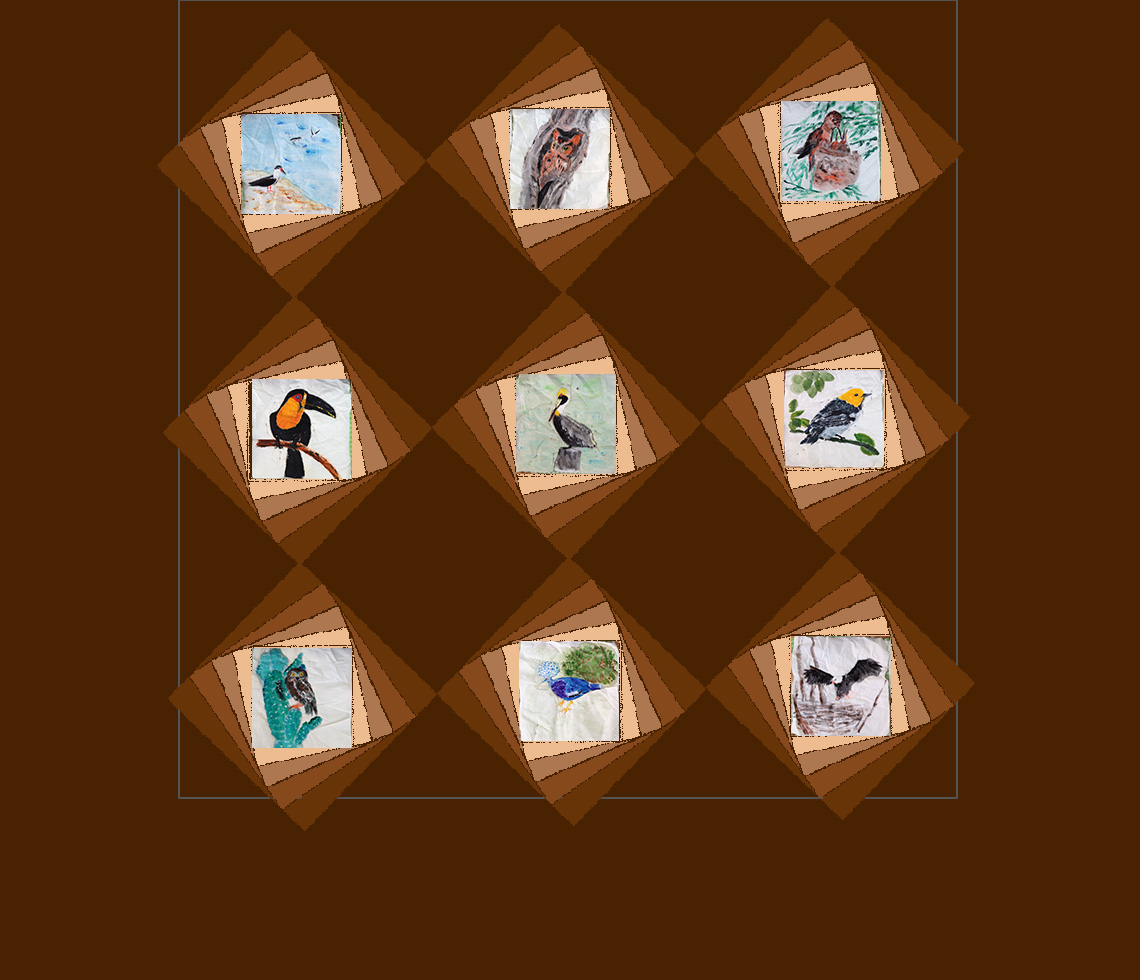
Of course, that was take #2. Take #1 looked (unsurprisingly) like this:

quilt top, with cat
quilt top, with cat

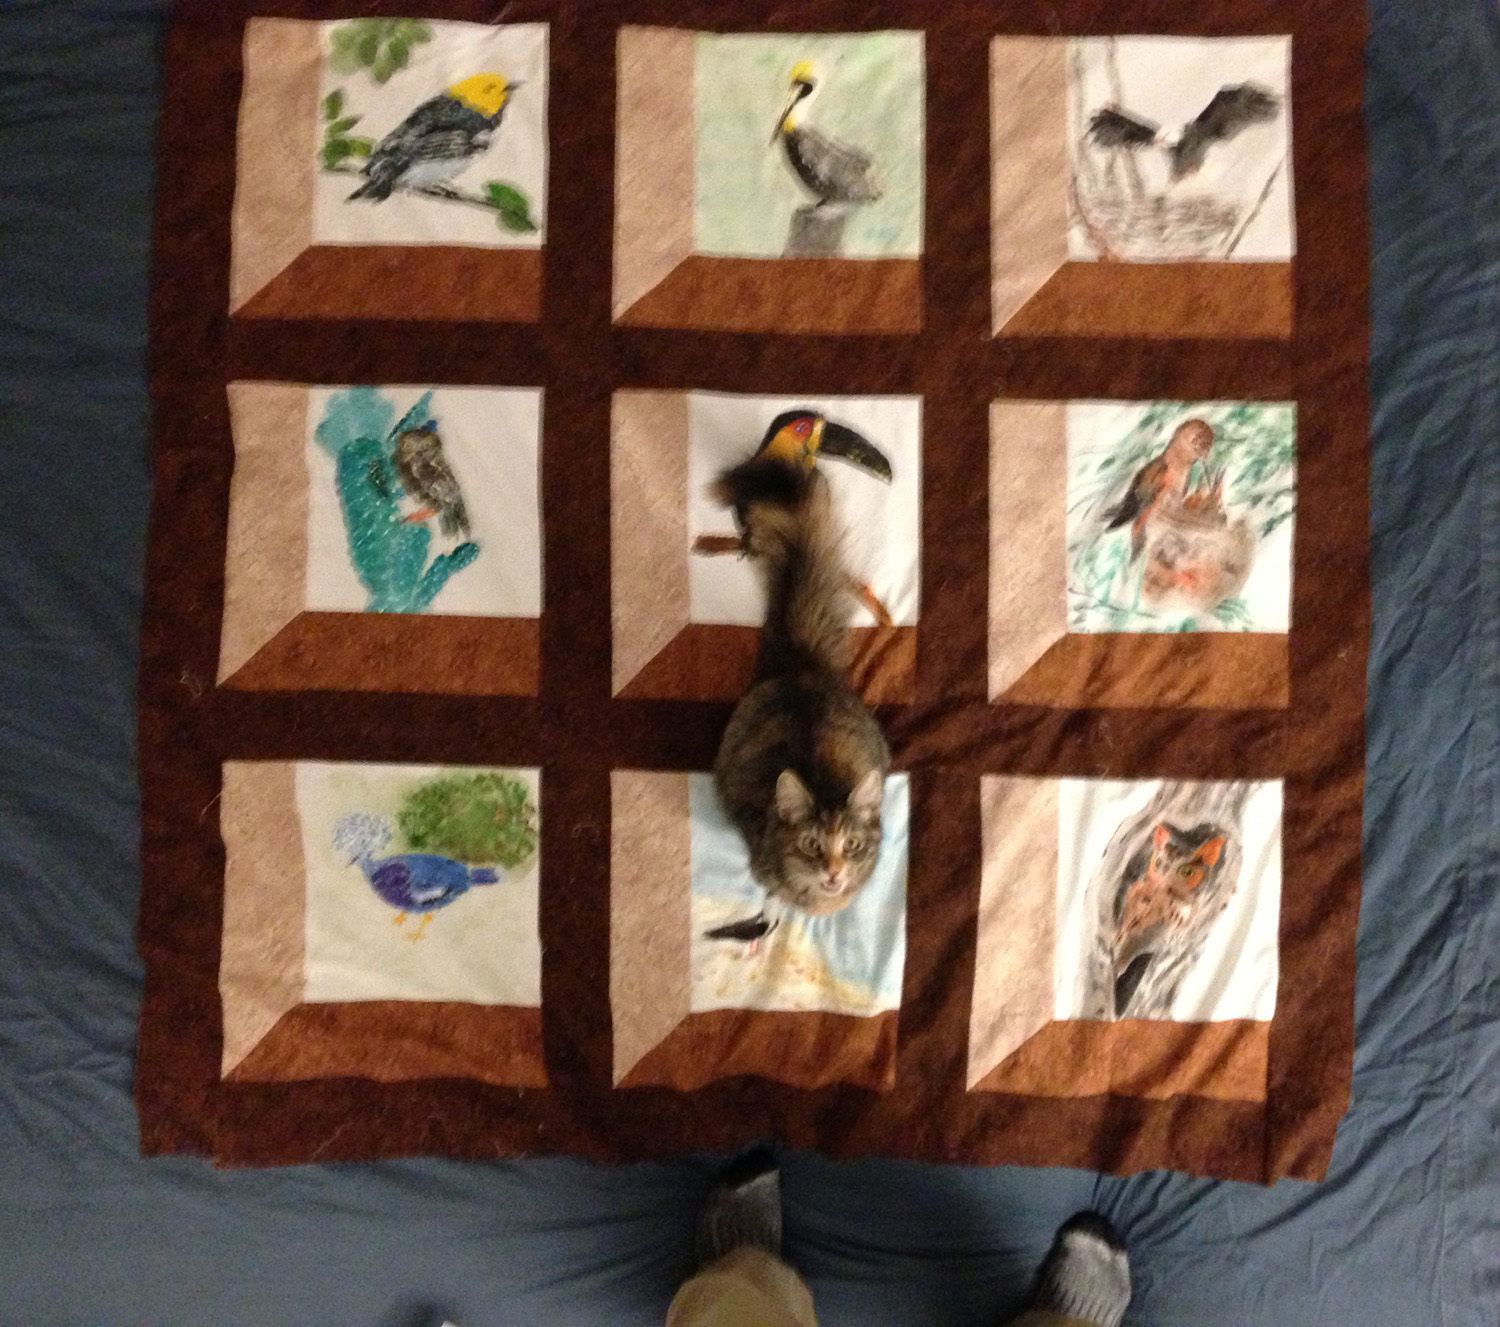
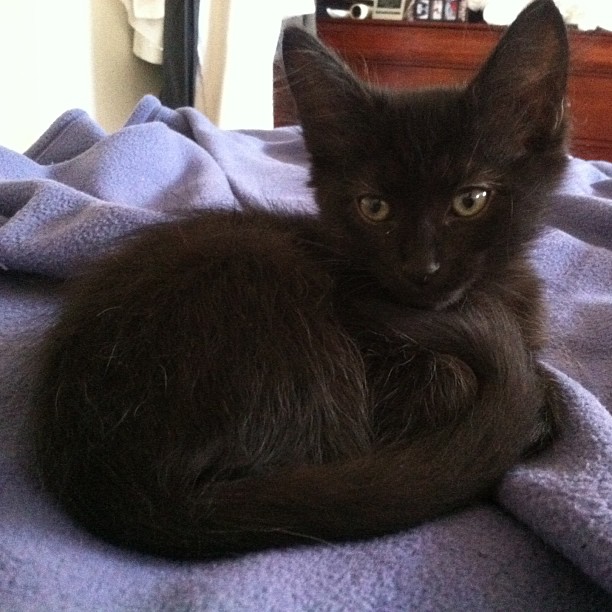
Tigress is charmingly convinced the quilt top belongs to her. As soon as I set it out, she jumped onto it, and spent the rest of the afternoon curled up on it. (Well, except during a brief period where she was removed for photography.)

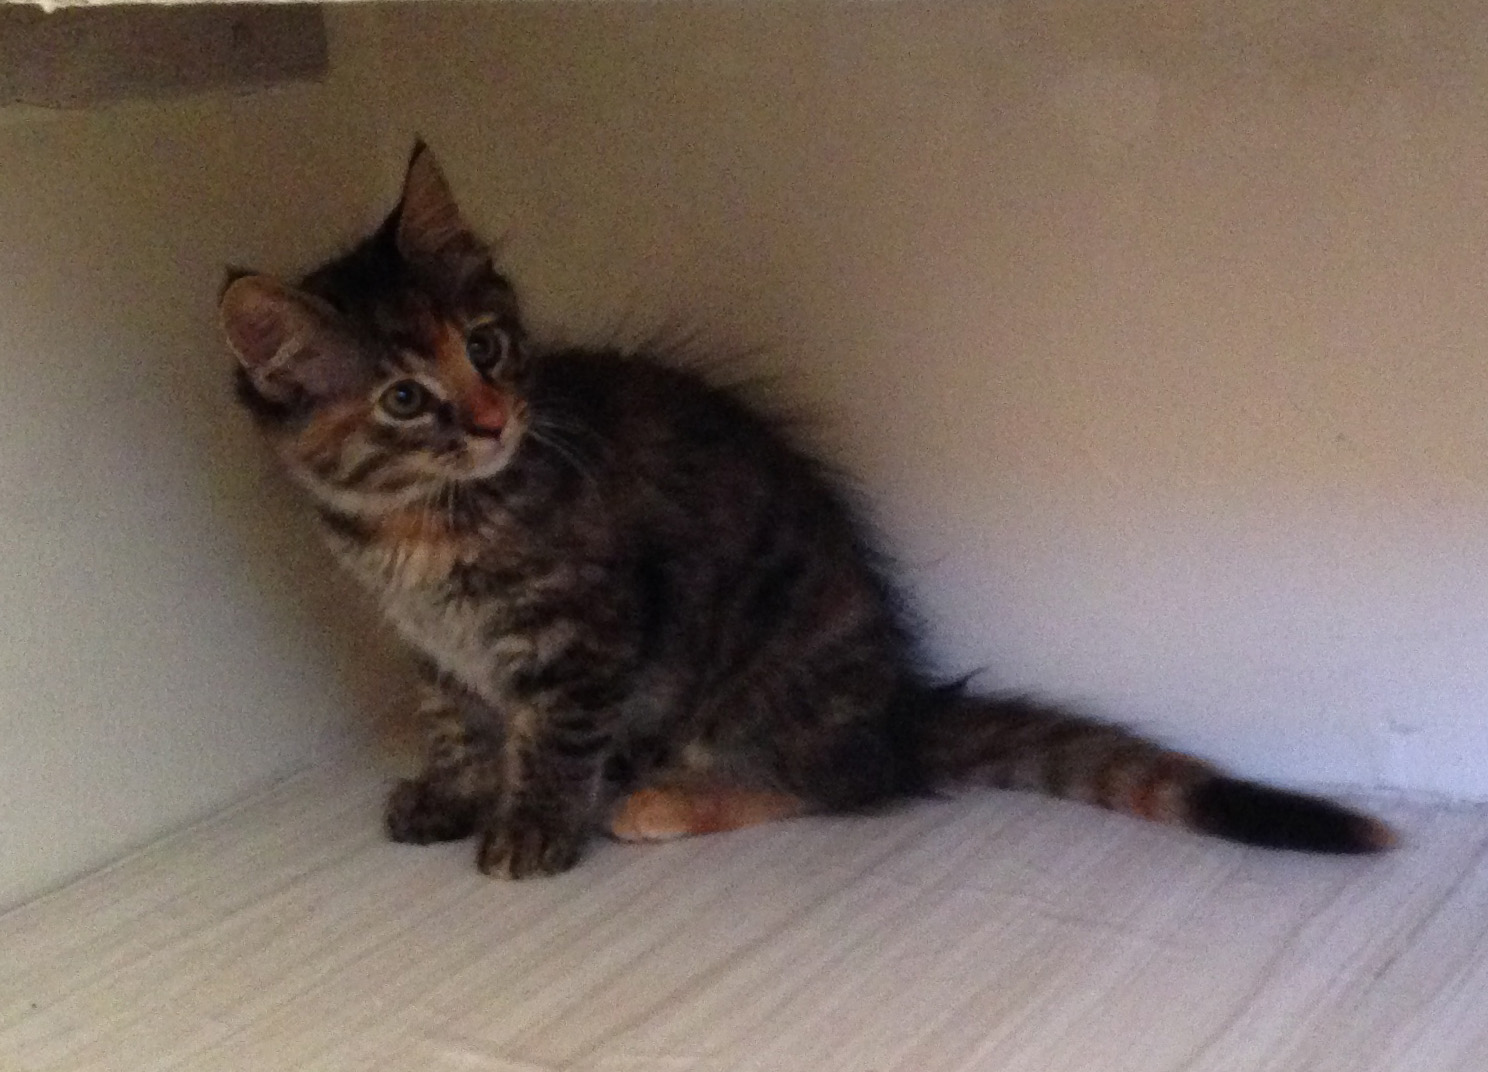
And since the last two posts were sadly devoid of kittens, I offer you a bonus kitten! Two bonus kittens, in fact, playing “Got Your Tail!” on my ironing board. A popular game, at least in this household.


Filed Under: All blog posts, textiles, sewing Tagged With: bird quilt

January 7, 2014 by Tien Chiu

Finalized the quilt design

I got Emmy up and working a few days ago. Here’s a very short video showing her in action:

As you can see, the shafts are hanging up on each other – this was a known problem with the loom. On AVL’s advice, I’ve ordered shims for the lamms and pulleys, but they won’t arrive until tomorrow (I think). I also need to order reeds, extra heddles, and other bits and pieces. So I’m working on quilt design until they arrive.

I’ve now been through many iterations of the quilt design. You may recall that the original design looked like this:

quilt design -spiral background squares

I liked this initially, but after showing it to several people for critique, various people felt that the spirals were too “busy”, drawing attention away from the birds. On sober reflection, I agreed.

So, on the advice of some quilters, I tried the “Attic Windows” block next:

quilt design, "Attic Windows" block
quilt design, “Attic Windows” block

The faint outline shows the edges of the mattresss; this is a king-sized quilt with the head at the top.

This worked fairly well, but felt like it lacked tension. So I tried variations on the background:


Attic Windows block on a green background
Attic Windows block on a tan background

The tan background didn’t work – the light, warm color drew attention away from the birds. The green, though, had potential – the only problem was that the sills of the window were too wide, making the birds hard to see. At the same time, the much narrower sills in the tan version produced a “window” that I thought was too small for the quilt – more like a prison window than an attic window!

So I compromised and made medium size sills:

quilt design - attic windows - narrower sills
quilt design – attic windows – narrower sills

I felt this worked the best.

Next I visited several quilting shops and bought some potential fabrics. I mocked up a square in each combination I wanted to test:


attic windows, medium brown background
attic windows, tan background
attic windows, green background

And – just for fun – I tried the spiral block as well:

spiral block mockup
spiral block mockup

This pretty much confirmed what I had seen in the computer mockups: the spirals were too busy, and the dark green background looked best with the “Attic Windows” block.

So I ordered twenty yards of the dark green fabric, ten yards for the front and ten for the back. They should arrive by the end of the week – meanwhile, I’ll cut and sew the fabric for the window part of the quilt.

I haven’t yet figured out what to do in the giant green border, but I’m thinking of doing an allover pattern, interrupted periodically by the outlines of birds, in a faintly contrasting thread. Too much contrast would draw attention away from the birds, but too little contrast would result in a green blob. I think maybe a medium to dark brown on the threads.

I also haven’t figured out how I’m going to do the border. I’ve been advised that a king size quilt (I’m planning on 116 x 100 inches) is almost impossible on a home machine, so I may either rent time on a longarm quilting machine or hire someone to do the quilting. But I figure I’ll cross that bridge once I get there.

And, finally, here is Fritz, playing with a favorite toy, one of my paper pirns. I love the way he practically trips over Tigress (hidden behind the drapes) at the end.


Filed Under: All blog posts, textiles, sewing Tagged With: bird quilt

January 1, 2014 by Tien Chiu

A brief diversion into quilt design

Yes, I know. I’m about to put together an awesome new weaving toy. I should not take on more projects. But my mother is coming to visit next week, and I’m taking the week off so I can spend time with her. However, since I don’t get out much, I’ve been racking my brains for what we could do together.

Fortunately, yesterday I was going through a collection of fabrics a friend had been keeping for me, and I happened upon these gorgeous painted birds, each in its own 11″ square of fabric.

nine painted quilt squares

What a treasure! I had completely forgotten about them. My mother had painted them for me when I was nine or ten years old – I was very enthusiastic about birds then. We had intended to make a quilt from them, but as a young kid, I soon lost interest, and they languished. For over three decades.

So as soon as I saw them, I thought, “What better way to spend a week with my mom than making a cherished family heirloom?” So I asked her if she’d be interested, and she said yes. So I’ve been working on quilt design, so I can have the pattern laid out and the fabric purchased (or dyed) before she arrives.

Here’s the first design I came up with:

Quilt design, diamonds in squares

(The square box indicates the borders of the bed – I’m planning on making a king size quilt, since that’s what Mike and I have.)

I really didn’t like this design – it felt too static, and the diamonds felt like they were overwhelming the birds. So I went back to the drawing board:

quilt design, with spiral background squares

I like this a lot better – the spirals add some motion without being obtrusive, and the value gradation makes the birds float luminously on top of the quilt.

I do need to figure out something more interesting to do around the border, but think that may just be the quilted pattern. I don’t want any color changes to distract from the birds.

The fabrics won’t be solid colors, of course. I’m currently debating whether to use commercial batik fabrics or whether to make my own low-water immersion dyed fabrics. The advantage of doing my own dyeing is that I get precise control over color. The advantage of using commercial fabric is that I don’t spend hours and hours dyeing (remember: I just got a new weaving toy!), and I know exactly what I’ll get. In either case I’ll do a test square or two to confirm that the design works, before proceeding.

It’s said that the New Year is a good time to look back on the year past, and think about the year to come. Many good things happened in 2013, but I think the best by far was this:

Fritz
Fritz!
Tigress as a very young kitten
Tigress!

And here’s where it all started, at a room in the Silicon Valley Animal Control Authority, in Santa Clara, CA:

At the Silicon Valley Animal Control Authority

That’s Tigress in the foreground, sniffing at my toe. Fritz isn’t in the photo, but he was an incredibly friendly kitten, climbing all over the two of us, purring and purring. And you know what? He’s still an incredibly friendly cat, meowing for attention and then purring and purring and purring in my lap.

So here’s to a wonderful year past, and a wonderful year (one hopes!) in the future.

Filed Under: All blog posts, textiles, sewing Tagged With: bird quilt

September 18, 2013 by Tien Chiu

Design progress

Sorry for the radio silence, but once again, so much has been happening that I haven’t had time to write about it all!

First, I finished the first muslin for the Phoenix Rising uchikake. The body came out way too wide, but by chopping two inches off either side, I got it down to a reasonable width. There is still one glaring problem – the extensions on the front panel need to be moved up by 5-6 inches. And the bottom needs to be extended by about 8-12 inches. But otherwise, it seems reasonably plausible.

Here are pics of the muslin:

The first muslin for Phoenix Rising kimono, with its arms down
Finished muslin for Phoenix Rising, back view, with its arms down
The finished muslin for Phoenix Rising kimono, front view, arms extended
The finished muslin for Phoenix Rising, back view, with its arms extended
The finished muslin for the Phoenix Rising kimono, back view, with its arms extended

This shows rather clearly some of the design challenges. The kimono/uchikake will likely be displayed on a broomstick, with its arms out to show the pattern. At the same time, however, it needs to look good when worn, and the pattern will look quite different when on the body.

For example, this beautiful design, which I spent several hours concocting before finishing the muslin, simply won’t work:

first draft design for Phoenix Rising kimono

It looks great hanging from a broomstick, but the two side panels will be largely invisible when the kimono is worn. (For evidence of this, look at the back of the muslin – the two stripes of white muslin appear clearly when the arms are extended, but are nearly invisible when the arms are down.)

My conclusion from this is that I really need to design directly on the muslin, so I can see what is working and what is not. This fortunately shouldn’t be too hard – I can design in Photoshop and then print onto long sheets of fabric, ironing the fabric to freezer paper to stabilize it and using a printer that can print 12″ wide and arbitrarily long. By taking this approach,  I can easily play with the design, while using a flexible material that won’t affect the drape of the garment. (Paper is too stiff to play well, I think.)

My next steps? Redo the muslin, this time in a heavier fabric that more closely resembles my handwoven fabric sample, and fixing the mistakes I made in the first one. Then design various phoenix motifs, print them on fabric, and test different arrangements on the broomstick and the dress form. I think I can finalize the design quite quickly using this approach – at least, enough to let me weave more samples.

And then? Well, chocolate season is approaching way too quickly. I’m making chocolates a month early, Oct 30 – Nov 2, because of my work schedule. This means I need to start making chocolates around Oct 19, which means finishing my planning by Oct 12 at latest. That means I need to know what flavors I’ll be using by then, which in turn means I need to start the flavor trials Sept 21-28 or so. Whoops! That’s coming up way too fast. So I am poring over chocolate books and starting a list of flavors to try for this year. Test kitchen commences on Sunday.

Filed Under: All blog posts, food, chocolate, textiles, sewing Tagged With: phoenix rising, phoenix rising kimono

July 5, 2013 by Tien Chiu

Simplifying

I’ve also started looking through the Fall 2013 haute couture shows on Style.com. I had been looking for ways to add details to the skirt, but after seeing the couture garments, I think it might be undesirable. What I noticed on the garments is that they mostly contain a single “idea”. Consider these two dresses (photos courtesy of the Metropolitan Museum of Art, for noncommercial use in accordance with their Terms & Conditions):

evening dress, by Versace
"May", by House of Dior
“May”, by House of Dior

Both of these dresses are visually successful, because they are “about” only one thing. The central idea for the first dress is the colors and cut of the bodice; the skirt is kept deliberately simple, to keep the focus on the bodice.

The central idea for the second dress is the leaf-and-flower embroidery, and the “cut” of the dress is kept simple to allow the eye to focus on the exquisite stitching.

So let’s look at some of my muslins again:

front of new muslin for Phoenix Rising

Here there are at least three or four ideas – the phoenixes, the painted-warp “flames”, the ruffles, and the gradations in color. It’s too complicated. The eye doesn’t know where to go.

And here is the latest rendition:

front of muslin
front of muslin

In this case, there are three ideas – the phoenixes, the color gradation, and the painted warp. I think this is still a manageable design because the central idea (in my mind) is phoenixes disappearing and reappearing in an inferno, but it still feels overly complicated compared to the two couture garments above. If I complicate the skirt, that will simply add to the confusion. So I’m leaning towards a simple, iridescent plain weave skirt at the moment. I may also eliminate the left shoulder “flame” (the smaller flame on the right side of the photo); to my mind, it distracts from the clean diagonal sweep of the phoenixes flying up into the inferno and out again on the other side. I may also eliminate the flame shapes cut into the bodice, for the same reason – though maybe not, as I really like those flames.

But for now, the intent is to simplify.

Filed Under: All blog posts, textiles, sewing Tagged With: phoenix rising, phoenix rising dress

« Previous Page
Next Page »

Subscribe to Blog via Email

Information resources

  • Dye samples
    • Procion MX fiber-reactive dye samples on cotton
    • How to "read" the dye sample sets
    • Dye sample strategy - the "Cube" method
  • How-Tos
    • Dyeing and surface design
    • Weaving
    • Designing handwoven cloth
    • Sewing

Blog posts

  • All blog posts
    • food
      • chocolate
    • musings
    • textiles
      • dyeing
      • knitting
      • sewing
      • surface design
      • weaving
    • writing

Archives

Photos from my travels

  • Dye samples
    • Procion MX fiber-reactive dye samples on cotton
    • How to "read" the dye sample sets
    • Dye sample strategy - the "Cube" method
  • Travels
    • Thailand
    • Cambodia
    • Vietnam
    • Laos
    • India
    • Ghana
    • China

Travel Blog

Entertaining miscellanies

© Copyright 2016 Tien Chiu · All Rights Reserved ·


Loading Comments...