Katazome paste is made from a mix of glutinous rice flour, finely ground defatted rice bran, calx, glycerine, and salt. Each ingredient serves a function:
- The glutinous rice flour, when wetted and steamed, is very sticky and clings to the fabric, helping the paste adhere during the application of dye. This is particularly important when indigo dyeing, as the paste needs to survive several immersions in an indigo dyebath. However, the glutinous rice paste is very sticky, so it doesn’t come off easily afterwards. Which leads to the addition of…
- Finely ground defatted rice bran. This acts as a filler, adding bulk to the resist, and also decreases the stickiness of the rice paste somewhat, making it easier to remove after dyeing.
- Calx is used to make the katazome paste more alkaline, making it more supple and elastic.
- Glycerine and/or salt are humectants, added to help the paste absorb a little bit of moisture from the air. This keeps a trace of moisture in the paste, which makes it flexible enough that it doesn’t crack off the fabric when dried.
The proportions used change according the properties you want. The typical ratio for stenciled paste is 1:1 glutinous rice flour to rice bran. That said, if you are applying paste using a cone rather than stenciling, or are planning many dips into an indigo dye vat, you might want a stickier paste. In that case, add more glutinous rice flour, since that’s what makes it sticky. Or if you want a paste that is easier to clean off, add more rice bran. There is considerable flexibility in the ratios of flour to bran.
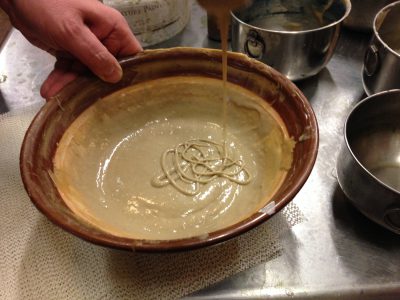
One thing to keep in mind is that the bran adds bulk and thickness. As an experiment, we prepared one paste using both rice bran and glutinous rice flour, and another paste using just glutinous rice flour. As it turned out, both made good resists – but the glutinous rice flour paste did not come out as thick and dried to a much thinner layer as the paste with the bran. This is because, on its own, the glutinous rice flour paste absorbed more water during steaming than the mix of glutinous rice flour and bran. The “pure” rice flour paste was also significantly gummier and (in the bowl) lacked the crisp definition of the mix of flour and bran. It still made a good resist for the stencil used, but I wonder whether it would be too runny for a stencil with lots of fine details. More experiments needed!
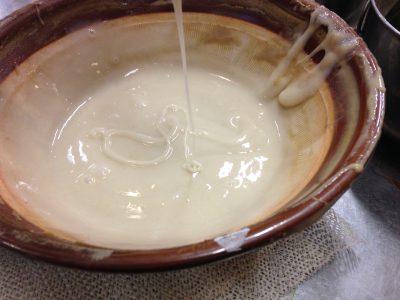
Unfortunately, the finely ground defatted rice bran is no longer manufactured – the last producer closed up shop recently. John Marshall (our instructor) still has a stash and allowed us to use it in class, but eventually a substitute needs to be found. We tried both pure glutinous rice paste and a mix of glutinous rice paste and regular rice bran (the kind you can buy in a health food store). The “regular” rice bran + glutinous rice flour produced a rather lumpy paste because the rice bran wasn’t as finely ground. The stencil it was used with didn’t have any super fine lines, and it worked well with that stencil – but again, I wonder whether it would be too lumpy for very fine details. More research needed!
To make the katazome paste, mix the glutinous rice flour and the powdered defatted rice bran in a bowl. Add very cold water, a little at a time, until the paste holds together. (Katazome teacher Karen Miller describes it as “feeling rather like your earlobe”; John Marshall makes it a little drier, more like pie dough.) According to John Marshall, using cold water helps keep it from becoming prematurely sticky.
Form the resulting paste into small pieces (golf ball sized lumps or 2-3″ donuts). Put the pieces into a steamer lined with a dampened fine cloth (muslin works well) and flip the ends of the cloth over the top so they aren’t hanging out over the edges (fire hazard) and so there is enough room on the sides for the steam to get by. (Dampen the cloth first to avoid having the cloth draw moisture from the paste – that could produce a crust that will be difficult to remove later.) If you are making large quantities of paste or multiple batches, use a multi-level steamer (available in most Asian markets) and rotate the levels every twenty minutes or so so that they steam evenly.
Steam the paste for a minimum of one and a maximum of three hours; according to John, there really isn’t much difference in texture during that time period, so whatever is more convenient works. Keep an eye on the steamer to make sure there’s enough water in the bottom, adding more water as needed.
While the paste is steaming, put a tablespoon or two of calx into 4-8 ounces of water. The exact amount is not that important. Mix the calx with the water and let it settle out.
After the paste is steamed, dump it out into a suribachi, scraping it off the cloth as needed. (Dump the cloth into a bucket of water if you don’t want dry paste adhering to it later.) A suribachi is a Japanese mortar and pestle, a heavy ceramic bowl with ridges in the sides, which help stick the paste to the sides, making stirring easier. Suribachis are available both in many Asian markets and online (search for “suribachi”). Immediately start mixing the paste with the pestle or a strong spoon (wooden is easier on the hands), until it is fairly smooth. The paste will thicken as it cools, so work quickly!
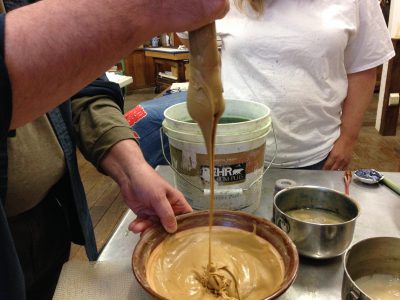
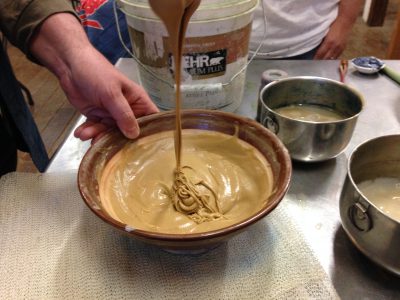
You will probably want to add some water to the paste to make it easier to mix. The finished paste should flow smoothly off a spoon (or whatever you are using for mixing) but retain definition when dropped from a spoon. Err on the side of less water, as you will be adding a bit more water in the next step, and it is easier to add water than to remove it!
Once the paste is fairly smooth, add a little bit of the calx water, being careful not to let the calx sediment on the bottom into the paste. (The sediment will create hard lumps.) The calx water makes the paste more alkaline, which makes it more elastic. Once you’re done, the paste should look like this:


This is not traditional, but here is the result of an experiment with “pure” glutinous rice flour (i.e. no bran) and an experiment mixing glutinous rice flour with “regular” rice bran, the kind you find in a health food store:


Finally, add glycerine and/or salt to help keep the paste from drying out completely (which will make it crack). This isn’t precise, but 2-3 tablespoons of glycerine in a cup or two of paste is a good starting point. (If you use that much glycerine, you won’t need salt.)
Scrape into a bowl, cover with a wet cloth (or with water), and allow to cool completely. The paste will thicken as it cools.
