The initial inspiration for my Celtic Braid Cape arrived in 2009, when I was working from home in an unheated garage. I live in the San Francisco Bay Area, so it never gets freezing, but winter is still pretty nippy! I was wrapping my fingers around a mug of tea to warm them up when I thought how wonderful it would be to have a coat to wear in the garage, to keep me warm as I typed.
And thus the idea for the project was born.
I have a long-time fascination with Celtic knotwork, and had prepared drafts for many different types of Celtic knotwork. Most of them didn’t work out well in practice – the knot designs tended to collapse when the fabric was wet-finished – but after much experimenting, I drafted a three-strand braid pattern that worked beautifully, in samples as well as on paper.
On to creating the fabric!
I happened to have on hand some silk yarn, six strands of 60/2 silk loosely twisted together, and some fine cashmere/mohair yarn that I didn’t know what to do with. However, there wasn’t quite enough of either to weave the fabric for the coat. So I added some fine wool yarn and some additional bits of silk yarn that I had lying around, to make up the amount I needed. I dyed the silk a beautiful garnet red, and the cashmere/mohair/wool mix a deep black.
Because I was cramming the dyepot (always a bad idea), one of the silk skeins came out darker than the others. I solved this problem by alternating stripes of the darker color with stripes of the lighter ones, so the resulting fabric has every third stripe darker than the others. I actually like this “design feature”; it adds interest to the fabric without being obtrusive.
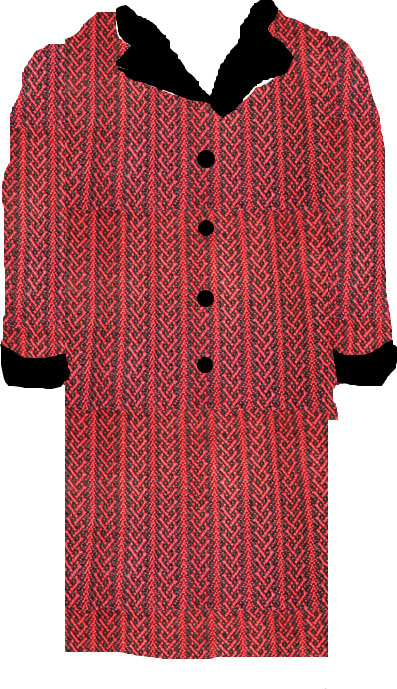
I wove the fabric in record time (for me anyway!) – about two weeks for fourteen yards of fabric. Now I had to work out how to sew it up. I liked this Photoshop simulation:
However, I knew I’d need to do considerable work to get it right, especially since I knew nothing about couture sewing. So I labored over many muslins, and over a version in mohair I was using to practice couture techniques. This took several months.
Then, of course, I got engaged! and spent over a year weaving and sewing my wedding dress. By the time I finished, the impetus for the project was lost, and the fabric languished in my stash for several years.
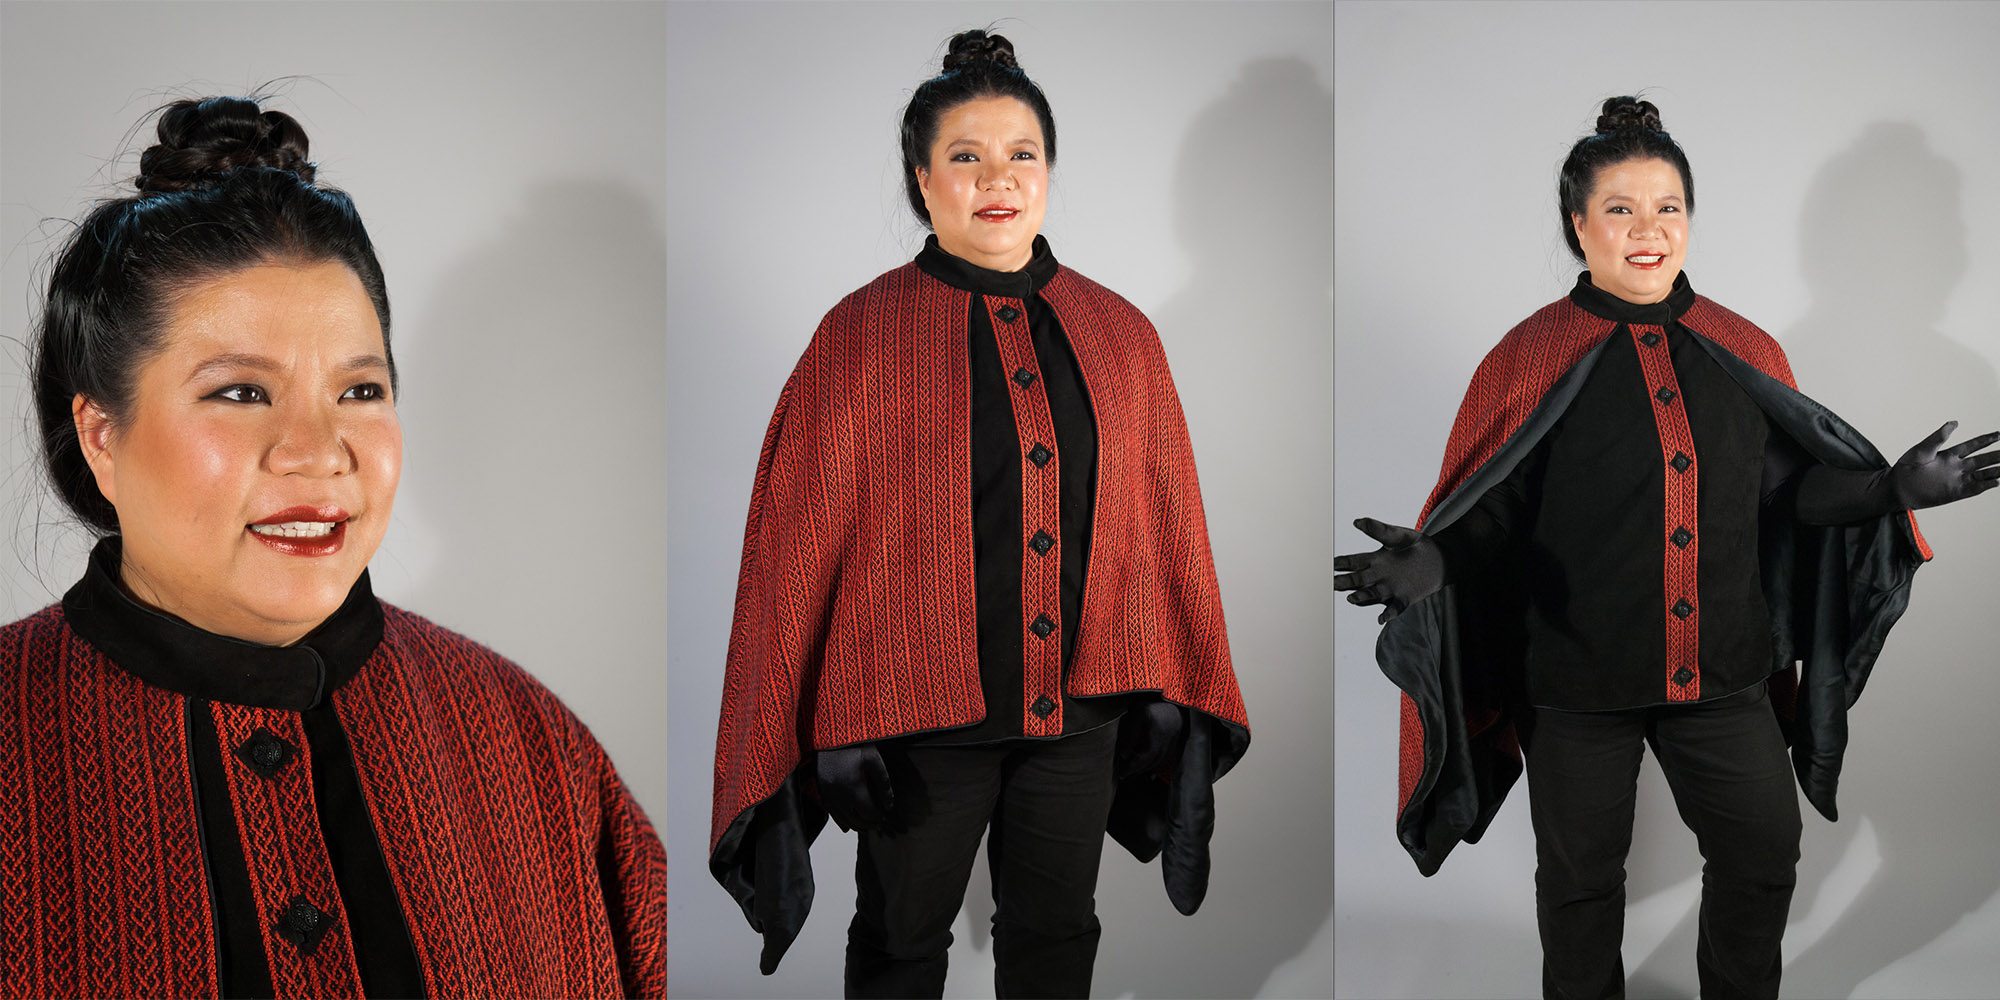
Then Handwoven announced a contest for sleeveless garments, and I spotted a Vogue pattern that would be perfect for both fabric and contest – a cape over a simple vest. I knew instantly that this was the design I wanted to use.
Unfortunately, I was still finishing up my Autumn Splendor project, so I wasn’t able to meet the contest deadline – but the idea was sound, so I moved rapidly ahead with the cape, sewing it up quickly and with a minimum of drama. I was ecstatic when Handwoven published it in their January/February 2013 issue!
Here are some photos from the making of the project:


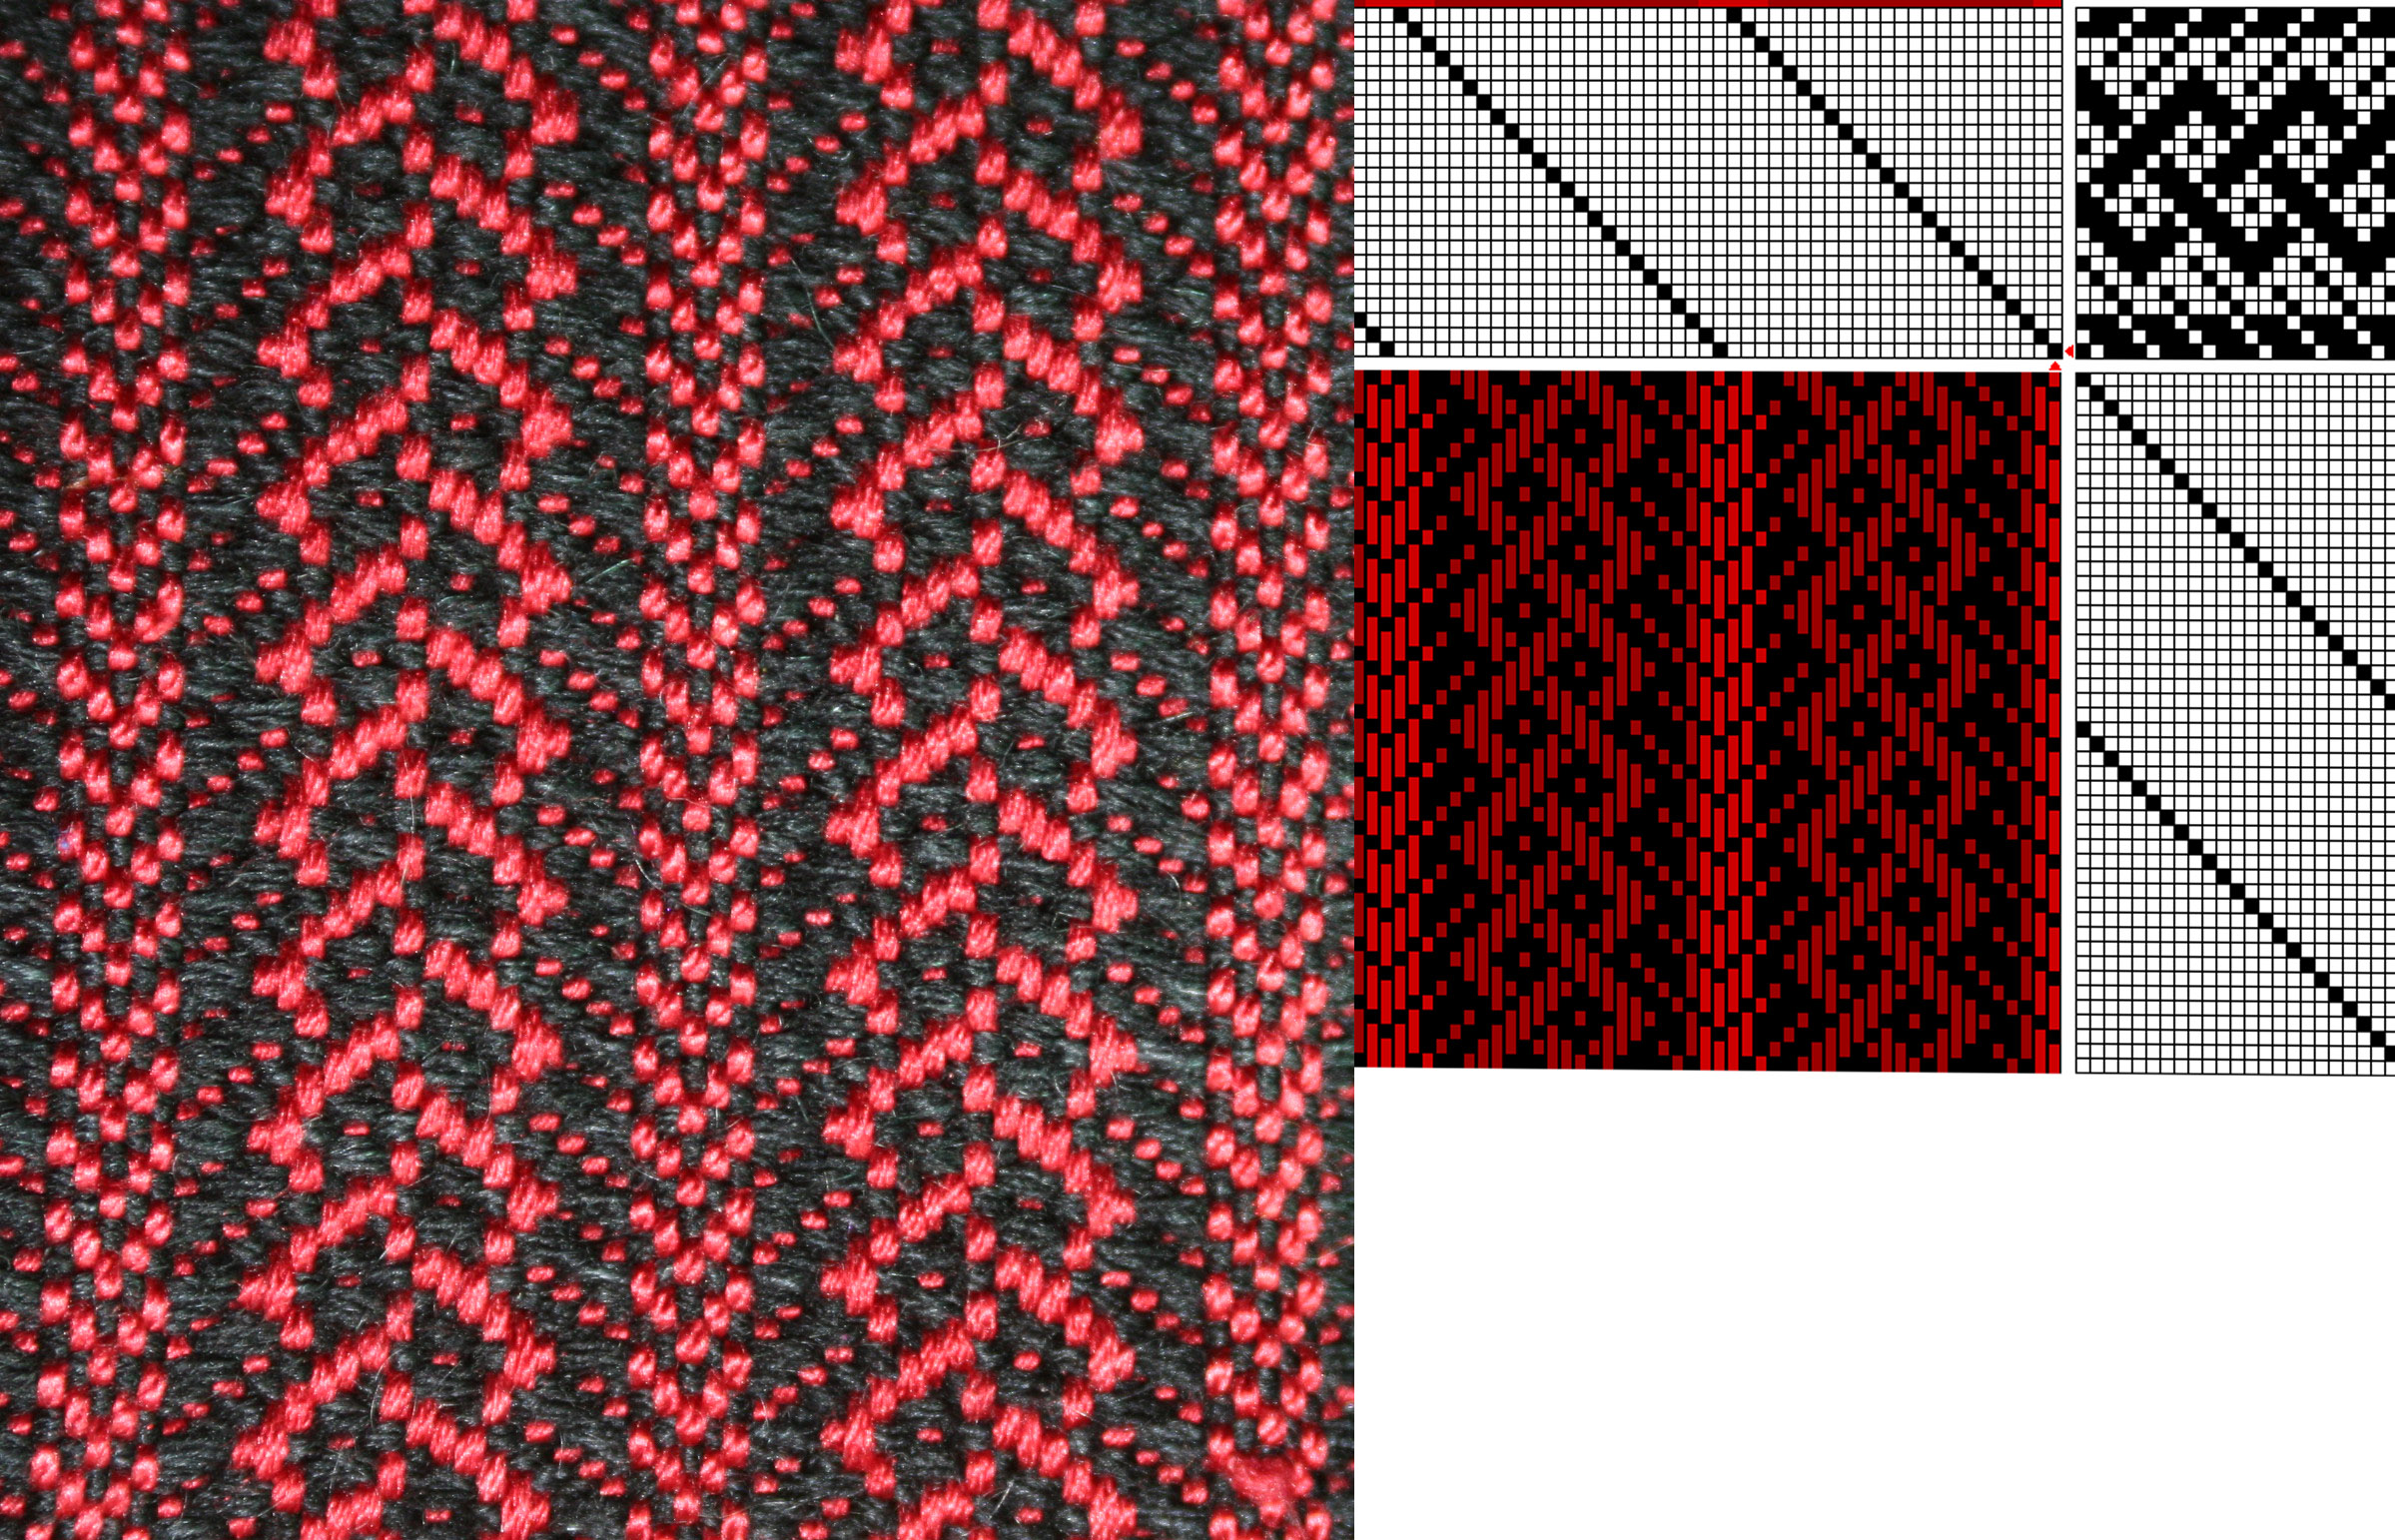
 Left, the draft for the project: right, the three-strand Celtic braid draft used in the project.
 A close-up of the pattern as it is being woven.
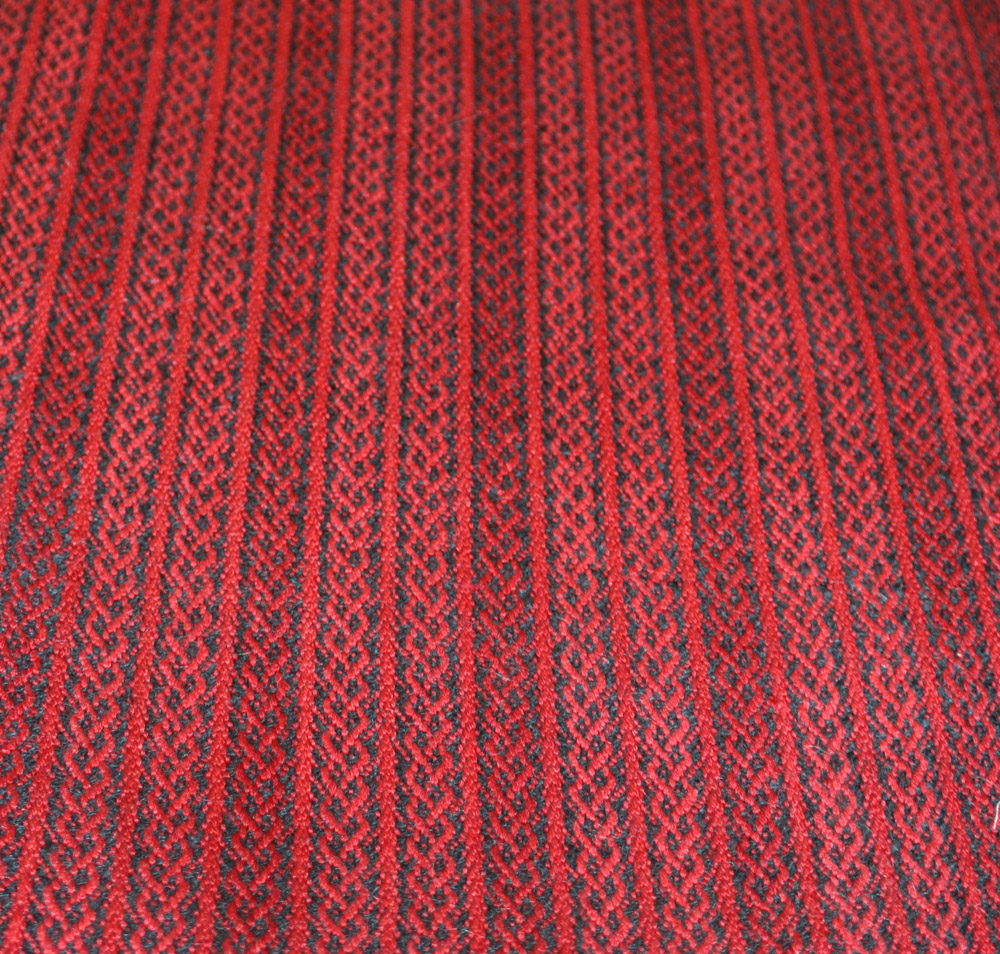
 The fabric before and after wet finishing. (Wet-finished, top; unfinished web, bottom.) Notice how the lines soften and change to become more smoothly curvy!
 The wet-finished fabric.
 The muslin for the first coat concept.
 A (crude) Photoshop simulation of the coat.
