Tien Chiu

  • Home
  • About
    • Honors, Awards, and Publications
  • Online Teaching
  • Gallery
  • Essays
  • Book
  • Blog
  • Dye samples
You are here: Home / Archives for design class

May 5, 2011 by Tien Chiu

Color and value in design

I spent some time this morning messing around in Photoshop, confirming a lot of things I’d read about color theory.  I played with hue (colors), value (lightness/darkness), and chroma (saturation), and produced about twenty new samples.  I won’t post them all, but here are some of the most instructive ones:

First, value matters a lot, probably more than hue, in where the eye goes.  Here are three samples, all with lighter values and darker values, at top, middle, and bottom:
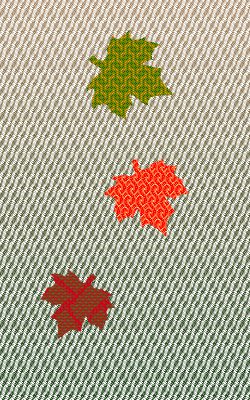
autumn leaf simulation, light value on top

Notice how, despite the green being a higher chroma (“brighter”) color than brown, the eye is immediately attracted to the top section, which has a higher value (lighter).

Now, lighter value on bottom:
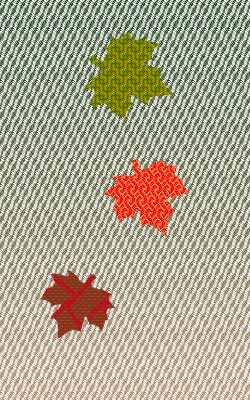
leaf simulation, light value on bottom

Here the eye is drawn immediately to the bottom.  Not good, not bad – it depends entirely on what you’re after.  This could work to draw the eye downward, if the effect is fairly subtle (more subtle than in this example) – in this example, the eye is drawn downwards and gets “stuck” there.

And, lighter value center:
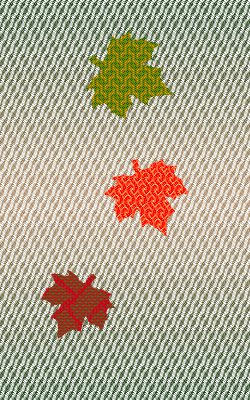
leaf simulation, light value in center

Here the eye is drawn to the center of the piece.

And, just for yuks, here is lighter value top and bottom:
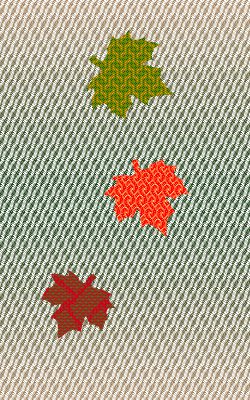
leaf simulation, lighter values on top and bottom

Here the eye bounces between top and bottom.  This one I don’t like at all; the eye doesn’t know where to go.

And, finally, equal values throughout:
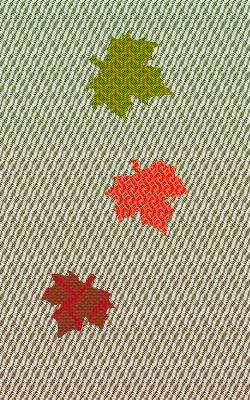
leaf simulation, more or less equal value throughout

Here there is virtually no movement in the background, and the eye is drawn immediately to the leaves.

Lesson from all this: value matters a lot in establishing where the eye goes.

My conclusion from all this is that I want to keep the value fairly constant, to keep the eye on the leaves, and maybe make it a very small bit lighter at the bottom, to draw attention downward.

Now, let’s look at saturation:
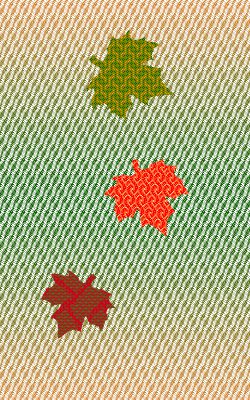
leaf simulation, saturated colors

And here is the same simulation with the colors desaturated:
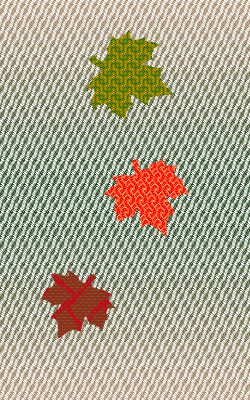
leaf simulation, desaturated

The “feel” of the first one is more exciting, but the leaves stand out better in the second one.  This is because a bright color next to a dull color looks brighter, and a bright color draws the eye.

I think the right answer here is to pick a chroma somewhere between these two simulations – saturated enough to be interesting, but not enough to compete with the leaves.  How saturated?  Only experimentation will tell.

And, finally, color.  Here is a version with red inserted, desaturated and lower-contrast so it doesn’t interfere with the leaves:
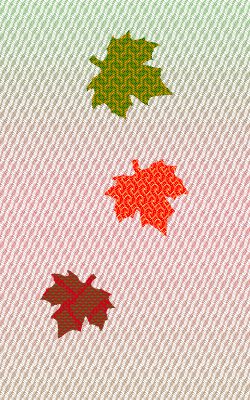
leaf simulation, all identical values, adding red to the background

Here the eye is drawn to the red center, which is the warmest color, partly because of the background and partly because of the red leaf, which is both the warmest colors and the highest-chroma (most saturated) of the leaves.

I am still mulling over all this.  The question is, where do I want the eye focused?  In this particular piece, I think I want the eye to enter on the top leaf, and be drawn downwards via the implied line between the leaves.  The eye naturally enters at the top left of a piece (for Western viewers), because we read starting from the top left, so the top leaf is one of the natural entry points (especially since it’s bigger, and thus has more “weight”).  The red leaf draws the eye downwards, and because it’s pointing in a specific direction, the eye starts heading southeast, doesn’t find anything there, and then follows the implied curve of the leaf shapes down to the brown leaf, giving a curvy line to the direction of the eye, and a sense of motion.  This is more or less what I want.  Having more stuff going on in the background would be a distraction.

Conclusion: use similar value colors in the background, probably green and brown, possibly with a slightly lighter value at the bottom.  Keep the leaves at a relatively similar level of visual interest, but with slightly higher interest towards the center and bottom, to keep the eye moving downwards.

This is all utterly fascinating to me, as it uses all the design principles I learned in class.  The design class I took has made me much more aware of where the eye is going and why – many thanks to Sharon Alderman, who suggested I take it!  It has been really helpful in refining my design.

Nancy asked what type of knitting machine I have.  It’s called an ArtKnitter 510, and Googling says nothing about it.  I’m guessing it was an unsuccessful knockoff of the Brother and Toyota knitting machines, which disappeared without a trace.  Nonetheless, mine seems reasonably functional, and I’ve been enjoying playing with it over the last few days!
Filed Under: All blog posts, textiles, weaving Tagged With: autumn splendor, color theory, design class

December 8, 2010 by Tien Chiu

…and, the pop-up

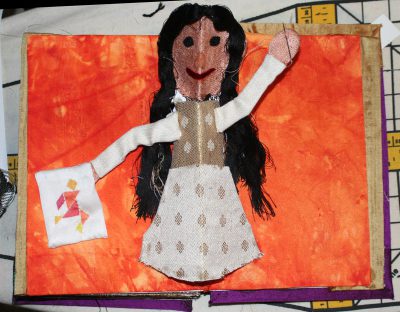
The final version of the pop-up girl

I was going to put all sorts of fiber arts stuff in the background, but realized that would only distract from the central figure.  I also decided to switch to quilting (ironically, one of the few fiber arts I have NOT particularly enjoyed) because it would allow me to insert the self-referential tangram figure as the quilt.  I think it’s a nice touch.

And every part of the pop-up girl is handwoven fabric, except the eyes and the mouth.  The face and hands are a 7-1 satin woven on the 60/2 black silk warp, using some of the dye samples from this summer’s study group as weft..  The sleeves are wedding-dress fabric, the bodice and skirt from the wedding-coat.  The hair, in a burst of inspiration, is thrums from the 60/2 black silk warp that I just cut from the loom.

(YES!!!  The endless 60/2 silk warp is over.)

The pop-up is a bit crude and cartoonish, which I’m not super happy about, but I think it’s the best I can do for now.  In Pop-Up 201, we’ll do the elegant flamenco dancer….

I am considering adding a stage curtain and a figure taking a bow on the back cover, but I think that would be gilding the lily.  It’s a beautiful book as it stands – it has many technical flaws, and I’d definitely redo it before submitting it to a juried show, but I love the concept, and for a class project it is way, WAY “over the top”.

Now, off to clean up the studio!  In the course of frenzied book-making it has turned into an enormous mess.  I am also overstocked with yarn, so if you know anyone interested in lots of (free) fine yarns, drop me a line and I’ll send you a list of what I’m giving away.

Next artistic adventure: drawing class!  I managed to get into Drawing I at Foothill Community College, and it’s an entirely online class, so I can work from home.  Class starts in January.

Filed Under: All blog posts, textiles, weaving Tagged With: design class

December 7, 2010 by Tien Chiu

Covers

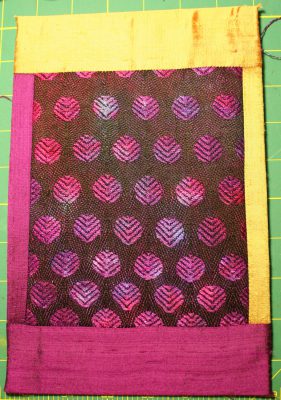
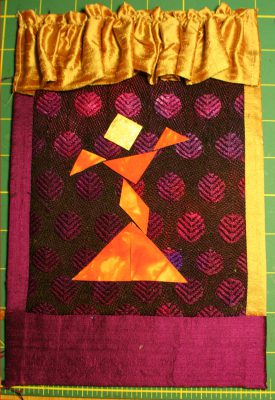
As you can see, I had a lot of fun with the front cover:

Front cover of book (handwoven fabric in background)

(The head of the figure is gilded with 24K gold leaf, a leftover from my egg art days.)

The back cover is similar, only simpler:

Back cover of book. Like the front cover, only less fancy.

I’m kind of tempted to put curtains on the back of the book and show the tangram figure taking a bow, but that’s definitely a finishing touch – I’ll leave that to the last, just in case I run out of time.

Something struck me as I was finishing the front cover – this book draws on an incredibly broad range of techniques from the fiber arts.  There is the custom-designed, handwoven fabric background.  It is painted using silk-painting techniques for pages 3-4, and scrunch-dyed using tie-dye/low-water immersion techniques for the covers.  The fabric covering the pages (and most of the tangram figures) is heat-bonded, a mixed-media fiber arts technique.  The covers are pieced using the freezer-paper technique from quilting, and the stage “curtain” on the front cover is hemmed using a catchstitch, a couture sewing method.  All I need to do is add knitting and handspinning to the last page and I think I’ll have my entire history in fiber arts covered!

Anyway, that makes it more special to me.  This is not something I could have made when I was twenty, and it’s nice to know that my entire repertoire of skills contributed to this.  Kinda cool, really.

Still left to do: attach the covers to the book, decorate the back pages of the book (optional), and finish the pop-up pages.  Deadline is Thursday morning, but I think I’ll likely finish tomorrow.

Filed Under: All blog posts, textiles, weaving Tagged With: design class

December 6, 2010 by Tien Chiu

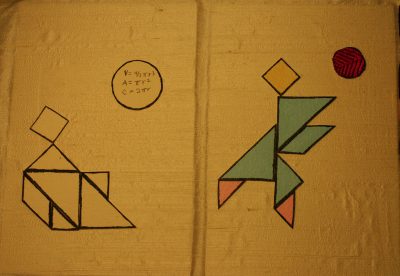
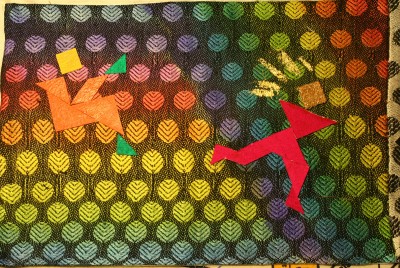
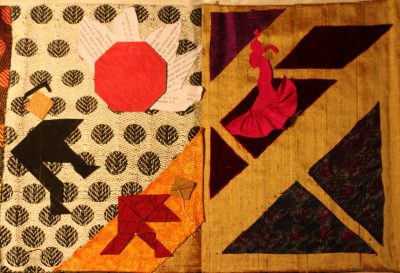
Pages 1-6, complete

Pages 1-6 of book
Full view of pages 1-6
Pages 1-2, complete
Pages 1-2, closeup
Pages 3-4, closeup
Pages 3-4, closeup
Pages 5-6, closeup
Pages 5-6, closeup

I explained pages 1-4 already, and some of page 5.  The narrative for page 6 is all about transformation: after sneaking past the stop sign and going down the artistic path, the figure finds itself magically transformed into a real person (a flamenco dancer, no less), dancing down the red carpet.  (I know it looks maroon in the photo, but it’s actually a rich, dark red velvet.)  The triangles at bottom left are cut from a few scraps of my woven shibori samples.

A subtle point is that the geometric shapes forming the background on page 6 are the same shapes that have been used to build all the previous figures.  But the geometry is now in the background rather than the person.  Maybe no one will notice it, but I think it’s a nice touch.  Also, there is handwoven fabric on every page except the first one.  🙂

What’s left to do now is the covers, which will be more hand-dyed handwoven-circle fabric, with the tangram figure (and maybe the flamenco dancer) stenciled on top, adding some decorative ribbon to the reverse side of the book, and the pop-up.  I’ve got 2.5 days left, and no commitments for those days, so I think I’ll have plenty of time to do a bang-up job on both pop-up and covers.

This has been a really fun project, and I’ll be sorry when it’s over!

Filed Under: All blog posts, textiles Tagged With: design class

December 5, 2010 by Tien Chiu

Things are popping…

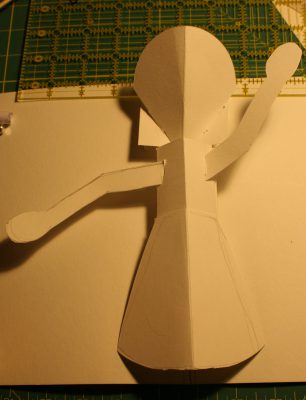
Since my pin-up girl days (yes, that’s really me on the cover of that magazine, and no, I’m not wearing anything except body paint 🙂 ) are over, I guess I’ll have to settle for being a pop-up girl:

Tien the pop-up girl

I’m actually pretty pleased with my pop-up girl, even in this rough version.  I mixed and matched four or five techniques from the book to arrive at Tien the Pop-Up Girl.  First, though it’s largely invisible, there is a pop-up platform holding the body and head about 5/8″ above the page.  This adds three-dimensionality, and allows for a realistic-looking skirt that drapes down from the body to the page.  (In my first version, the skirt “felt” squashed up against the page.)

Then there’s the head, which is a simple piece of paper angled in by tabs.  The body is a “tent” of fabric glued to the bottom platform, and the arms are a “reverse tent”, asymmetric, which brings one arm out at a steeper angle from the page than the other.  (The top arm angles out towards the viewer, while the arm pointing downwards is nearly parallel to the page.)  The skirt is just a separate piece glued to the body..

I like this mockup enough, in fact, that I think I will use it as the armature for the Real Thing, covering the face and hands with a skin-tone fabric and “dressing” it in other fabrics, probably handwoven.  I’ll add hair (yarn), and give her something to hold.  (I’m still debating between a shuttle (which is my favorite, but unrecognizable except to other weavers), a spindle, and a needle.)  The one thing I need to change is the background.  I want the entire background covered in fabric, and that will be easier if I just cut the pop-up off the current page and reglue it to a fabric-covered page.

So it’s been a productive and very enjoyable day.  Playing with pop-ups is FUN! and I’m already thinking of other things I could do with weaving and pop-ups.

But first there is the rest of the book to finish, so back to work!

Filed Under: All blog posts Tagged With: design class

Next Page »

Subscribe to Blog via Email

Information resources

  • Dye samples
    • Procion MX fiber-reactive dye samples on cotton
    • How to "read" the dye sample sets
    • Dye sample strategy - the "Cube" method
  • How-Tos
    • Dyeing and surface design
    • Weaving
    • Designing handwoven cloth
    • Sewing

Blog posts

  • All blog posts
    • food
      • chocolate
    • musings
    • textiles
      • dyeing
      • knitting
      • sewing
      • surface design
      • weaving
    • writing

Archives

Photos from my travels

  • Dye samples
    • Procion MX fiber-reactive dye samples on cotton
    • How to "read" the dye sample sets
    • Dye sample strategy - the "Cube" method
  • Travels
    • Thailand
    • Cambodia
    • Vietnam
    • Laos
    • India
    • Ghana
    • China

Travel Blog

Entertaining miscellanies

© Copyright 2016 Tien Chiu · All Rights Reserved ·


Loading Comments...