Tien Chiu

  • Home
  • About
    • Honors, Awards, and Publications
  • Online Teaching
  • Gallery
  • Essays
  • Book
  • Blog
  • Dye samples
You are here: Home / Archives for phoenix rising dress

July 20, 2013 by Tien Chiu

Wet-finished samples

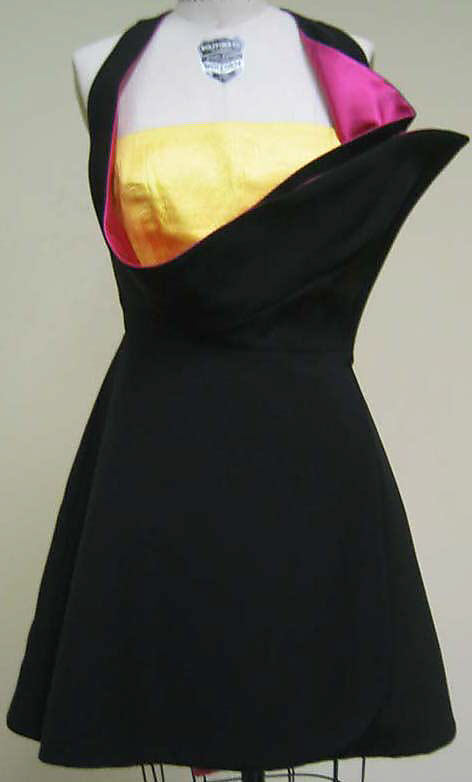
I have been weaving more samples! After a ten-inch length of plain weave, I wove four inches with a metallic gold weft, like so:

sample with metallic gold weft, on loom

I didn’t like it on the loom – too gaudy – but persevered, because often the cloth looks quite different after wet-finishing.

And so it does!

sample woven with metallic gold weft, after wet-finishing

While it is still gaudy if viewed with the light reflecting directly off it, under most light it just looks regal, and a bit glittery. It’s beautiful.

Which is a pity because it’s such a royal pain in the butt to weave! The metallic gold polyester embroidery thread is stiff and springy, and leaps off the pirn at the slightest opportunity. I continually had to stop an adjust the thread in the shuttle.

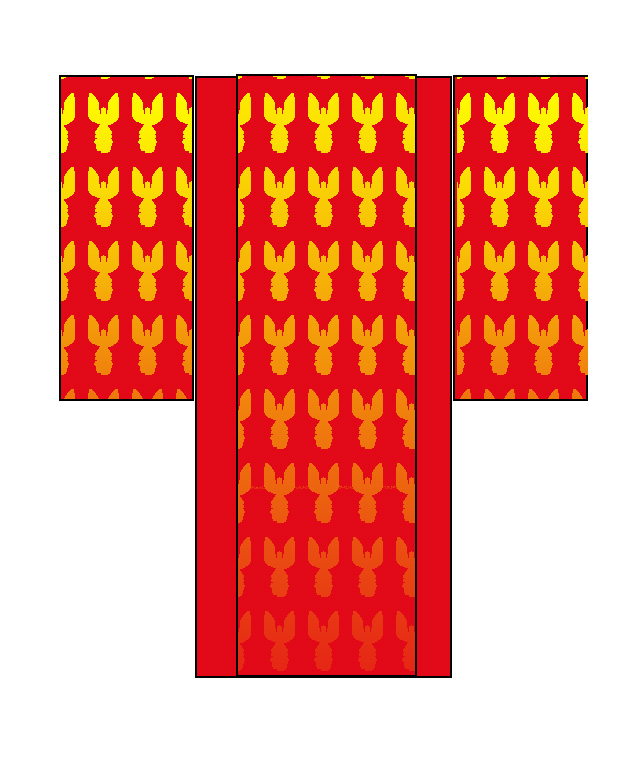
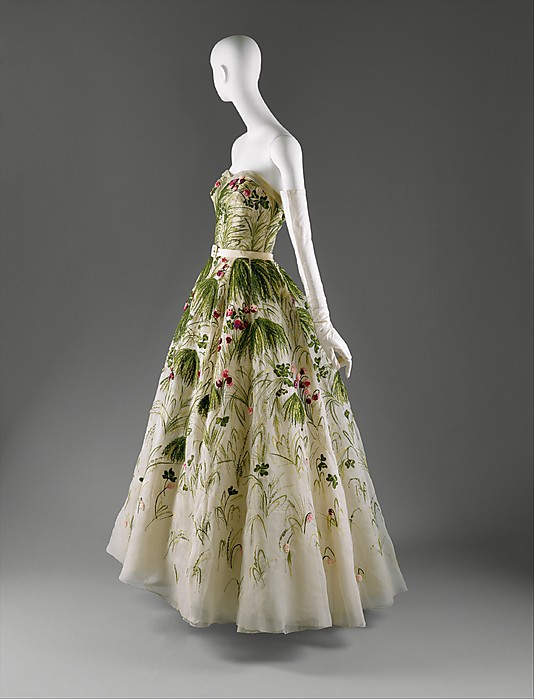
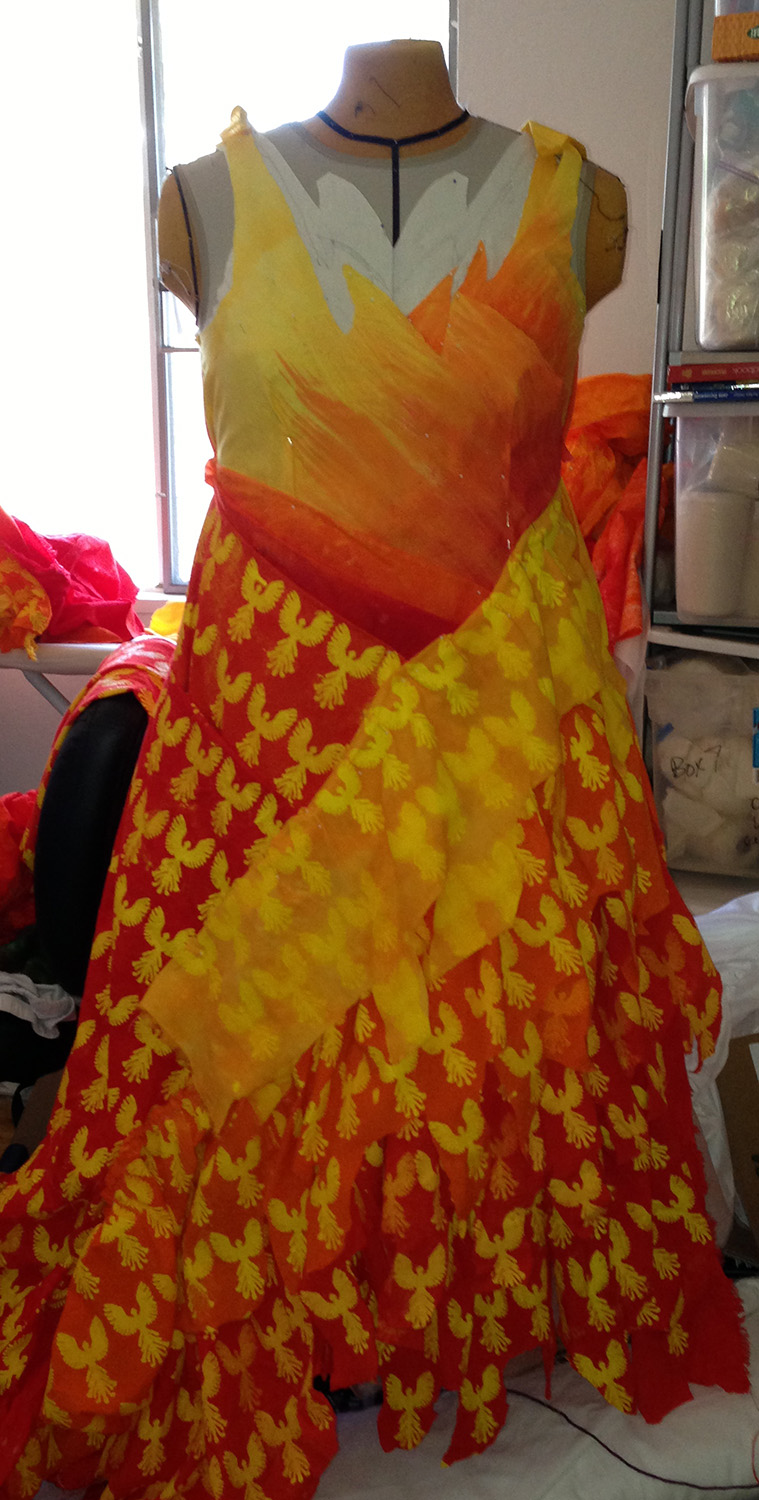
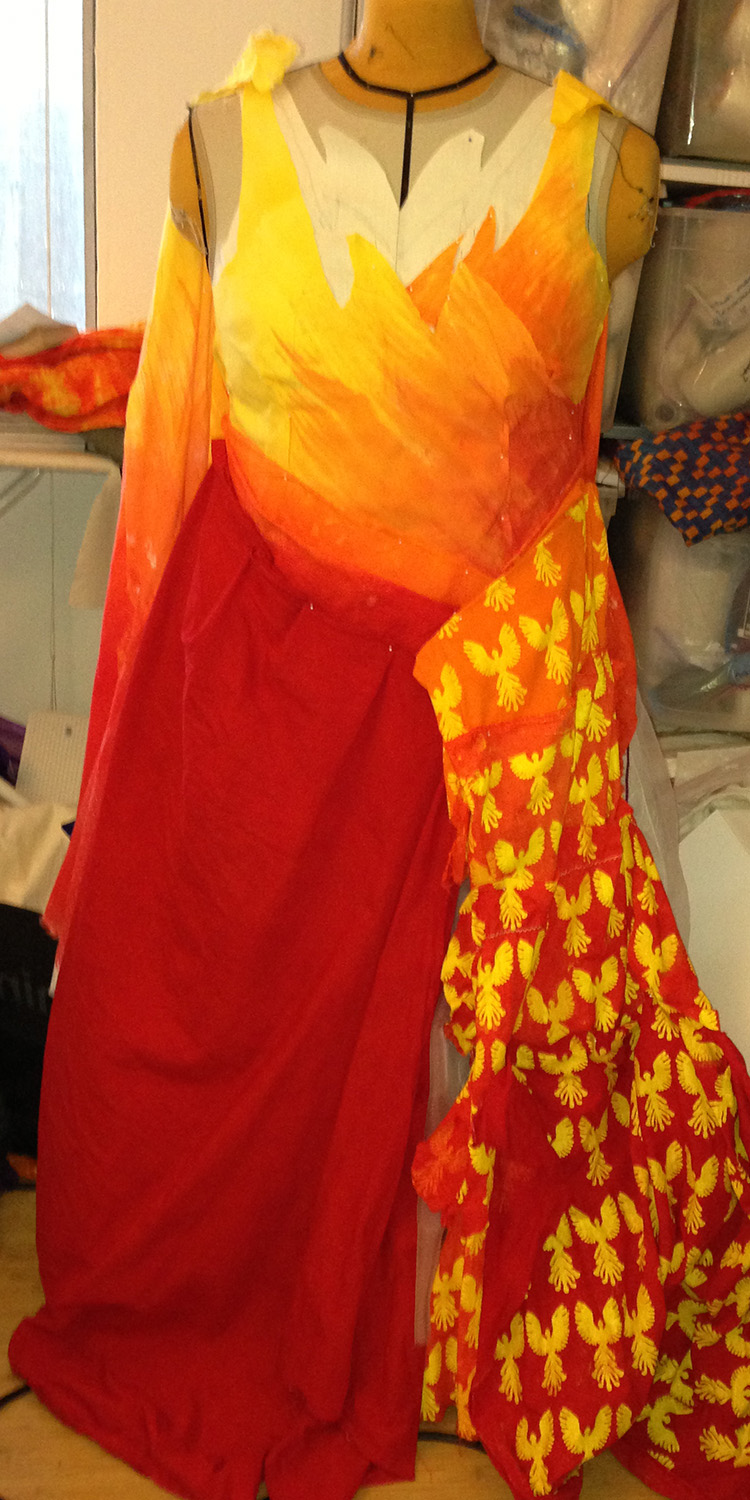
Unfortunately (or perhaps fortunately?), the woven fabric is too stiff to use in the skirt of the ball gown. But I am considering using it (or something similar) in the kimono, where drape is less of an issue. If I weave a flame pattern into the fabric, that could be quite beautiful. Or it could distract from the phoenix pattern. Hmm.

I’ve also discovered that my plain weave fabric is far from perfect. The trouble is that warp floats are very difficult to detect while weaving, but blindingly obvious on the wrong side:

plain weave sample, front side
plain weave sample, back side

Here I may have been changing sheds too fast for my loom to keep up. I slowed down later in the sample and the results are flawless (in the metallic gold weft section, anyway).

I was also having trouble with the shafts jumping off their hooks in this section. Mike suggested using lineman’s pliers (big heavy pliers) to close up the hooks slightly, which I did. Yay! No more shafts leaping off their cables.

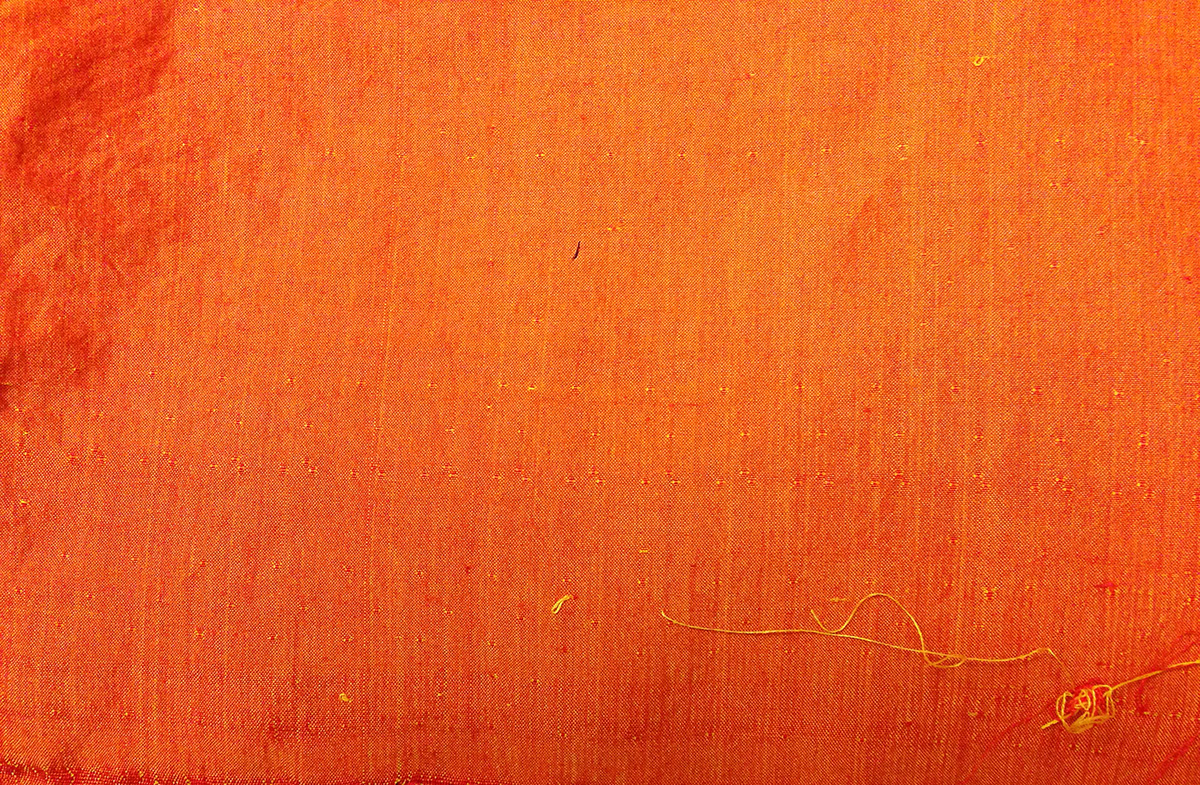
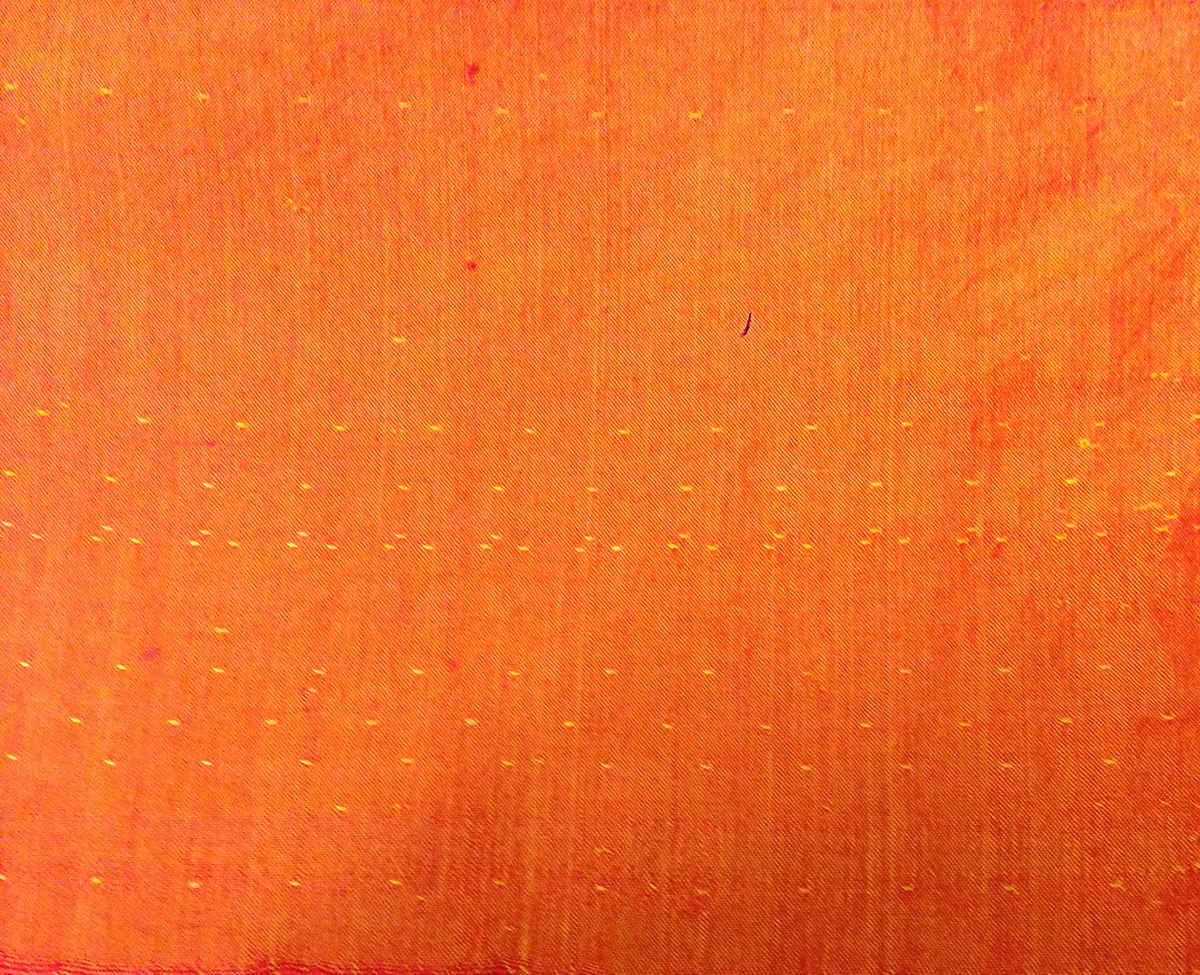
The plain weave, by the way, is nicely iridescent:

plain weave fabric sample, scrunched to show off iridescence

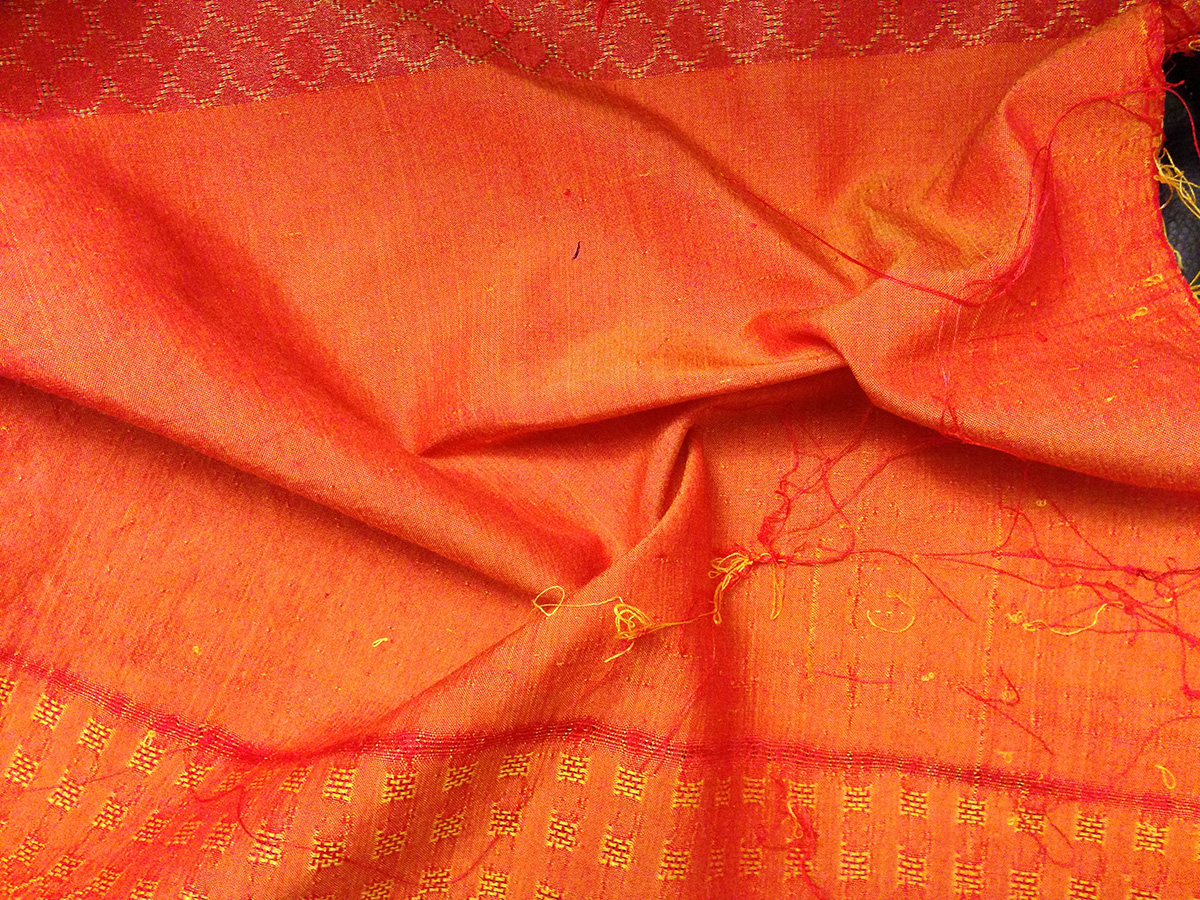
And, finally, here is my first sample, off the loom and wet-finished:

first sample, wet-finished

The sample at the top, a pattern of huck lace squares, was not successful. It’s pretty, but having floats in some sections and not others results in different take-up between the two sections, which in turn results in slack threads in the section with the squares. I had hoped that, with a very fine warp, the difference would not be enough to cause problems, but after only three squares I was already feeling slackness in the threads. So I aborted that particular draft, and will try re-drafting something else interesting.

On the agenda for today? The farmer’s market, making truffles, and a friend’s party. I live under a rock, but I am occasionally a social creature. Besides, I need somewhere to bring the treats I’m making!

Truffle flavors? MacAllan 12 Scotch whiskey (a perennial favorite), and maybe some orange curd truffles, and some goat cheese and honey truffles. The last two are among my favorite flavors, but they’re too perishable to make in my annual November frenzy, so I rarely get a chance to trot them out. Delicious, though!

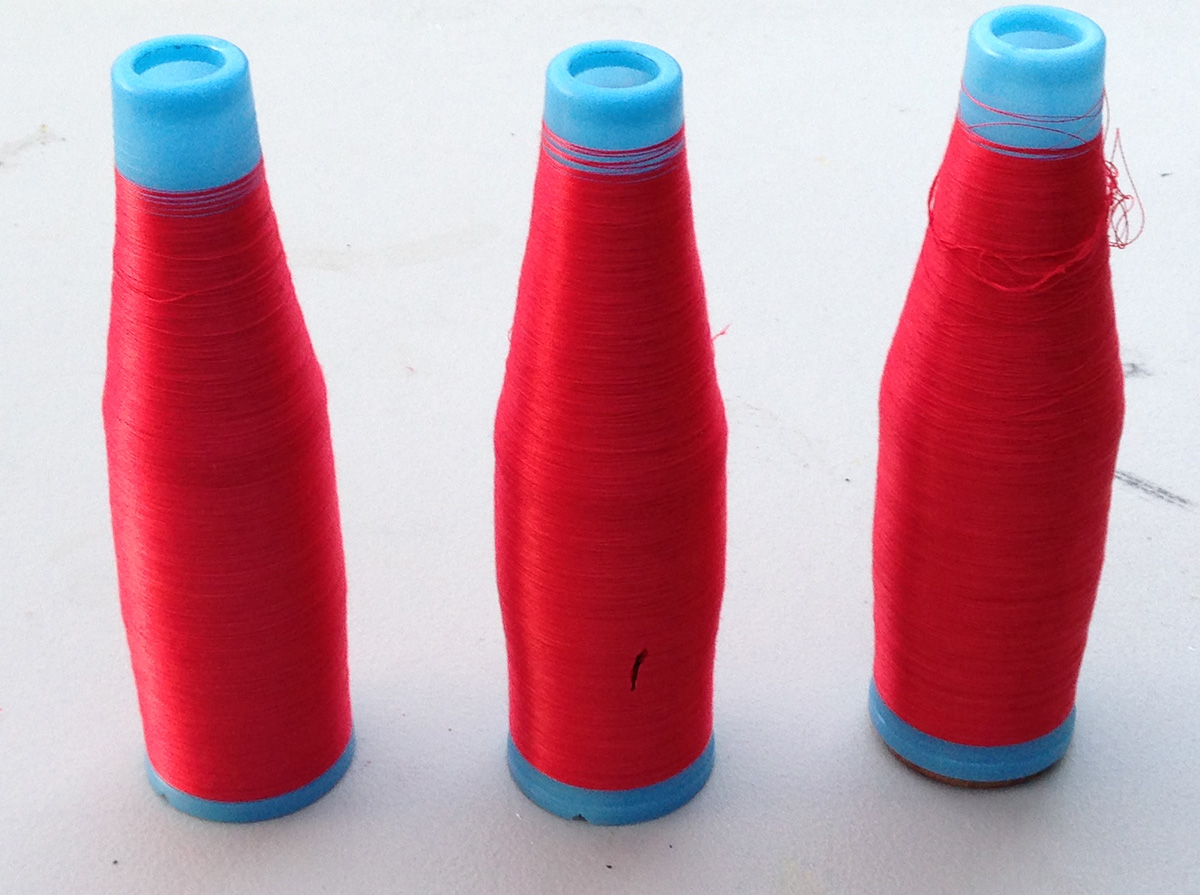
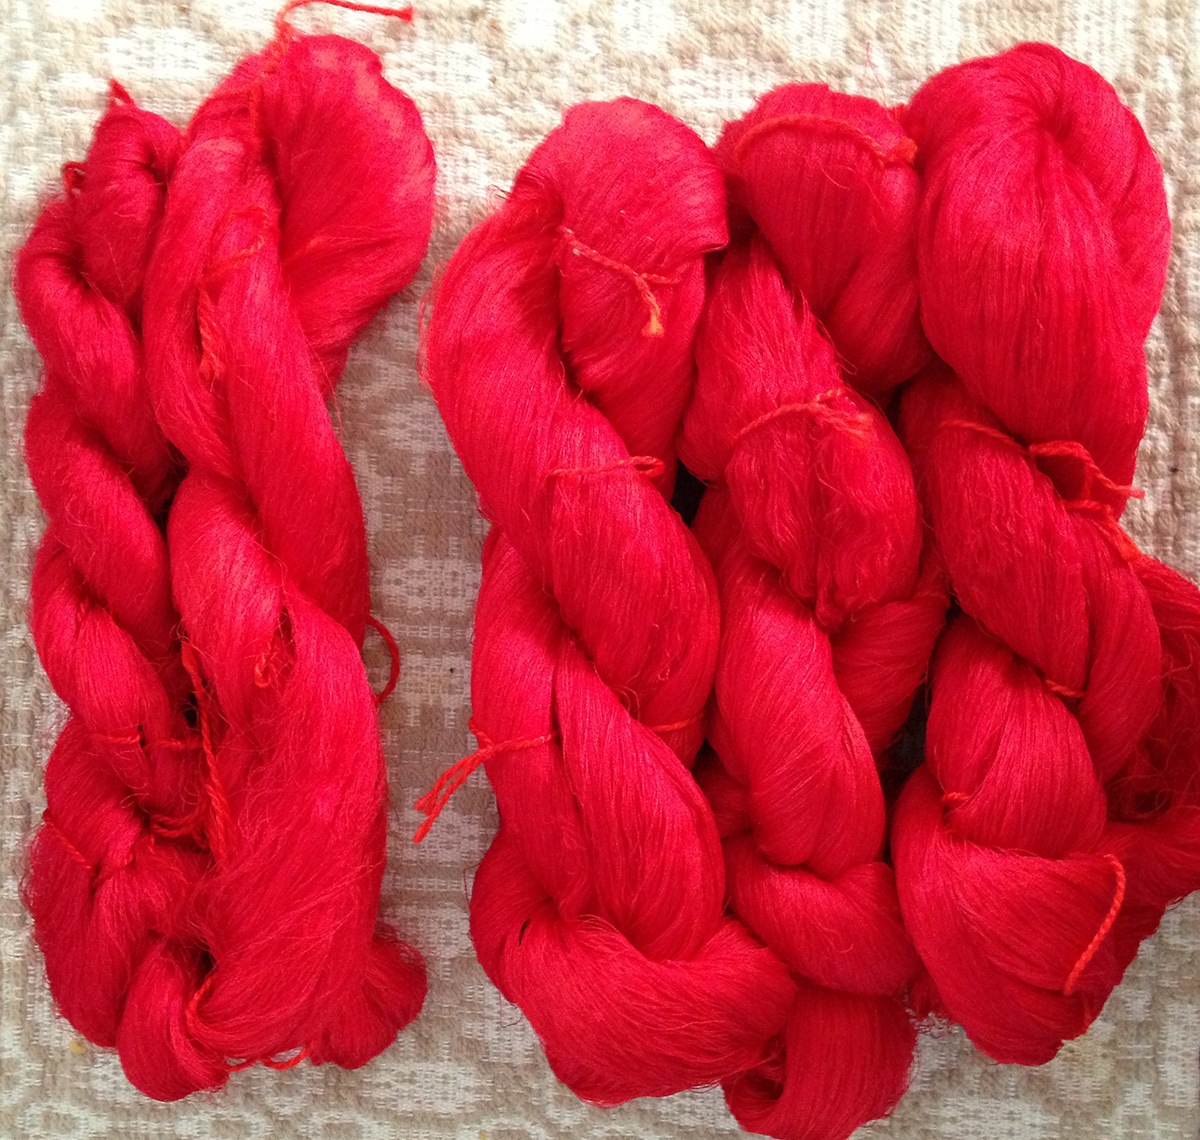
I’m also planning on weaving some samples for the skirt of the ball gown, using a fine tram silk. I have two colors, orange and dark ruby red – I’m hoping the ruby red works out, because it’s pre-dyed and pre-coned, and dyeing/winding off tram is a real pain.

And, finally, I need to do some more work on Creating Craft. Lots to do this weekend!

Filed Under: All blog posts, textiles, weaving Tagged With: phoenix rising, phoenix rising dress, phoenix rising kimono

July 8, 2013 by Tien Chiu

Forks in the road

I spent the long weekend blocked on both book and ball gown, but I finally solved both problems yesterday. I’m splitting both of them into two projects, making a total of four projects total.

For the ball gown, Stephanie was spot on: there are really two garments lurking in the dress. The first is a very simple cut – most likely a kimono – to show off the phoenixes. The second is the ball gown I’ve been designing, sans phoenixes. The first has a simple cut to show off a complex fabric. The second has a simpler fabric, which flows with the complex cut of the dress. Both will be beautiful, I think.

Here’s what I’m considering for the kimono:

phoenix kimono?
phoenix kimono?

Very simple cut, phoenixes plus color gradation. I experimented with adding a sun in the center panel to provide a focal point, and decided it overcomplicated things. If I need to add interest, I will do it with beading and/or other embellishments.

Also very simple to weave: solid background and painted-warp phoenixes. Probably a hand-dyed commercially woven silk for the red background parts. I am fighting the temptation to “bling it up” with gold thread in some of the phoenixes. I am not doing hand-manipulated techniques at 100+ picks per inch, thank you very much.

My reasoning for this approach is pretty simple: the phoenixes are large individual motifs that do not take well to being cut. It is also impossible to seam lengths of fabric together because, unless you are a better weaver than I am, there will always be some uneven-ness in beat, meaning the phoenixes won’t totally line up, so the seam will be super obvious.

So if you want to avoid diagonal seams and vertical seams, loom-shaped garments are the way to go. I rarely go in that direction, but for this cloth, I think it’s appropriate.

I will probably use heavier thread for this and switch the threading to a double two tie threading, which will give smoother shapes, and keep the phoenix size about the same. I’m thinking 60/2 background warp with a 30/2 pattern warp. I intend to bleach the silk beforehand to get the absolute brightest yellow possible in the pattern warp.

The ball gown remains more or less the same, except with more painted warp “flames” in the two drapes, instead of phoenixes.

Which do I work on first? That’s an excellent question. I’d say the kimono, as I have a better chance of finishing that before the Convergence deadline, except that I’m halfway through putting a sample warp onto the loom, for the skirt of the ball gown. I hate to just take it off and toss it, but it will also take months to weave off, so I’m not really sure what to do. I am seriously dubious that, with a very fine silk warp, I can take it off and preserve it somehow.

With the book, I realized that I had really written half each of two books – one aimed at novice designers and one aimed more at intermediate designers looking to improve their skills. I need to decide which book I’m writing first, and fill in exercises, etc. for each audience. A difficult call since my heart is with the intermediate designer book, but the one for beginners will be much easier to sell, and will presumably fuel sales of the intermediate book, if it comes out after the beginners’ one.

Oy. I do have a way of complicating things in the process of simplifying them, don’t I?

Filed Under: All blog posts, textiles, weaving, writing Tagged With: book, phoenix rising, phoenix rising dress, phoenix rising kimono

July 5, 2013 by Tien Chiu

Simplifying

I’ve also started looking through the Fall 2013 haute couture shows on Style.com. I had been looking for ways to add details to the skirt, but after seeing the couture garments, I think it might be undesirable. What I noticed on the garments is that they mostly contain a single “idea”. Consider these two dresses (photos courtesy of the Metropolitan Museum of Art, for noncommercial use in accordance with their Terms & Conditions):

evening dress, by Versace
"May", by House of Dior
“May”, by House of Dior

Both of these dresses are visually successful, because they are “about” only one thing. The central idea for the first dress is the colors and cut of the bodice; the skirt is kept deliberately simple, to keep the focus on the bodice.

The central idea for the second dress is the leaf-and-flower embroidery, and the “cut” of the dress is kept simple to allow the eye to focus on the exquisite stitching.

So let’s look at some of my muslins again:

front of new muslin for Phoenix Rising

Here there are at least three or four ideas – the phoenixes, the painted-warp “flames”, the ruffles, and the gradations in color. It’s too complicated. The eye doesn’t know where to go.

And here is the latest rendition:

front of muslin
front of muslin

In this case, there are three ideas – the phoenixes, the color gradation, and the painted warp. I think this is still a manageable design because the central idea (in my mind) is phoenixes disappearing and reappearing in an inferno, but it still feels overly complicated compared to the two couture garments above. If I complicate the skirt, that will simply add to the confusion. So I’m leaning towards a simple, iridescent plain weave skirt at the moment. I may also eliminate the left shoulder “flame” (the smaller flame on the right side of the photo); to my mind, it distracts from the clean diagonal sweep of the phoenixes flying up into the inferno and out again on the other side. I may also eliminate the flame shapes cut into the bodice, for the same reason – though maybe not, as I really like those flames.

But for now, the intent is to simplify.

Filed Under: All blog posts, textiles, sewing Tagged With: phoenix rising, phoenix rising dress

July 5, 2013 by Tien Chiu

The long un-winding road

Yesterday I spent one solid day unwinding skeins. First they went from my Tinkertoy swift to bobbins, then from bobbins to cones. I had expected it to be easy to unwind the bobbins onto cones, but it turned out to be remarkably difficult! Eventually I clamped a metal rod to two tables and used that as an axle. Nonetheless, it was tedious, frustrating work, as I had to go slowly to prevent the yarn from snapping. I am not a patient person when it comes to tedious, boring jobs, but I persevered, and after an entire day of unwinding, I wound up with these:

three cones of fine silk yarn

It doesn’t look like much, does it? Especially for one solid day’s work. But there are about 6000 yards on each cone, so despite having only about two hundred grams total of yarn, I should be able to wind my 15″ x 10 yards warp.

Which I started doing this morning:

first two bouts on sectional beam

At my chosen sett, 90 epi, and winding from only three cones, it takes about half an hour to wind a single bout. (I actually wound two at once, which took an hour.) Unfortunately, an hour of winding was all my still-recovering ankle would tolerate, so that’s my output for the morning. 🙁 I will probably spend the rest of the day either working on muslins or working on Creating Craft, and try another two bouts in the evening. Despite my eagerness to get this warp on the loom, I am not going to aggravate my ankle sprain. I want it to heal nicely – otherwise I won’t be able to do any weaving!

I did try to unwind the superfine silk, but it had tangled badly during the dyeing, and while I’m sure I could get it off with several hours of work, winding by hand, I don’t have that kind of patience. I’ll no doubt try again, and this time I’ll put in twelve skein ties instead of eight. I’m not hopeful about getting better results, but since I have some pre-dyed, pre-coned black yarn about the same size, it’s not critical for testing out the collapse weave.

Filed Under: All blog posts, textiles, weaving Tagged With: phoenix rising, phoenix rising dress

July 3, 2013 by Tien Chiu

Query letters and sample prep

I’ve been pretty quiet the last few days, but much has been happening behind the scenes! The biggest news is that I finally finished my query letter for Creating Craft, and sent it out into the world! So far I’ve contacted three publishers and two agents, all referrals from people I know. I’ve gotten one rejection already – Make Media‘s book editor loved the idea, but they’re not accepting craft submissions anymore – and one request (by one of the agents) to see the full proposal. That may well peter out, of course – but it’s an auspicious start.

So now it becomes a waiting game. My goal is to have ten queries out at any given time – mostly to agents, I’m not approaching publishers unless I have a direct contact at the publisher. As each query “ages out” (most agents don’t bother to reply to a query unless they’re interested), I’ll send out a new one. However, at the start, I’m going to wait two weeks to see if any of my referrals bear fruit. Meanwhile, I’ll work on catching up my to-do list on Creating Craft, which has been sadly neglected while I worked on the proposal and query letter.

Meanwhile, I have not been idle on the Phoenix Rising front, though I have perhaps not been exceptionally active, either. (The sprained ankle, while better, makes me reluctant to stand for long periods.) I have wound and dyed the yarn for the skirt sample:

dyed yarns for Phoenix Rising sample

Doesn’t look like much, does it? But it’s about 24,000 yards of yarn, best estimate. On the left is the insanely fine silk I bought from John Marshall. It was a real beast to skein, because it comes on big heavy spools (almost eight ounces). That means I had to find an axle for the spools, figure out how to keep the spools from moving along the axle, and start the skeinwinder verrrry slowly so I could get the spool going without without snapping the thread. Each skein is about thirty grams, so a total of sixty grams (about two ounces). At an estimated 60,000 yards per pound, that’s about 8000 yards of yarn over there on the left.

The three skeins on the right are a far more moderate 140/2 silk (I never thought I’d find myself describing 140/2 silk as “moderate”!), 210 grams at 35,000 yards per pound = 16,000 yards total on the right.

Fortunately, the dyeing went smoothly, and I have already wound two of the three skeins of 140/2 silk onto bobbins (which is gentler on the silk than winding directly onto cones). I have not decided yet whether to re-wind them onto cones before winding the warp – I have the feeling that cones will be easier to work from, but I’d rather avoid all that rewinding time if I can. Still, if it saves time later, it’s worth it. Decisions, decisions.

Still to do: wind the remaining skein of 140/2 silk onto a bobbin, and (gulp) wind the two skeins of superfine silk. I’m worried about that, but if I’ve wound the skein well and treated it gently enough during dyeing, it should behave itself. I hope.

I have a four-day weekend coming up, as Thursday is July 4, Independence Day in the U.S., and I’m taking the following day off. Hopefully by then the ankle will be almost 100% (it’s “mostly better” now), and I can start winding the warp for the skirt sample. It will be either 15″ x 10 yards or 24″ x 7 yards. Yes, that is suspiciously long and wide for a sample (many people might describe it as “yardage”), but I want to try a variety of wefts and a variety of drafts, and want large (18″) swatches so I can use them in draping. So that is not excessive – in fact, it may be too short. We’ll see.

Filed Under: All blog posts, textiles, weaving Tagged With: book, phoenix rising, phoenix rising dress

Next Page »

Subscribe to Blog via Email

Information resources

  • Dye samples
    • Procion MX fiber-reactive dye samples on cotton
    • How to "read" the dye sample sets
    • Dye sample strategy - the "Cube" method
  • How-Tos
    • Dyeing and surface design
    • Weaving
    • Designing handwoven cloth
    • Sewing

Blog posts

  • All blog posts
    • food
      • chocolate
    • musings
    • textiles
      • dyeing
      • knitting
      • sewing
      • surface design
      • weaving
    • writing

Archives

Photos from my travels

  • Dye samples
    • Procion MX fiber-reactive dye samples on cotton
    • How to "read" the dye sample sets
    • Dye sample strategy - the "Cube" method
  • Travels
    • Thailand
    • Cambodia
    • Vietnam
    • Laos
    • India
    • Ghana
    • China

Travel Blog

Entertaining miscellanies

© Copyright 2016 Tien Chiu · All Rights Reserved ·


Loading Comments...