Tien Chiu

  • Home
  • About
    • Honors, Awards, and Publications
  • Online Teaching
  • Gallery
  • Essays
  • Book
  • Blog
  • Dye samples
You are here: Home / Archives for tie-dye

September 16, 2022 by Tien Chiu

Playing in the dye pots

Yeah, I know. I start by saying “Less fiber content” and next thing you know, I’m posting about dyeing? But hey – that’s what I was up to last weekend. That’s my story, and I’m sticking to it.

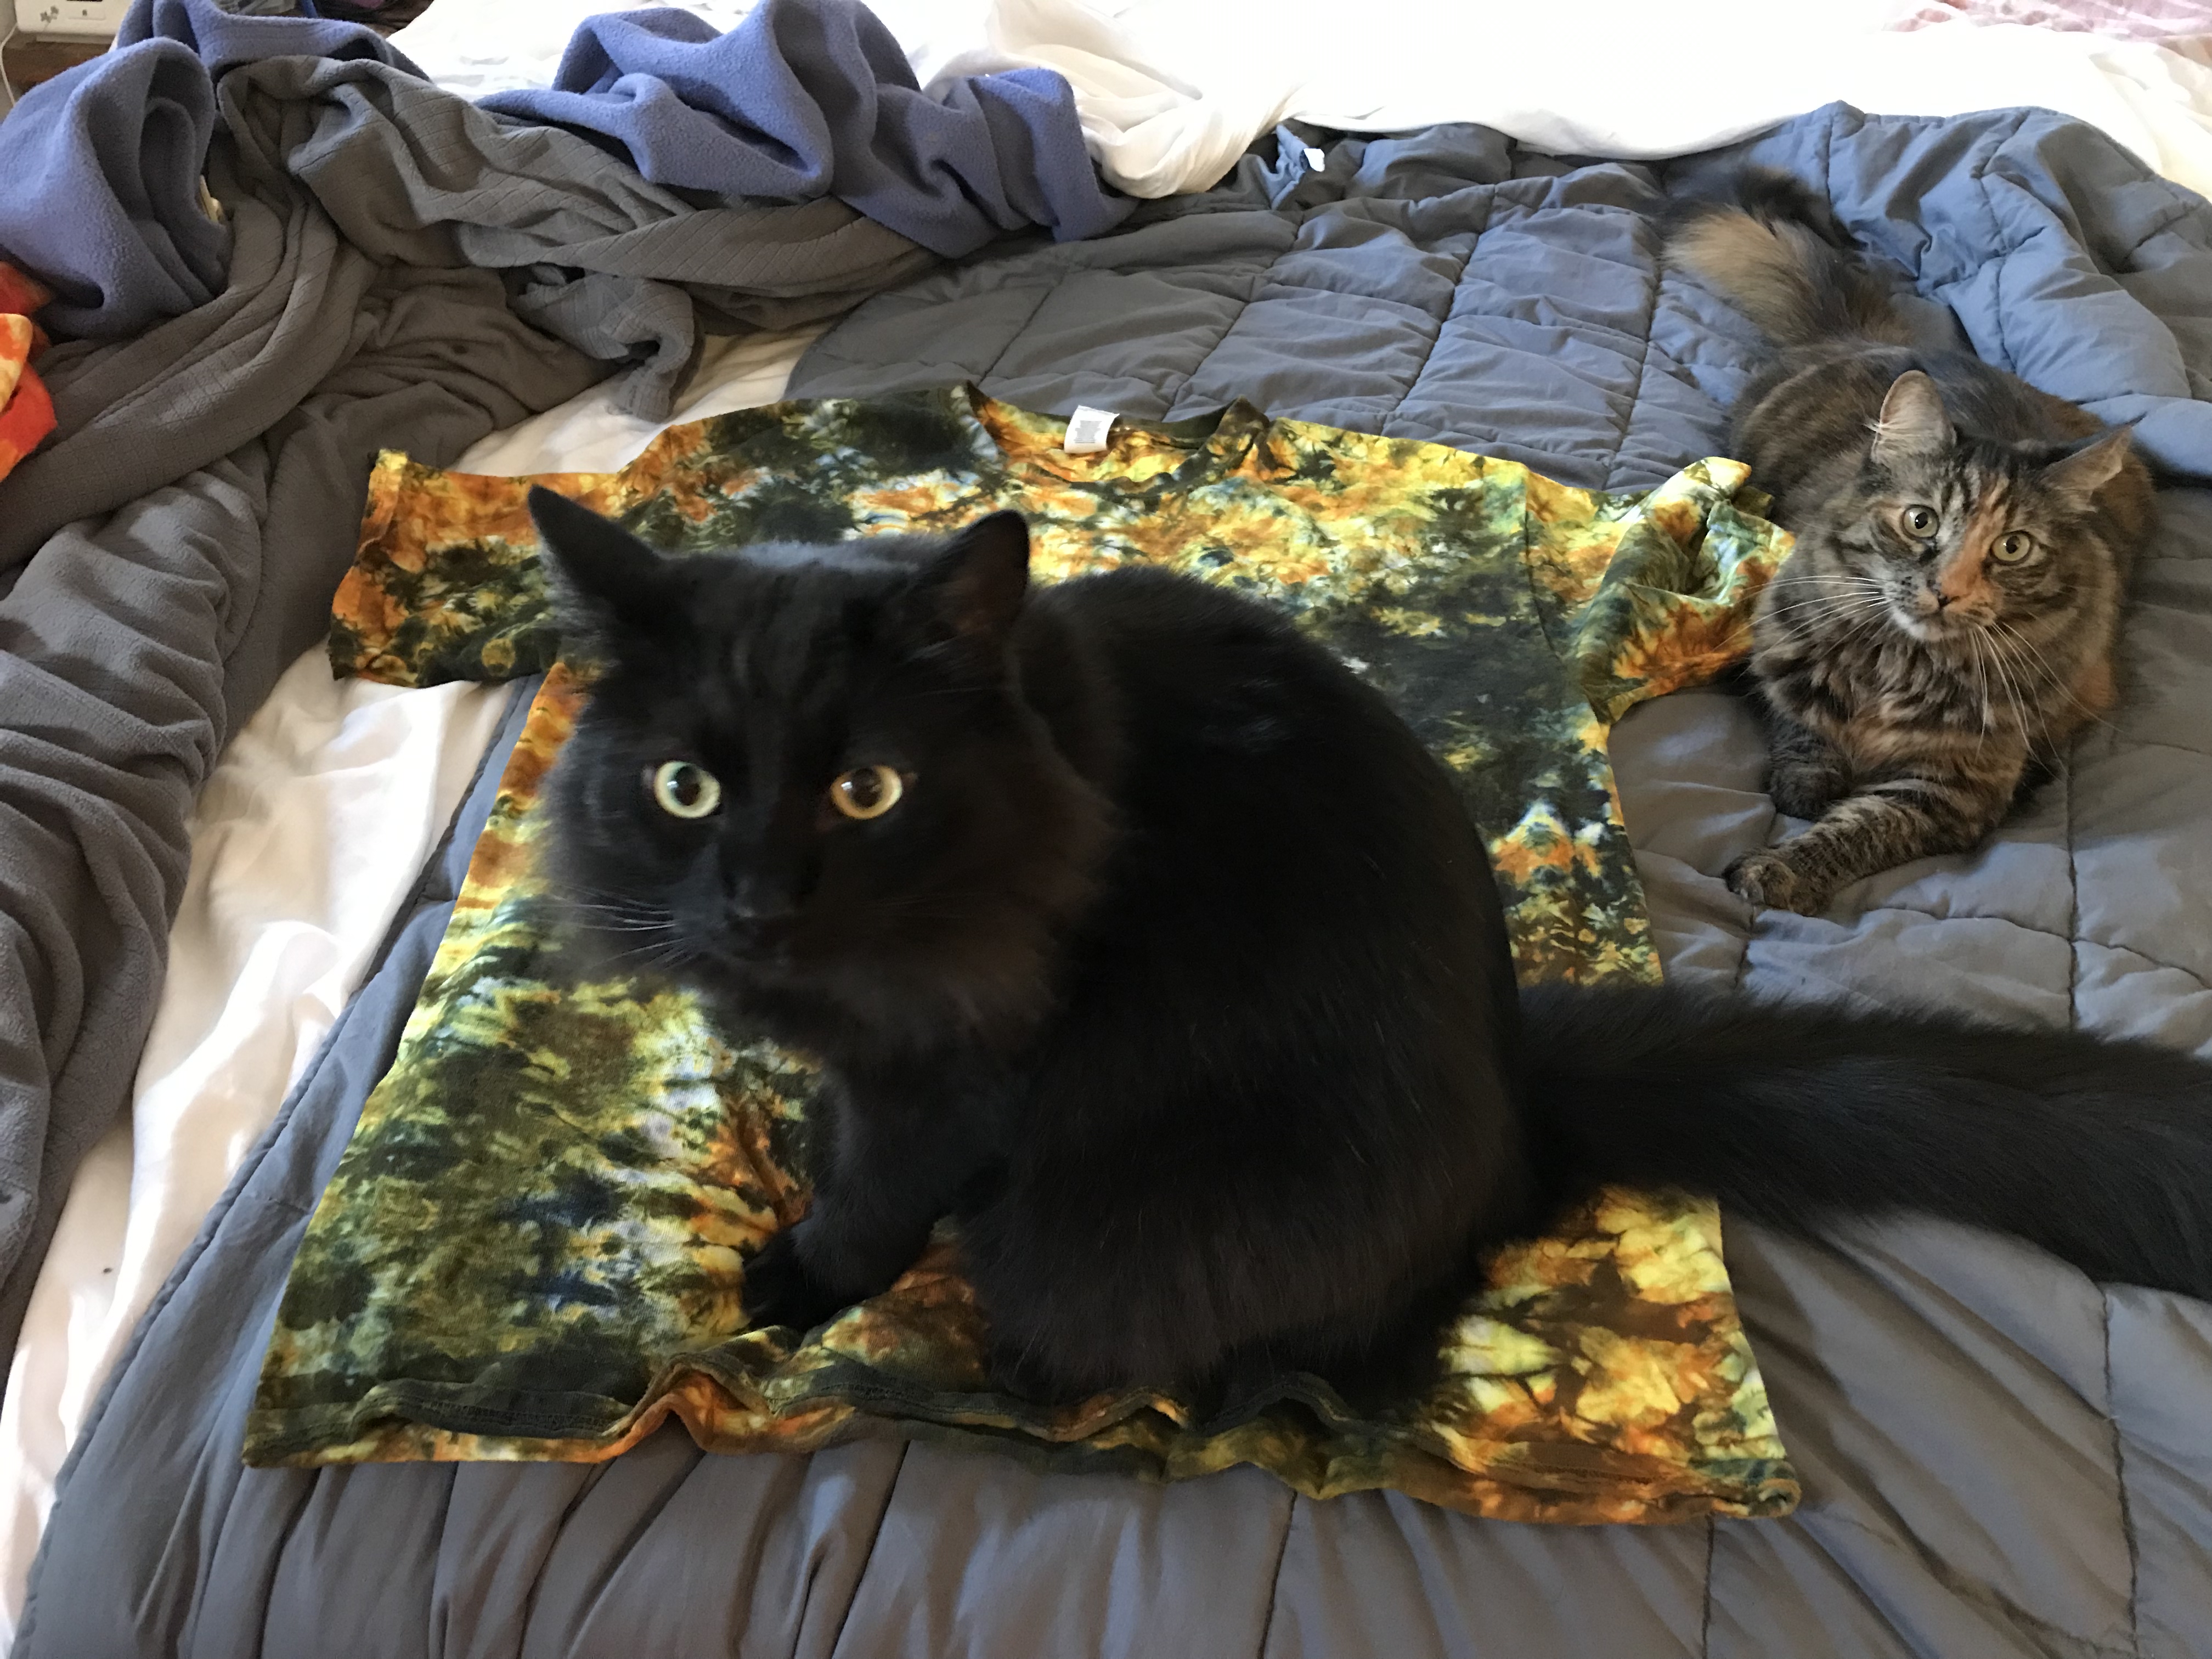
My wardrobe, as you may or may not know, consists almost exclusively of tie-dyed clothing. This isn’t because I’m a ‘60s child (I wasn’t born in the ‘60s), nor because I’m a Grateful Dead fan. It’s mostly a practical choice: when you are a five-foot-tall woman with exceptionally wide shoulders, you can pretty much guarantee that nothing off the rack is going to fit.

(How exceptionally wide? The average shoulder width for an American woman is 14.4 inches, and for a man it’s 16.1 inches. Mine are 17.5 inches shoulderbone to shoulderbone – plus all that muscle from powerlifting. I’m basically a freakishly short female linebacker.)

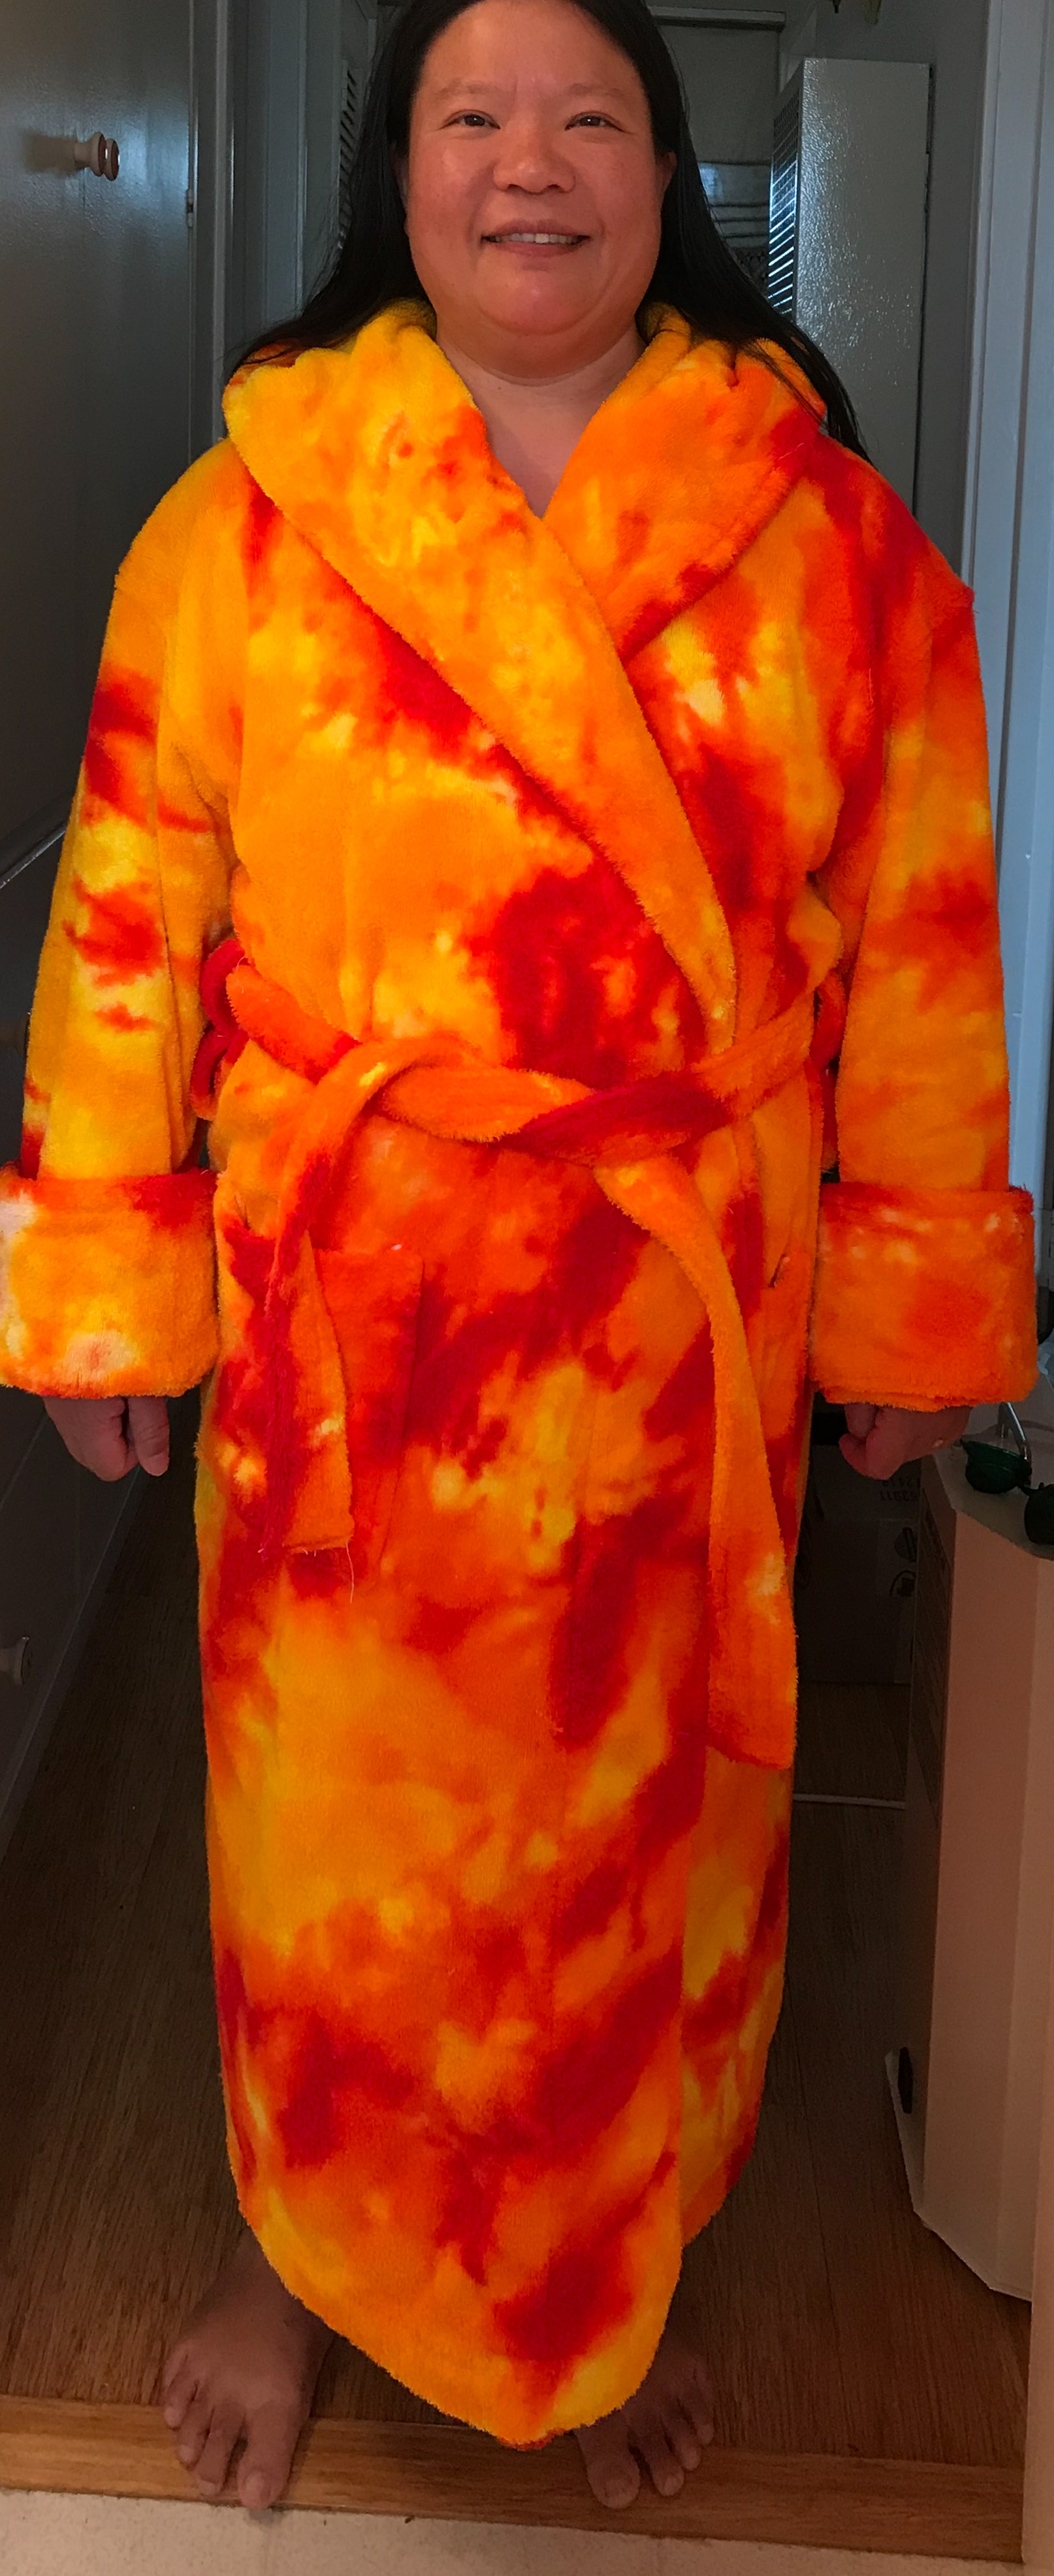
To accommodate my odd dimensions, I buy white T-shirts and white men’s shirts from Dharma Trading Company and dye them so they don’t all look identical. This strategy has worked beautifully for me for many years. 🙂

But then I got a fabulous tattoo covering most of my right arm.

My original theory was that I’d get the tattoo and then wear T-shirts when I wanted to cover it up, and tank tops when I wanted to show it off. As soon as I got the tattoo, though, I realized, “Why the *#& would I ever want to hide this??? I’m going to wear tank tops all year round!!”

Of course the only problem with this theory was that I didn’t actually have any tank tops. Dharma Trading to the rescue! I dyed eight tank tops the weekend after I got the tattoo. Whew! Disaster averted.

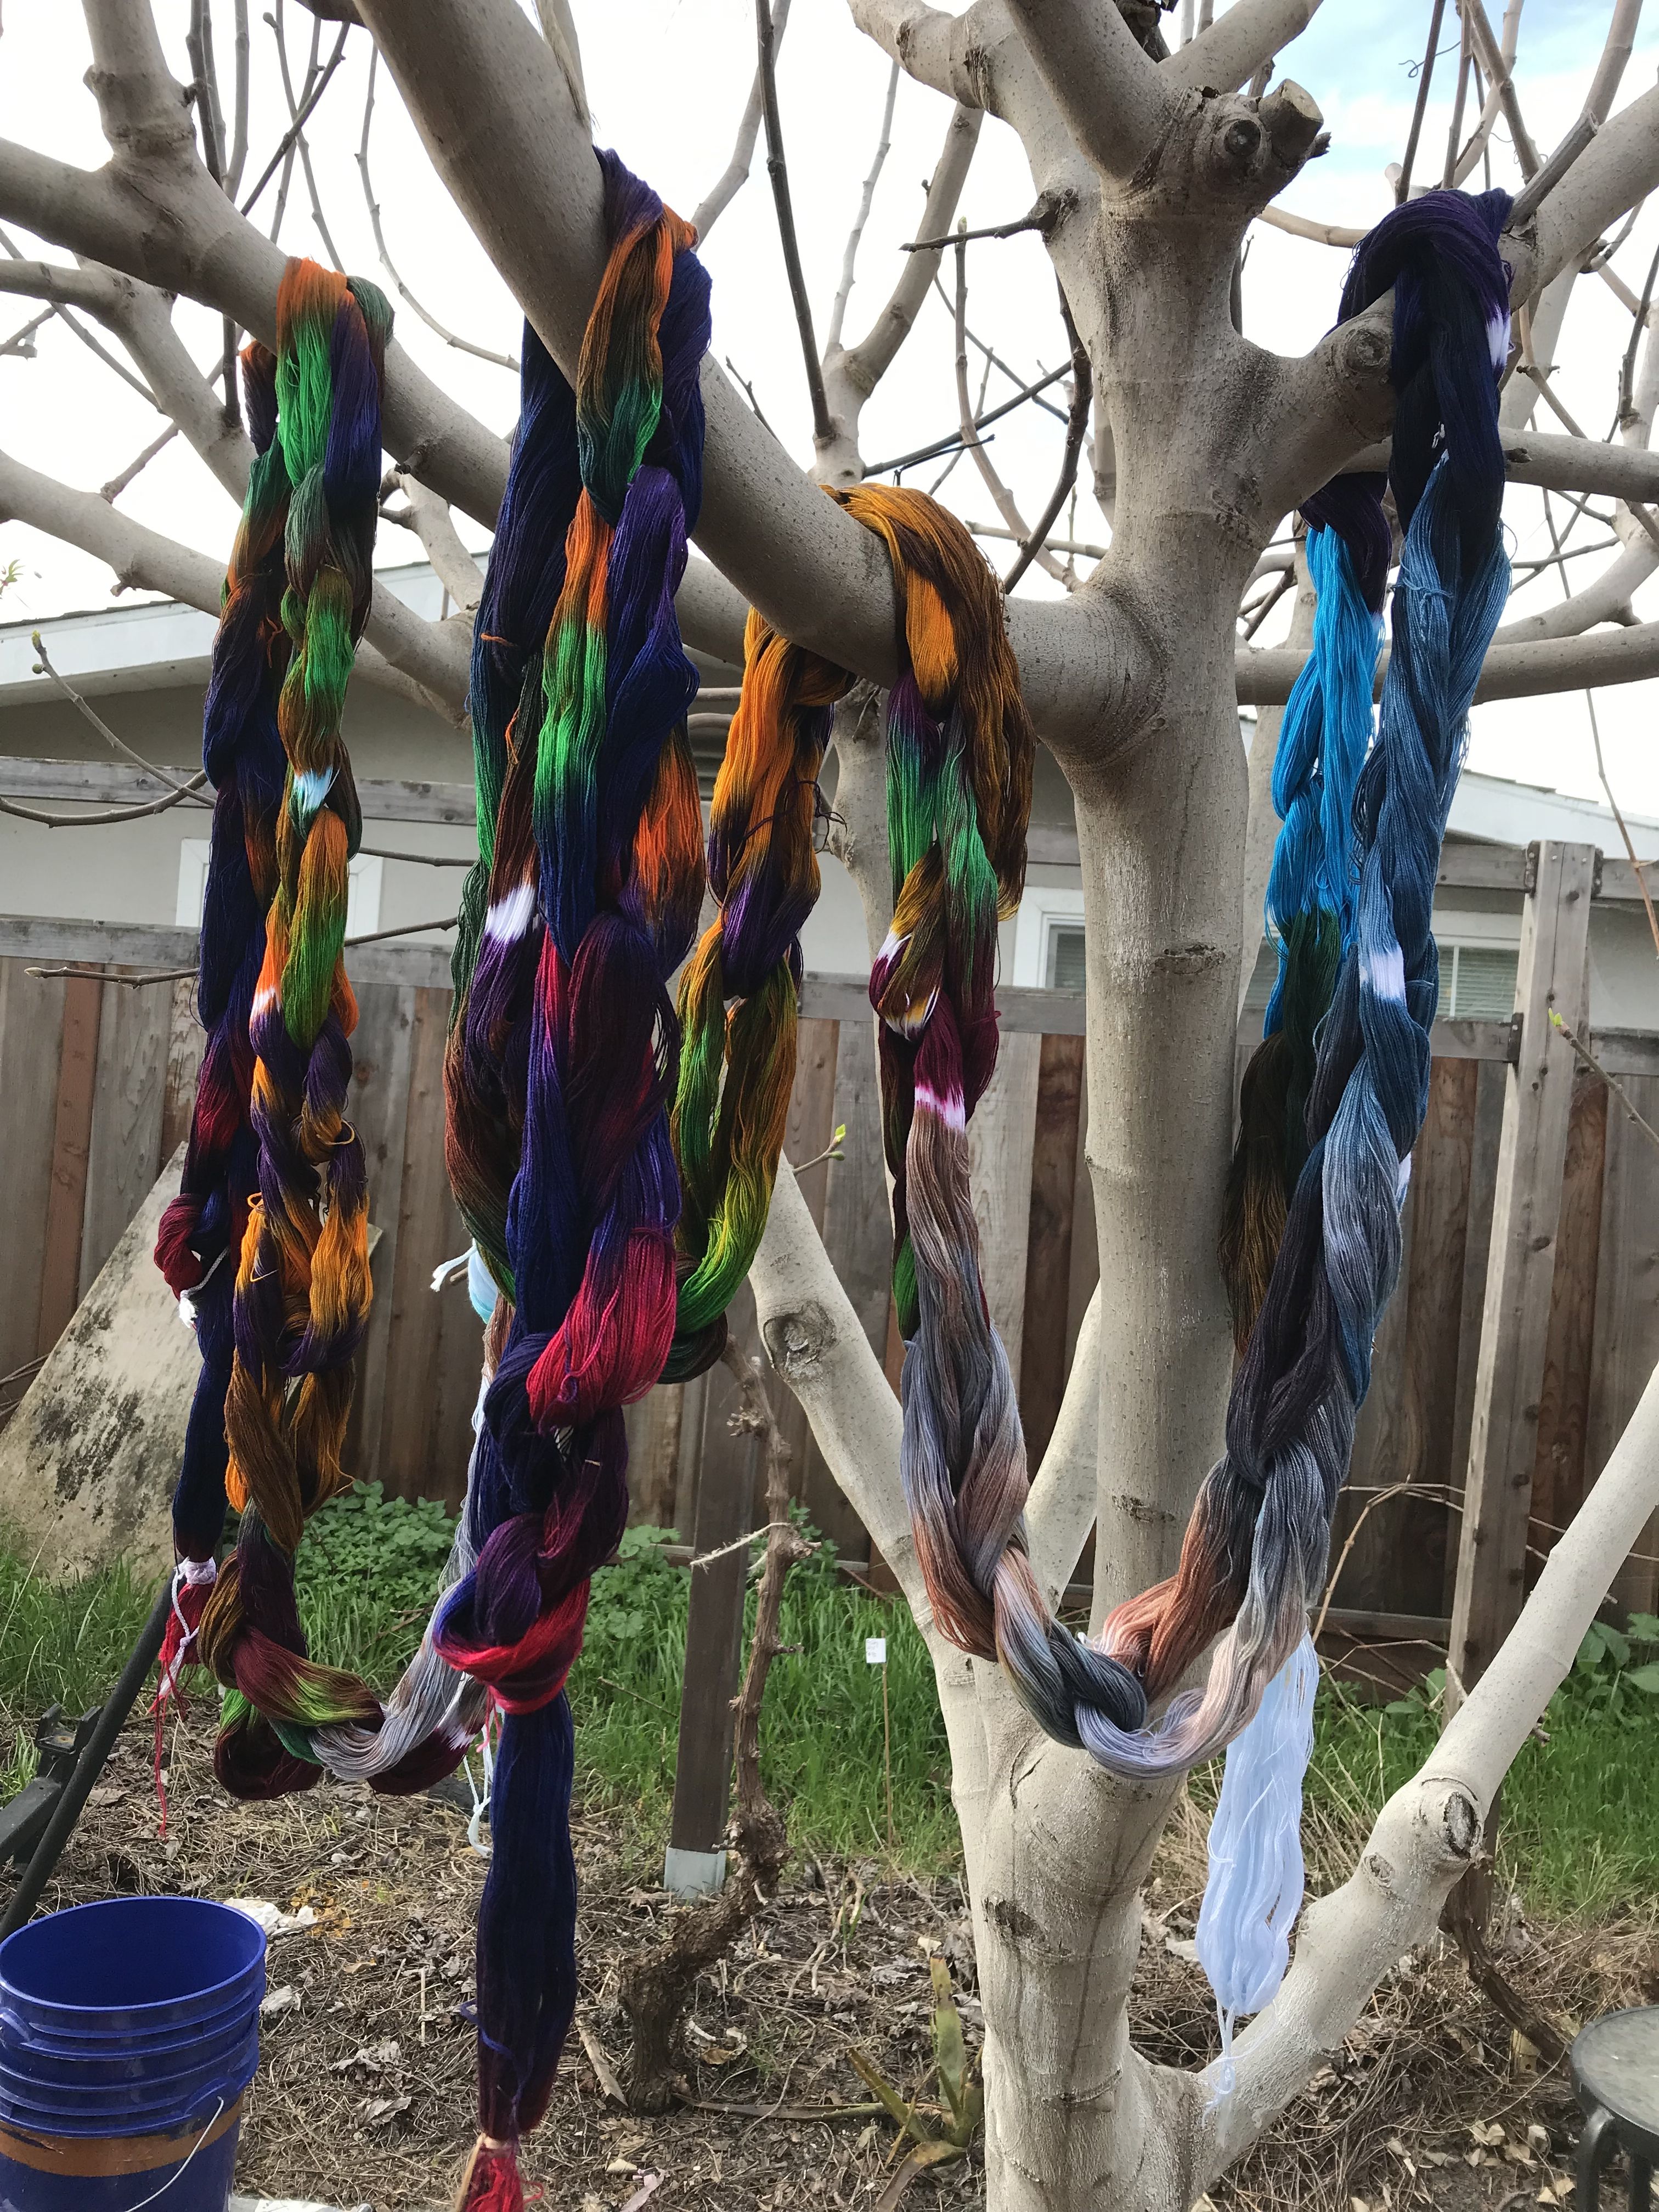
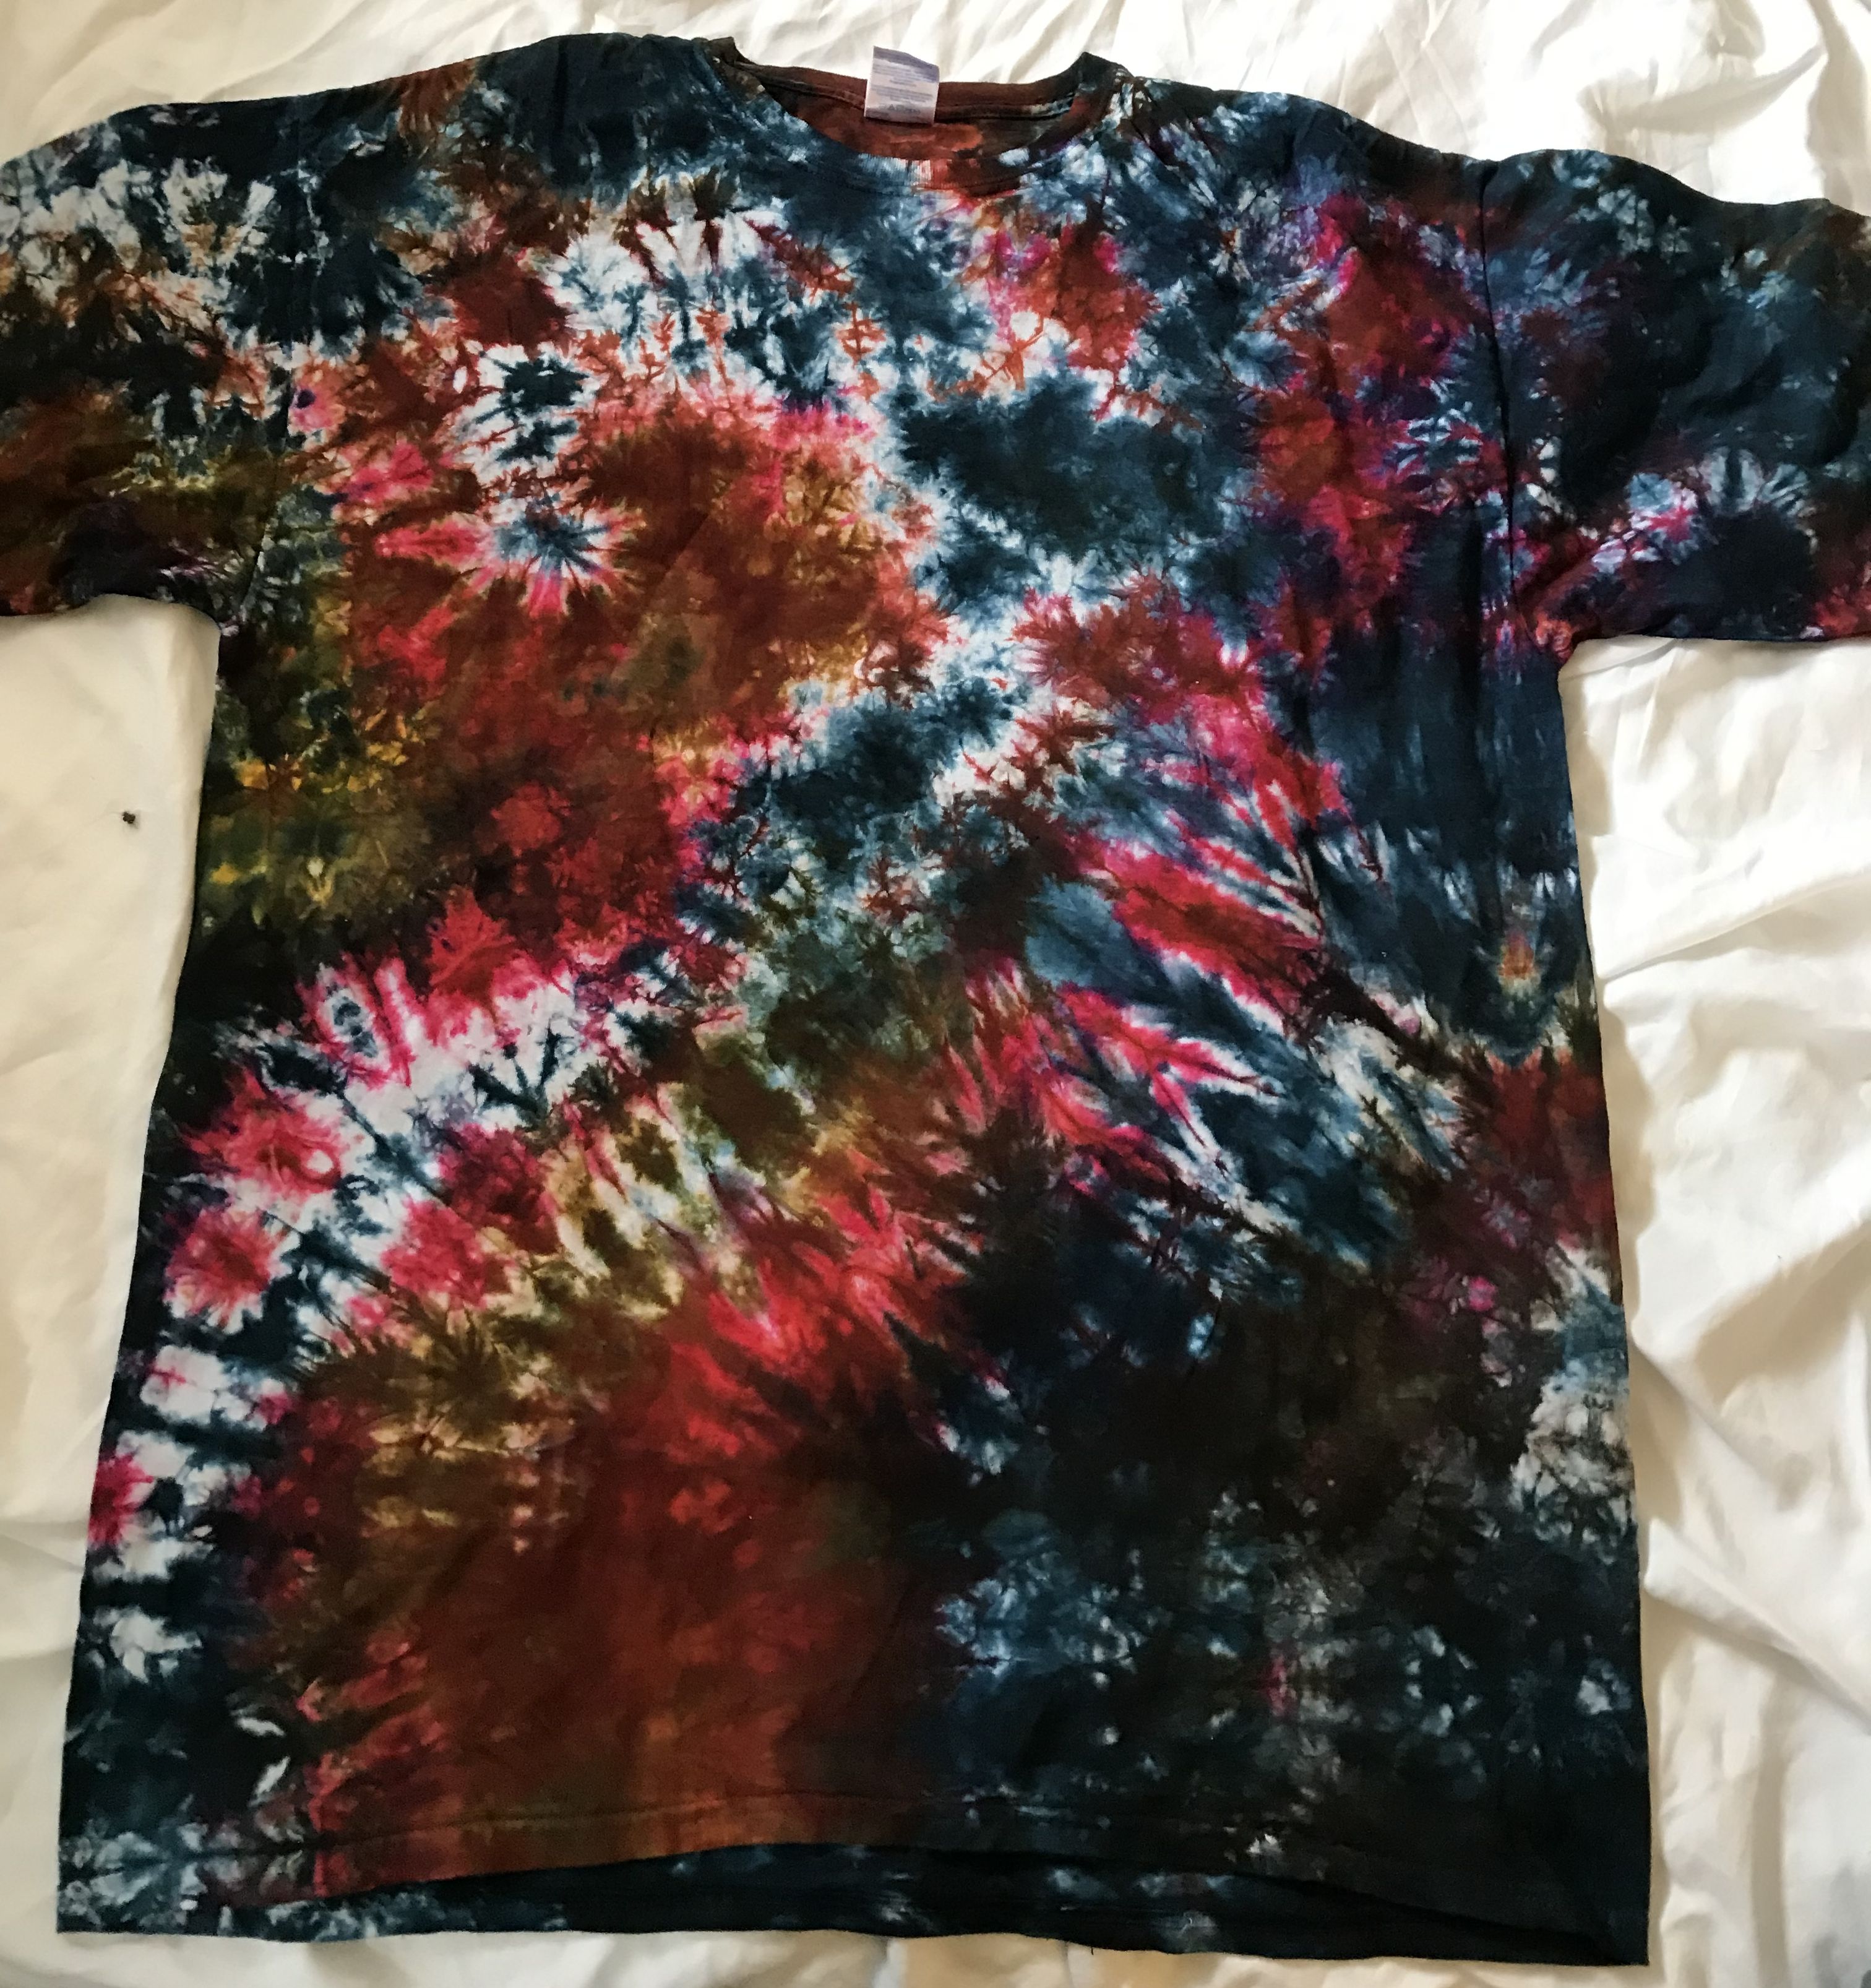
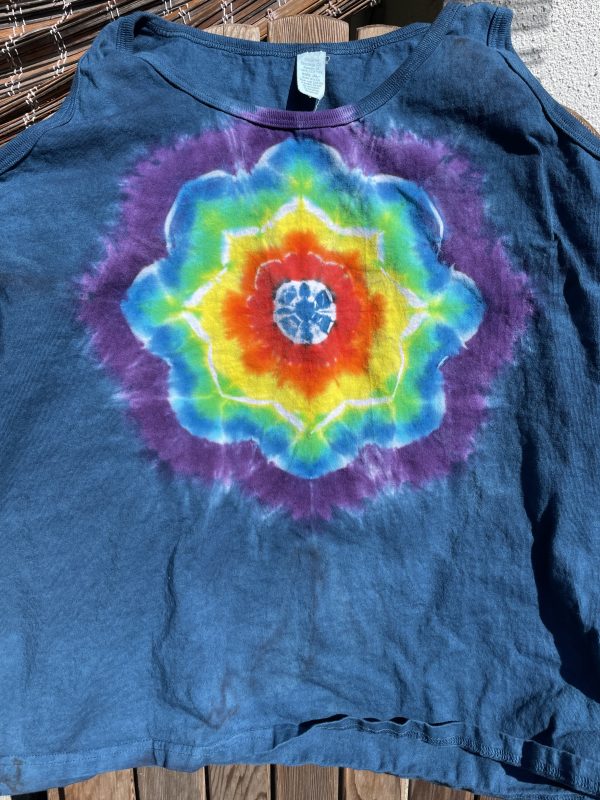
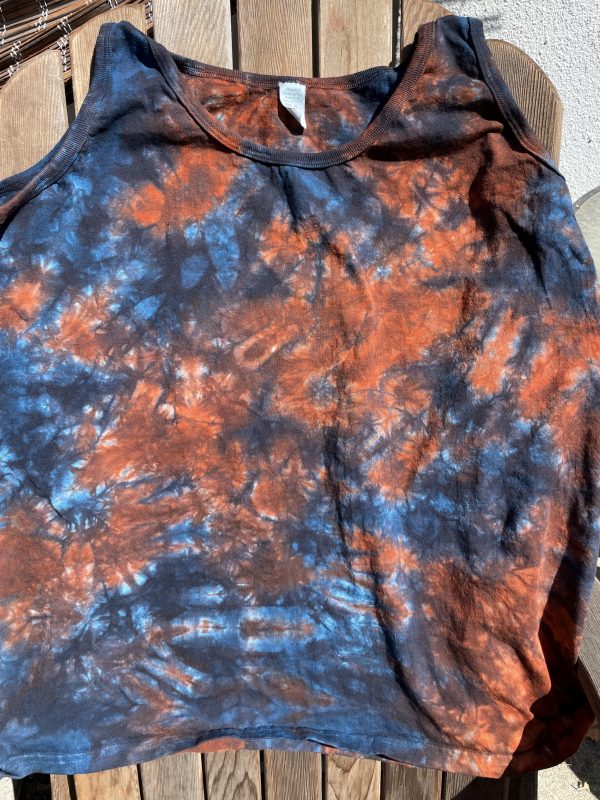
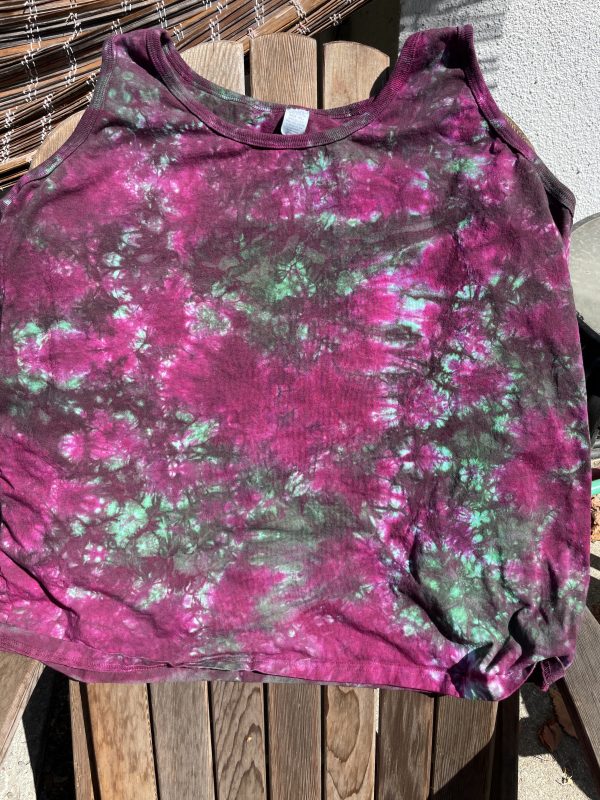
But a girl likes to have some variety. So last weekend I dyed eight more, plus a T-shirt for Jamie, who (much to my relief) has FINALLY relented and allowed me to dye something for her.

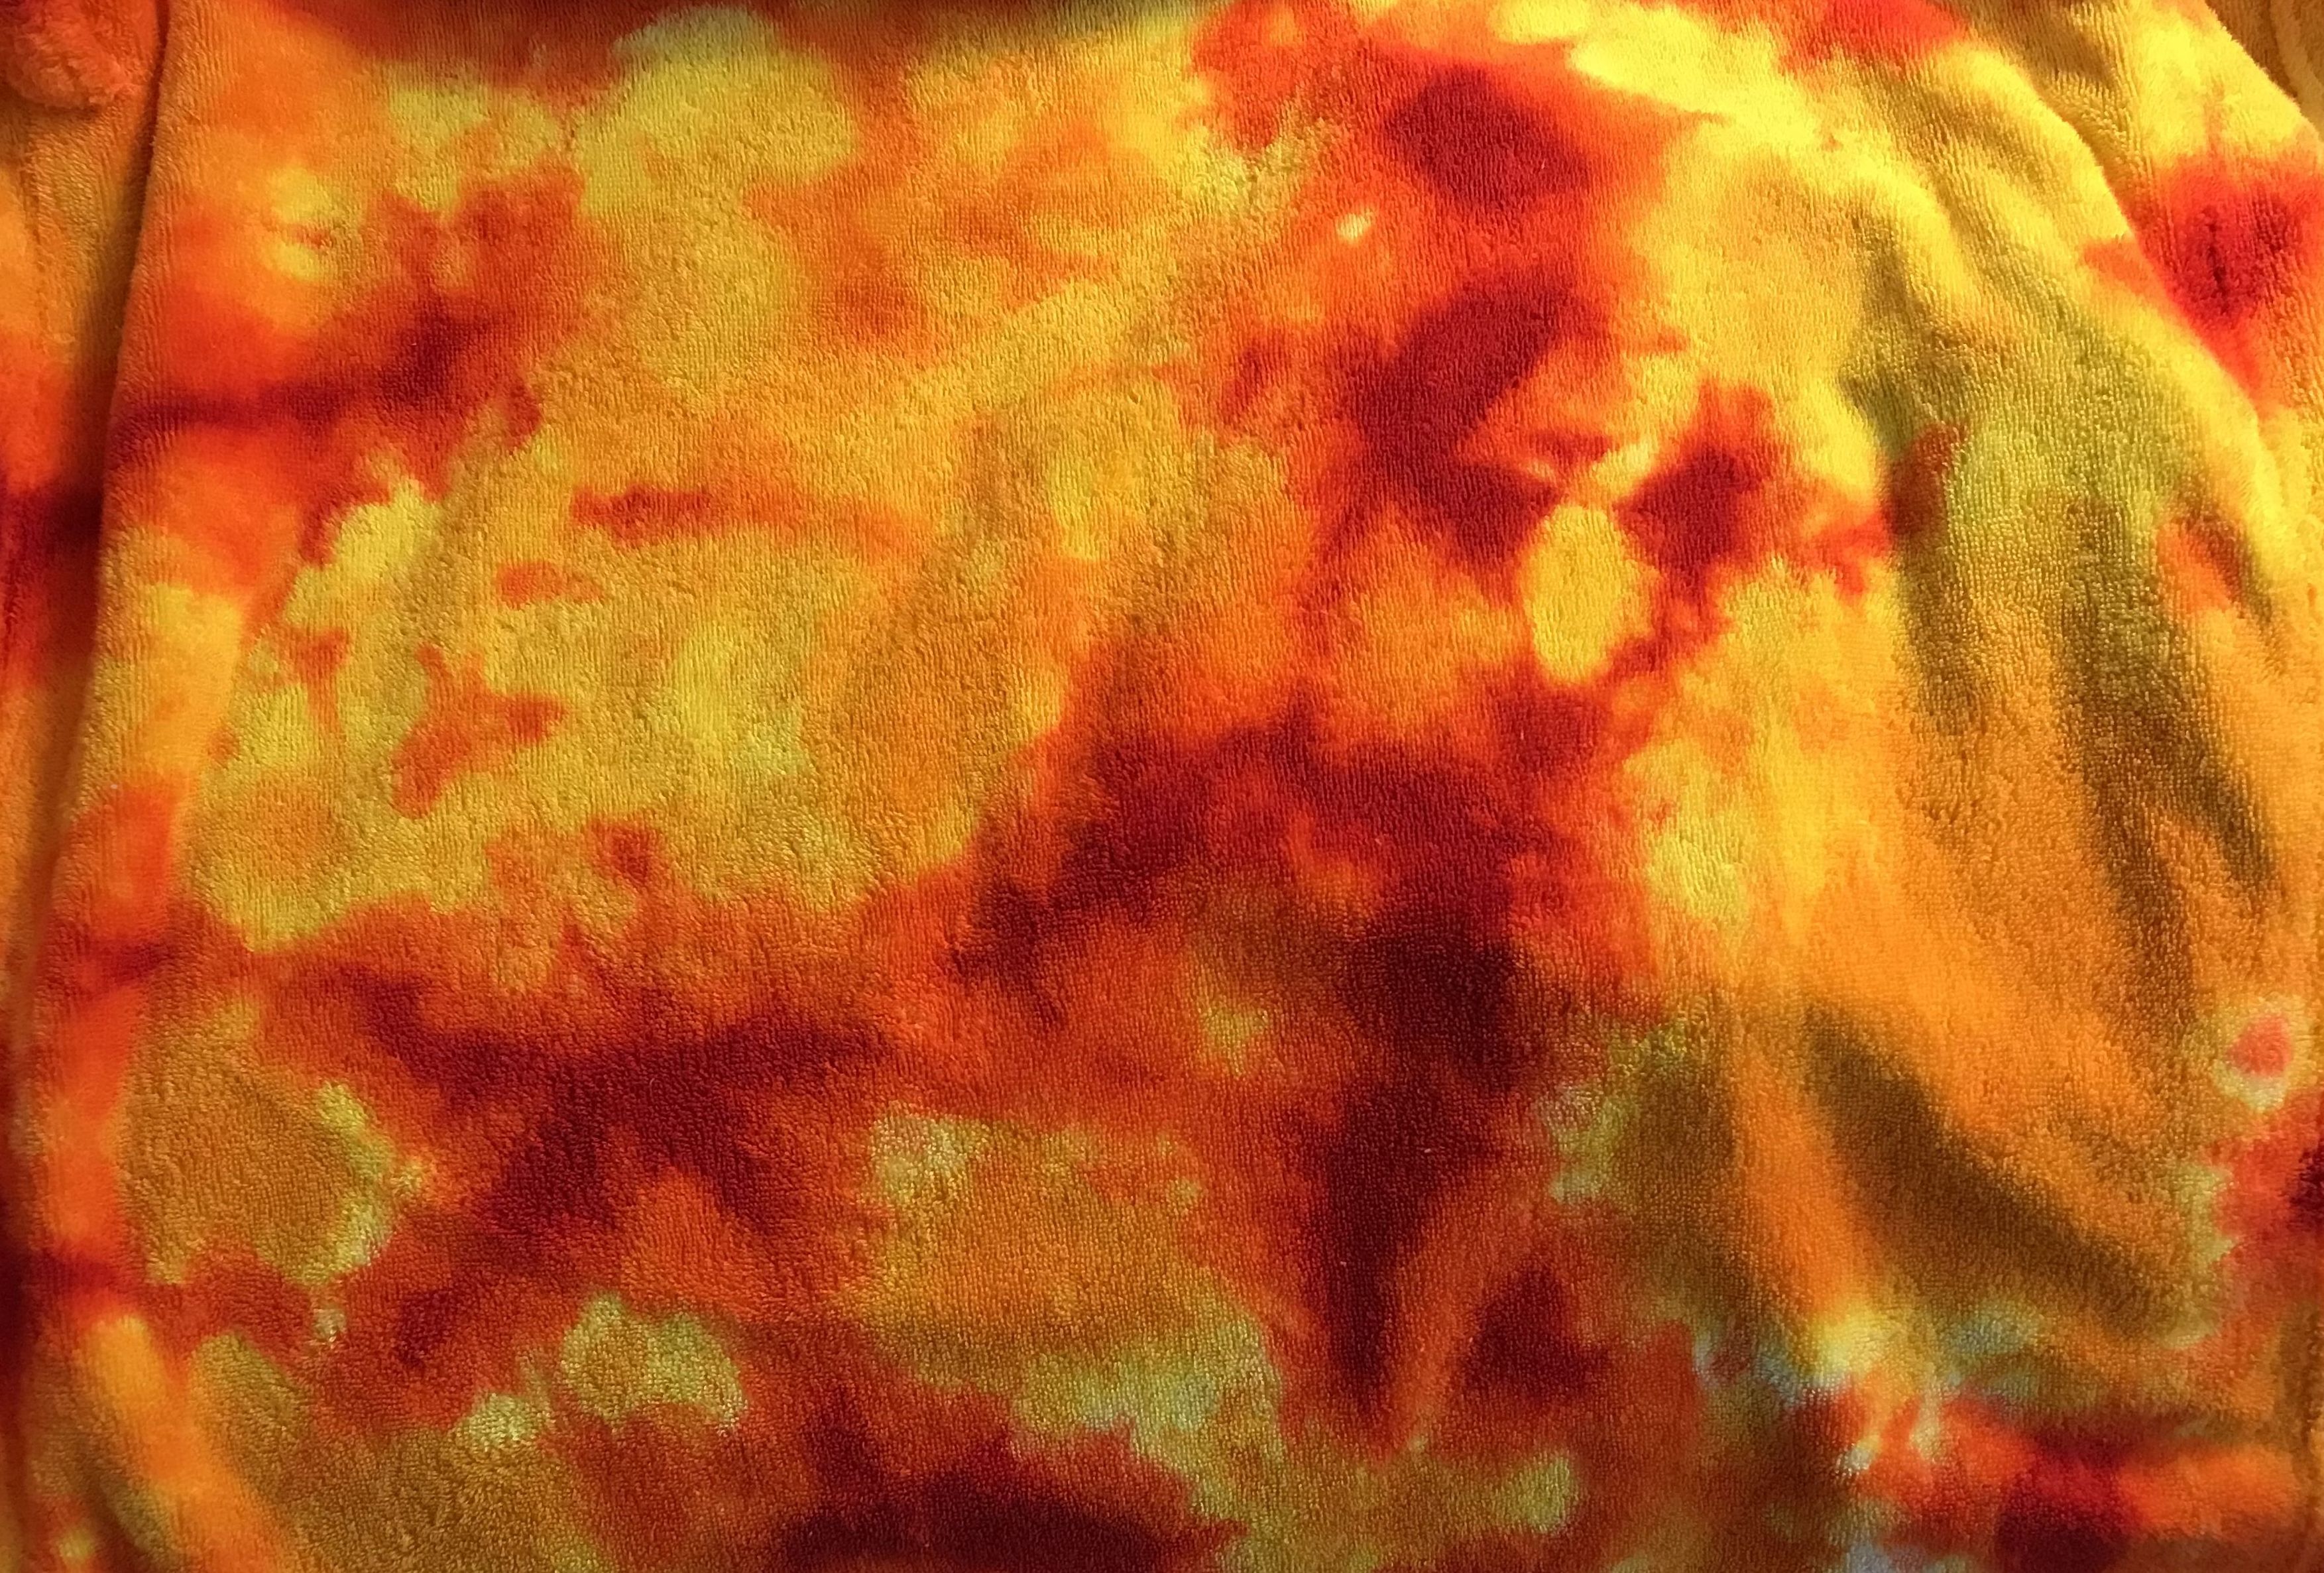
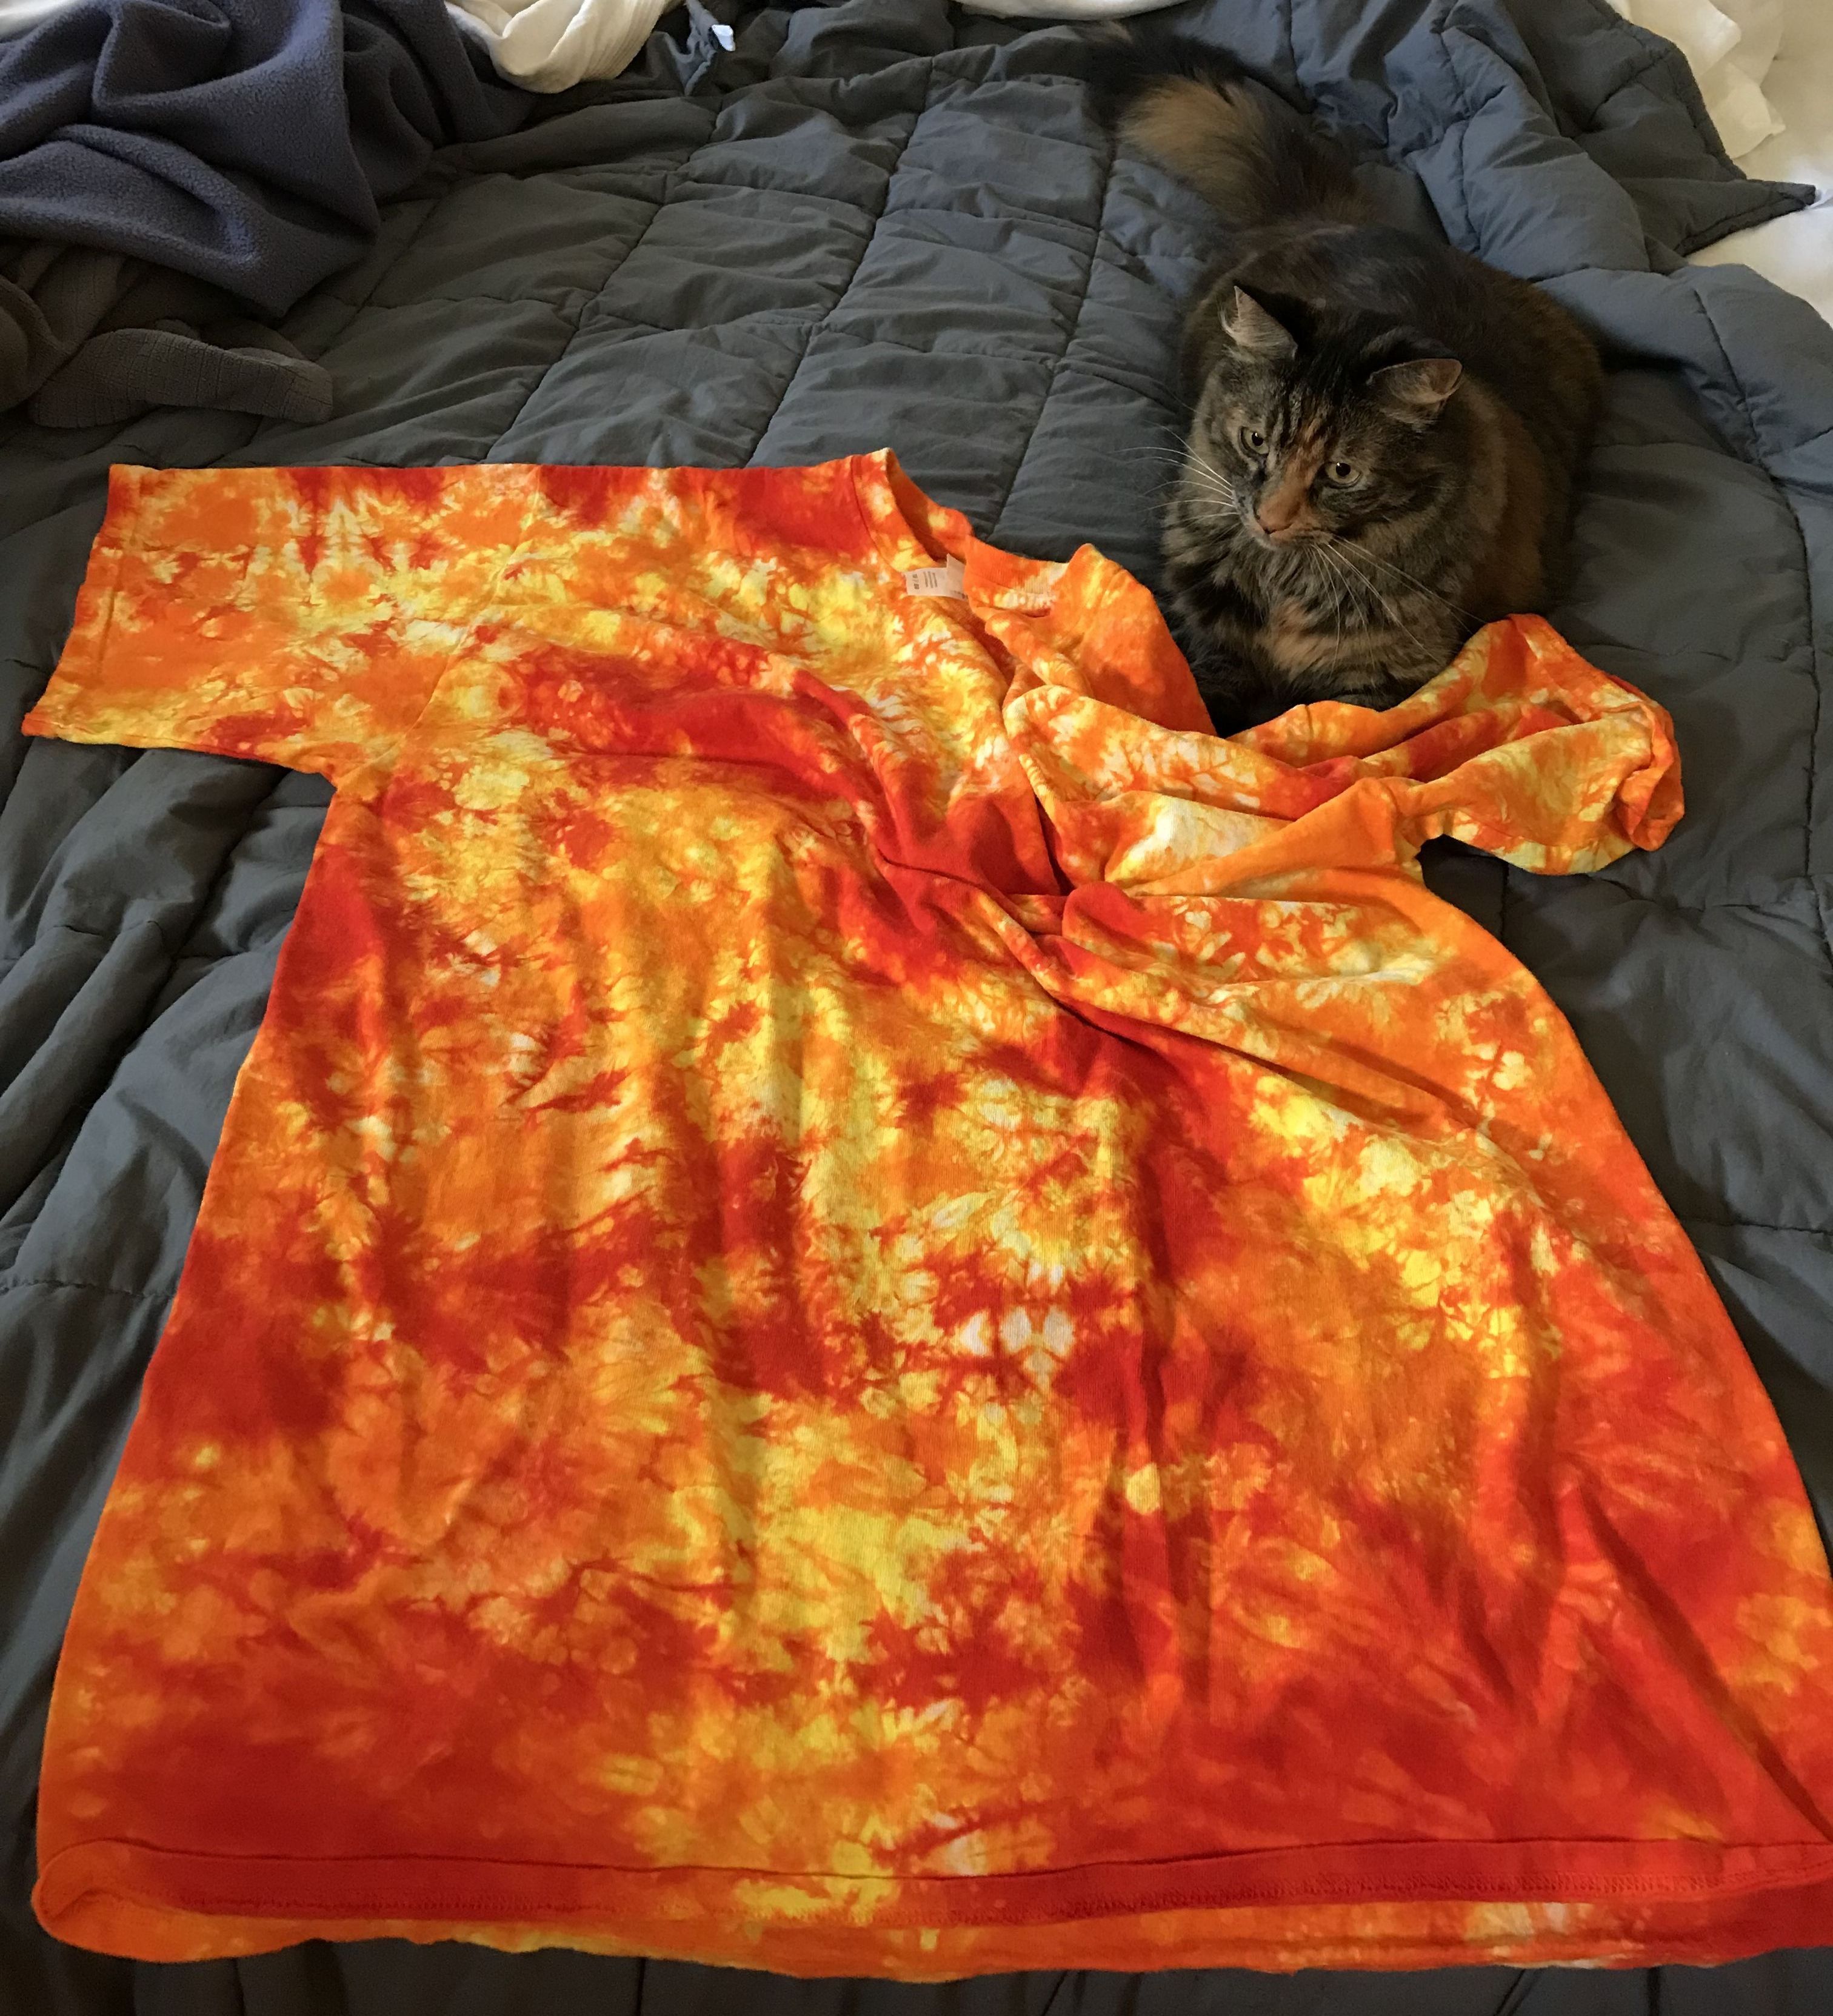
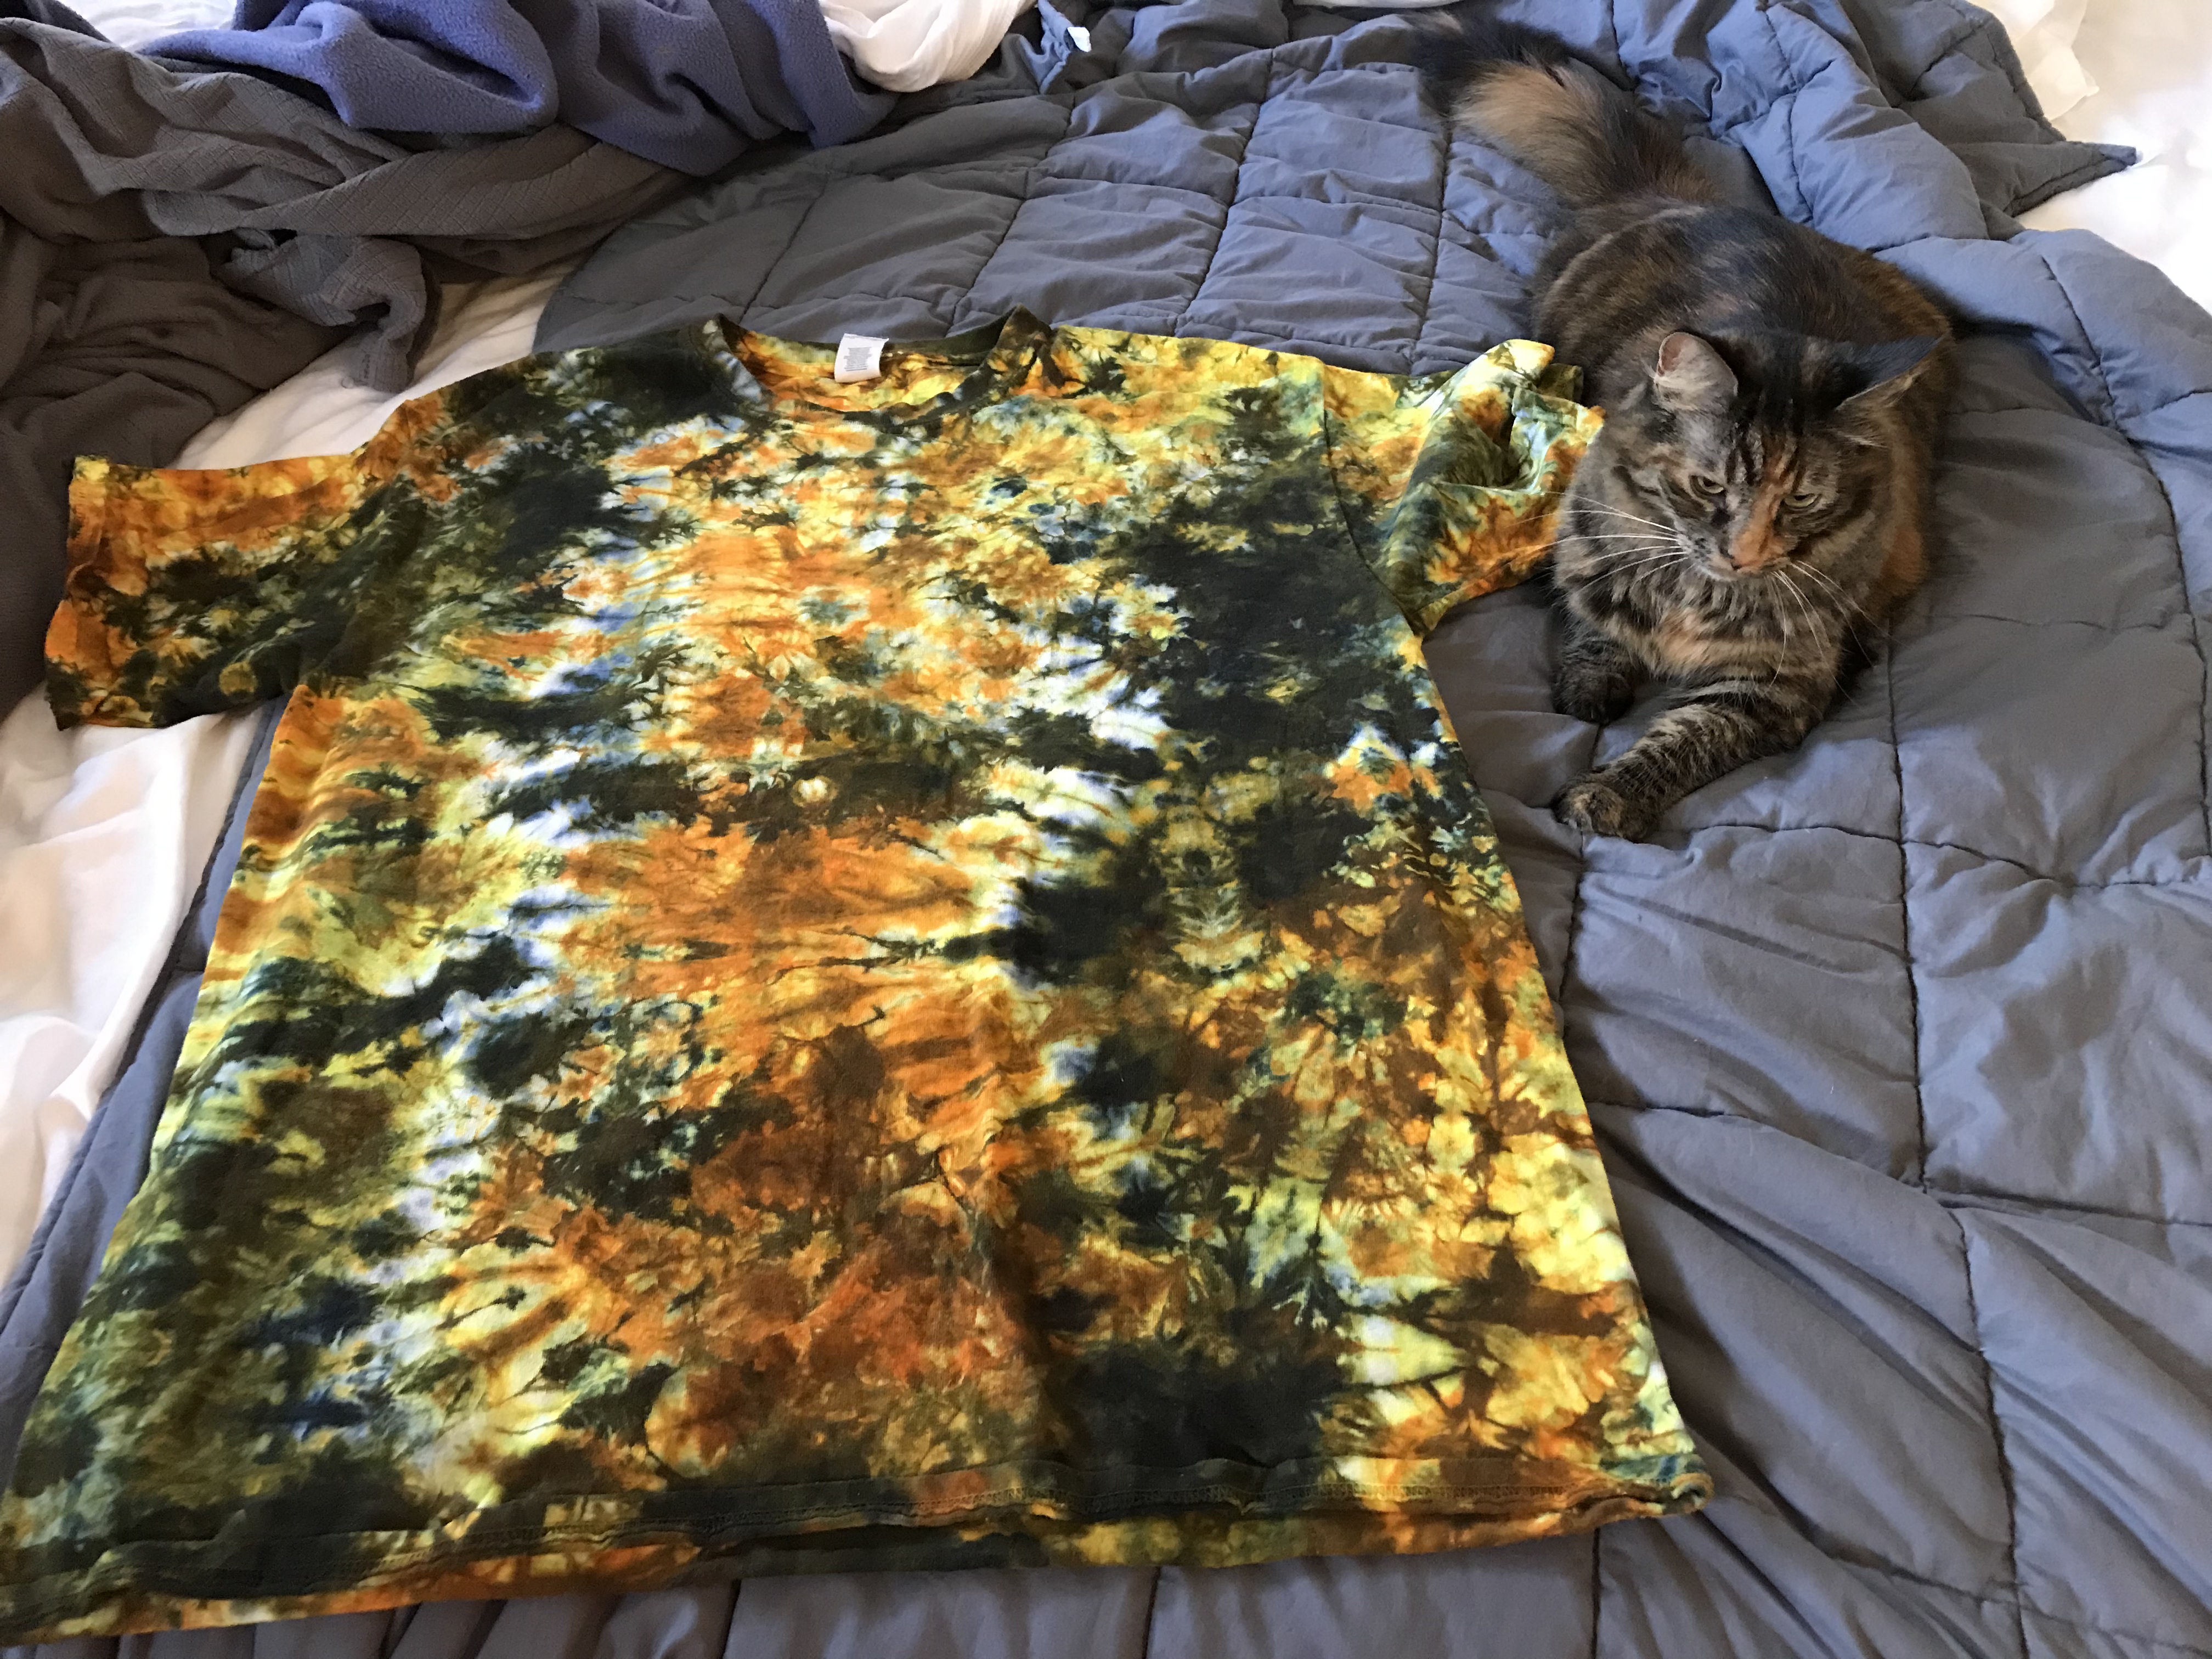
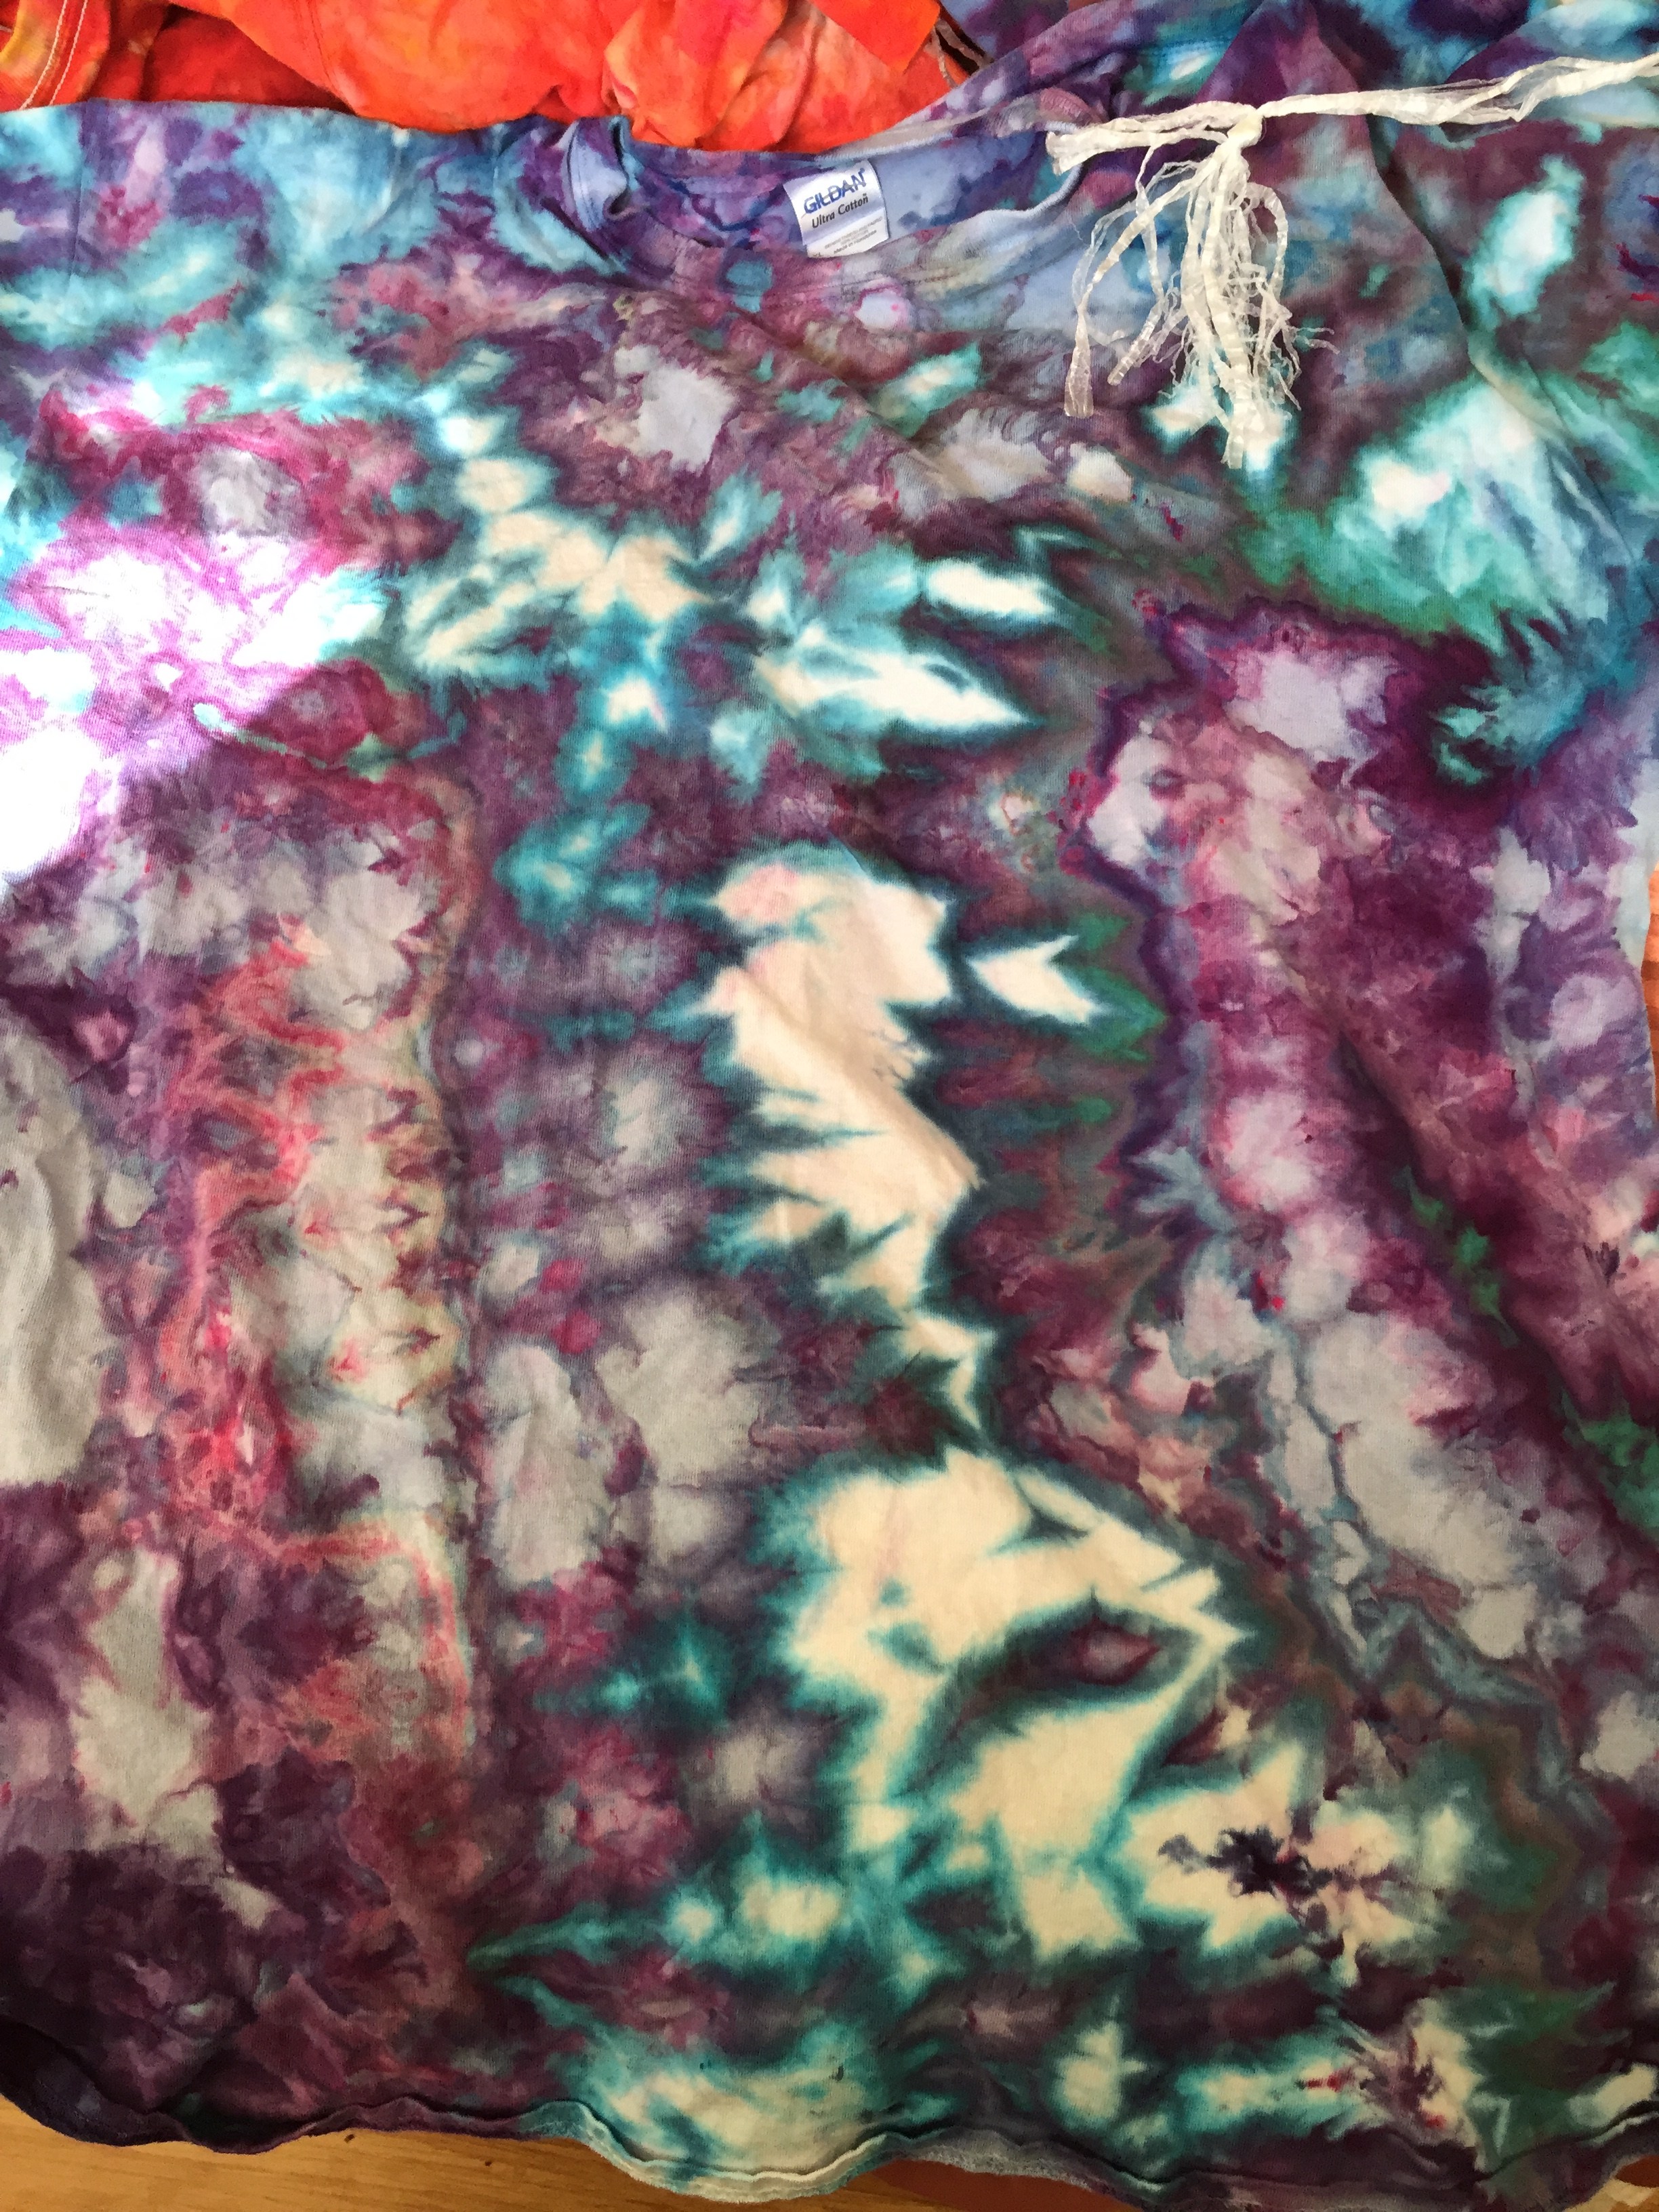
Here’s what came out of the dyepots (pardon the less-than-perfect photos; I was in a rush):

Black bordered mandala tank top
Rainbow mandala tank top
Blue and rusty orange scrunch pattern tank top
Magenta-purple and green scrunch pattern tank top
Square pattern, yellow-red-orange turquoise and purple tie dye tank top
flame pattern tank top

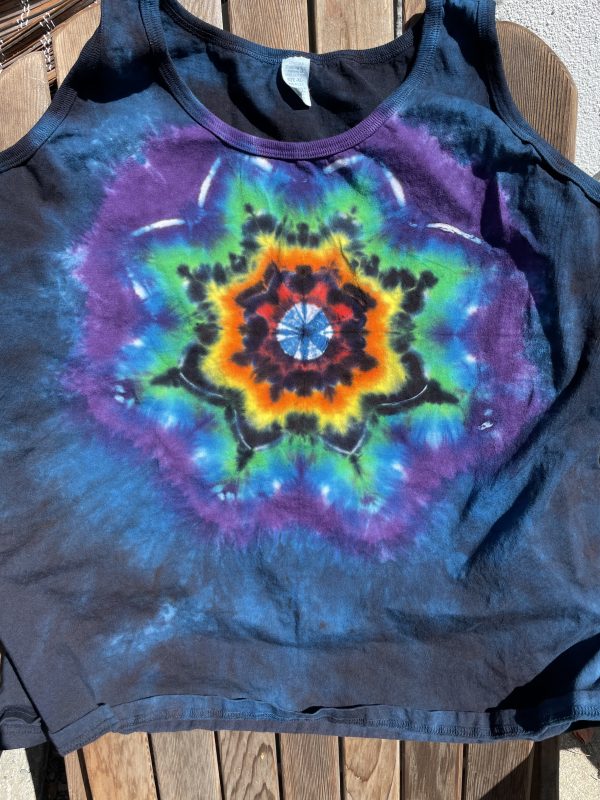
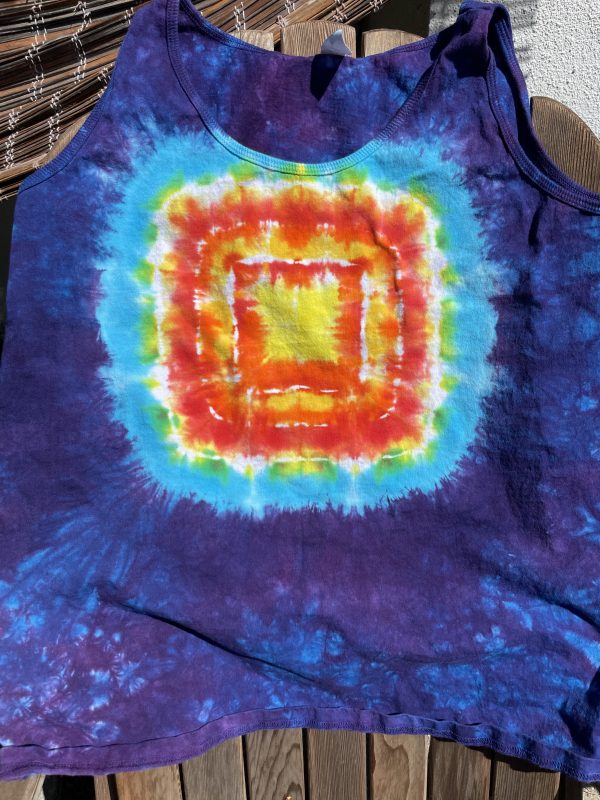
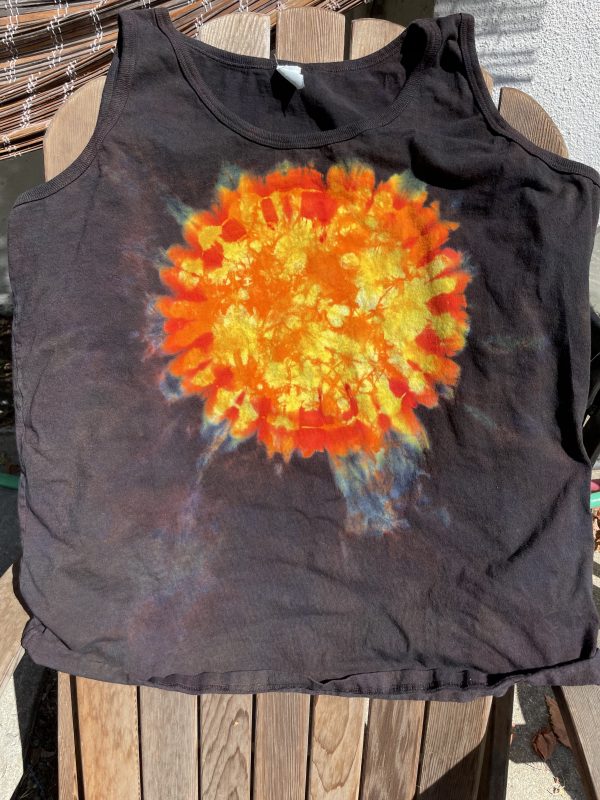
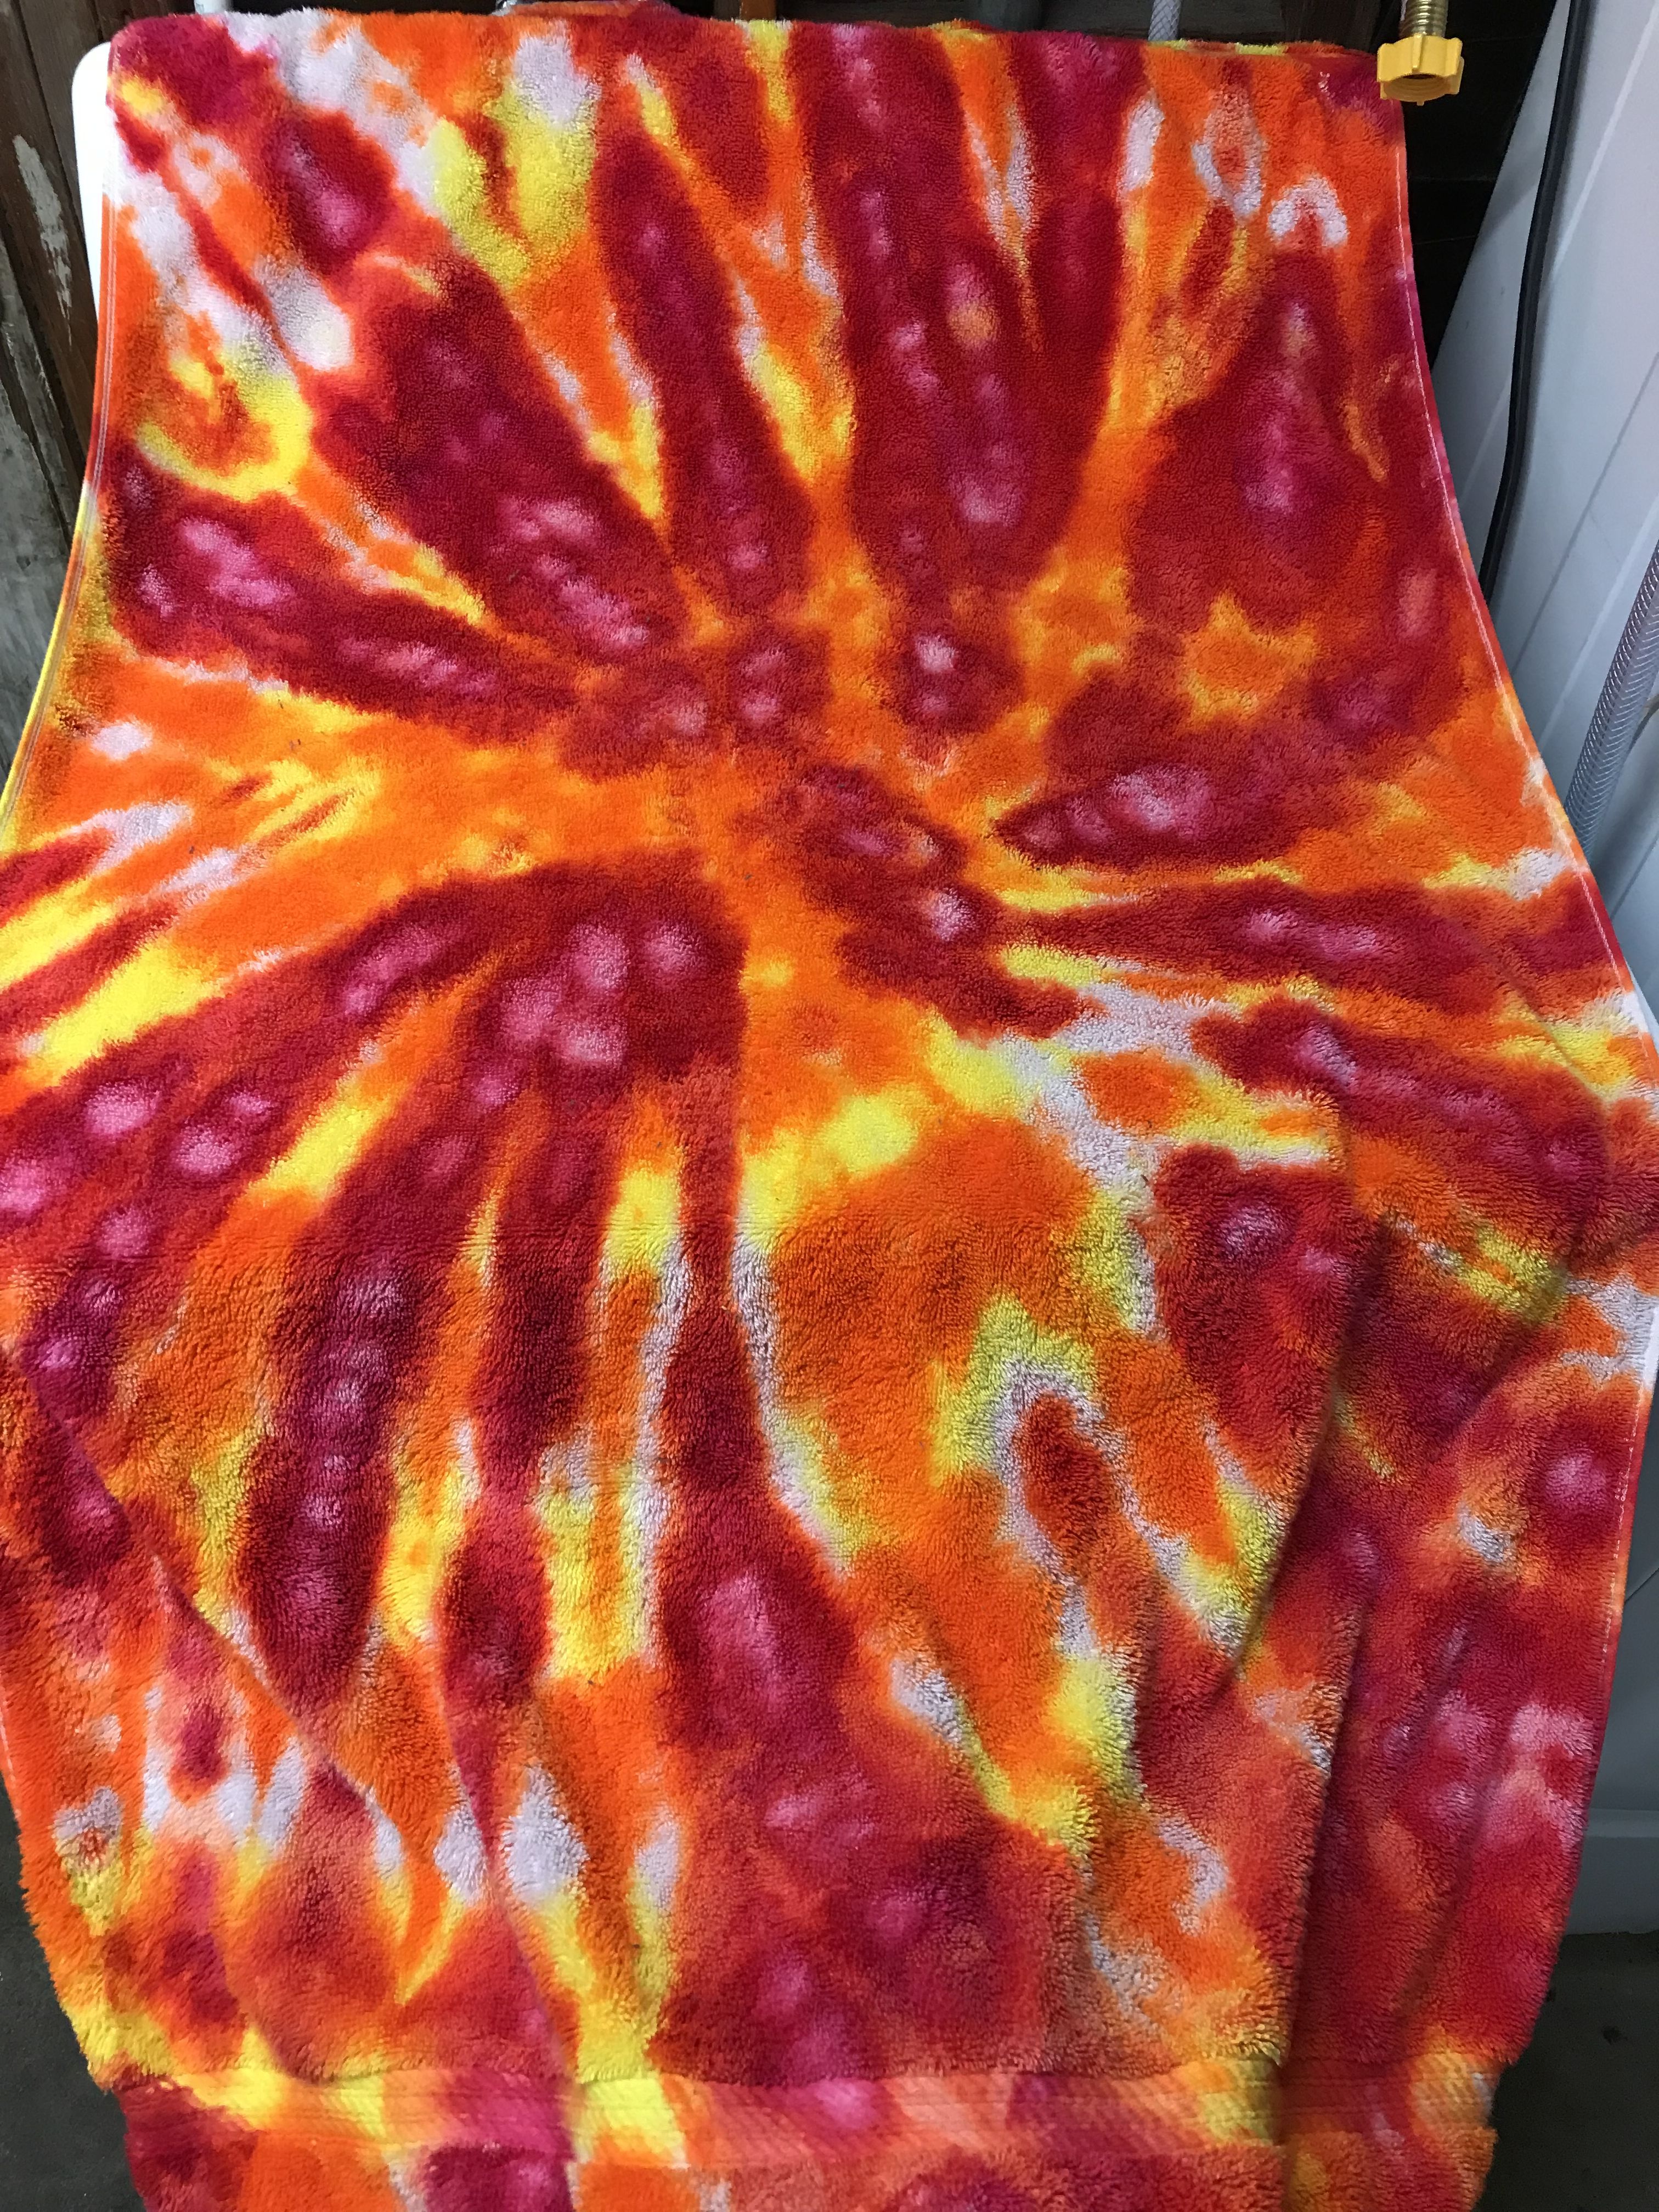
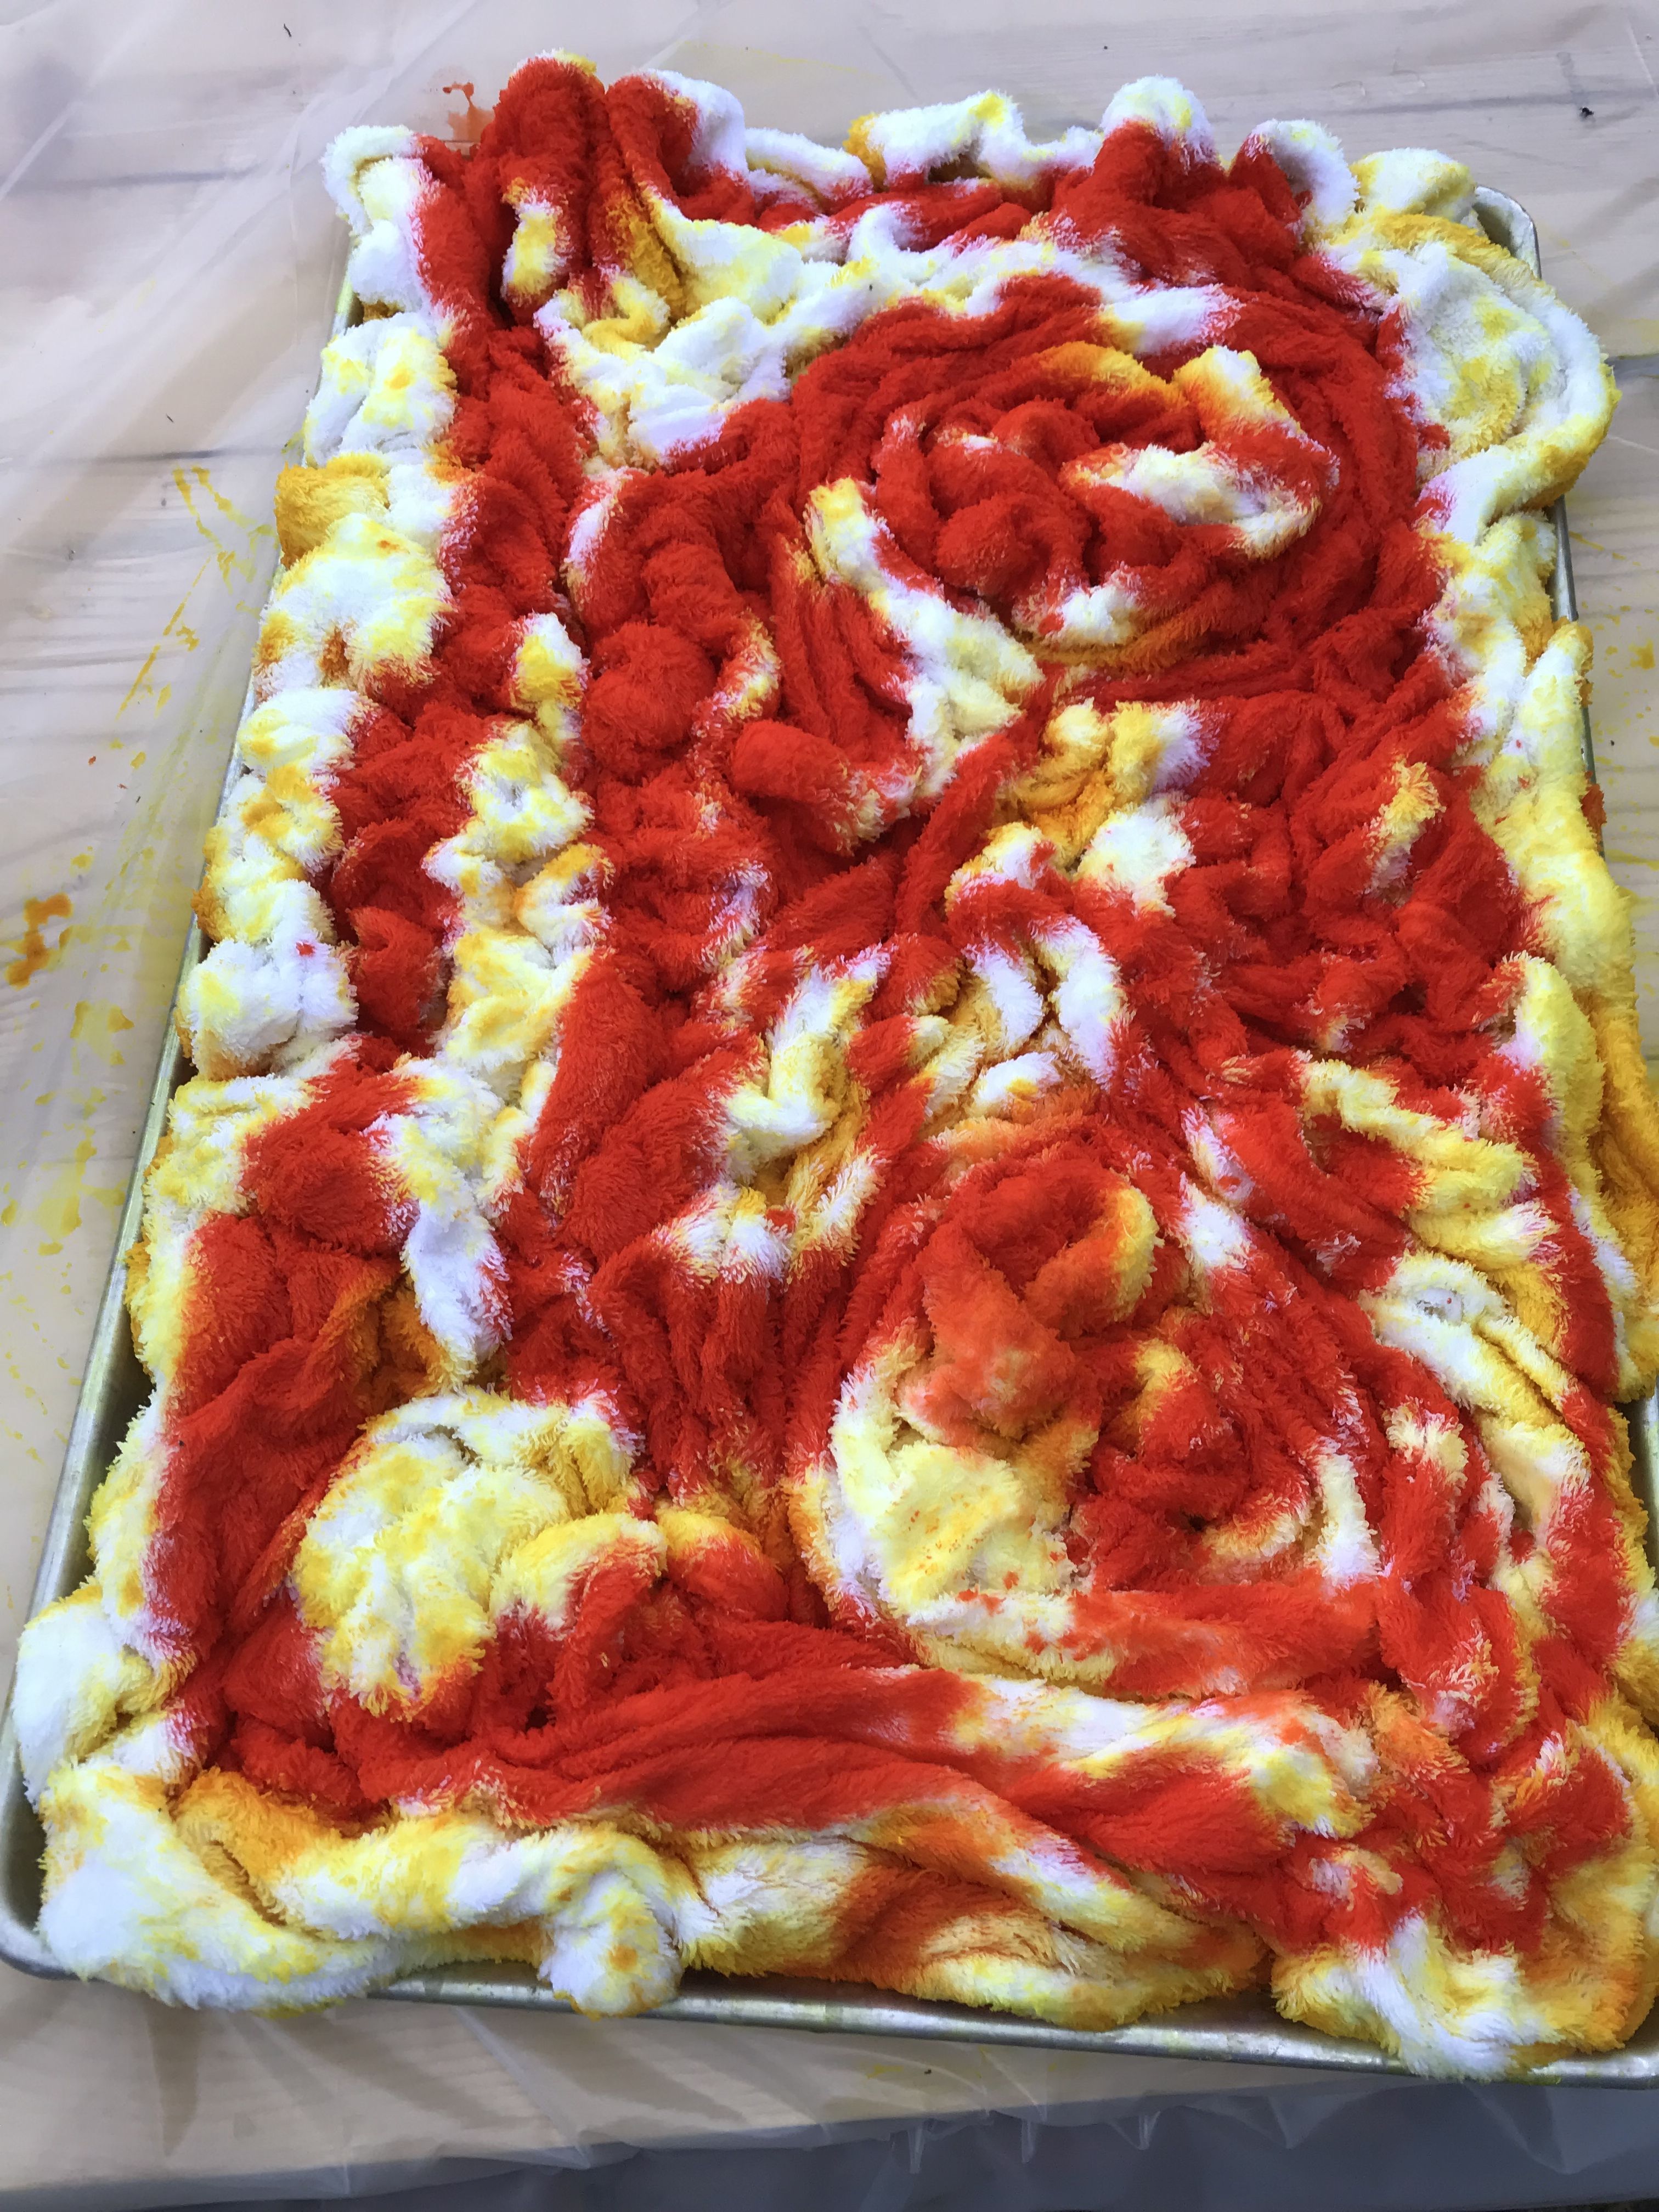
The last tank top is actually double dyed. That is to say, it’s actually been dyed twice. The first time it was dyed like the second to last one (the orange and yellow flame pattern). Unfortunately, it got a stain on it, so of course the only thing to do was overdye the stain. So I tied it up in a circle pattern, put red around the edges, and dyed the outside black.

Preventing the dye from getting where you don’t want it is a bit of a tricky process – dye has a way of splashing and seeping in very inconvenient ways, especially when it’s something like black on yellow where mistakes would be VERY obvious. (The dye gods are capricious!)

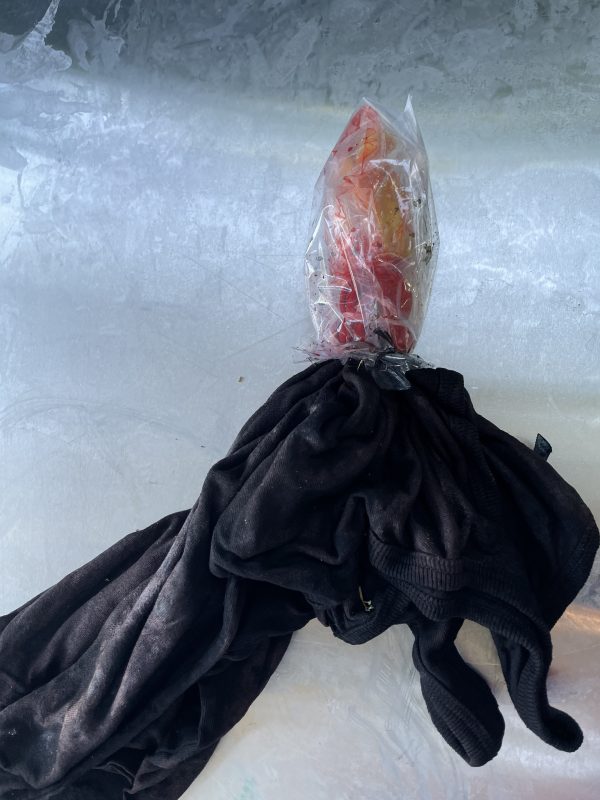
To protect against this, I used a method called “capping” which is just a fancy way of saying “stick the part you don’t want contaminated into a plastic bag and then tie the bag on tightly before applying more dye. I actually capped it twice, once to keep the flame-patterned dye from getting contaminated with red and once to keep the red area from getting contaminated with black.

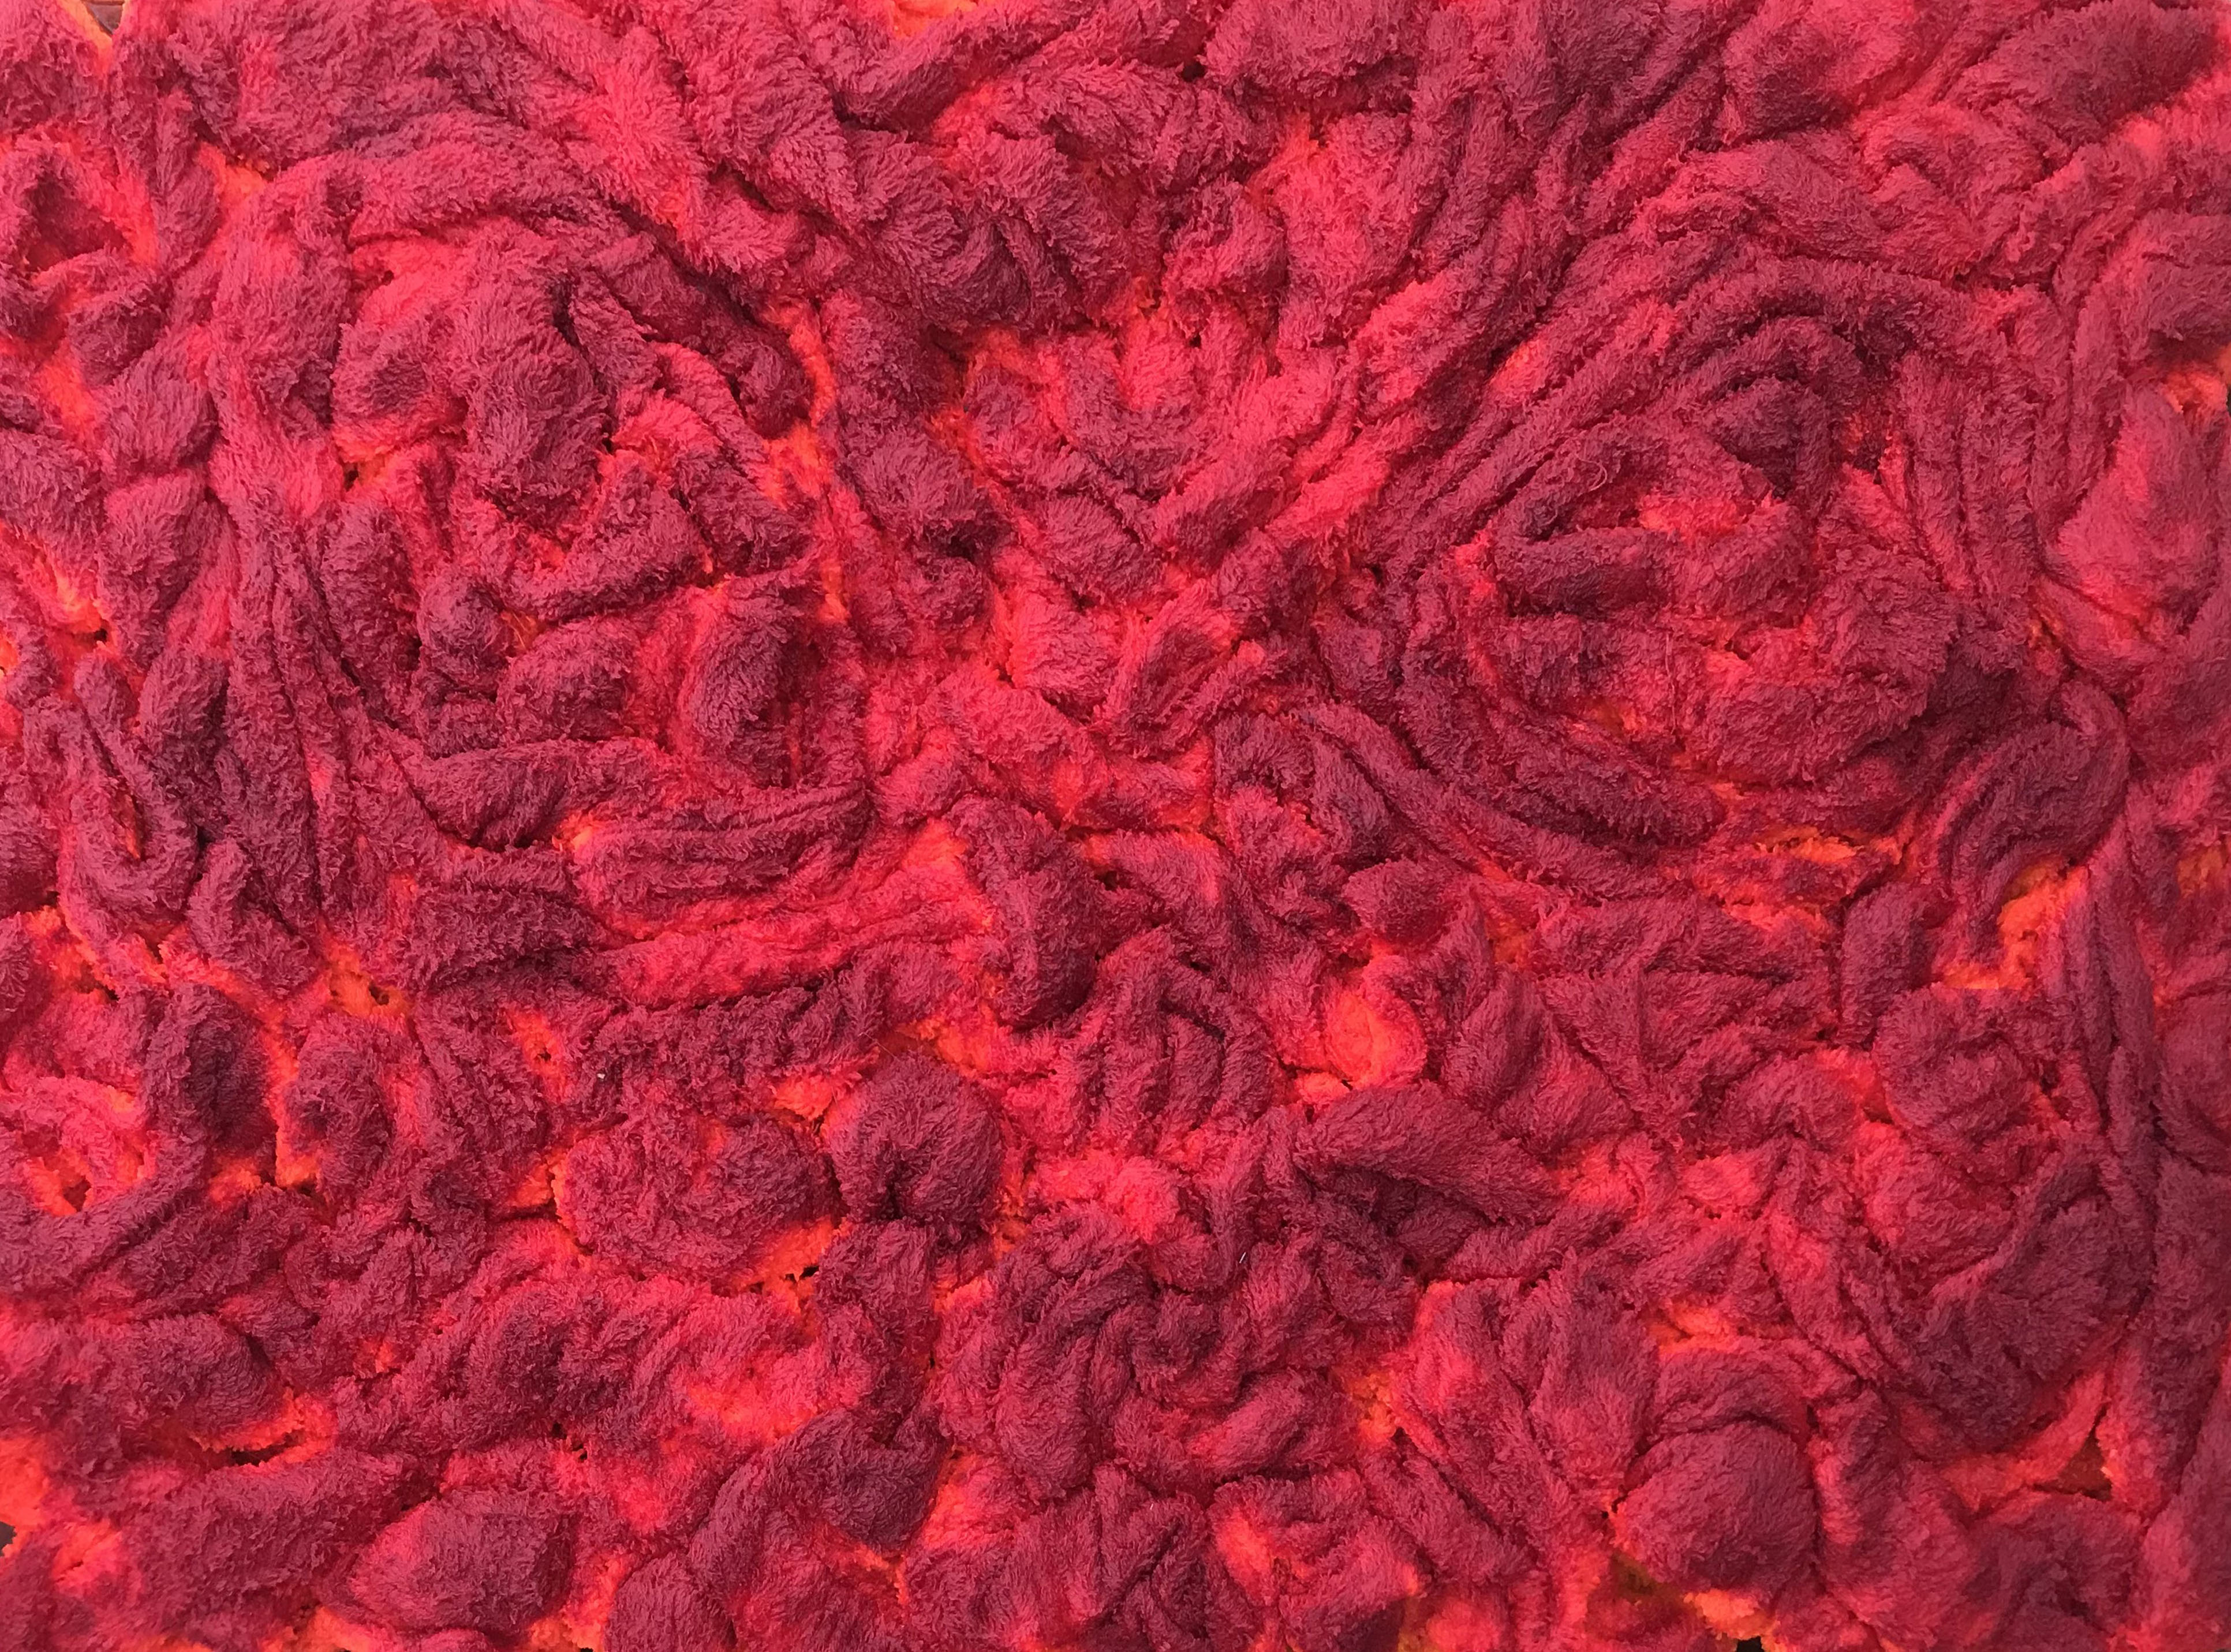
Here’s what it looked like when fully capped and dyed:

Red starburst tie dye in progress photo, with the red and yellow areas capped off in a plastic bag

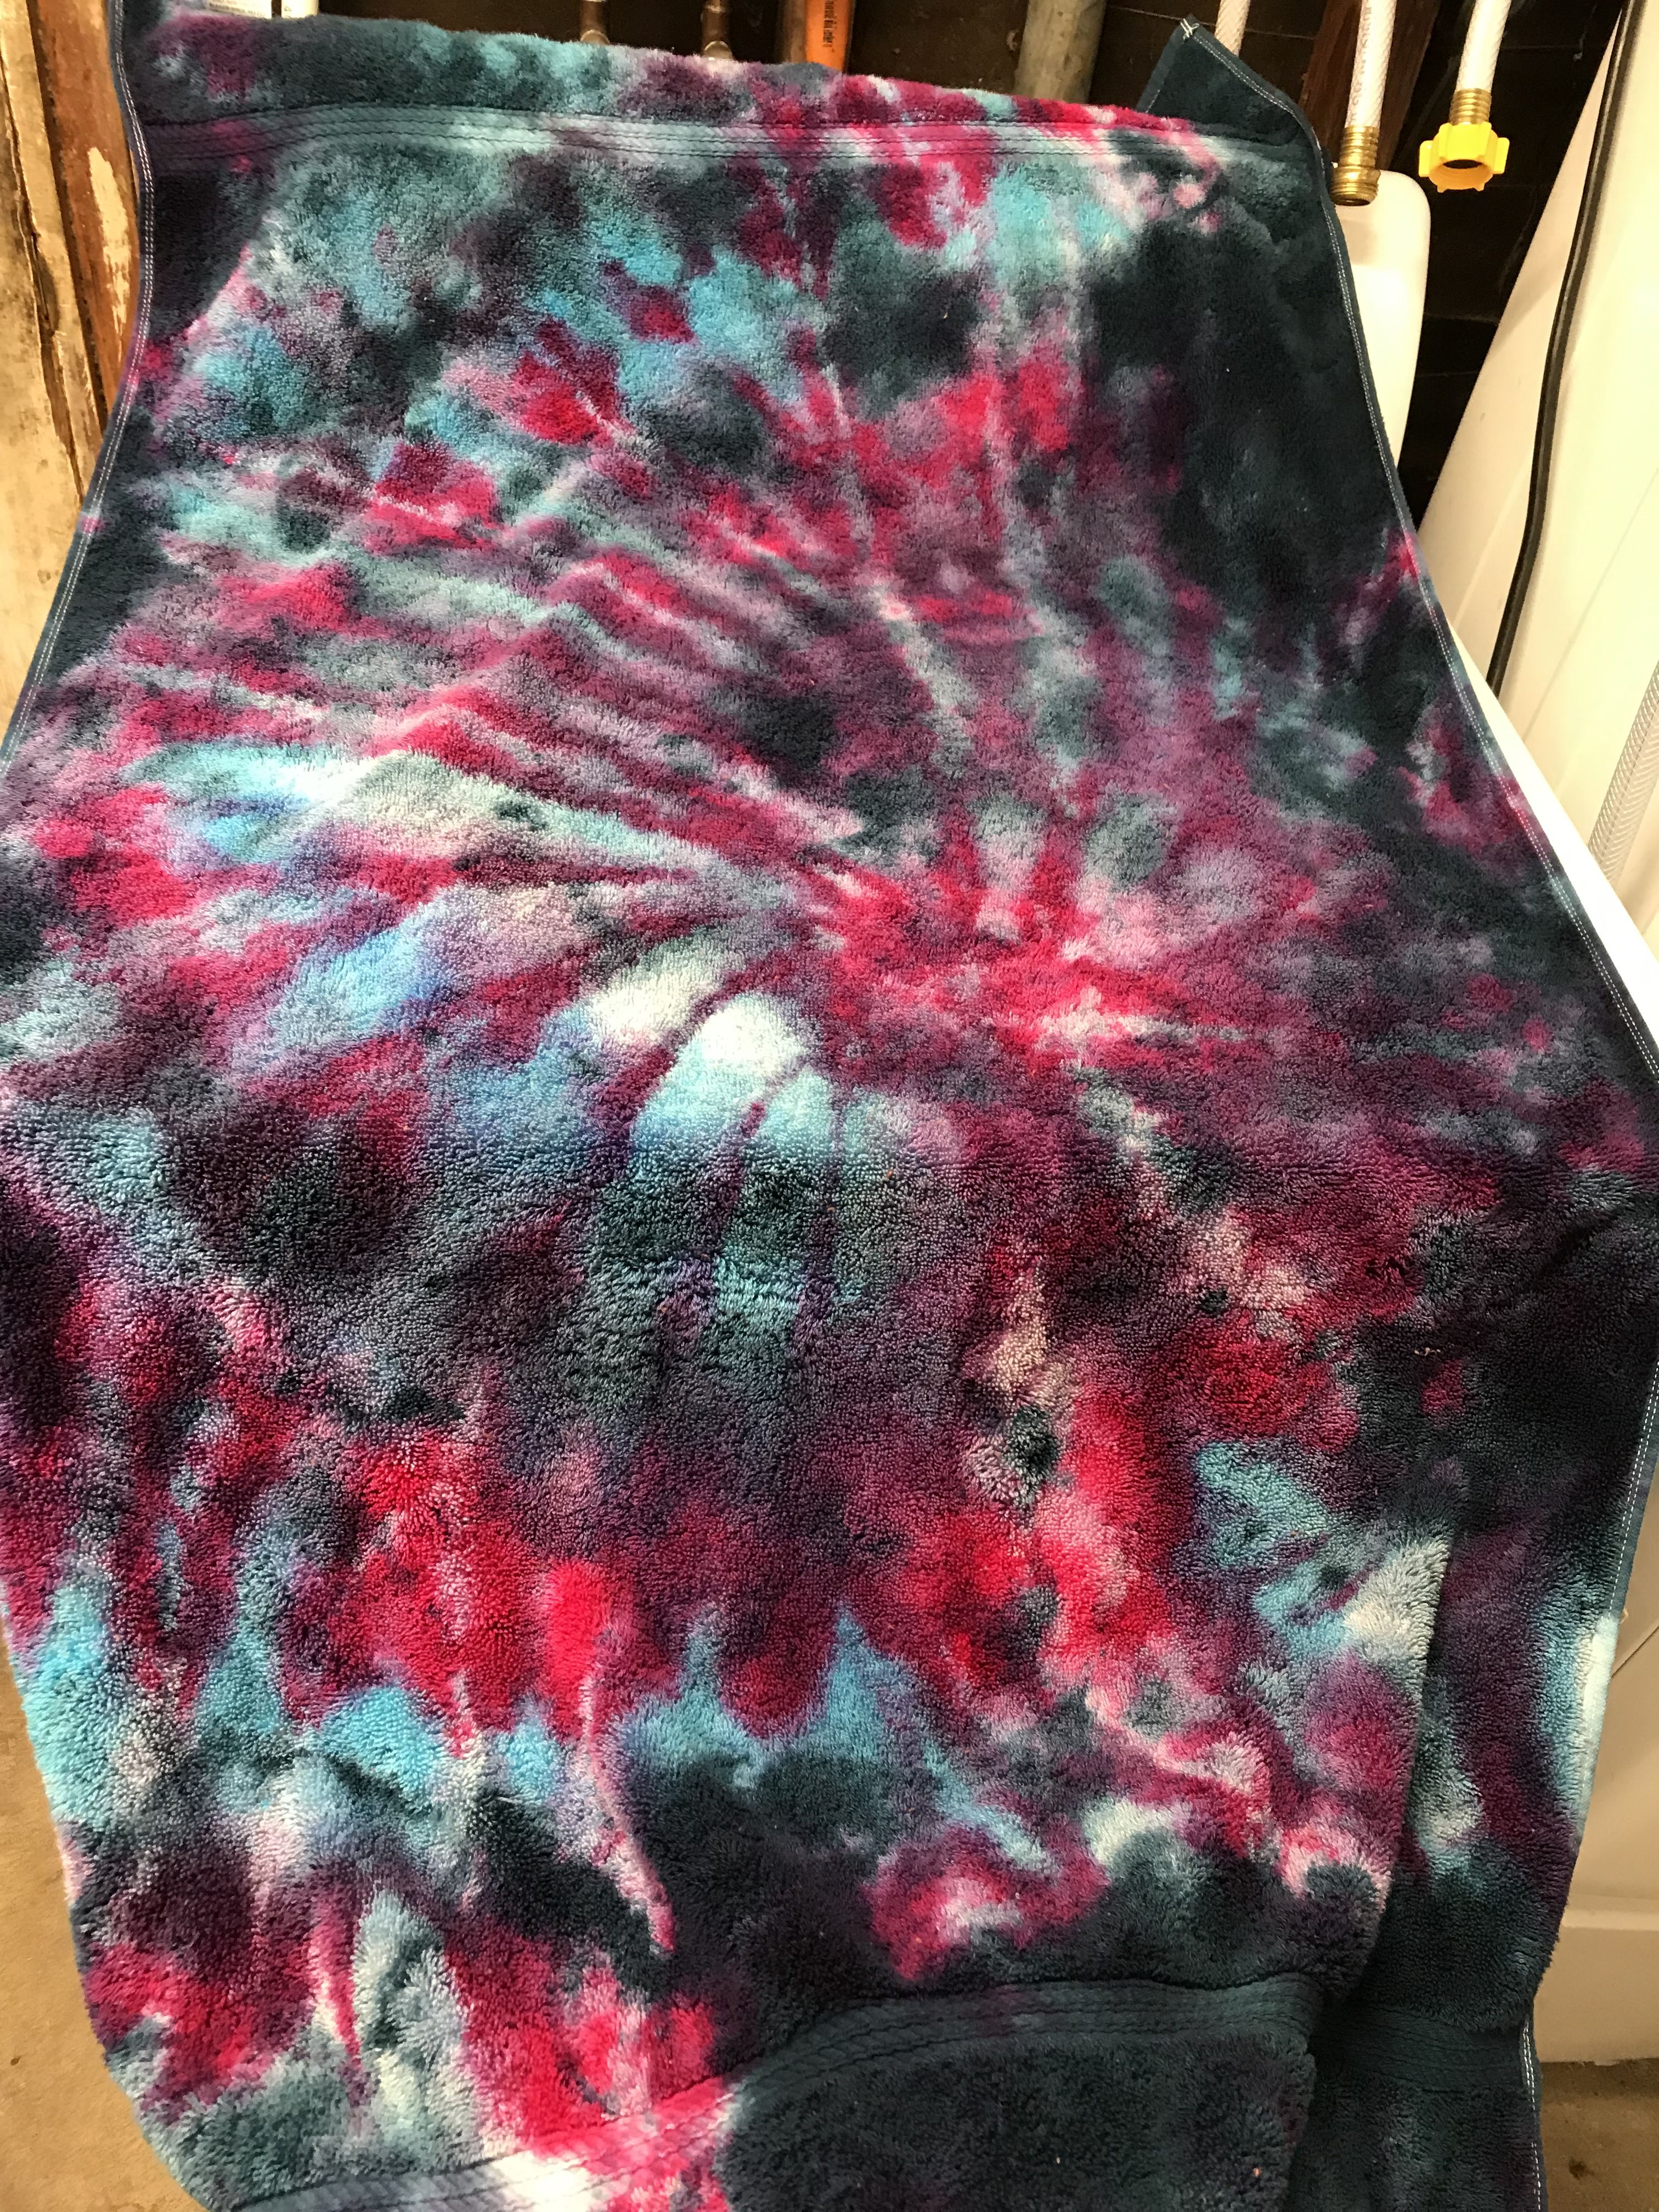
And here’s what it looked like when it was partially uncapped:

Red starburst tie dye, partially uncapped, with the red portion showing

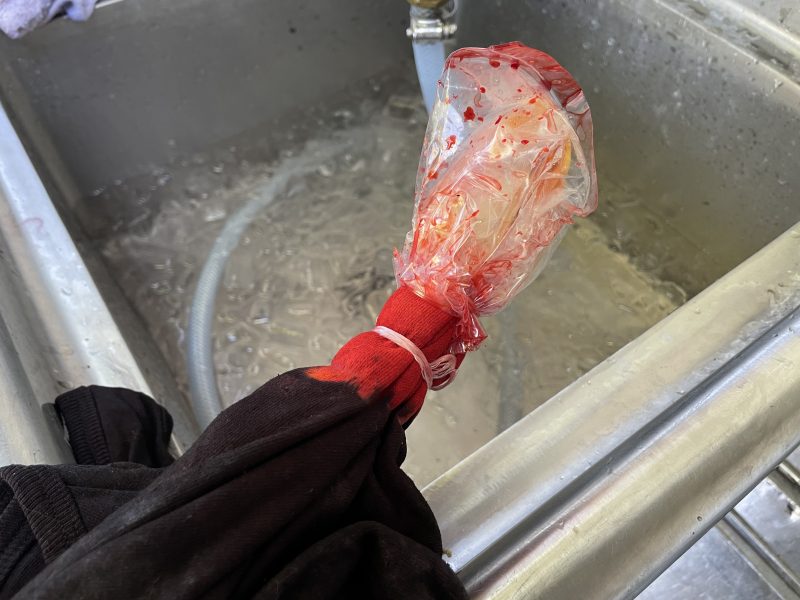
Here the first plastic bag has been removed to reveal the red portions but the orange-and-yellow is still protected.

You might be wondering about the sink full of water with ICE floating in it that appears in the background of the photo. The ice is the secret to keeping your tie-dyes bright when you’re rinsing out the dye.

There’s a potentially dangerous moment when you dunk your beautiful multicolor tie-dye into the water. With fiber-reactive dyes, there’s always a lot more dye than the fabric can actually react with, and the moment you plunge the fabric into the water, a ton of loose dye comes off into the water…and can potentially stain your beautiful shirt.

However, if the water is freezing cold, the dye can’t react. That’s because the dye reaction requires alkalinity, moisture, dye, and some heat to take place. The fabric has soda ash (alkalinity) and dye in it, so if you put it in warm water, all four dye reaction components are present. If you put it in ice water, though, there’s not enough heat for the dye to react, and the loose dye can’t stain the fabric.

At the same time, the first rinse bath rinses out the soda ash that gives the dye the alkalinity it needs to react. So after the ice water rinse, all the other rinses are safe to do in room temperature or warm water for as long as you like. In fact, it’s recommended to soak overnight in cold water to make the rinse-out process as easy as possible. The rinse water will turn super-dark with loose dye – but it all comes out. No dye reacts with the fabric. All because of that first ice-water rinse!

Better living through chemistry!

I have another dye day scheduled next weekend – some friends from waaaaaay back in high school are coming over and we’re going to do more tie-dyes together. Since it’s starting to get cooler, I may do some sweatshirts, and maybe some T-shirts and tank tops for Jamie.

Filed Under: All blog posts, textiles, dyeing, surface design Tagged With: tie-dye

April 13, 2020 by Tien Chiu

Chocolate and cows

Or, how I spent my Easter weekend…

First, the chocolate. (Because chocolate is so much more fun than cows!)

You may recall that awhile back, I made myself some low-sugar chocolate. Well, predictably, Jamie hoovered up most of the low-sugar chocolate, and after it ran out, asked me to make more. So I ordered another 6 kg of Valrhona’s Alpaco (my favorite flavor of their line), 3 kg of unsweetened and 3 kg of their 66% cacao solids. Over the weekend, I mixed 1 kg of each, tempered it, and made some 83% Alpaco chocolate. It’s very intensely chocolate, and low-sugar enough that I can eat it in small doses without feeling too bad about it (my blood sugar is, fortunately, very well-controlled). And, mixed with nuts and dried fruit, it’s even tastier!

Here’s what I made. First, plain chocolate bars. Here they are in the molds:

chocolate bars, still in molds

These are the heavy-duty, rigid polycarbonate molds used by professional chocolatiers. I’ve tried the thin, flimsy plastic molds sold to home cooks and I don’t know how anyone can succeed with them – they drive me crazy. So when I got rid of all my other molds I kept these four back, just in case I wanted to make bars again someday. I’m glad I did!

And here are the bars, unmolded:

Finished chocolate bars

They’re not absolutely perfect – they have a slightly matte finish instead of a high sheen – but that may be partly because of the high cocoa content, as the unsweetened chocolate doesn’t have as much cocoa butter as a couverture does. I’m not entirely sure about that. Doesn’t matter; they look quite good and will taste even better!

Here’s the peanut gianduja (aka: peanut butter mixed with chocolate, like the inside of a Reese’s Peanut Butter Cup, only much much better). Technically it’s not a gianduja as it contains no powdered sugar, but don’t tell anyone!

peanut gianduja with raisins

The front part contains “regular” (unsulfured) raisins, the middle golden (sulfured) raisins. The back part is plain peanut gianduja, and very tasty it is.

And here is the cherry almond chocolate:

Dried cherries and roasted almonds mixed with chocolate

This is still in what I consider the most glorious stage of chocolate: when it hasn’t quite fully set, and is a little matte in sheen. I don’t know why I find this moment in chocolatiering so beautiful – perhaps because it is so transitory. It lasts only a minute or two. The chocolate goes from a liquid, translucent shine to the hard, waxy sheen you see in chocolate bars. But in between is this soft, matte glow that I just love. It says, “The chocolate is tempered perfectly, and will come out great.”

For those who have dyed with indigo, it’s like that magical transformation from the yellow-green of antifreeze through beautiful shades of aqua to pure indigo blue, after you take the fiber out of the dyebath and the pigment oxidizes. It’s wonderful to see.

Meanwhile, about the cows…Um, yes, the cows. Actually, only about a quarter of a cow. I hope, anyway.

I’ve wanted a chest freezer for quite a few years. I like making big batches of food because it’s more efficient, but of course the freezer is only big enough to hold 1-2 two-gallon batches of soup or chili. A bigger freezer would allow me to do a bigger variety of foods, so I can still cook efficiently without having to eat chili for two weeks straight.

But for a variety of reasons, we never quite got around to getting a chest freezer.

Then the coronavirus hit. And the idea picked up some urgency.

I will admit to being both a gourmet and a pessimist. I buy my meat at the farmer’s market, and what with social distancing and the throngs that usually populate the farmer’s market, I imagine it’s only a matter of time before they either shut down the farmer’s market or shopping at the farmer’s market becomes completely untenable due to long lines etc.

Plus, supply chain issues may become a problem. There have already been reports of meat packing plants having problems with workers getting sick. My guy doesn’t get his meat processed at a big meat packing plant, but there’s nothing to prevent the workers at his place getting sick either. And while I’m sure I could live without meat if I needed to, I happen to like grass-fed beef, it’s better for the environment than corn-fed beef, and I REALLY don’t want to support factory farming.

So…a chest freezer and a bulk meat purchase seemed like a good idea. I called him up, and it turns out that I can get a quarter cow for $5.50/lb hanging weight. Hanging weight is the weight of the steer when they hang up the carcass for dry aging, right after it’s been slaughtered. In this case, I asked for the smallest steer they had, which turned out to be 600 pounds. So that was 150 pounds of meat.

That’s still a LOT of meat for two people, but it turns out that you lose about 40% of the weight during the dry aging and butchering process, so it will work out to about 90 lbs of actual meat. I’m asking for bones + offal (all the stuff they’ll give me, anyway) so I might get a bunch more – we’ll see.

Anyway, we have a 7 cubic foot chest freezer (I had to exercise my Google-Fu and then call all over town to get it – apparently everyone and their kid sister wants one right now too, for the same reasons I want one!), and the quarter-cow will take up about half of it. I’d make a crack about the dead bodies taking up the other half, but since I quit my job as a project manager, I don’t need to dispose of dead bodies any more! 🙂

Now, of course, if you have a quarter-cow in the freezer, plus a quarter-freezer’s worth of cat treats that must not get stale (because priorities!), you have to organize it all. Dumping a hundred packages of beef into a freezer at random is a recipe for chaos. My tentative plan is to file the quarter-cow neatly into canvas tote bags, classified into steaks, roasts, ground beef, and so on. Using tote bags will make it easier to haul stuff in and out since tote bags (unlike cardboard boxes) come with handles. Wire baskets might be better, but I don’t have wire baskets to fit the chest freezer and am wary of scratching up the interior.

Of course, you then have the problem of differentiating a sea of identical canvas tote bags.

I bet you can guess where this is going…

Yep! I spent part of yesterday tie-dyeing canvas tote bags so I could differentiate frozen cow body parts:

The colors aren’t the most brilliant, but I was dyeing with the colors I was using for the dye samples for the double weave cape, and I was dyeing on an off-white canvas base. But I’m happy with the results anyway – I will certainly be able to tell them apart in the freezer!

And, with that, I’m off to other things. I’ll update you on the latest set of yarn samples once they’re dry.

Filed Under: All blog posts, food, chocolate, textiles, dyeing Tagged With: tie-dye

April 16, 2019 by Tien Chiu

Robes of fire

The bathrobe is done, and it is GORGEOUS!! It will keep me toasty warm, mentally and physically, all year round:

bathrobe in fiery colors
robes of fire!

I’m particularly happy with how the pattern of the reds and oranges came out. Because I sponged on the red at the very top of the scrunched-up bathrobe, the red patches are centered in the most intense patches of orange, like this:

closeup of flame-dyed bathrobe, showing the intense patches of red centered in the patches of orange

This gives a really nice effect of real fire.

Compare this to the tie-dye towel from my initial experiment:

image of tie-dye towel with randomly painted lines

I tried the paint the lines to fall in the more intense areas of orange, but as you can see, it’s really not the same, and the bathrobe looks way better. Hurray!

The bathrobe inspired me, so last weekend, I hosted a small tie-dye party for some friends. I spent most of the time helping them with their tie-dyes, but took a few moments to make two scrunch-dyed T-shirts for myself – one in fiery colors, like the bathrobe, and another in yellow, orange, and black.

Needless to say, as soon as I laid down the first shirt to take photos, this happened:

photo of fiery-colored T-shirt with a photobombing cat (Tigress)
a photobombing cat!

I love the T-shirt! You’ll notice how it has much more detailed crinkling than the bathrobe. That’s because it’s a lighter-weight fabric than the bathrobe, so it holds tight wrinkles better – and thus produces a more detailed dye job. Not better or worse, just different.

The second shirt reminded me of Sharon’s comment on the previous blog post – “I think Tigress was born tie-dyed.”

I laid the shirt on the bed and snapped a photo of it next to Tigress. There is definitely a family resemblance between the tie-dyed shirt and Her Royal Highness – though, of course, there is no question about who is more fabulously beautiful!

Tigress with a black, orange, and yellow scrunch-dyed tie-dye shirt

Of course, if you take a photo of one cat, the other cat must photobomb. It is The Feline Way:

Fritz sitting on the T-shirt I was trying to take a photo of

Fortunately (for the human), His Royal Highness was just a moment too late – I had already taken the photo I needed. But I snapped a photo of him anyway, because how could you not take a photo of such utter cuteness?

And then, of course, he got a belly rub, because I have only One Job.

Filed Under: All blog posts, textiles, dyeing Tagged With: tie-dye

April 10, 2019 by Tien Chiu

Tie-dyed towels?

Honey, in this household, everything is tie-dyed.

(Except Fritz and Tigress. They run too fast.)

More seriously, I’ve been gearing up to tie-dye that bathrobe I mentioned a few posts back. And since it’s a big expensive project, that means I need to do samples! And what better way to sample for a big, sumptuous bathrobe than by doing some big, sumptuous towels?

I had been considering ice-dyeing this bathrobe, so the first step was buying 80 pounds of ice. 40 pounds for ice dyeing, and 40 pounds for rinsing out the tie-dyes afterwards.

(Dyer’s trick: do the first rinse of fiber-reactive-dyed items in ice water, to prevent unreacted dye from migrating and staining other areas. The ice bath chills the dye to the point where it won’t react in that rinse, and the ice water rinse removes the soda ash, so the dye won’t react in subsequent rinses either. Presto, your white areas stay white.)

I was thinking of two options. One was an indigo blue background and fuchsia/turquoise/purple patterning. The other was my usual favorite, orange and yellow background with red patterning. Ice dyeing would add randomness to the pattern, and variations in intensity – dark and light areas where the ice diverted or diluted the dyes.

Here’s an ice-dyed T-shirt I did in 2016 that gives you an idea of what you can get from ice dyeing:

ice dyed T-shirt
ice dyed T-shirt from 2016

So I made up a bunch of dyes and did the towels. I did one towel in navy blue, turquoise, purple, and fuchsia, ice dyed in a spiral – navy blue on the bottom and turquoise/fuchsia/purple on top. Then I did two more towels in fiery colors – one in an ice-dyed spiral with orange and yellow on the bottom and fuchsia/scarlet/orange on to. The other I dyed in a scrunch-dyed pattern with orange and yellow on top, and painted it afterwards with a network of red lines.

Here’s what the fiery-color ice-dyed spiral towel looked like after I piled ice on top and dripped the dyes on:

ice dyed towel in the process of dyeing it
ice dyed towel in progress

And here’s what all three towels looked like when done:

Blue, fuchsia, and turquoise towel
Sample towel #1 – blue, purple, fuchsia, turquoise
Tie-dyed towel - yellow-orange and scarlet-fuchsia ice dyed spiral
Sample towel #2 – ice dyed spiral in yellow/orange/scarlet/fuchsia
Sample towel #3 - yellow-orange with red lines
Sample towel #3 – side 1
Sample towel #3, the other side - yellow-orange with red lines
Sample towel #3 – the other side

Obviously (if you are me, anyway) the choice is #3. A dark blue bathrobe in the dark winter is a nonstarter – I’d want to shoot myself by the time January rolled around. And I didn’t like the cool reds or the way the ice diluted the color. A bathrobe the color of fire would be the perfect thing to warm me up during the (cough) freezing California winters.

So yesterday I soaked the bathrobe in soda ash solution, spun it out briefly in the washer, and arranged it on a baker’s full-size sheet pan. Like this:

bathrobe scrunched up on a baker's sheet pan, ready for dyeing
bathrobe, ready for dyeing!

Then I poured a quart of yellow dye onto the bottom of the sheet pan. Which vanished immediately.

I scratched my head, and mixed up another quart. Which also vanished immediately.

At which point I poured in a leftover pint of golden yellow. Repeat vanishment.

I abandoned subtlety, and mixed up half a gallon of yellow dye, throwing in another quart of soda ash solution just in case there wasn’t enough. I poured that into the bottom of the sheet pan. Take that, bathrobe!

Finally, I had yellow peeking up from the bottom, as I wanted. I started dripping on the orange dye.

Here’s what the bathrobe looked like now:

bathrobe sprinkled with orange and yellow dye

After sprinkling on the orange dye, I decided not to paint on the red lines but to try an experiment: sponging on just a little bit of red dye to create a tracery of red lines in the center of the most intense orange areas.

Here’s what the bathrobe looked like partway through the sponging process:

bathrobe sprinkled with orange dye, partially sponged with red dye
bathrobe, sprinkled with orange dye, partially sponged with red dye

And here’s what it looks like at the edge, where you can see all three layers of dye: red, orange, and yellow:

bathrobe - showing all three three layers of dye: red, orange, yellow

And what does the finished bathrobe look like? Tough noogies, sweetheart – the dyes haven’t finished setting yet, so I don’t know yet. It’ll be another couple hours before I can pull it off the tray start the rinsing process, and that will take another half-day or more. So I’ll be in suspense for another day or so – and so will you.

Perhaps this would be a good metaphor:

Fritz staring at feathers

See you (and the bathrobe) tomorrow!

Filed Under: All blog posts, textiles, dyeing Tagged With: tie-dye

March 20, 2019 by Tien Chiu

A dyeing extravaganza

I started recovering from my cold right around the time the weather cleared up, so one of the first things I did was wind and paint the warp for my painted-warp samples. Here it is, festooning our fig tree:

painted warp hung to dry in the fig tree

There are actually two warps, wound and painted together, which will be woven using the exact same threading and treadling. Only the tie-up will be different. But! One fabric will blend warp and weft colors into a single, mixed color. The other will separate warp and weft colors as much as possible. As a result, the two fabrics will look quite different. They should be quite instructive for my students.

Since I had a bunch of leftover dye after painting the warp, of course I had to add a few T-shirts to my wardrobe. So I grabbed a few shirts and used them to soak up extra dye.

(I am infernally lazy about clothing. Since I am 5’0″ with extremely broad shoulders, muscular arms, and weigh considerably more than I should, it’s nearly impossible to find clothes that fit. My solution is to find one type of clothing that fits, buy a dozen of it in white, and dye twelve different variants so they all look creatively unique. Back when I was working in high-tech, it was short-sleeve button-down shirts; nowadays I mostly just roll with T-shirts.)

Of course, as soon as I laid the shirts on the bed for photography, the inevitable happened. Because in this household, cats are always standing by to help!

Fritz, helping out with photos!

Fortunately, a bit of a belly rub, some head scritching, and a bit of out and out cat-treat bribery convinced Mr. Fritz to take himself elsewhere. (Of course, this could explain why cats are so eager to help, but what’s a human to do? Moving the cat would be unthinkable!)

So here are the shirts I dyed. First up is my favorite. Usually I only use two colors with scrunch dyed shirts, but this time I used three colors – a warm fuschia, gold, and indigo blue. I LOVE the results – the photo really doesn’t do it justice:

multi-color low water immersion dyed shirt

This shirt, dyed in a mix of indigo, turquoise, and steel gray, came out gorgeous, but a bit too subdued for my tastes (what can I say, I’m a magpie!) Fortunately, my friend Sand fell instantly in love with it, so I gave it to them, and we were both delighted.

A T-shirt tie-dyed in indigo blue and steel gray

I have mixed feelings about the Wild Boar Farms T-shirt below:

A Wild Boar Farms T-shirt tie-dyed in orange and green

The colors are a bit more muted than I had intended – partly because the shirt is 50/50 cotton-polyester, which I hadn’t realized before dyeing. (Polyester doesn’t take fiber-reactive dyes, so the color is less intense than on a pure cotton shirt.) On the other hand…the color is PERFECT for a tomato farm T-shirt, which is exactly as I intended! And it captures perfectly the colors of my favorite tomato variety, Berkeley Tie-Dye, bred by…Wild Boar Farms!

A Berkeley Tie-Dye tomato I grew last year - red, green, and yellow stripes
A Berkeley Tie-Dye tomato I grew last year

Meanwhile, the samples Laura Fry wove up for me arrived. I have not yet photographed them, though, because when I tried to take photos, this happened:

My cat Tigress sitting on handwoven samples
Tigress, helping with photos

Since I was out of cat treats (just kidding – the world would end if I actually ran out of cat treats!), I had to abandon the samples to Ms. Tigress and give up on photography for the day. (What? Move the cat? Unthinkable!)

But the samples are quite interesting – looking forward to getting the photos and analyzing the color interactions. Plus, they’re pretty!

I’m also planning another dye day…including not one, but TWO new bathrobes. A big event for me…I only do a new bathrobe every few years, and it’s a big deal because I like huge, floor-length, luxurious bathrobes. They’re expensive, tricky to handle, and soak up a LOT of dye – so it’s rather like trying to dye a giant ball gown. So stay tuned…fun times ahead!

Filed Under: All blog posts, textiles, dyeing, weaving Tagged With: tie-dye

Next Page »

Subscribe to Blog via Email

Information resources

  • Dye samples
    • Procion MX fiber-reactive dye samples on cotton
    • How to "read" the dye sample sets
    • Dye sample strategy - the "Cube" method
  • How-Tos
    • Dyeing and surface design
    • Weaving
    • Designing handwoven cloth
    • Sewing

Blog posts

  • All blog posts
    • food
      • chocolate
    • musings
    • textiles
      • dyeing
      • knitting
      • sewing
      • surface design
      • weaving
    • writing

Archives

Photos from my travels

  • Dye samples
    • Procion MX fiber-reactive dye samples on cotton
    • How to "read" the dye sample sets
    • Dye sample strategy - the "Cube" method
  • Travels
    • Thailand
    • Cambodia
    • Vietnam
    • Laos
    • India
    • Ghana
    • China

Travel Blog

Entertaining miscellanies

© Copyright 2016 Tien Chiu · All Rights Reserved ·


Loading Comments...