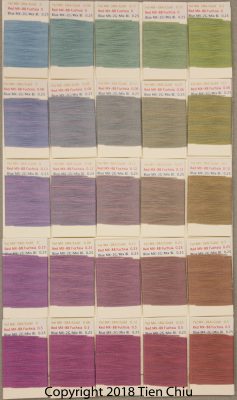
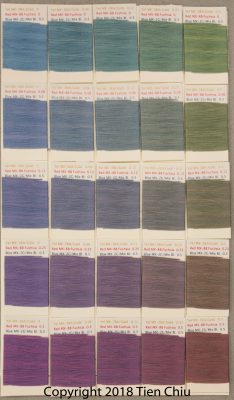
Sequential dyebaths – “Cube” strategy
The basic idea behind this method comes from Carol Soderlund’s dye mixing classes (as reported to me; I haven’t taken the classes). The idea is that you do a “color cube” where you take a predetermined set of dye concentrations, then dye every possible combination of those concentrations with three primary colors (yellow, red, blue), in sequential dyebaths (each primary has its own dyebath, and each sample goes through three dyebaths). This method uses 3n dyebaths to create n³ samples, where n is the number of dye concentrations used.
- Run n dyebaths using dye #1, with n² samples in each dyebath. These should cover all concentrations of dye #1 in the samples (including 0%).
- After the samples are dry, sort samples into piles according to the concentration needed of dye #2. There should be n piles, each containing n samples of each concentration of dye #1 (for a total of n² samples in each pile).
- Run n dyebaths using dye #2.
- After the samples are dry, sort samples into piles according to the concentration of dye #3. There should be n piles, each containing n² samples covering every possible combination of dyes #1 and #2.
- Run n dyebaths using dye #3.
This produces a “cube” of dye concentrations. The three axes of the cube are the concentrations of yellow, red, and blue (or whatever three colors you use).
How the samples are arranged
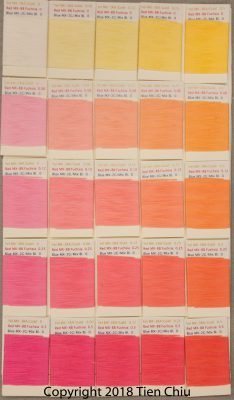
Here’s a page from one of the sample sets that shows three levels of a single dye “cube”.
The first level has five concentrations of yellow, increasing from left to right, and five concentrations of magenta, increasing from top to bottom. It contains no blue.
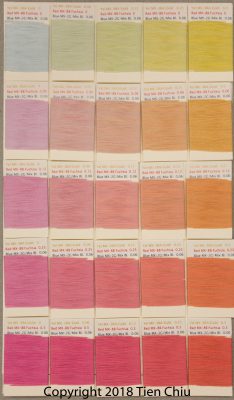
The second level contains the same five concentrations of yellow, increasing from left to right, and five concentrations of magenta, increasing from top to bottom. However, each of the samples has also been dyed with 0.06% blue.
In essence, the second level is what you get when you take the first level, and add 0.06% blue to each sample.
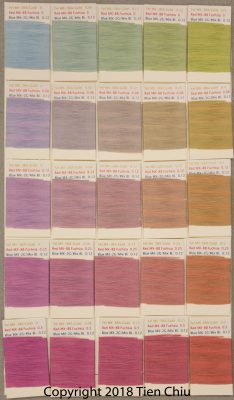
The third level also has the same five concentrations of yellow and magenta, but 0.12% blue has been added.
Level 4 adds 0.25% blue:
And Level 5 adds 0.5% blue.
There are a total of 125 skeins in this cube, representing all possible combinations of the three dyes, in each of the 5 concentrations (0, 0.06%, 0.12%, 0.25%, and 0.5%).
Because the sequence in which colors are dyed makes a difference (color receptors can max out), it’s important to run dyebaths in the same color sequence throughout. In this case I decided to do the colors in this order: (yellow, red, blue). That’s because yellow is typically the weakest mixing color, and blue is the strongest, so it gives yellow a chance not to be overwhelmed at high %WOG.
Why sequential dyebaths?
Procion MX dyes “strike” at different rates and have different preferred temperatures. Turquoise, for example, dyes best at about 120F, which is too hot for some of the other dyes. As a result, MX dyes can be hard to reproduce precisely when dyed as mixtures.
It is also a lot faster to mix up several sequential dyebaths than to dye each sample in a single dyebath.
Finally, sequential dyebaths allow dyeing multiple samples at once, reducing the need for precision measurements. (It is easier and more accurate to measure larger quantities of dye.)
In theory, this also means that you should dye the actual fabric/yarn in sequential dyebaths, especially at darker concentrations that are likely to max out the dye receptors. I did some spot checks with individually dyed skeins, though, and the differences are minimal.
Creating a palette – the “double cube” approach
Carol Soderlund uses a single cube with 7 concentrations to cover the gamut from pastel to dark colors. This requires 73 or 343 colors per set. However, many of these samples are very similar. It is possible to eliminate some of these samples to create a larger palette with the same number of skeins, by using two sets of cubes, one for lighter and medium shades, one for dark colors.
Here is a photo of one page of samples made in one of Soderlund’s classes. The amount of blue is constant; the concentrations of red increase as you move to the right, and the concentrations of yellow increase as you move down the page.
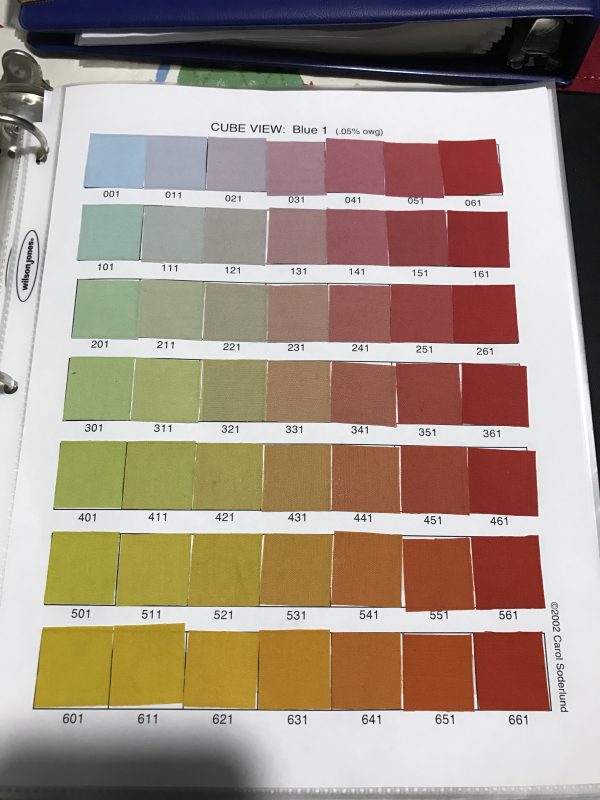
The concentrations of dye use double in each step. This sounds counterintuitive, but you need to use double the amount of dye to get what appears to be a linear progression of color.
You can see that samples 501 through 521 have minimal differences in color, and samples 601-631 are likewise quite similar in color. The same goes for 051 through samples 051-351 (vertical column) and 061 through 461. Other pages are fairly similar, suggesting that roughly the same palette could be constructed by using two cubes: (0, 0.06, 0.12, 0.25, 0.5) and (0, 0.5, 1, 2, 4). The first cube has 125 skeins and the second cube has only 27, for a total of 152 skeins – less than half the original number!
I eventually decided to do two cubes to cover a broader range of concentrations:
Light to medium colors:
- 0 %WOG
- 0.06%
- 0.12%
- 0.25%
- 0.5%
Medium to dark colors:
- 0 %WOG
- 0.5%
- 1%
- 2%
- 4%
But don’t you lose some colors by doing this?
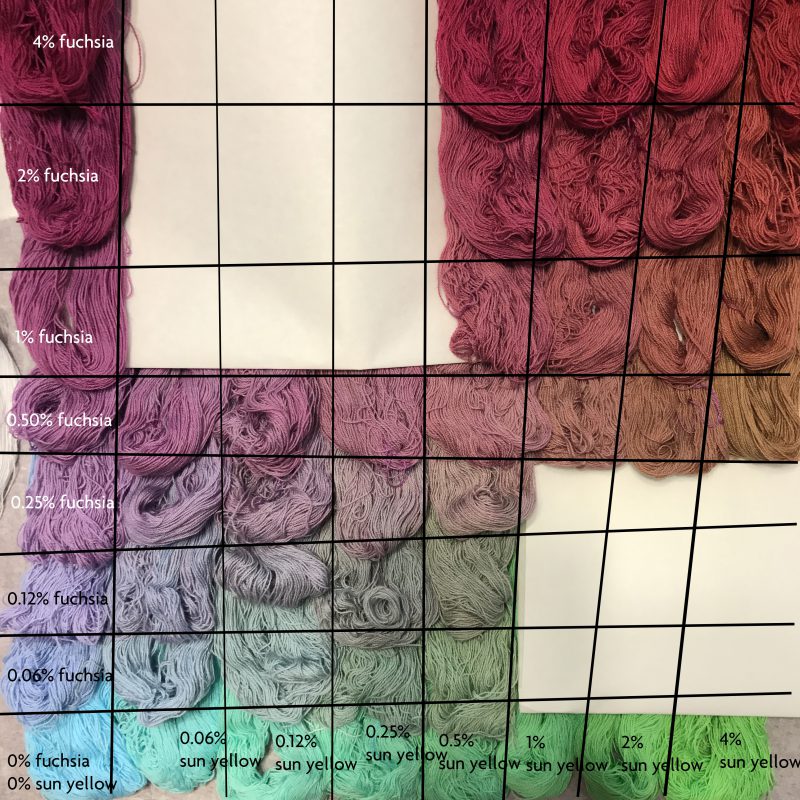
Yes, you do, particularly where a low-concentration yellow is mixed with a high-concentration red or blue, because yellow is a weak mixing color. You can see this in this photo, which shows 0.50% turquoise mixed with the labeled concentrations of sun yellow and fuchsia. Notice that in the bottom right there is a huge jump between 0% and 0.50% fuchsia. That’s unfortunate, but to do the full set of 8 concentrations using the cube method would mean doing 512 skeins instead of 250 for each 3-color combination. And the yellow tends to be a fairly weak mixing color, so the differences at those concentrations may not be profound anyway. So for a small loss of palette, I can get a 50% reduction in the number of skeins to be dyed. I can live with that, especially in a project that already requires 1500 skeins!
