So, yesterday Laura showed me how she puts on a warp – quickly and efficiently.
I had asked her how to handle putting a painted warp onto a sectional beam. I’d never tried doing this before, thinking that you had to beam a sectional beam in sections, but it turns out that you can beam onto it just as you would a plain beam. So that’s exactly what she did.
First, she rough-sleyed a reed and inserted temporary lease sticks into the cross. Then, she slipped a rod through the looped ends of the warp, and tied onto the sectional beam, as you would for regular back-to-front warping.
Then she threw the warp over a rod hanging from the ceiling. (Laura refers to it as a warping valet, but Kati Meek refers to it as a trapeze in her book Warp with a Trapeze and Dance with Your Loom – same thing, different names.)
At this point the warp looked roughly like this:
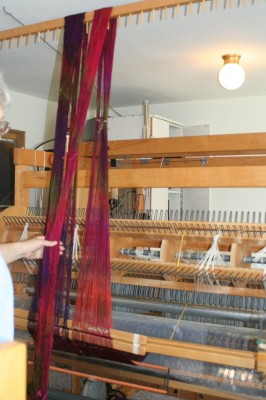
Notice the rough-sleyed reed (which is used as you would a raddle) and the lease sticks at the bottom of the warp.
Here’s a side view:
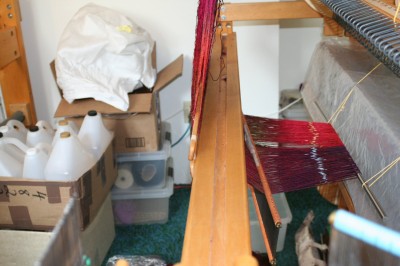
Notice the reed hanging between the warp beam and the back beam. I asked Laura why she preferred a reed to a raddle – she said that, among other things, it was easier to tilt the reed to make the warp wider or narrower. For winding on warps, she doesn’t use warp sticks, instead she narrows the warp gradually as it gets wound on, creating a trapezoidal cross-section that prevents the edges from slipping off. It doesn’t work on all warps, though. I’m not sure I can use this method since my loom is built differently (not enough space between the warp beam and the back beam), but it’s a good trick to know about, and I’m sure I’ll try it someday.
Here’s how Laura weights the warp as it dangles from the trapeze:
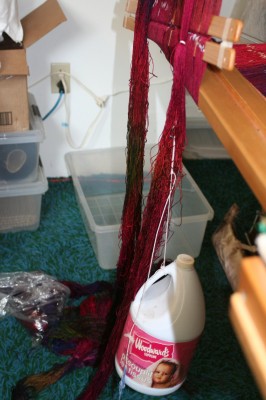
There’s a loop of thread (lark’s-head-knot) tight around the warp, attached to an S-hook, which in turn is attached to a gallon jug filled with (I think) water. This keeps the warp under tension as it’s beamed on.
Next, she cut off the choke ties, spread out the warp, and brushed it with a hair brush:
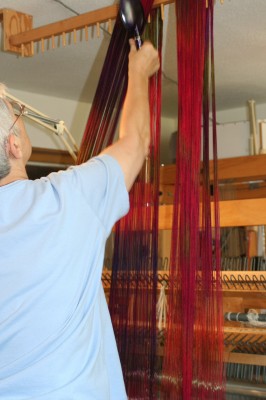
This helped even it out and identify any loose ends. (It should be mentioned that not everyone does it this way, and some weavers actively recommend against it, but Laura says it works fine for her. Kati Meek, in her book on warping with a trapeze, recommends “spanking” the warp with a stick to do the same thing.)
Then she moved the lease sticks as far up as they would easily go:
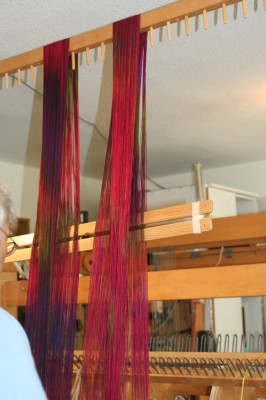
Once this was done, she started winding onto the back beam.
A shot of the reed, turned to narrow the warp slightly:
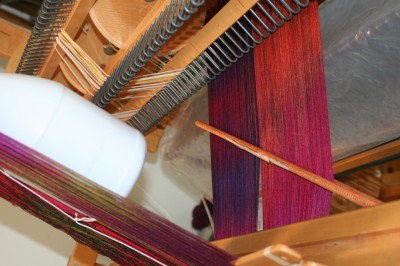
As the warp wound on, of course, the lease sticks moved down, and the weights moved up. When the lease sticks reached the back beam, or the weights started to get near the ceiling, Laura would stop, rehook the weights at the bottom, cut the choke ties, and repeat the brushing process, moving the lease sticks up again. Then she’d wind on another length.
At the end, of course, she came to the reed. This answered the question that had been nagging at me: if you rough-sley a reed, how do you remove it without disturbing the cross, which is at the other side of the reed?
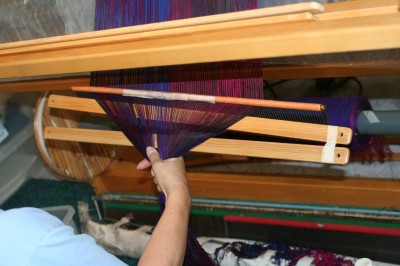
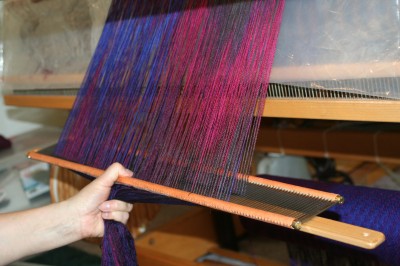
Turns out to be quite simple (doh!). You pull the warp through until the lease sticks right up against the reed. Then you turn the lease stick closest to the reed to make a small “shed”. You insert a new lease stick through the “shed” on the other side of the reed, and remove the old lease stick. Then you do the same thing with the other lease stick.
In photos:
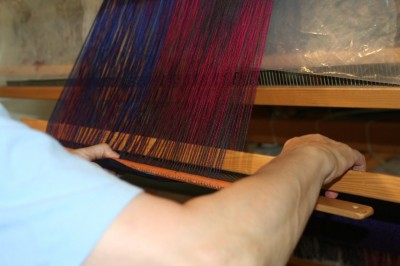
And that was it! The warp was fully beamed on, in about 15-20 minutes. Way, way, faster (and more even) than walking back and forth between back and front to “jerk” the warp!
I’m totally sold on the warping valet/trapeze. Fortunately, I had made one for myself back when I had the Leclerc Diana….now I just have to FIND all the parts for it!!
Later in the afternoon we worked on weaving ergonomics, and will work on it more today. Laura took a video clip of me weaving at the beginning (it should be noted that I was still struggling badly with the Fanny), and will take more videos today. I’m hoping to be able to resize and post them tonight or tomorrow – talking about weaving ergonomics is darned near impossible. A video is worth a million words!
Finally, in the evening we started working on repairing the many, many flaws in the dress fabric. It’s a daunting task; we may not finish it before I leave. But I have my hopes…
Off to a new day’s adventure!

Looks as if you are learning lots and enjoying it. Instead of jugs of water, I use donut-shaped weights purchased at a sports store. They are inexpensive, don’t spill, and take up less room. I have a variety of weights from 1.5 to 5 lbs.
Say, “Hi,” to Laura for me.
Lest we have great tearing of hair and rending of garments by weavers worldwide as they sob into their beers, “I’ve never beamed a warp in 15-20 minutes,” we need to know how long the warp was. Also, what do you include in the 15-20 min? Rough sleying the reed? All the other setup involved in beaming a warp? Or just the actual turning of the back beam to get the warp on.
You provide a great explanation of how the reed and leases are used. The photos, per usual, are worth a 1000 words. I’d love to see some photos of the warp going on and actually staying in the beam sections.
The description of sleying in descending order is interesting. I happen to be a leftie and sley left to right whenever possible. Ascending order works better for me. Still, at times I need to take a right-handed approach so will use the descending order.
The warp was an 11 meter long painted warp – so not pristine. Rough sleying took an additional time – about 7 minutes? I wasn’t paying close attention, but not too long. 20 epi/ppi.
For detailed photos and description of the process for a scarf warp, my website http://laurafry.com has a lot more pictures. Click on Education, then Warping Valet.
Cheers,
Laura