By running the air conditioner and heat at once (which is what a dehumidifier does anyway), I managed to reduce the humidity in my working area from 64% to about 50%. I also followed a tip I got to increase the working temperature of the chocolate to prevent too much thickening. What a dramatic difference! My chocolate tempered correctly, molded correctly, and stayed fluid while dipping. Much frustration ended. (Very similar to weaving! where a small improvement in, say, the evenness of tension while warping can lead to a much, much better woven product, and much less frustration while weaving. Sometimes small tweaks produce HUGE results!)
At any rate, here is a photo of an actual, honest-to-god correctly cast chocolate mold:
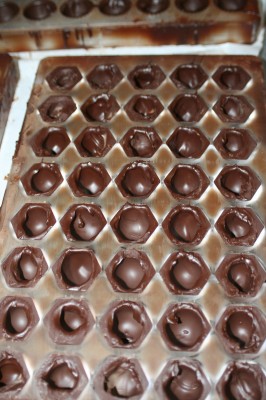
These, by the way, are professional-quality polycarbonate molds, not the cheap flexible kind you see in candymaking shops. They cost $20-24 apiece (plus shipping, sometimes from Europe) and are pretty much necessary if you want to produce a clean-looking end product that releases well and has no “feet”. I highly recommend investing in them if you ever want to go “whole hog” into chocolates. It will be much less frustrating.
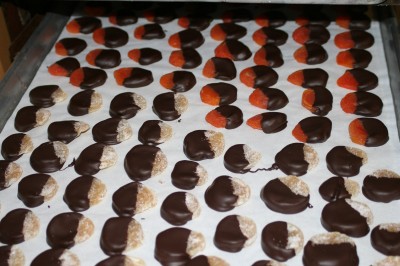
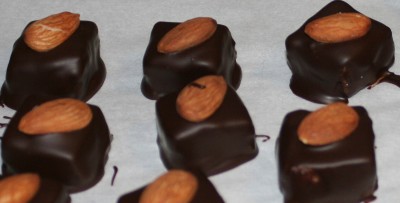
And I made a bunch more dipped chocolates:
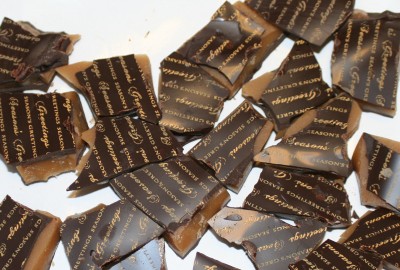
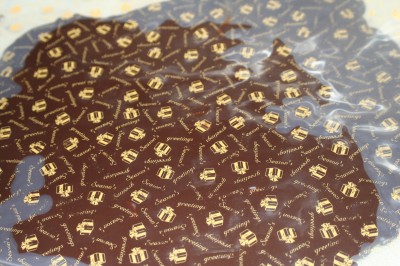
A word of explanation about the last photo: one “prints” on chocolate by applying an acetate sheet, printed with colored cocoa butter, to the freshly dipped chocolate. The cocoa butter melts into the warm chocolate, and when you pull away the acetate sheet, you get printing on the chocolate. I thought it would be interesting to show you a sheet of toffee with the sheet still on it, to get a better idea of how this whole process works. I had some custom transfer sheets printed this year and can’t wait to see how it turns out!
And here is my experiment in peanut butter gianduja:
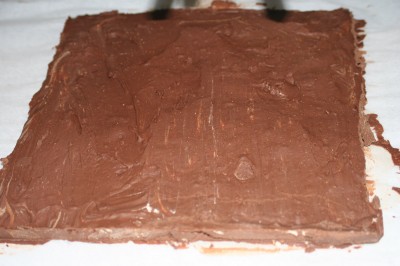
I’m going to have to handle this one carefully; I may “save” it to be the last item dipped. I forgot that I was working with peanuts, and that many people have peanut allergies (including one friend for whom peanuts are literally lethal). Either that or I will scrub down the equipment after dipping it and give away the leftover chocolate (can’t be reused without risking allergy in other people). What a bother! Next year I will try piping it into molds, but I didn’t have the molds cast when I made the gianduja.
At any rate, I have now cast the molds for two types of chocolates, and over the next two days will work on casting the molds for three more types of chocolates (the rest will be dipped). I am also going to start my “mise en place” – the culinary term for making sure everything is prepped as much as feasible, so that when you start cooking you can do so as efficiently as possible. In this case, it means weighing out the perishable ingredients beforehand, cutting the butter into small chunks to make it easier to work with, making fruit purees, etc. This way, when I enter the big time crunch on Wednesday (18 flavors of bonbons MUST be made between Wednesday night and end-of-day Saturday), I won’t have to “waste time” weighing out the dry ingredients – it will all be done and plastic-baggied beforehand.
I’m also going to finish off the candied citrus, I think. It’s nearly ready and I won’t have time to attend to it during the time crunch, so better to finish it off now.
Off to work on my design class homework! I need to come prepped to work on my book during Tuesday morning’s class, which means figuring out what I want to make beforehand, so I can bring the necessary cornucopia of craft stuff. And I can’t work on chocolate until Mike gets up (in about an hour), so I may as well put the time to good use!

Tien – I’m gaining weight just looking at these gorgeous candies!