Tien Chiu

  • Home
  • About Tien
  • C.V.
  • Online Teaching
  • Works
  • Essays
  • Travels
  • Book
  • Blog
  • Dye samples
You are here: Home / Archives for cashmere coat

March 30, 2009 by Tien Chiu Leave a Comment

Buttons and buttonholes

Things have been moving a bit slower than I would have liked, but I am making some progress.  On Daryl’s advice, and after testing several options, I bought a yard and a half of tightly woven plum-colored flannel to use for interfacing.  I drafted the interfacing patterns, cut out the interfacing, and marked it with roll lines, buttonholes, darts, and center front.  I am just about ready to start tailor-basting the interfacing to the coat, and padstitching the lapels.

This is where things get a bit confusing.  Claire Shaeffer’s book, while it covers the main points, doesn’t provide a complete blow-by-blow description of the process.  For example, she doesn’t specify when to add the buttonholes or when to add welt pockets (though she does give instructions elsewhere in the book for creating both).  She does say that couturiers add the buttonholes near the end, not during the initial construction.  But since my last experience in making buttonholes was at least ten years ago (and I have never made a bound buttonhole), I’m not sure I want to wrestle with buttonholes in a nearly-finished jacket.  Doing them earlier just seems smarter considering my experience level.  So I think that, for this first coat anyway, I will do the buttonholes first.

Of course, doing the buttonholes early means that you have the buttons ready.  Since I had planned to make the coat with suede buttons (using the same suede as for the collar/lapel), this meant making the buttons myself.  So I spent some time this evening experimenting with make-your-own-button kits, and discovered that they just aren’t designed for material as heavy as suede.

So instead I took a slightly rounded button with a long shank and covered it with suede, the old-fashioned way.  I cut a circle from the suede, about twice the diameter of the button.  Then I sewed a gathering stitch around the edges, put the button in the center, and pulled both ends of the thread until I had a nice tight gather right around the shank, and the button was smoothly covered in suede.  Looks really nice (except on the back side, which nobody is going to see) and the results are quite durable, I’d expect.  I used heavy-duty thread to reduce stretch and to make sure it held.

That part was easy.

Now I am reading through books to make sure I understand the assembly process.  It is a slow process, because I have three good books on sewing jackets and they sometimes contradict each other.  So I am reading all three, trying to understand the motivations of the author in making that recommendation.  Sometimes it’s speed, sometimes it’s simplifying for the  inexperienced, sometimes it just seems arbitrary.  It’s a little overwhelming, but I’m letting myself puzzle it out because the important part is not actually getting the coat done; it’s learning how to think about fabric, how it behaves and how to work with it.  And the way you learn how to do that is not by blindly following instructions, but by reading and thinking closely about what you are doing and why.  This takes longer, but I’ve got patience.

So I am back to my high-school and college days: reading texts, taking notes, and writing in my notebook my understanding of what they are recommending and why, and also my plans for moving forward.  Because it’s easy to get bored, confused, or just plain overwhelmed with this much information, I plan to do this in tandem with a couple of fairly straightforward things: padstitching the lapels and collar, making the buttons, and practicing bound buttonholes.  All  of these are relatively simple and relatively time-consuming, giving me plenty of time to think while still making progress.

So stay tuned…in a day, a week, a month I’ll start to understand this…and then, by all the myriad gods, THERE WILL BE FIREWORKS!!
Filed Under: All blog posts, sewing, textiles Tagged With: cashmere coat, mohair coat

March 27, 2009 by Tien Chiu Leave a Comment

Basting the backing

Daryl Lancaster and I swapped a couple of emails today – she was kind enough to offer some thoughts on the interfacing and backing.  As I had half suspected, the mohair is too loosely-woven to work well with a sewn-in organza backing.  (There are 1/16″ gaps between the threads!)  If I simply tack it to the organza at the seamlines, over time it will stretch and “bag” at the bottom.  And because of the looseness of the weave, it definitely needs support.

At the same time, the mohair is nubbly enough that a fusible would be problematic – twice over.  First, I don’t want to flatten the “pile” of the brushed mohair by fusing an interfacing on top.  Second, the rough surface would make it hard for the fusible to adhere.

So what to do?  Well, obviously the only thing left was to sew the backing to the fabric, tacking it down across the entire piece of fabric.  And that’s exactly what Daryl recommended.

So that’s what I’ve been doing:

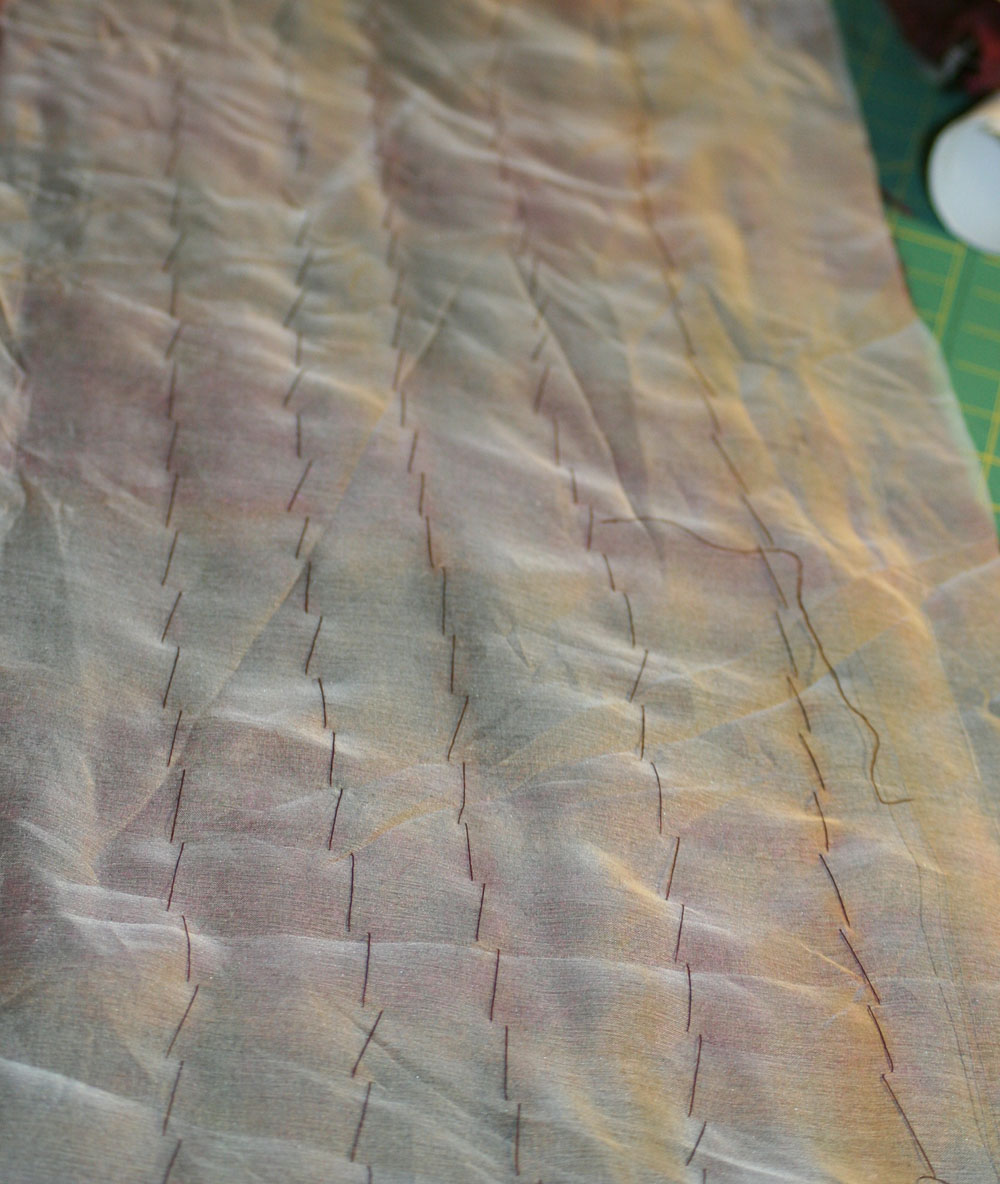
Tailor-basting the backing to the mohair

I have been going through each piece, pinning the backing and the fabric together, then tailor-basting the backing to the fabric.  The stitches are about 1″ in length, and the columns are spaced 1.5-2″ apart.  I’m hoping that will be sufficient.

This is both quick and slow.  The stitches go very quickly, but of course there are a lot of them to do.  I spent about an hour working on it tonight, and have done one back piece, one side panel, and just under half of one sleeve.  I expect I’ll spend a good chunk of time on it tomorrow, and that it will take me two or three hours to get  it done.

This is  not bothering me.  The rest of this whole cashmere-coat voyage has been fairly slow, and this falls right in line with the rest.  Moreover, it’s contemplative, and quiet, both things that I need really badly right now.  And it’s hand-stitching, which I enjoy.

I have never really liked the sewing machine.  It is undoubtedly faster, and in some cases better, than hand sewing.  But it never feels “alive” to me, in the way that a loom does, or that a needle and thread do.  I use it like I would use a computer – something that you work with, but which has no relationship to you – no “soul”.  To me, a sewing machine is something standing between me and the fabric.  I like hand sewing a lot better, and am seriously considering hand sewing this coat.  To me, it is not just a garment, but also a meditation of sorts, and I feel like a machine gets in the way.  The sewing machine, to me, is focused on efficiency, and that is not what this coat is about.

So I am really enjoying this basting work.  It is giving me time to explore the silent, empty spaces, a wordless meditation.

Filed Under: All blog posts, musings, sewing, textiles Tagged With: cashmere coat, mohair coat

March 26, 2009 by Tien Chiu Leave a Comment

Cutting and basting

Yesterday, after a deep breath, I took my courage in both hands and started cutting the fabric.  First I cut out the mohair (I botched one cut, so there was just barely enough fabric to finish!), then I cut the organza backing.  Then I started basting the organza to the mohair.

I had planned to baste the organza to the mohair initially using a rather expensive wash-out glue, that being easier to “stitch” without distorting the fabric.  However, I rapidly discovered that the fabric was too nubbly, and too loosely woven, for this to work.  The glue vanished into the crevices.  So I settled for hand-basting every piece.  I’ve finished basting nearly all the pieces and expect to start preshrinking/cutting the interfacing tonight.

I discovered along the way, though, that this beautiful mohair fabric was woven using a loop yarn!  No wonder the brushed surface is so lofty, and the back side so nubbly.  It also has long floats carried along the edges, that I’ve never seen on machine-woven fabrics before.  I’m starting to wonder if this fabric was handwoven, too!  (The original price was $90/yd, from Britex, so it was certainly expensive enough to have been.)

Anyway, I took a few shots of the backside of the fabric, to give you the look of it.  It’s impossible to catch the nubbly  soft “hand” of it, though – it really is delightful stuff.

I also took a few photos of the work-in-progress:

The backside of the brushed mohair fabric, showing the boucle yarn used to weave it.  Click on it to get the  closeup version.
The backside of the brushed mohair fabric, showing the boucle yarn used to weave it. Click on it to get the closeup version.
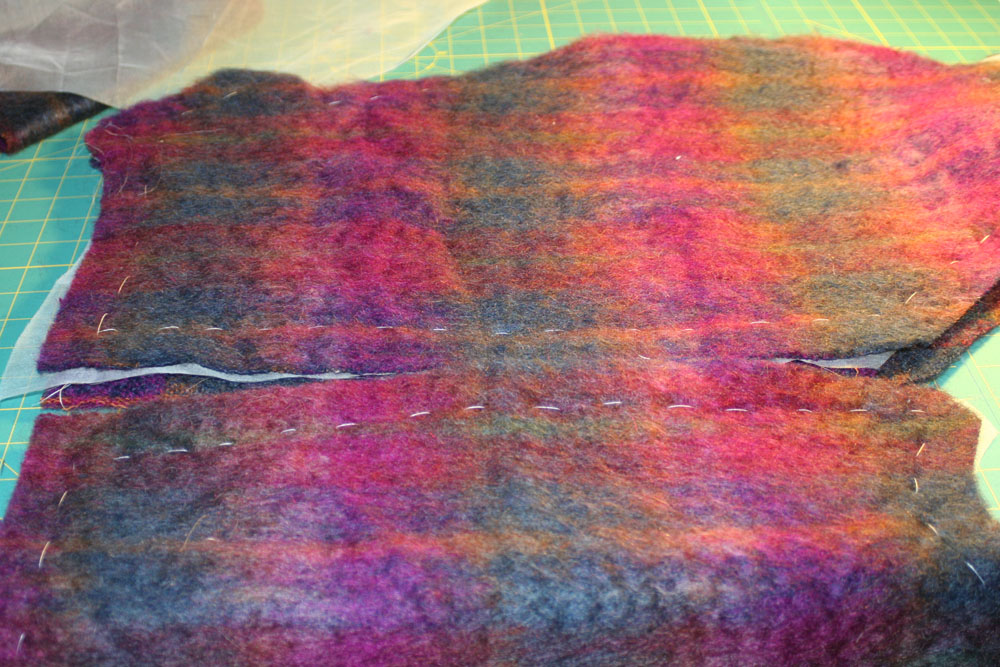
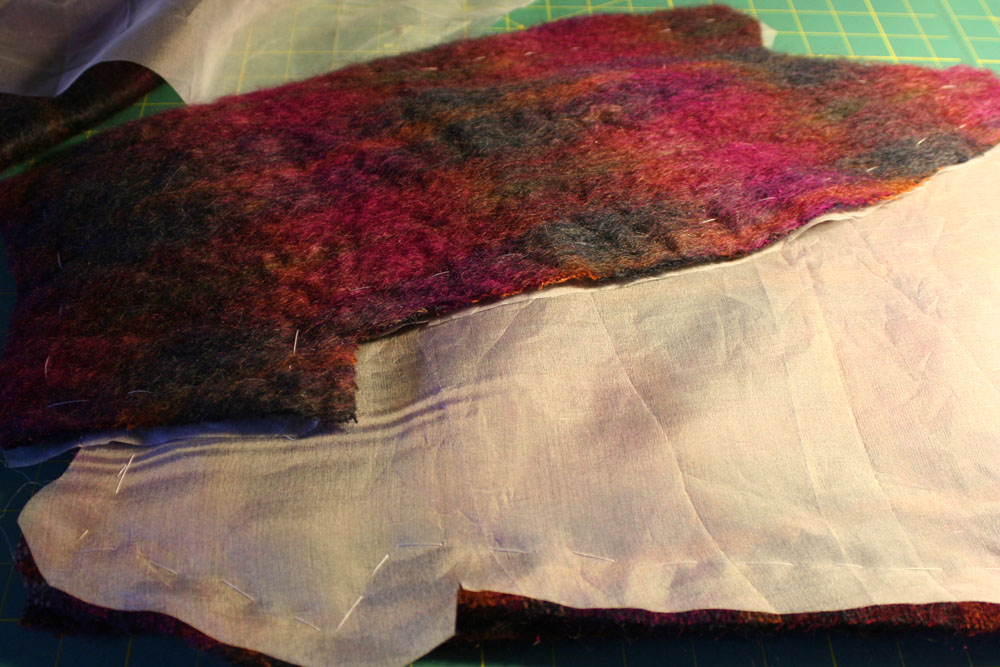
I was pleased to note that I had successfully matched the stripes on the two parts of the two-piece sleeve.
Top, the public side of the lower sleeve piece; bottom, organza-backed private side of the upper sleeve piece.

I almost forgot to mention that I bought some suede!  It is a dark hunter green, and complements the fabric beautifully.  It will make great lapels + collar.  Pix tomorrow, or in the next post, whenever that is.

Filed Under: All blog posts, sewing, textiles Tagged With: cashmere coat, mohair coat

March 24, 2009 by Tien Chiu Leave a Comment

Dyeing the lining

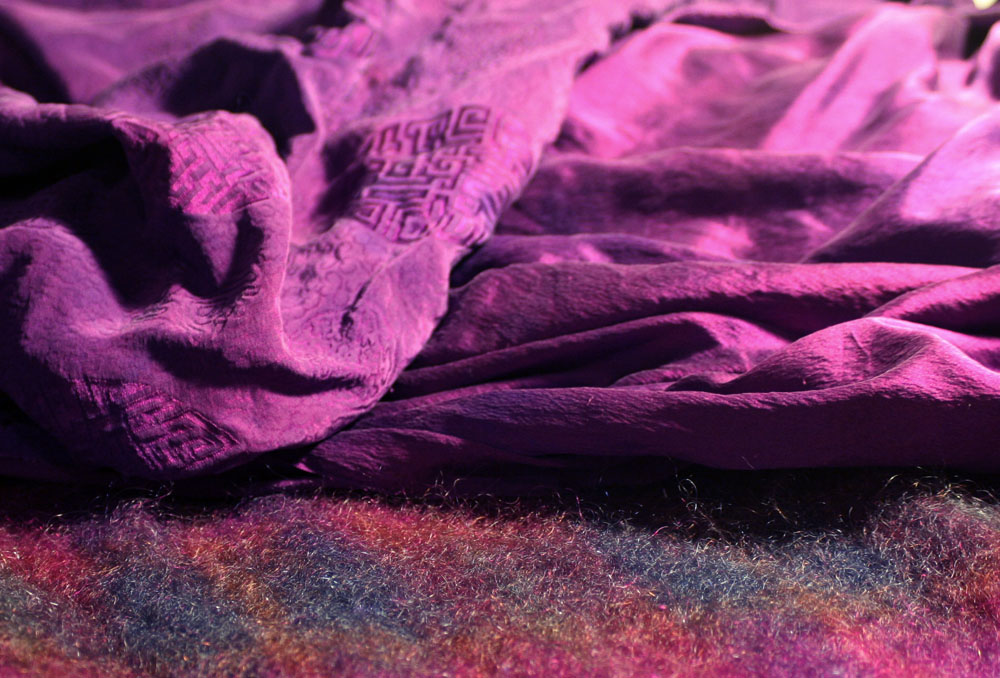
Last night I preshrunk the mohair (dunked into warm water, swished around a bit, spun out to dry and then allowed to dry flat) and dyed the lining.  It’s gorgeous!  Here’s a photo:

The lining for the mohair coat

Despite some fiddling in Photoshop, the photo is not quite true to color – the lining is actually a beautiful, deep iris purple.  It’s actually been through three dyebaths: one fiber-reactive (alkaline) dyebath in Sabracron F dyes, one acid dyebath using Sabracron F dyes, and one acid dyebath using Washfast Magenta acid dyes.

This was not intentional.  I had intended to do just one dyebath, to a fuschia-purple, with the Sabracron F, and carefully measured out my dyes.  Alas, my water was apparently not hot enough for the Electric Blue to “take” (it can be fussy that way), and I wound up with a pretty shade of lilac.  Which clashed with the mohair.

So I decided to redye it, and to see whether Sabracron F worked as an acid dye.  (Procion MX fiber-reactives “go both ways”,  but I wasn’t sure whether Sabracron F, which is slightly different chemically, did.)  Into the dyepot it went, along with the Sabracron F Electric Blue and some citric acid.

It behaved differently than I expected.  Normally, with Sabraset dyes, the dye “strikes” very quickly and leaves no trace behind.  With the Electric Blue, it took nearly 20 minutes at 180 degrees to “strike”, and the water still had plenty of blue in it.  I snipped off a small sample, washed it, ironed it dry (nobody ever accused me of patience), and took a look.  Gorgeous, cool blue-violet.  Not appropriate to the mohair, which was all warm shades.

So I went back to the dye cabinet, grabbed some Washfast Fuchsia, dumped it into the boiling dyebath, stirred furiously, and hoped for the best.  And it worked!  The end result is warm, deep royal/iris purple, and it will be perfect as lining.

Today I plan to adjust my patterns.  I am following Claire Shaeffer’s instructions from Couture Sewing Techniques, and the first thing she mentions is that couture sewing uses 1″ seam allowances.  Presumably this is to allow adjustment for fitting issues.  I have adjusted my muslin countless times and I’m pretty sure it’s right, but allowing some leeway for adjustment seems like a sensible thing, so I’m going through all my pattern pieces (and there are a lot of them) and adding 3/8″ to the seam allowances.  This is not quite as bad as it sounds as a lot of the lines are perfectly straight, so I can use my quilting ruler.  I may also “cheat” and use a double tracing wheel and transfer paper to mark the enlarged pattern before cutting.  That is less accurate, though, so I will probably do it the harder-but-better way.

I’d be lamenting having to change my lining pattern pieces as well, but Shaeffer recommends not using lining patterns, instead draping the lining before stitching in place.  I don’t know if my skills are up to that, but it’s worth a try.

After that the next step will be cutting the pattern pieces.  I am going to use the mohair backed with silk organza, so I will need to cut out the organza and mohair pieces and sew them together.  Backing with silk organza will stabilize the mohair and also make it easier to transfer any markings.  For accuracy, I  plan to baste in place with a quilting applique glue that comes out easily and leaves no traces  whatsoever behind.  Then I will probably baste the organza in  place by hand.

Tomorrow the sew-in hair canvas interfacing should be arriving – good, high-quality hair canvas, 60% wool and 40% goat hair.  I will also be able to stop by Fabric Outlet to buy the suede for the lapels.  At that point I can cut the facings, and send off the remaining scraps to be made into buttons.  After that, it’s the slow process of putting on the interfacing (which must be “quilted” to the fabric, by hand, slowly), and after that, who knows?

I’m really looking forward to this.  Working with quality goods that I like is totally different from working with icky, ugly fabric.  This will be worth the investment.

Filed Under: All blog posts, sewing, textiles Tagged With: cashmere coat, mohair coat

March 23, 2009 by Tien Chiu Leave a Comment

Brushed mohair

I just remembered the brushed mohair I bought at Britex, thinking to use it as an underlining!  It will be just perfect.  One piece is a pink/black/white plaid that I don’t like at all, but the other is a blue/gold/purple/fuchsia diffuse plaid that I really like.  It’s big enough to do an entire coat mockup with, too.

I will do the collar/lapel in leather, to get the practice, but I’m not sure I like the black – it looks a little stark against the muted purples and blues.  Here’s a photo to get the idea:

Brushed mohair fabric for the "practice" coat

Tomorrow I have to be up in SF for work, so I’ll stop by Fabric Outlet and check out their suede collection, to see if they’ve got other colors.  I have 3 yards of white silk jacquard that I think will do for a lining, and some extra silk charmeuse in case that’s not enough.  I will, of course, dye it to match the mohair (perhaps blue, perhaps a bright fuchsia); I think I’ll do that tonight.  I’ll also soak the mohair in warm water, spin it out, and let it dry flat.  That should preshrink it nicely.  After assembly, it’ll be dry clean only, but I want to make sure it doesn’t shrink too much when pressed.

So not only do I have some nice fabrics to use, but I’m clearing out stash as well!  Now this is a test project I can feel good about!

Filed Under: All blog posts, sewing, textiles Tagged With: cashmere coat, mohair coat

  • « Previous Page
  • 1
  • 2
  • 3
  • 4
  • 5
  • …
  • 11
  • Next Page »

Archives

Tags

aids lifecycle outfits autumn splendor book cashmere coat cats celtic braid coat color study cross dyeing design design class devore doubleweave doubleweave shawls drawing dye samples dye study group gradient colors house infinite warp jacquard loom katazome knitted blanks kodachrome jacket ma's memorial mohair coat network drafted jacket/shawl project network drafting painted warp phoenix rising phoenix rising dress phoenix rising kimono phoenix rising reloaded pre-weavolution project sea turtles taquete tie-dye tied weaves tomatoes velvet weaving drafts web design website redesign wedding wedding dress woven shibori

Categories

  • Africa
  • aids lifecycle
  • All blog posts
  • All travel posts
  • Asia
  • Bangkok
  • Belize
  • Cambodia
  • Central America
  • Chai Ya (Wat Suon Mok)
  • Chiang Mai
  • Chiang Rai (Akha)
  • China
  • chocolate
  • computer stuff
  • creating craft
  • Creative works
  • cycling
  • Delhi
  • Dharamsala
  • drawing
  • dyeing
  • Fiber Arts
  • finished
  • food
  • garden
  • Ghana
  • Guatemala
  • Hanoi
  • Ho Chi Minh City
  • Hoi An
  • India
  • Khao Lak
  • knitting
  • Knitting
  • Ko Chang
  • Laos
  • Luang Namtha
  • Luang Prabang
  • markleeville death ride
  • meditations on craft
  • mental illness
  • musings
  • Phnom Penh
  • powerlifting
  • Rewalsar (Tso Pema)
  • sewing
  • Siem Reap (Angkor Wat)
  • Southeast Asia
  • surface design
  • textiles
  • Thailand
  • travel
  • Vangvieng
  • Vientiane
  • Vietnam
  • Warp & Weave
  • weaving
  • Weaving
  • weavolution
  • writing

© Copyright 2025 Tien Chiu · All Rights Reserved ·

Loading Comments...