Tien Chiu

  • Home
  • About Tien
    • Honors, Awards, and Publications
  • Online Teaching
  • Gallery
  • Essays
  • Travels
  • Book
  • Blog
  • Dye samples
You are here: Home / Archives for phoenix rising dress

June 10, 2013 by Tien Chiu 7 Comments

Radical changes

I spent most of yesterday tinkering with the design and mostly hating it. It didn’t feel right, no matter what I did. Finally I sat down and thought about why I wasn’t liking it.

skirt muslin with phoenixes flying different directions

Here’s what I realized:

  • The organic flame shapes on the top weren’t working well with the rigid phalanxes of phoenixes at the bottom.
  • The phoenixes and the bodice were battling for attention, so the eye didn’t know where to go.
  • While the top was well aligned and felt harmonious, the phoenixes were flying every which way in chaos.
  • There wasn’t enough color difference between the layers of the skirt, so they blended into mush.

I spent some time thinking about how to fix it, and reluctantly decided that there really wasn’t any way to reconcile the top with the bottom. Since I wasn’t about to give up the phoenixes, the beautiful flame shapes, no matter how lovely, had to go.

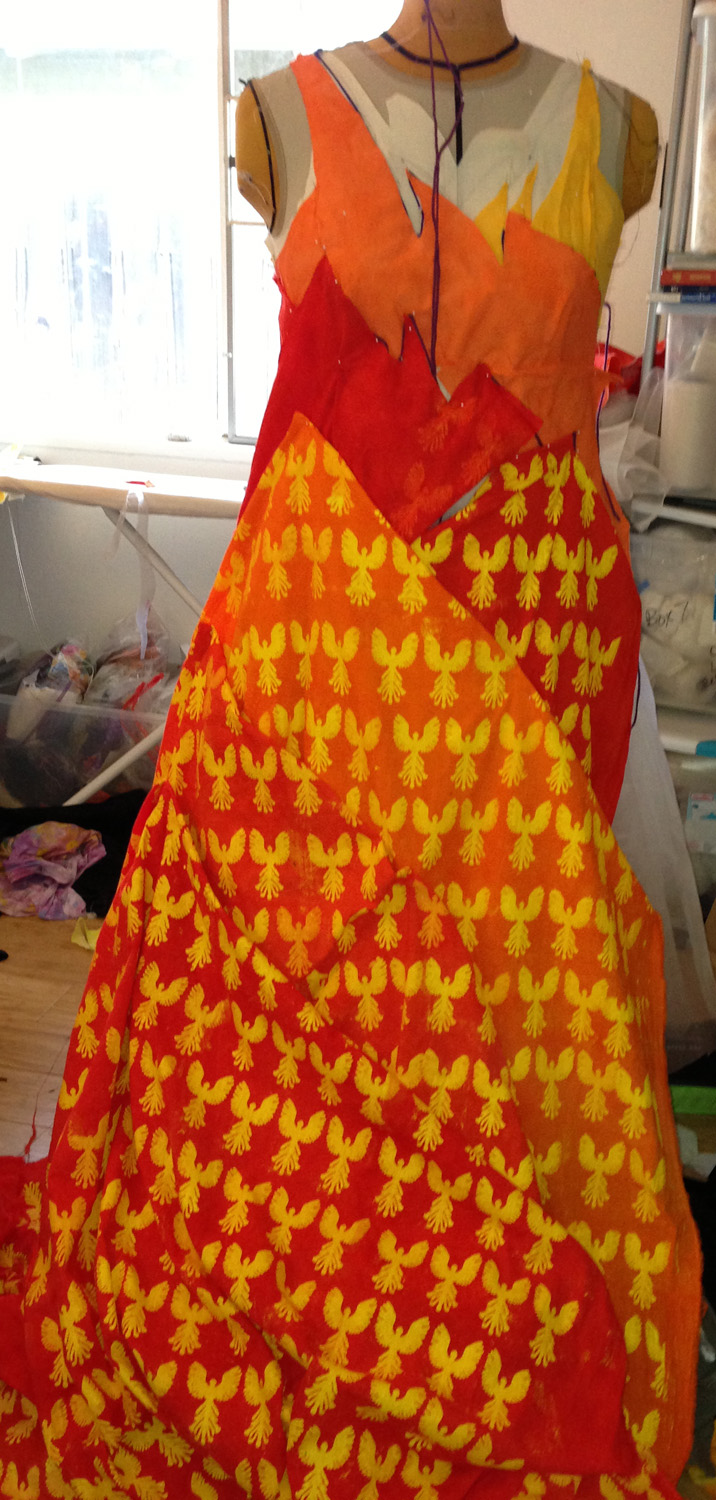
You may recall that I had experimented with simulating a painted warp by monoprinting roughly-painted thickened dye in gradated colors. Also that those prints hadn’t worked with the flames. But could they work for the new bodice? I hauled them out to try.

And here’s what I wound up with:
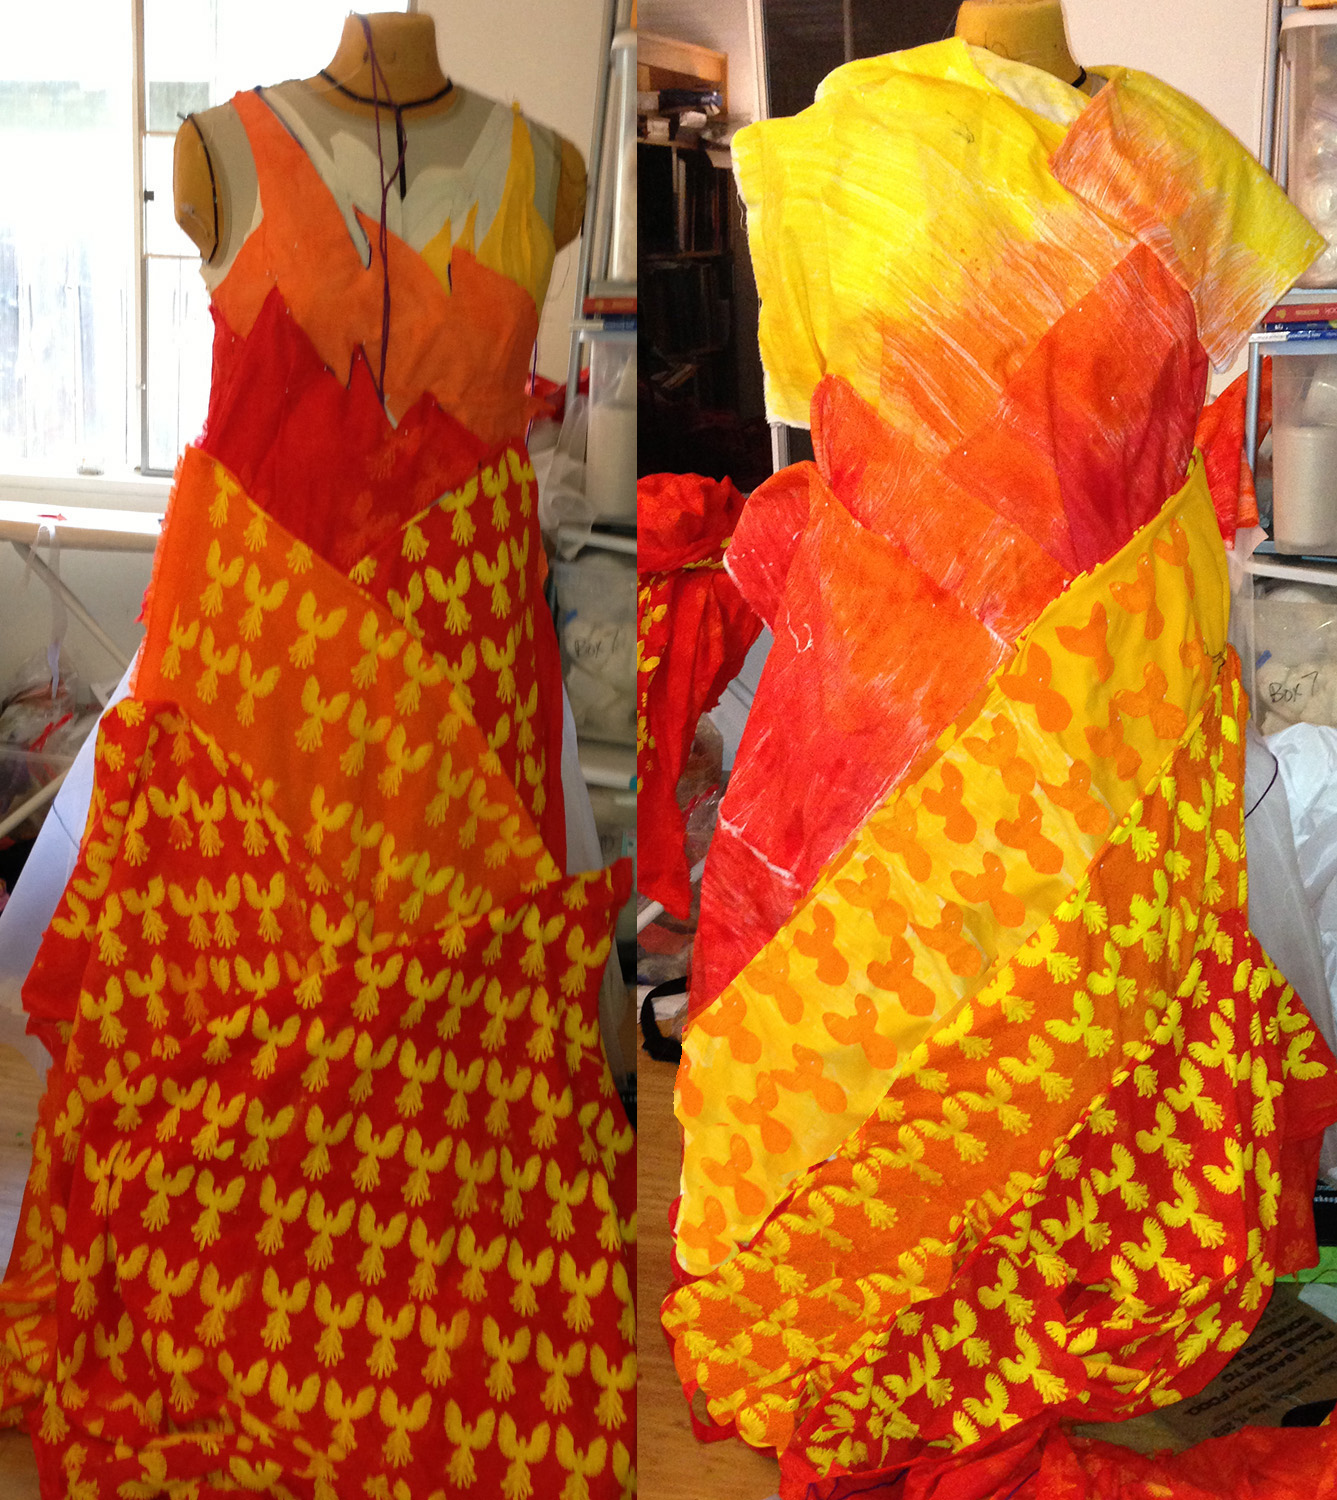
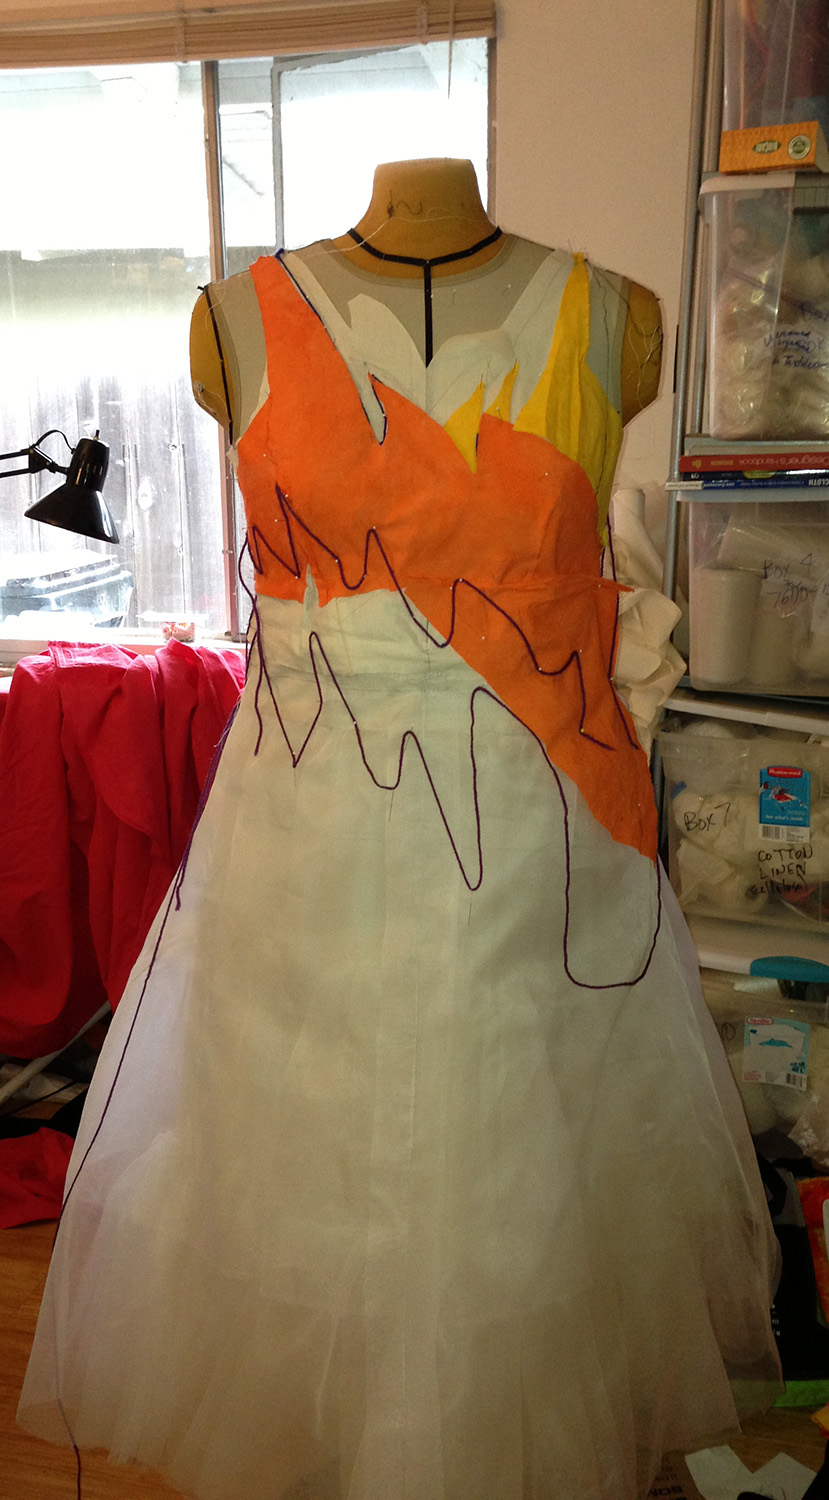
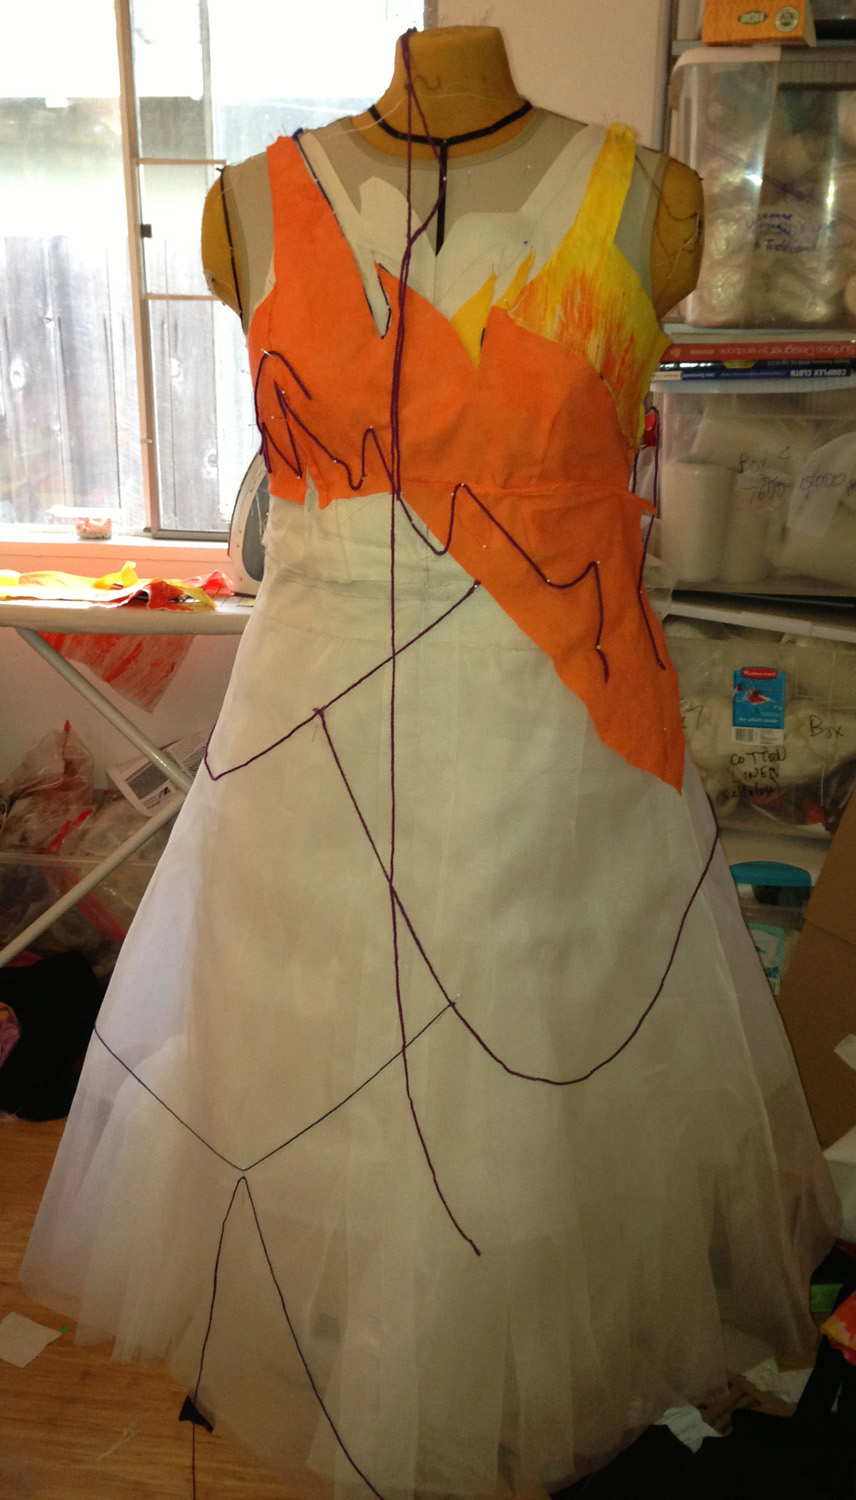
phoenix rising muslin, version 1 vs. version 2

Obviously version 2 isn’t done yet: I’ve only laid out the colors, really. But I like it better, because the lines are more harmonious, the bodice is much simpler (no longer fighting the skirt for attention), and it just “feels” less busy.

Plan for today is to dye some fabric a deep golden yellow with just a touch of orange, and screen print it with orange phoenixes as in the photo. I also want to paint some fabric in yellow, orange, and red so I can better simulate the diagonal expanse of painted warp that I’m visualizing from the dummy’s top right shoulder (top left of photo) down to the waist at bottom left (right side of photo). It’s currently represented by two pieces of fabric because I didn’t have a piece with the correct color changes, but it should really be a single smoothly flowing piece.

And then, of course, I need to lay out the lines for the bodice, so it isn’t just roughly-wrapped fabric. And figure out the sides and the back. And so on. But I am quite excited about this new direction.
Filed Under: All blog posts, sewing, textiles Tagged With: phoenix rising, phoenix rising dress

June 9, 2013 by Tien Chiu Leave a Comment

Much progress

Much progress lately! Thursday and Friday I dyed four lengths of muslin in various shades of orange and scarlet, and yesterday I screen printed the yardage with a phoenix pattern to mimic the handwoven fabric that will be used. This morning I began draping. I’m still roughing out the very broad design, and don’t expect it to be finalized until sometime next week, but here’s my process so far.

First, I tested to see whether a painted warp would be more interesting than solid colors in the bodice. Here’s the original bodice:

photo of muslin
starting to draw lines on the torso

I had mimicked a painted warp by monoprinting some fabric with a mix of yellow and orange, with broad bands where the strokes of orange and yellow overlapped. I then cut a piece out of the monoprinted fabric and put it on one section of the yellow, like this:

muslin with one simulated painted warp section

I didn’t like it. I thought about it and eventually realized that the problem was shape vs. color: the striation of the orange-yellow color transition blurred the shape of the orange flame. The original was all about the flame shapes, and the addition of color transitions blurred that, making an unclear design.

Still, I wasn’t quite sure whether the painted warp effect could be used in this design, so I added a second piece of “painted warp” fabric, this time in orange-red:

musllin with two "painted warp" sections
musllin with two “painted warp” sections

Now I was quite sure this wouldn’t work: the edge of the flame was lost and the fact that the lines were going in different directions produced complete visual confusion. So I went back to the solid fabric.

Next up was the skirt, which was to be made of phoenix-patterned fabric, transitioning gradually from orange at top to scarlet at the bottom. In my first attempt, I kept the fabric on grain, which forced all the phoenixes to fly in the same direction: up. Here’s what it looked like:

muslin skirt, with all the phoenixes flying upward

This doesn’t work. First, it’s pretty boring, visually – the different skirt tiers all blend into each other, looking like a single skirt when they should be distinct. Second, it looks rigid, in a piece that is all about flow and movement.

So I switched it to have the phoenixes flying in different directions:

skirt muslin with phoenixes flying different directions

I like this better, tentatively speaking – it has more motion, and you can easily distinguish the tiers of the skirt. The phoenixes are still flying generally upward, moving the eye up the dress to the torso, but less rigidly. It feels more like a flock of birds swirling in the sky. So I am going to work with this some more.

(Taking the fabric off grain will force me to underline the fabric with something stable and on-grain, but that’s fine with me: I had planned to line it to finish the edges, and a soft china silk should stabilize the fabric while still letting it flow.)

Obviously there is a lot left to do – I haven’t finalized the basic lines yet, much less the flame-shaped borders, and have not even thought about the sides and back – but it’s a good start. And it’s still early in the day, so I have time to do lots of tinkering!

Filed Under: All blog posts, sewing, textiles Tagged With: phoenix rising, phoenix rising dress

June 6, 2013 by Tien Chiu Leave a Comment

Mapping out the torso

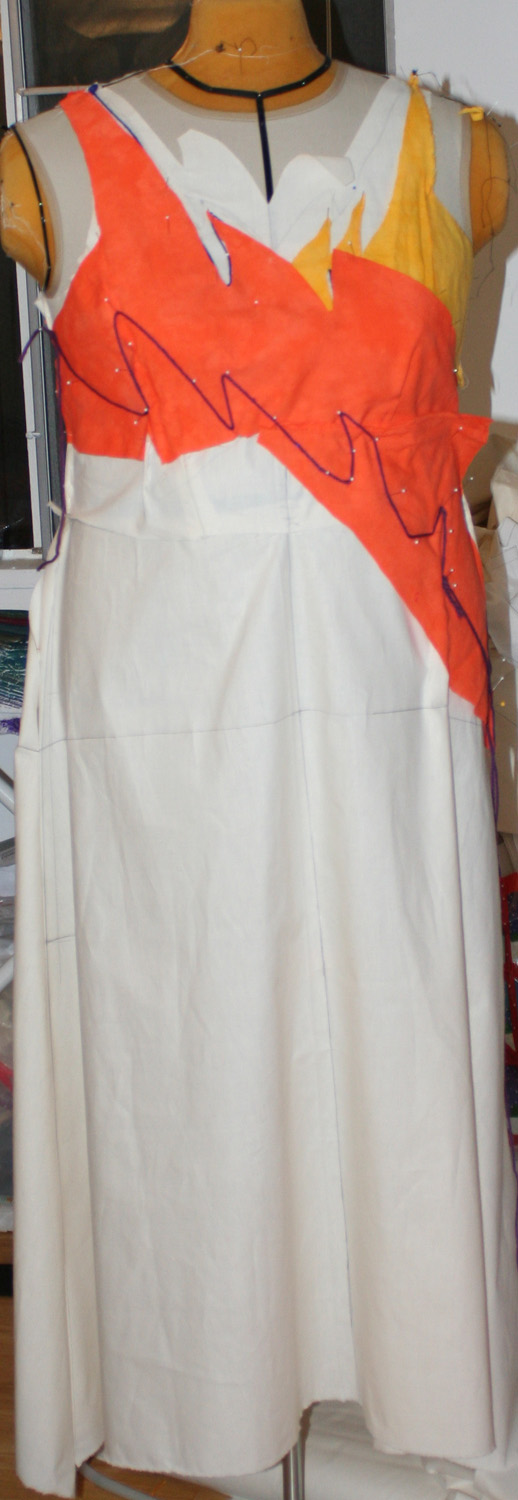
The last few days have been pretty busy at work, and I’ve been getting home mentally exhausted. Nonetheless, I’ve gotten quite a bit done on Phoenix Rising. I’ve gathered twenty yards (!) of organza ruffle for the skirt, and put on an organza overskirt. The crinoline for the muslin is now complete, and I’m starting to map out the torso colors:

photo of muslin
starting to draw lines on the torso

These are purely preliminary; I’m not at all happy with the lower tier of the torso (which will be red). I  think it needs to echo the asymmetry in the orange and yellow, not just follow the orange edge slavishly down. So many adjustments are in order! I expect to fiddle with this for the rest of the week.

I also need to dye some more muslin, in various shades of yellow, yellow-orange, and red. So there is a lot to do! But I am hoping/expecting to finish laying out the visual design this weekend, finishing the first muslin.

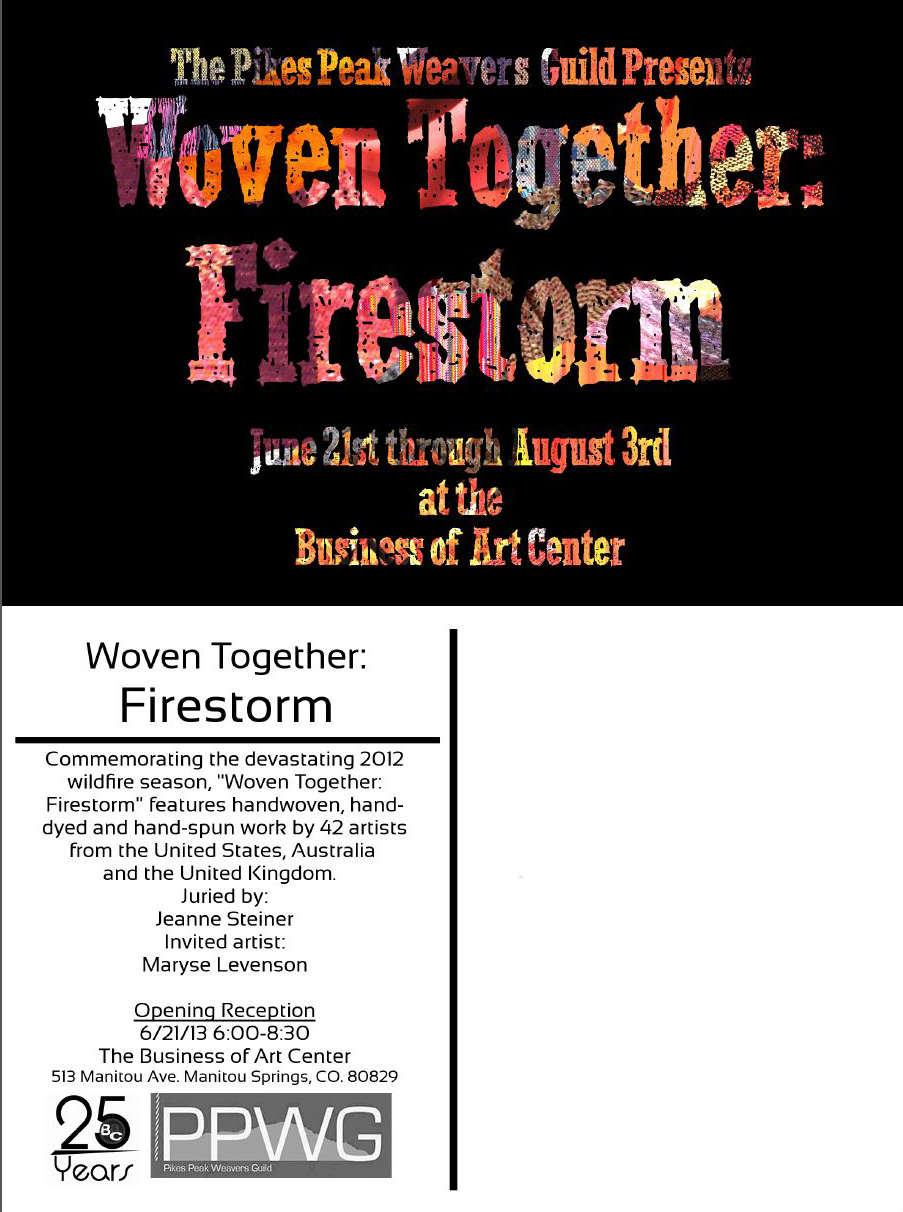
Meanwhile, the Pikes Peak Weavers Guild exhibit Woven Together: Firestorm is about to open, and I am pleased to say that my In the Inferno: Firebirds! scarf will be in it! So if you are in the area, please stop by (and I’d love a report!):

Firestorm postcard

Off to work! Things there are marvelously exciting, if exhausting, so all in all, it’s been a wonderful week, at least so far.

Filed Under: All blog posts, sewing, textiles Tagged With: phoenix rising, phoenix rising dress

May 27, 2013 by Tien Chiu Leave a Comment

Muslin progress

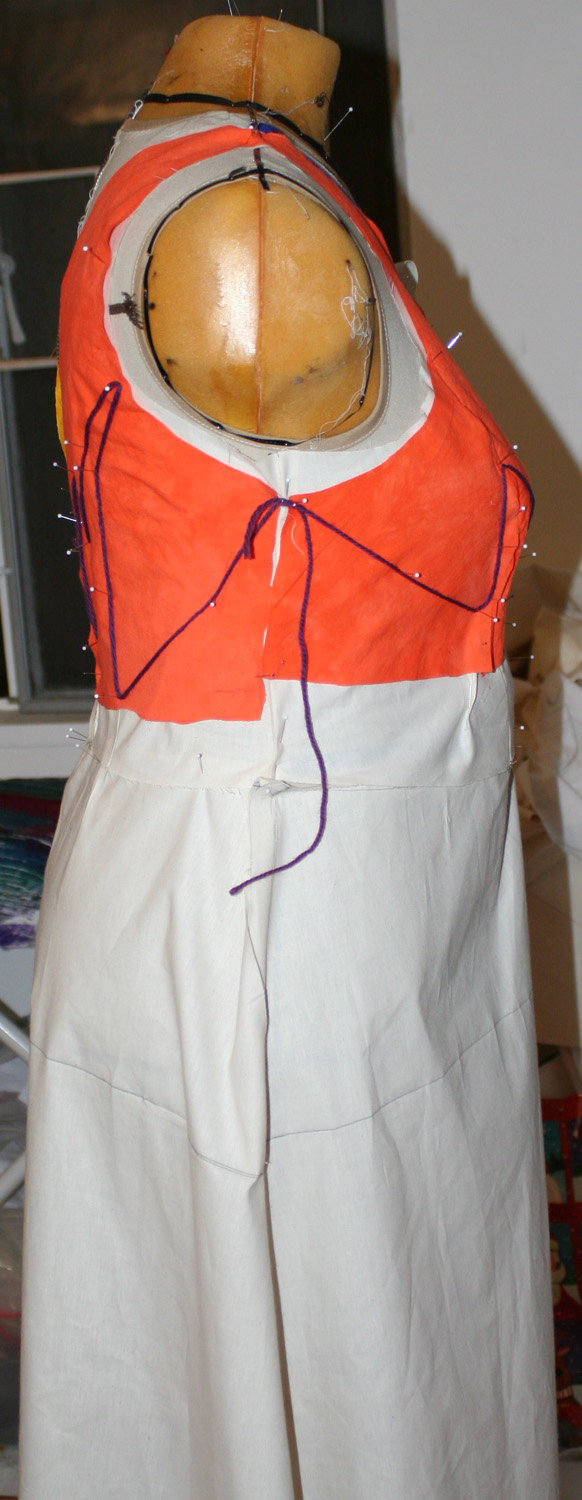
Sharon and I spent several hours playing with the draped muslin for Phoenix Rising. She corrected some problems in the bodice, and then we started playing with the arrangement of colors in the bodice. Here’s what we wound up with, after two hours of playing around:

muslin, front view
muslin, front view
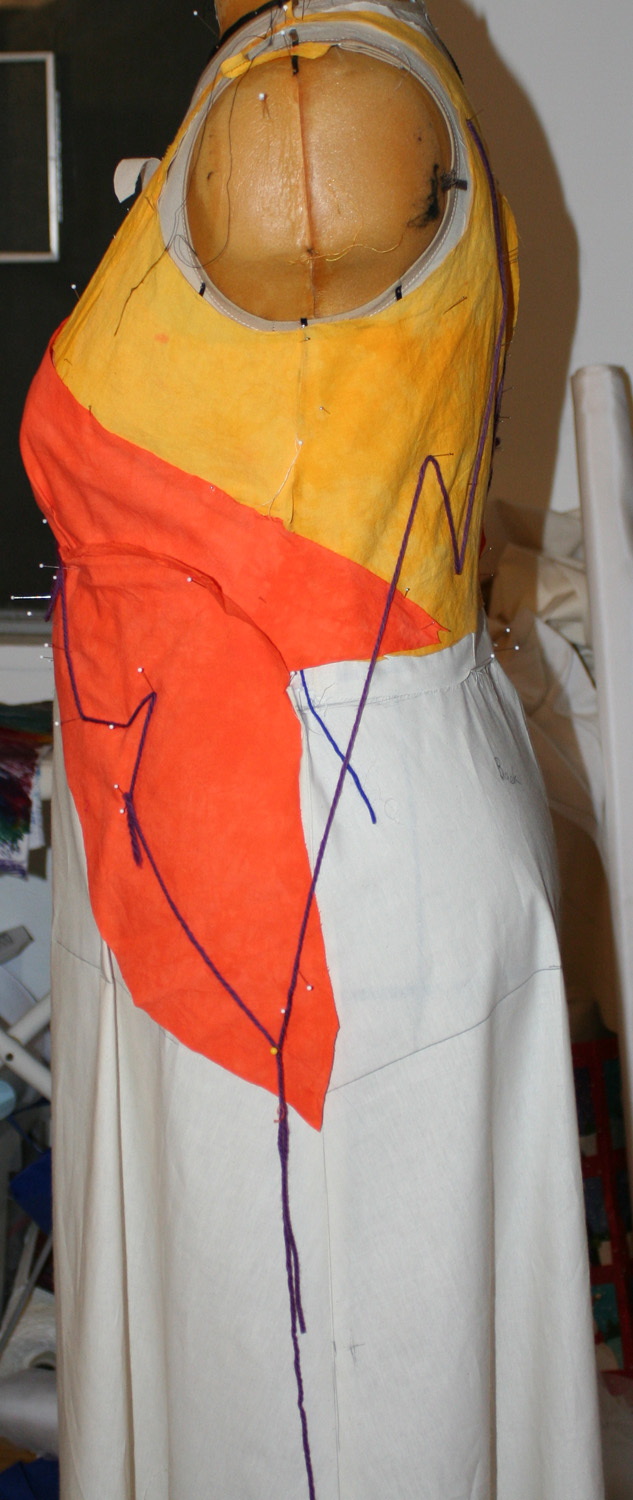
Muslin, right side
Muslin, right side
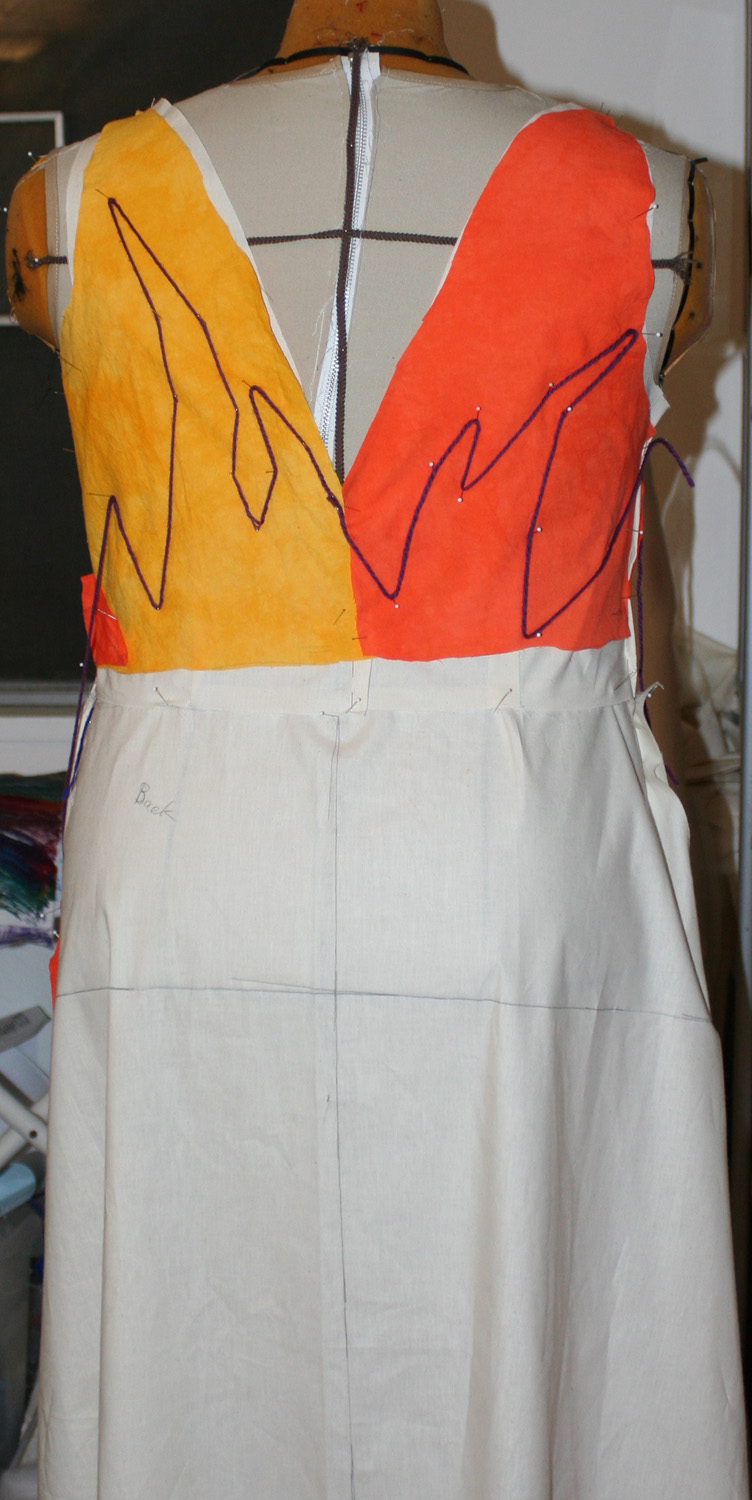
muslin, back view
muslin, back view
muslin, left side
muslin, left side

The sections underneath the purple lines will be in red fabric, which will finish out the bodice. Underneath the bodice will be three skirts made from phoenix fabric – starting out with yellowy orange, then orange-red, then red.

There is, obviously, quite a bit still to be defined about the design, but it’s a start. Next steps?

First, the skirt needs to be rebuilt. There is too much flare at the hip, which will prevent the bodice from descending smoothly on the left side. So I am going to put in a three-inch yoke at the waistline and start the flare of the skirt at the end of the yoke. That will give it a little flare, but hopefully not too much. I will also take out some of the flare at the bottom, as it will make the crinoline unpredictably bulky.

Once I redo the skirt, I’ll add ruffles to make the crinoline that “fluffs out” the skirt. Sharon and I spent some time discussing this, and eventually decided to try out silk organza for the ruffles, as we’re worried about the weight of the skirt. We think organza will give more fluff to the skirt per unit weight than tulle would, and organza will also hold up better against a heavy skirt. So I’ve ordered fifteen yards of silk organza and will dye it appropriately when it arrives.

Once all that is done, I’ll resume draping, this time starting with the bottom of the skirt. Once I’ve done the three tiers of skirt, it will be time to come back and finish the red of the bodice. Yes, I have a lot of work cut out for me! I’ll be visiting Sharon again in about three weeks, and hope to have much of the infrastructure done by then.

Off to monoprint some more! The sun is finally up, so I can start dyeing, and I have one more precious day before the new job starts tomorrow. Better make the most of it!

Filed Under: All blog posts, sewing, textiles Tagged With: phoenix rising, phoenix rising dress

May 21, 2013 by Tien Chiu Leave a Comment

Planning a five-day orgy

An orgy of studio work, that is. (Mind you, I have nothing against the other kind, but given that I’m an introvert, I think the studio orgy is apt to be more interesting!)

I’m essentially redundant at work by now, so I’ve been taking some of my free time and analyzing the different kinds of surface design I might play with. Here is a rough breakdown of how I intend to spend my time:

Day One:

  • prep work (mixing dyes, print paste, soda ash soak for cotton)
  • Play with applying soy wax resists – stamping, drawing with a tjanting tool, using my tjap.
  • Apply thin dyes, thick dyes, etc. to resisted fabric with brushes, stamps, etc.

Day Two:

  • Fold, tie, and dye a bunch more stars
  • Work more with soy wax resists
  • Play with mark-making using thickened dyes:
    • Writing/drawing lines
    • Scraping
    • Making marks with a credit card or similar object
    • Using a roller
    • Brushing
    • Stamping
Day Three:
  • More mark-making
  • Monoprinting
  • Thermofax screen printing
  • All above with water soluble resists
Day Four:
  • Screen printing using cut stencils
  • Deconstructed screen printing?
  • Layering more pattern on fabrics dyed in previous days
Day Five:
  • Mix paints
  • Play with stamping, stenciling, etc. paint on dyed fabrics
  • Clean up!

This is a rather ambitious slate, of course, and odds are that I’ll get sidetracked long before Days 4 and 5. That’s fine; those days are only roughly sketched anyway, and I’ll be delighted if something happens to pull me in a new and different direction. Also, I am planning to do some work on Phoenix Rising during those five days, so not everything will get done. That’s OK! The point here is to play. And to make the most of my five days between jobs.

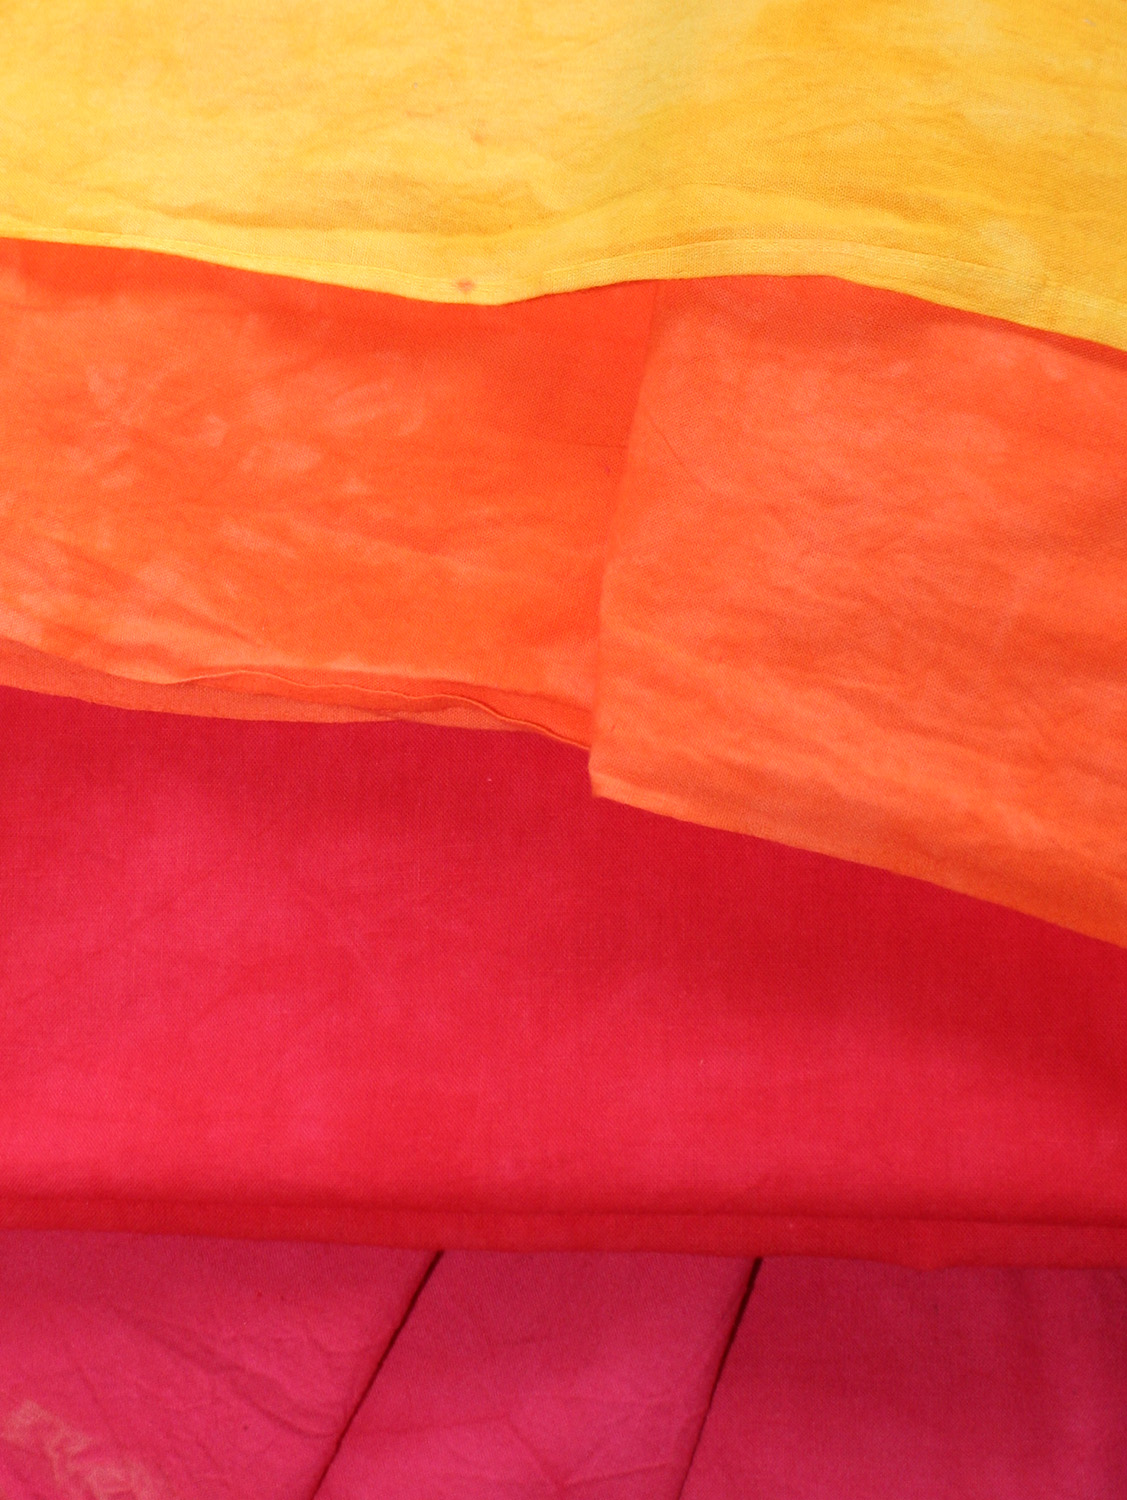
Meanwhile, I have dyed the fabric for Phoenix Rising’s first muslin:

Dyed fabric for first muslin

I’d really prefer the orange-red to be more orange, but it’s not bad for a first stab. I won’t be using this fabric immediately, though – I need to build the undergarment and crinoline before doing the pretty stuff.

Filed Under: All blog posts, dyeing, surface design, textiles Tagged With: phoenix rising, phoenix rising dress

  • « Previous Page
  • 1
  • 2
  • 3
  • 4
  • 5
  • Next Page »

Archives

Tags

aids lifecycle outfits autumn splendor book cashmere coat cats celtic braid coat color study cross dyeing design design class devore doubleweave doubleweave shawls drawing dye samples dye study group gradient colors house infinite warp jacquard loom katazome knitted blanks kodachrome jacket ma's memorial mohair coat network drafted jacket/shawl project network drafting painted warp phoenix rising phoenix rising dress phoenix rising kimono phoenix rising reloaded pre-weavolution project sea turtles taquete tie-dye tied weaves tomatoes velvet weaving drafts web design website redesign wedding wedding dress woven shibori

Categories

  • Africa
  • aids lifecycle
  • All blog posts
  • All travel posts
  • Asia
  • Bangkok
  • Belize
  • Cambodia
  • Central America
  • Chai Ya (Wat Suon Mok)
  • Chiang Mai
  • Chiang Rai (Akha)
  • China
  • chocolate
  • computer stuff
  • creating craft
  • Creative works
  • cycling
  • Delhi
  • Dharamsala
  • drawing
  • dyeing
  • Fiber Arts
  • finished
  • food
  • garden
  • Ghana
  • Guatemala
  • Hanoi
  • Ho Chi Minh City
  • Hoi An
  • India
  • Khao Lak
  • Knitting
  • knitting
  • Ko Chang
  • Laos
  • Luang Namtha
  • Luang Prabang
  • markleeville death ride
  • meditations on craft
  • mental illness
  • musings
  • Phnom Penh
  • powerlifting
  • Rewalsar (Tso Pema)
  • sewing
  • Siem Reap (Angkor Wat)
  • Southeast Asia
  • surface design
  • textiles
  • Thailand
  • travel
  • Vangvieng
  • Vientiane
  • Vietnam
  • Warp & Weave
  • weaving
  • Weaving
  • weavolution
  • writing

© Copyright 2025 Tien Chiu · All Rights Reserved ·


Loading Comments...