Tien Chiu

  • Home
  • About Tien
  • C.V.
  • Online Teaching
  • Works
  • Essays
  • Travels
  • Book
  • Blog
  • Dye samples
You are here: Home / Archives for phoenix rising

November 21, 2013 by Tien Chiu 6 Comments

Unexpected results

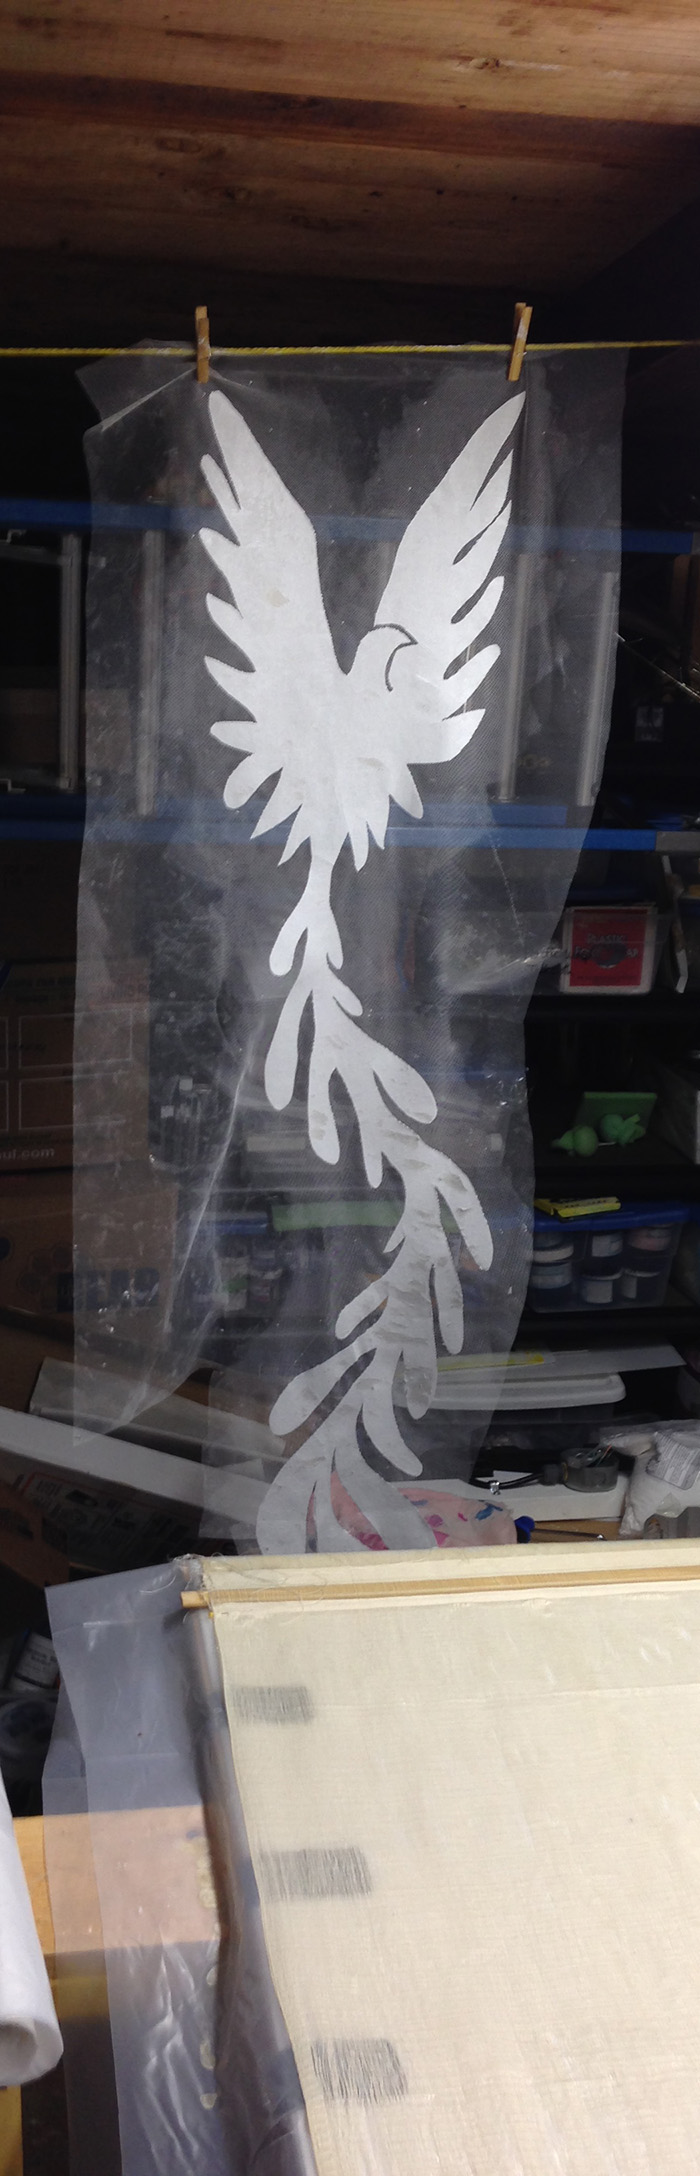
I uncovered and rinsed out my warp yesterday morning. Here’s what it looked like before rinsing:

stenciled warp, before rinsing

I was worried about backstaining (getting black dye into the white areas while rinsing), so I did the first two rinses in ice water. This removes the soda ash, so the dye can no longer bind to the fiber. The ice is to lower the temperature, preventing the dye from reacting before the soda ash is removed. Then I did two more rinses in hot water to remove the unbonded dye. Here we are, going from the second rinse (ice water) into the third (hot water).
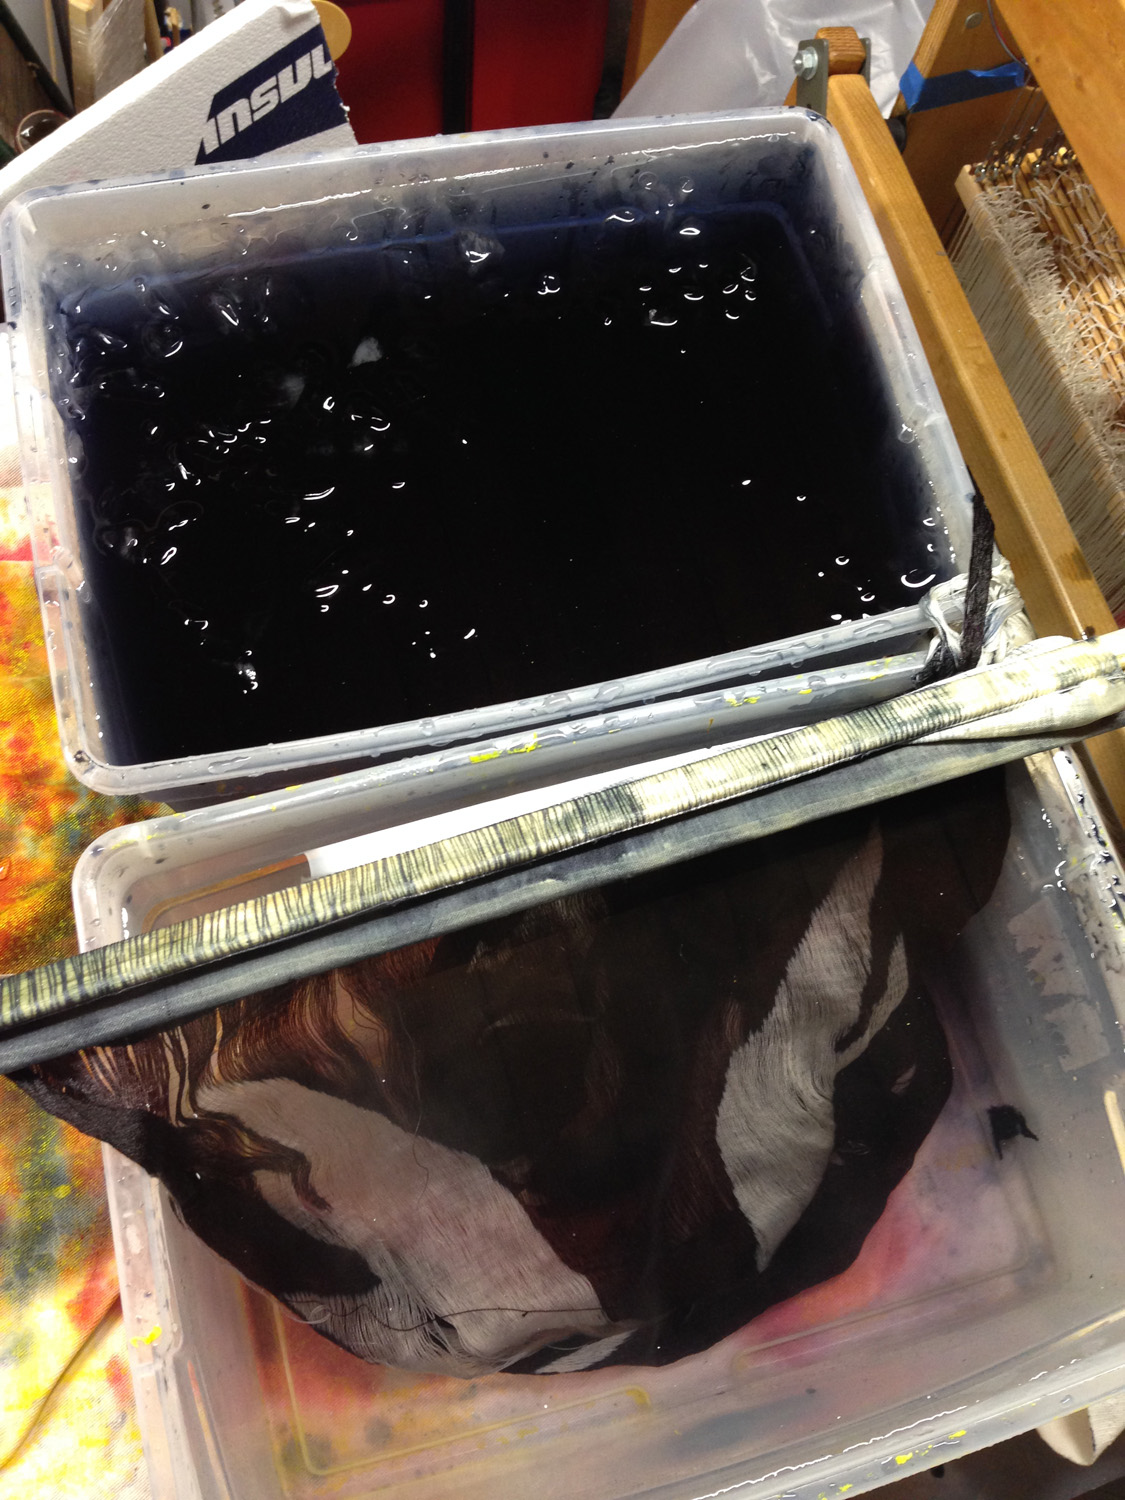
washing out the warp

This worked remarkably well, and here’s what the warp looked like post-rinse:

stenciled warp, immediately after rinsing

No backstaining at all! (The darker spots are from the stuff underneath the warp, not backstaining on the phoenix.)

I was also pleased with how well the sacrificial weft held the warp together – no clumping or tangling.

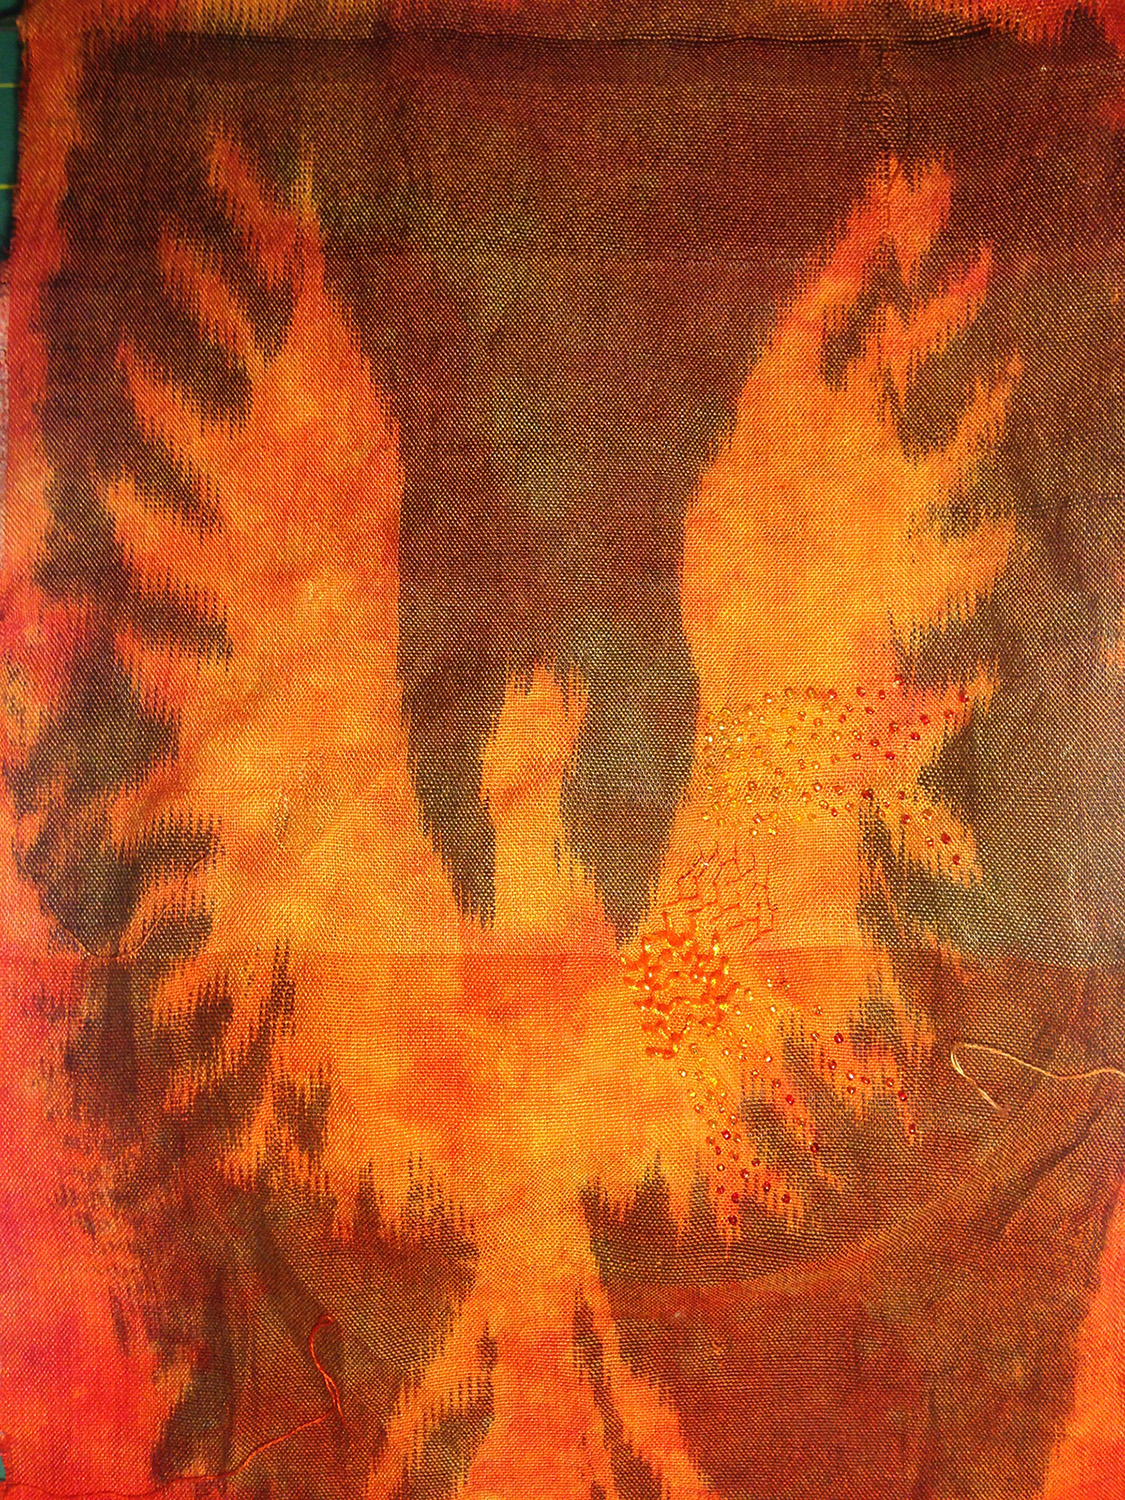
As the warp dried, however, I was astonished to discover it was not actually black, but a deep maroon tending towards eggplant:

stenciled warp, half dry

Here’s a closeup of the color, once fully dry.
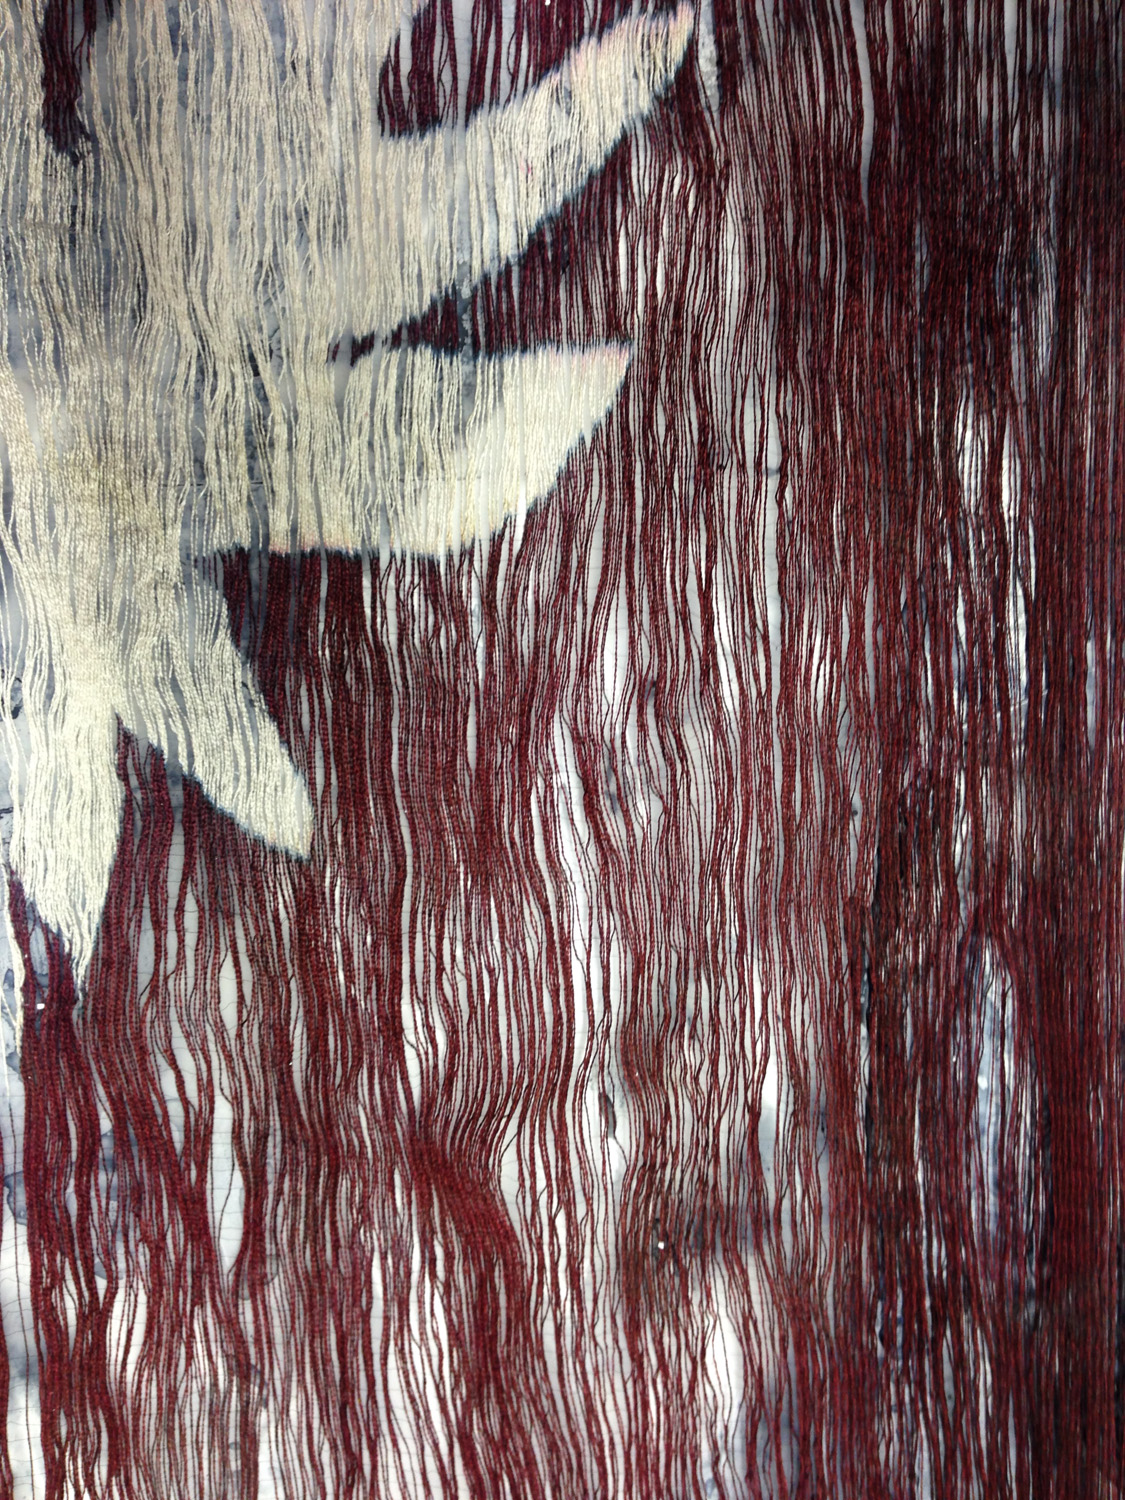
stenciled warp, color closeup

I was racking my brains, trying to figure out the problem – had I not kept it warm enough? Did it need longer to react? Then I remembered that I was using a black dye meant for cotton on silk – and Procion MX mixed colors shift on silk, because of changes in reactivity and dye uptake between silk and cotton.

On sober consideration, however, I decided that the change was not a bad thing. The redder tinge would warm up the piece, making it more fiery, and enhancing the feel of a phoenix rising from death. Of course, we’ll have to see what it looks like in the Real Thing!

So I set it up and got ready to weave:
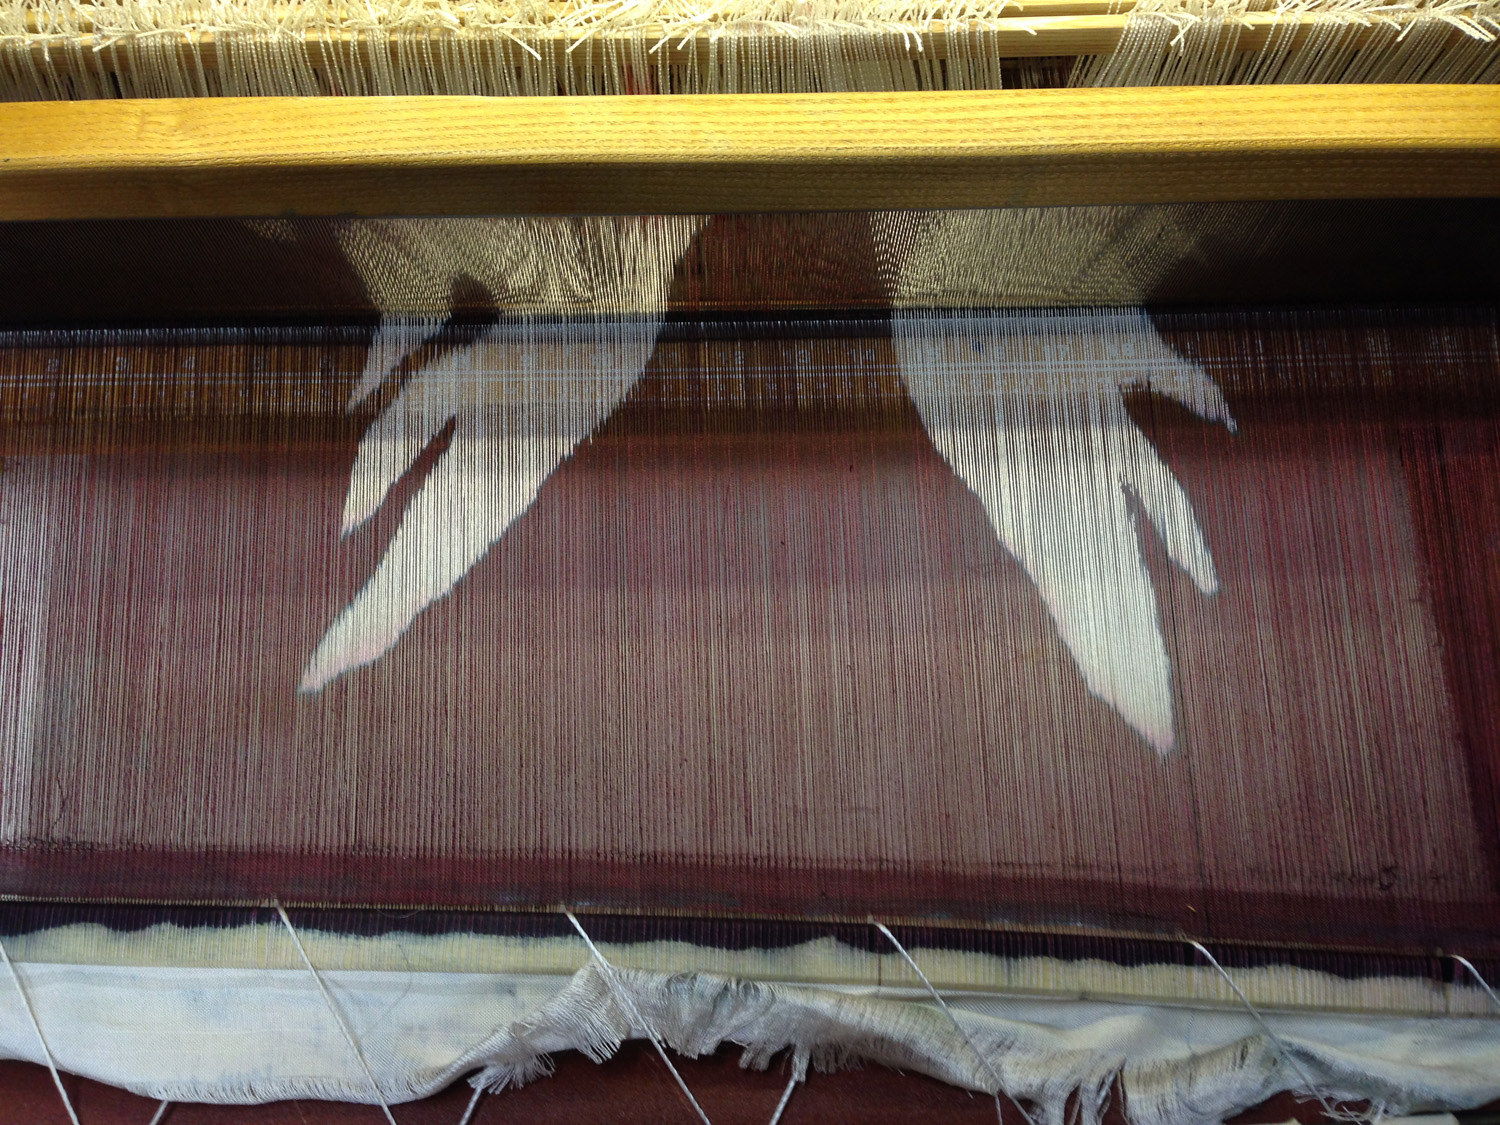
 

stenciled warp, before being woven

I had quite a few loose threads, and pulling them forward would have distorted the image, so I weighted the ends instead. Here is a look at the back of the loom (pardon the mess on the floor; I never was tidy!):
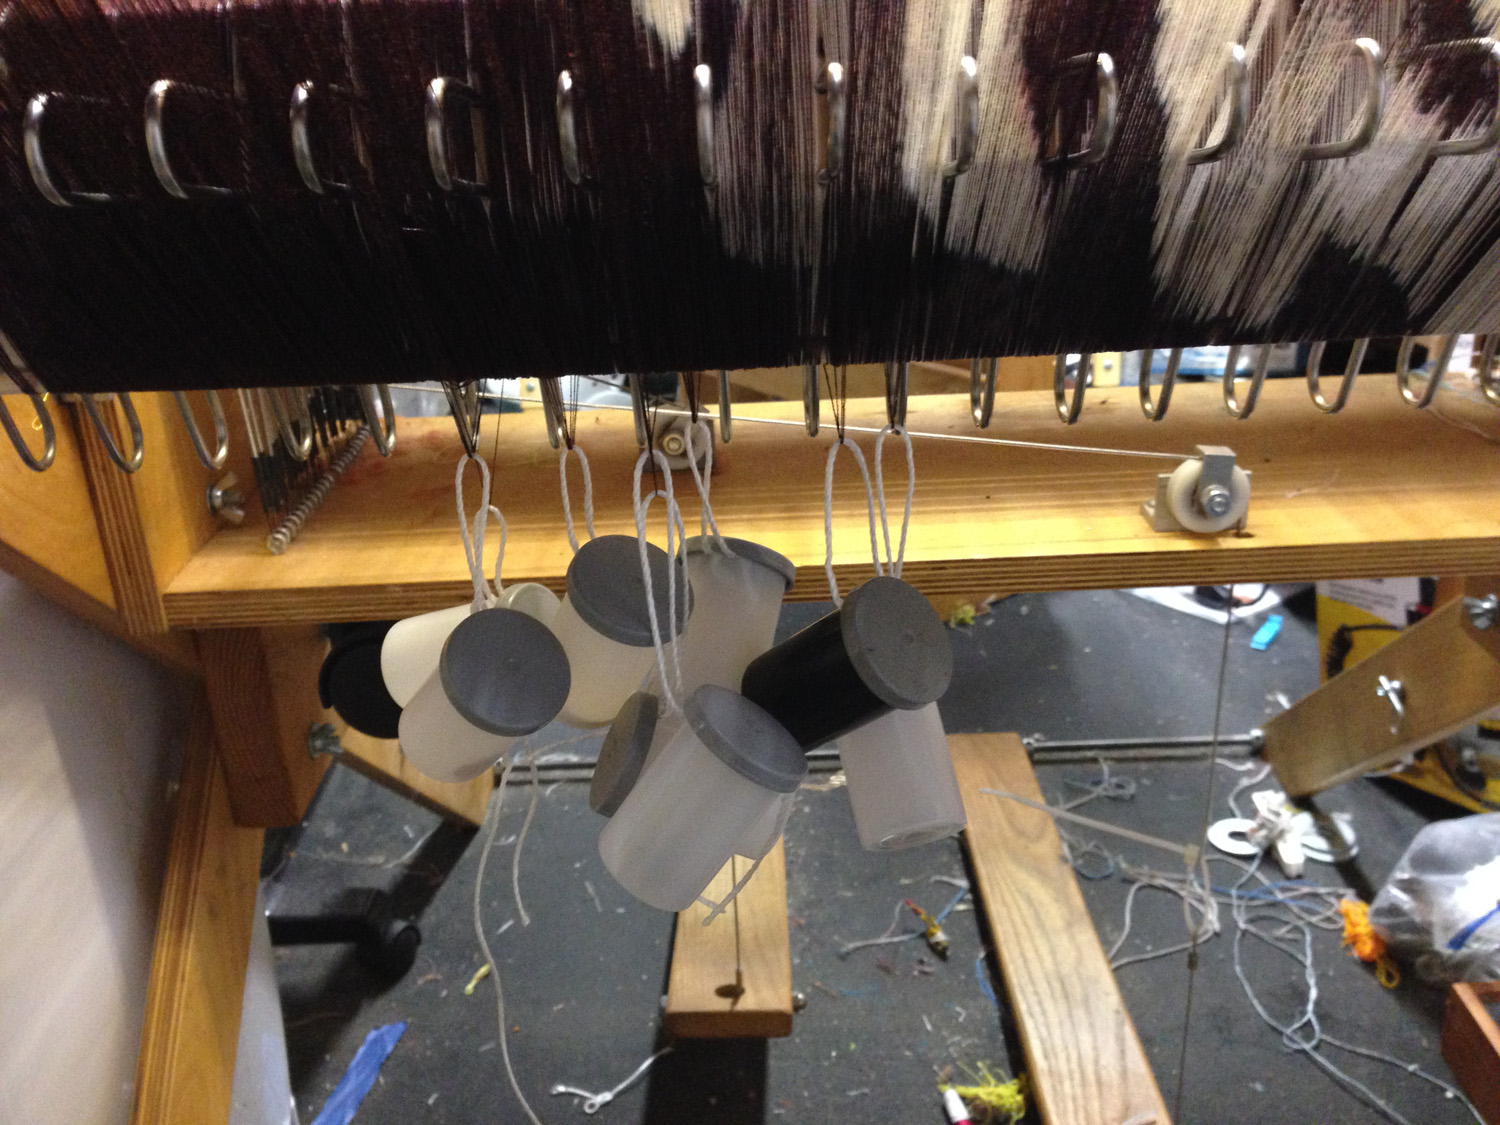
weights on stenciled warp

Then I started weaving. Much to my surprise, every fourth thread (in some areas) got pulled forward by about half an inch:

stenciled warp, half woven

I tried to figure out why. It couldn’t be the threading, because there was no consistency across shafts. While it was more prevalent in some areas, it was fairly uniform across the warp. What would cause a change every four threads?

Then I remembered. When I wound the warp, I had intended it as a sample warp. So, I used three cones of yarn from one supplier and one cone from a different supplier, figuring I could use up the last bits of the yarn from the second supplier. Apparently the tension or the stretchiness of the oddball cone was different from the others, resulting in feathering when woven. (I do run the threads through a tension box as I wind them on, but perhaps the difference was too great to even out via tension box.) I took a closer look at the threads and realized that the oddball threads also took the dye slightly differently – so yes, they were almost certainly a different yarn. Object lesson: not all 60/2 silks are the same!

Still, I like the feathering, so this is not a problem – though I do wish the feathering was more random.

Due to a number of other flaws, this will likely be another sample piece. But that’s not a bad thing; it will give me freedom to embellish (or not) with abandon, testing things out before doing the final piece.

Finally, I leave you with this image of domestic bliss:

Fritz and Tigress, cuddling together
Fritz and Tigress, cuddled together

They went to the vet on Tuesday for their final vaccinations and a health check. The vet pronounced them eminently healthy, and said we didn’t need to come back for another year. I’m sure that will make the kitties happy.
Filed Under: All blog posts, dyeing, surface design, textiles, weaving Tagged With: phoenix rising, phoenix rising wall hanging

November 19, 2013 by Tien Chiu 1 Comment

Working on the larger phoenix

In addition to creating embellishment samples over the last few days, I’ve also decided what to do about my show entries for the year. I’m going to make one piece of yardage, woven in the twenty-four shaft phoenix summer & winter pattern I’ve been noodling on for most of the past year. That will eventually become three shawls with beaded edge – very similar to my “In the Inferno” scarf. I’m currently debating what weight of thread to use. “In the Inferno” (photo below) is 80/2 and 140/2 silk, and produces a super lightweight, floating fabric that is perfect for scarves but too light for shawls. However, I love the delicacy of the pattern and the floatiness of the fabric at that weight. The samples I wove with 60/2 silk and 10/2 cotton are bigger and heavier, suitable for a decorative shawl, but just aren’t as interesting to me as the finer pattern. So I’m debating which way to go. I think it would be fun to try it in silk and cashmere, too!

The second piece I’ll be making will be using the stenciled-warp technique, and will be a 20″ x 60″ wall hanging. I changed the aspect ratio on the phoenix stencil to suit the new dimensions, and carved the stencil over the weekend. I couldn’t quite get a photo of the whole thing, but here’s most of it:

The full-size stencil


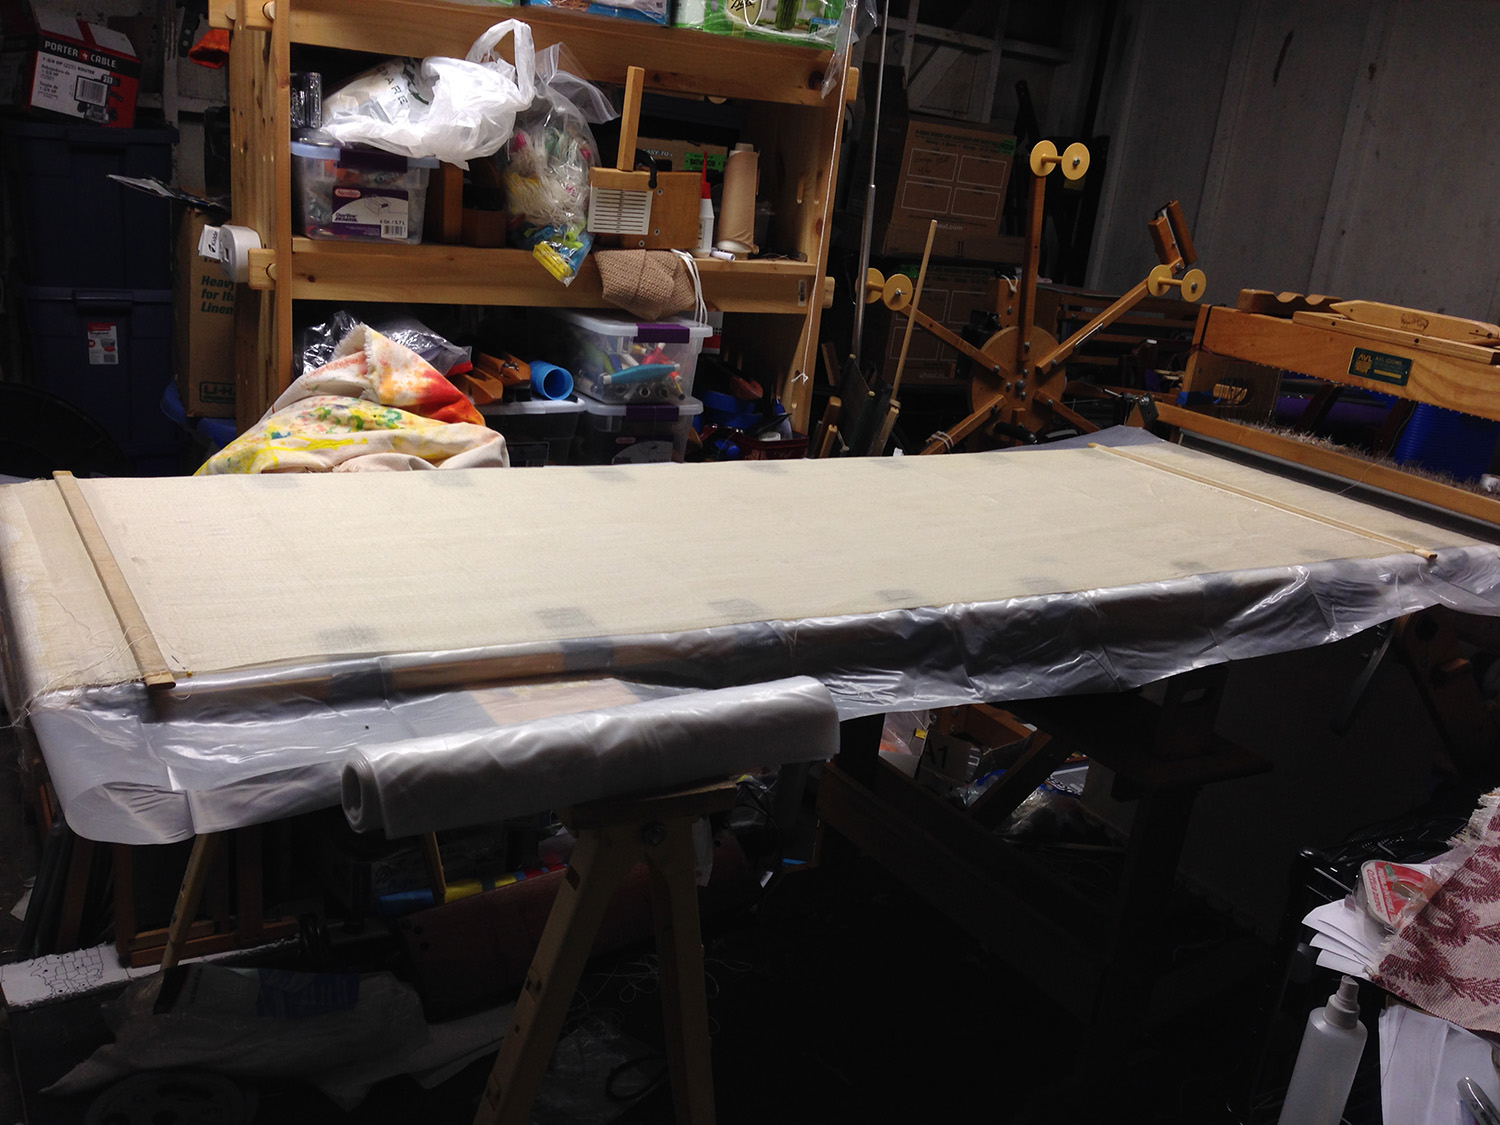
Then I wove a five-foot section with the sacrificial warp, and stretched it out on a table pressed up against the loom, like so:

five feet of warp woven with sacrificial weft and then stretched out on the table

I soaked the warp in soda ash solution and let it dry over the weekend. This morning I stenciled the warp, using thickened fiber-reactive black dye. I forgot to take a photo of it before I covered it up, but here is a pic of the Rube Goldberg device which is keeping it warm while the dye cures:

A warming tent for the stenciled warp!

The trouble, of course, is that the loom is in the garage, which is not heated, and which gets down into the fifties at night. Fiber-reactive dyes work best at 70 F or warmer, and don’t work very well below 60 F. I wanted to make sure it would be warm enough to get good dye results, so I threw a plastic drop cloth over the loom and the table, stuck an electric heater underneath, and plugged the heater into the temperature controller I use for my acid dyes. I then threw some towels over the contraption for insulation, and away I went. I checked the temperature recently and it’s perfect. Tomorrow morning I’ll rinse out the warp, and on Thursday, when it’s dry, I’ll remove the sacrificial weft, wind the warp back onto the loom, and try weaving it. If it comes out nicely, I will use it as the final piece – otherwise, it will simply be the next sample. I have enough warp to redo the piece, so I’m not stressing about it either way.

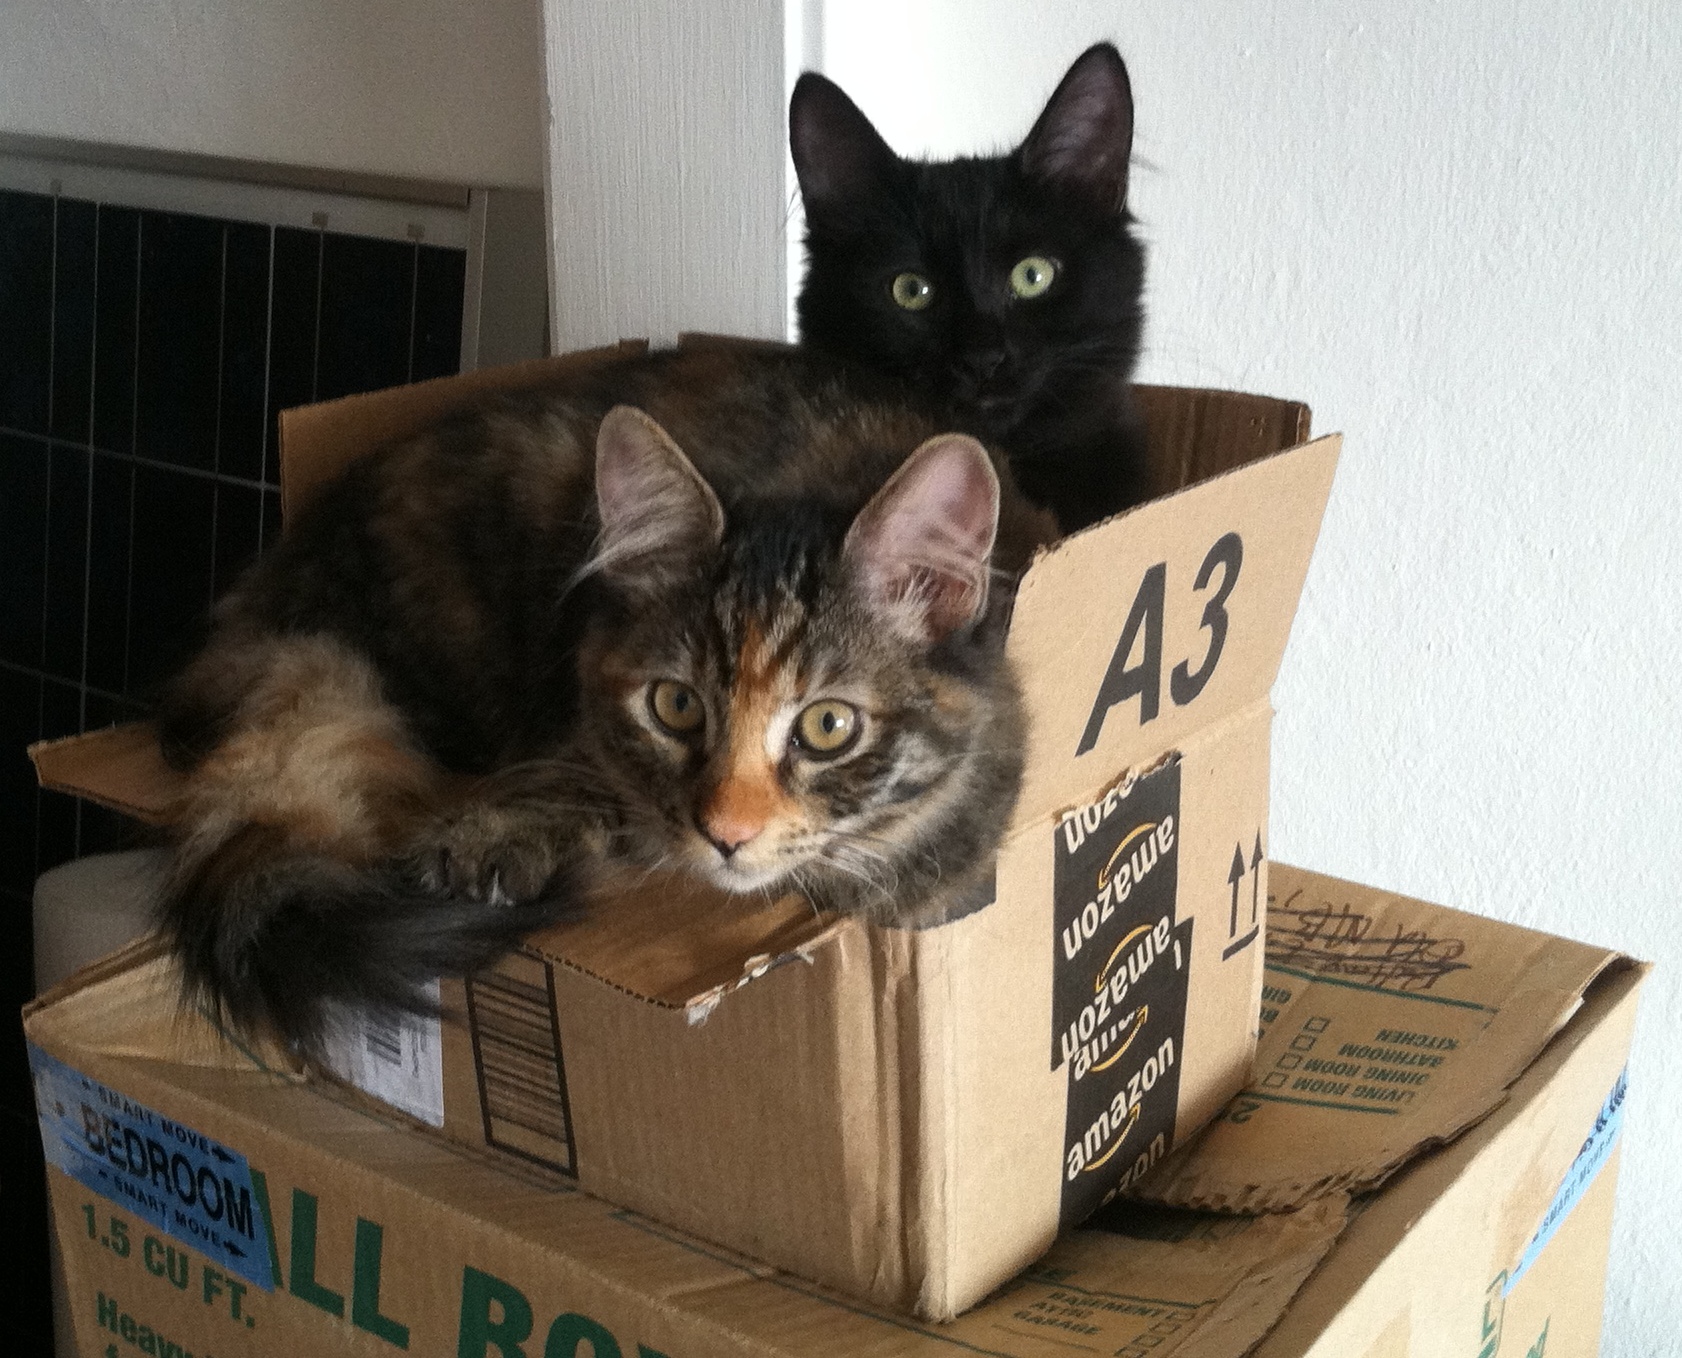
Meanwhile, B. has discovered that Schroedinger was wrong about the cat thing. In fact, Schroedinger’s box actually contains two cats, both of whom are quite alive and well, thank you:

Cats in a box!
Cats in a box!

B. (who took the photo) was impressed: the box would be small even for a single cat, but with careful packing and their usual enthusiasm and verve, the kittens managed to squeeze themselves in.

Filed Under: All blog posts, dyeing, surface design, textiles, weaving Tagged With: phoenix rising, phoenix rising wall hanging

November 19, 2013 by Tien Chiu Leave a Comment

To embellish or not to embellish…

…that is the question, isn’t it?

I’ve spent most of the last few days working up some embellishment samples. Here’s a photo of what I’ve done so far (click for the larger photo):

samples of embellishments on Phoenix Rising stenciled-warp sample
samples of embellishments on stenciled-warp pattern

And here’s a closeup:

closeup of embellishment samples

The embroidery is feather stitch using three threads. The bottom one is a sheer knitted tube (orange) with a gold cord running through it. The middle one is a silk embroidery floss, and the top one is a metallic blending filament.

The beading is mostly experiments with size 14 seed beads – varying the color along the length of the “feathers” in the wing. I also experimented with density a bit in the top sample – denser beads near the front edge of the wing, becoming gradually more spaced as they flutter out to the ends of the feathers.

The photo unfortunately really doesn’t do the sample justice. The embellishments are much nicer than they appear in the photo. I’ve been showing them to people to collect opinions – most people like the thicker thread combined with the beads on the feathers, as in the bottom of the sample. The thicker thread gives some three-dimensionality and texture, the beads add glitter. Using both gives definition to the different parts of the wing, and provides variety in texture. Compared with the beads-only version near the top, you can see that it’s more interesting.

But do the embellishments actually add anything to the design? They are pretty, but what is the central focus of the design? What is the piece about?

I’m still on the fence about whether to use embellishments at all. At the scale of the sample, it almost seems like gilding the lily. The power of the piece is in the evocative phoenix and the feathering around the edges, reminiscent of flame.  Do the embellishments add to this? I’m not sure. I talked about this at length with my critique partner last night – he felt that the piece didn’t really need embellishment, and I am leaning that way as well. But since the actual piece will be at a different scale, I’ll need to re-evaluate once it’s woven and dyed.

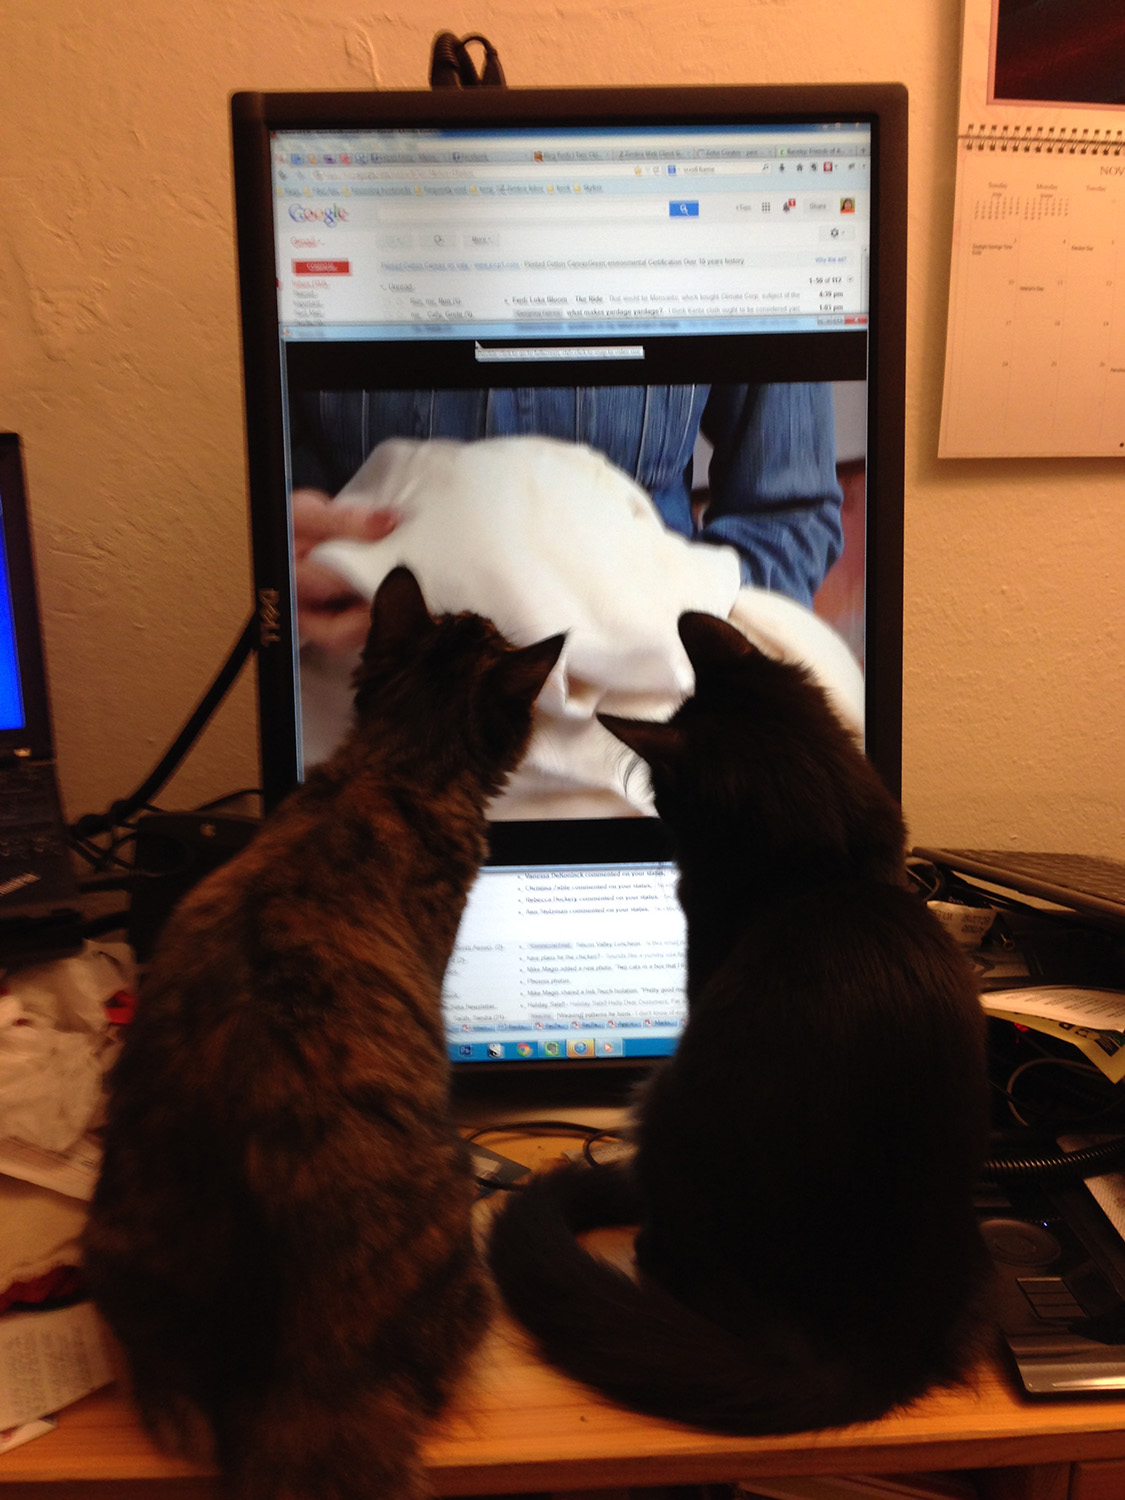
Meanwhile, I was watching Ana Lisa Hedstrom’s DVD “Stitch Resist Reconsidered” over the weekend, but I only got eight minutes into it before the rest of the theater-goers arrived:

Cat TV?
Cat TV!

Shouting “Down in front!”, had no visible effect, so I retired to work on other things.

Filed Under: All blog posts, dyeing, surface design, textiles, weaving Tagged With: phoenix rising, phoenix rising yardage

November 15, 2013 by Tien Chiu 6 Comments

Revisiting the phoenix design

Up until now, I’ve been using a symmetric design for the phoenix, a holdover from the original weaving draft. That had to be symmetric because I had only 24 shafts to play with, and needed the symmetry to make a wider design on a point threading.

But since I’ve shifted to using surface design, symmetry is no longer necessary – and too much symmetry comes across as boring and rigid. So I decided to design an asymmetrical phoenix. Not easy since my drawing skills are rudimentary at best. (Not to mention my 3-D spatial visualization, which is awful.)

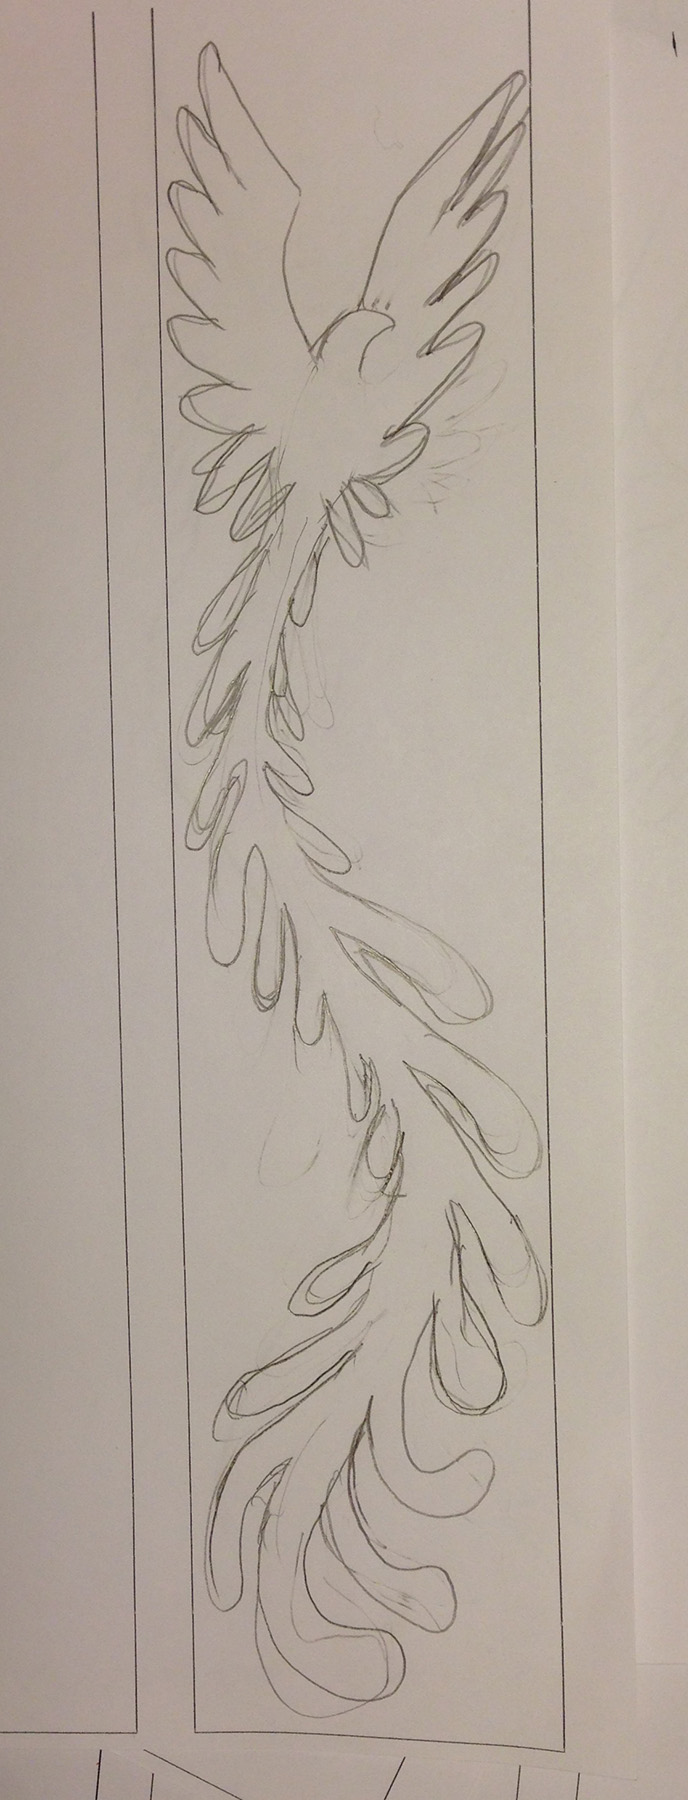
However, with patience and pigheaded determination, many things are possible. I started by sketching a few preliminary ideas:

first rough sketches for Phoenix Rising yardage

Because of the very long aspect ratio, I thought two birds might fill the space better than one. But after seeing them, I decided I wanted to stick with a single phoenix – the two-ness of the birds bothered me, because now the “story” in the photo was about two birds and their interactions, rather than the single phoenix.

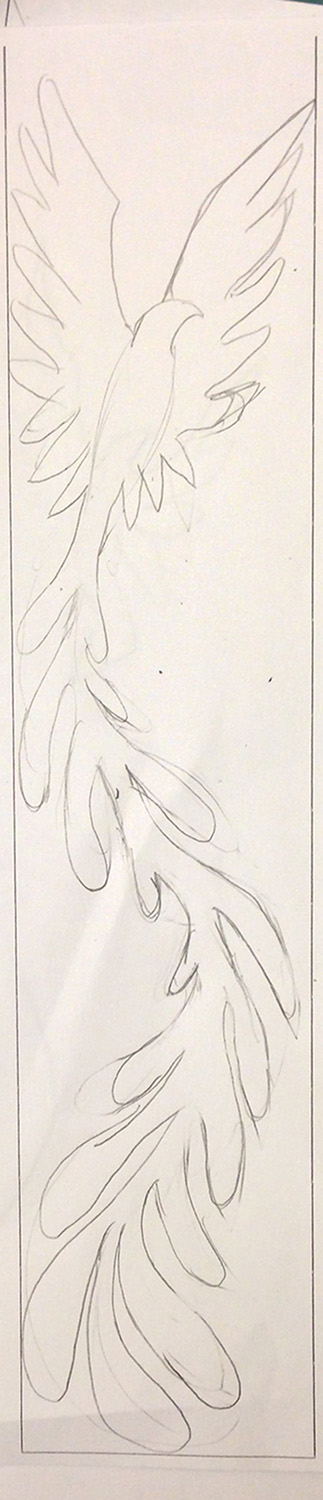
So I decided to work with the single bird. I felt the tail was still a bit boring, so I tried a sketch with two curves in the tail instead of one:

second sketch for Phoenix Rising yardage

This looked much better, to me at least – it filled the space nicely, gave the impression of a flaming trail, and was more interesting than a single curve.

However, some things still needed tweaking. The tail didn’t feel realistic – parts of it were flat, parts three-dimensional. I wasn’t drawing things with enough three-dimensional awareness. And the body felt too short in comparison to the tail. Back to the drawing board for some minor changes:

third sketch for Phoenix Rising yardage

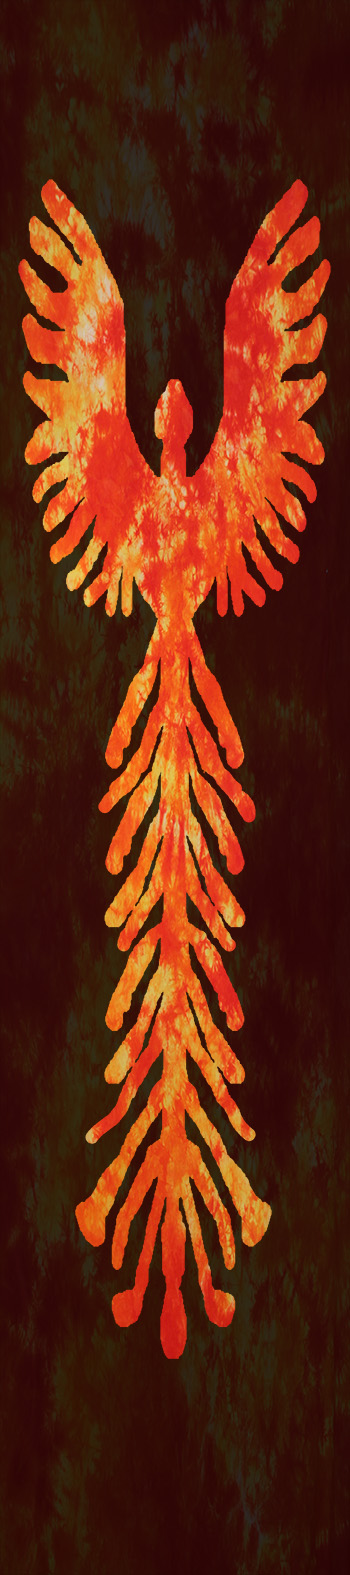
This one I liked, so I put it into Photoshop to see how it would work in the simulated version:

simulated phoenix rising yardage
simulated “Phoenix Rising” yardage

This works!! I like it a lot, and will start carving some stencils today.

Compare it with the version I started with:

extended phoenix for yardageWhile both have their pros and cons, the new version is much more dynamic and interesting (I think) than the old one.

Not bad for a day’s work!

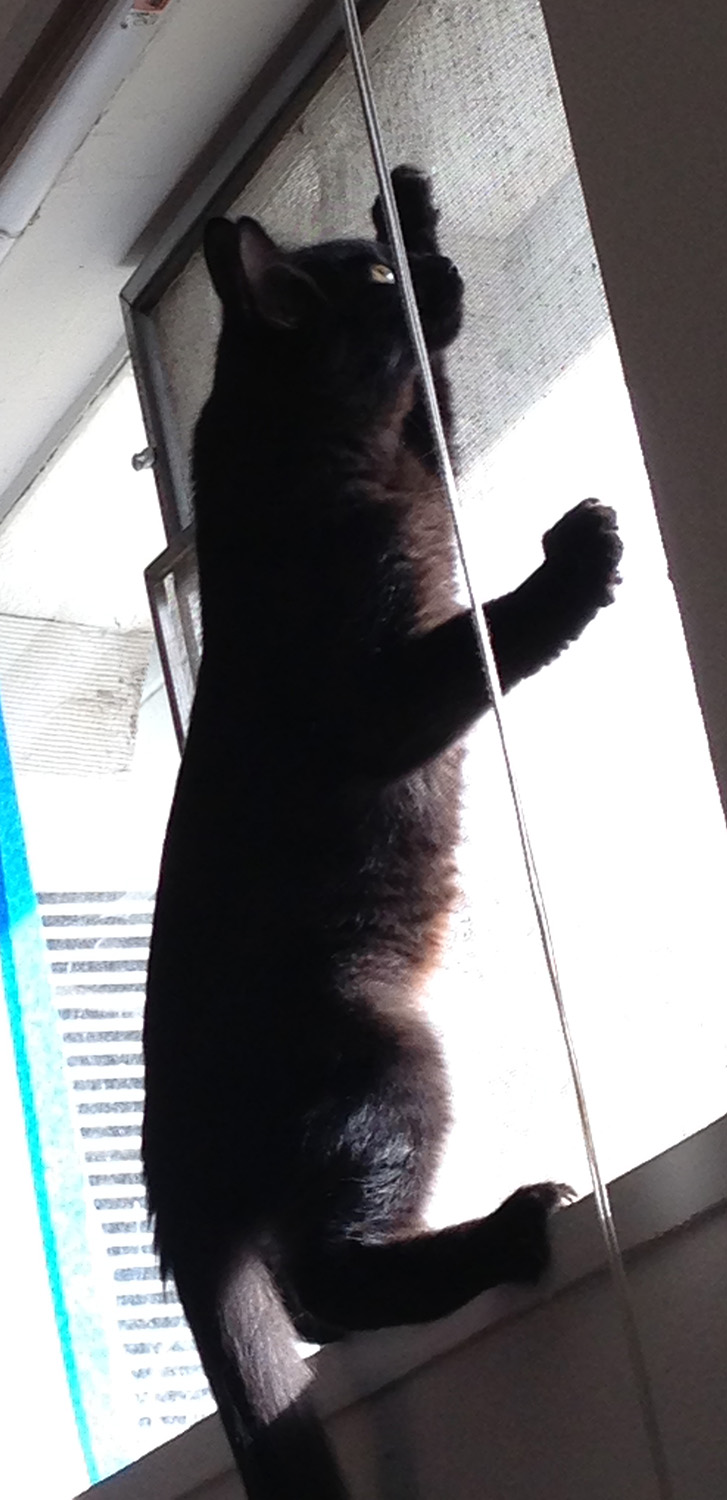
Meanwhile, feline paws have not been idle. Fritz, for example, has discovered the joy of window screens:

Fritz, climbing the window screen

Tigress, on the other hand, seems to be mellowing out from her tear-around-the-house rambunctiousness. Here she is on the bed, showing off her regal beauty.

Tigress, relaxing
Tigress, relaxing


Filed Under: All blog posts, dyeing, surface design, textiles, weaving Tagged With: phoenix rising, phoenix rising yardage

November 14, 2013 by Tien Chiu Leave a Comment

Phoenix yardage

I’m now intrigued by the idea of entering the Convergence yardage exhibit, so I spent some time this morning mocking up phoenix yardage in Photoshop. While highly preliminary, the experiment does suggest that working with my anticipated aspect ratio (23″ wide x 3 yards long) will work:

phoenix, extended for yardage

Obviously, this needs tweaking: the tail is repetitive and boring, for one thing. (Not too surprising, since I created it by cutting and pasting part of the original tail!) But reworking that should be relatively easy.

I’ve also started experimenting with embroidering the surface of my sample, adding ribbon, embroidery floss, seed beads, and other embellishments to enhance the design. I don’t want to go whole hog into it yet, as the embellishment requirements will change as the image gets larger. But the results so far are promising (sorry, no pictures yet!).

From here? My first step will be to play with, rework, etc. the phoenix design until I’m satisfied with the overall pattern. Then I will create a smaller stencil so I can test the design at scale, and work out some technical issues, before committing to a larger version of the piece. (I will probably also test out embellishment designs on the smaller piece.) After that I will start weaving the final version.

That is still quite a bit to complete by the February 5 deadline, but feels much more do-able.

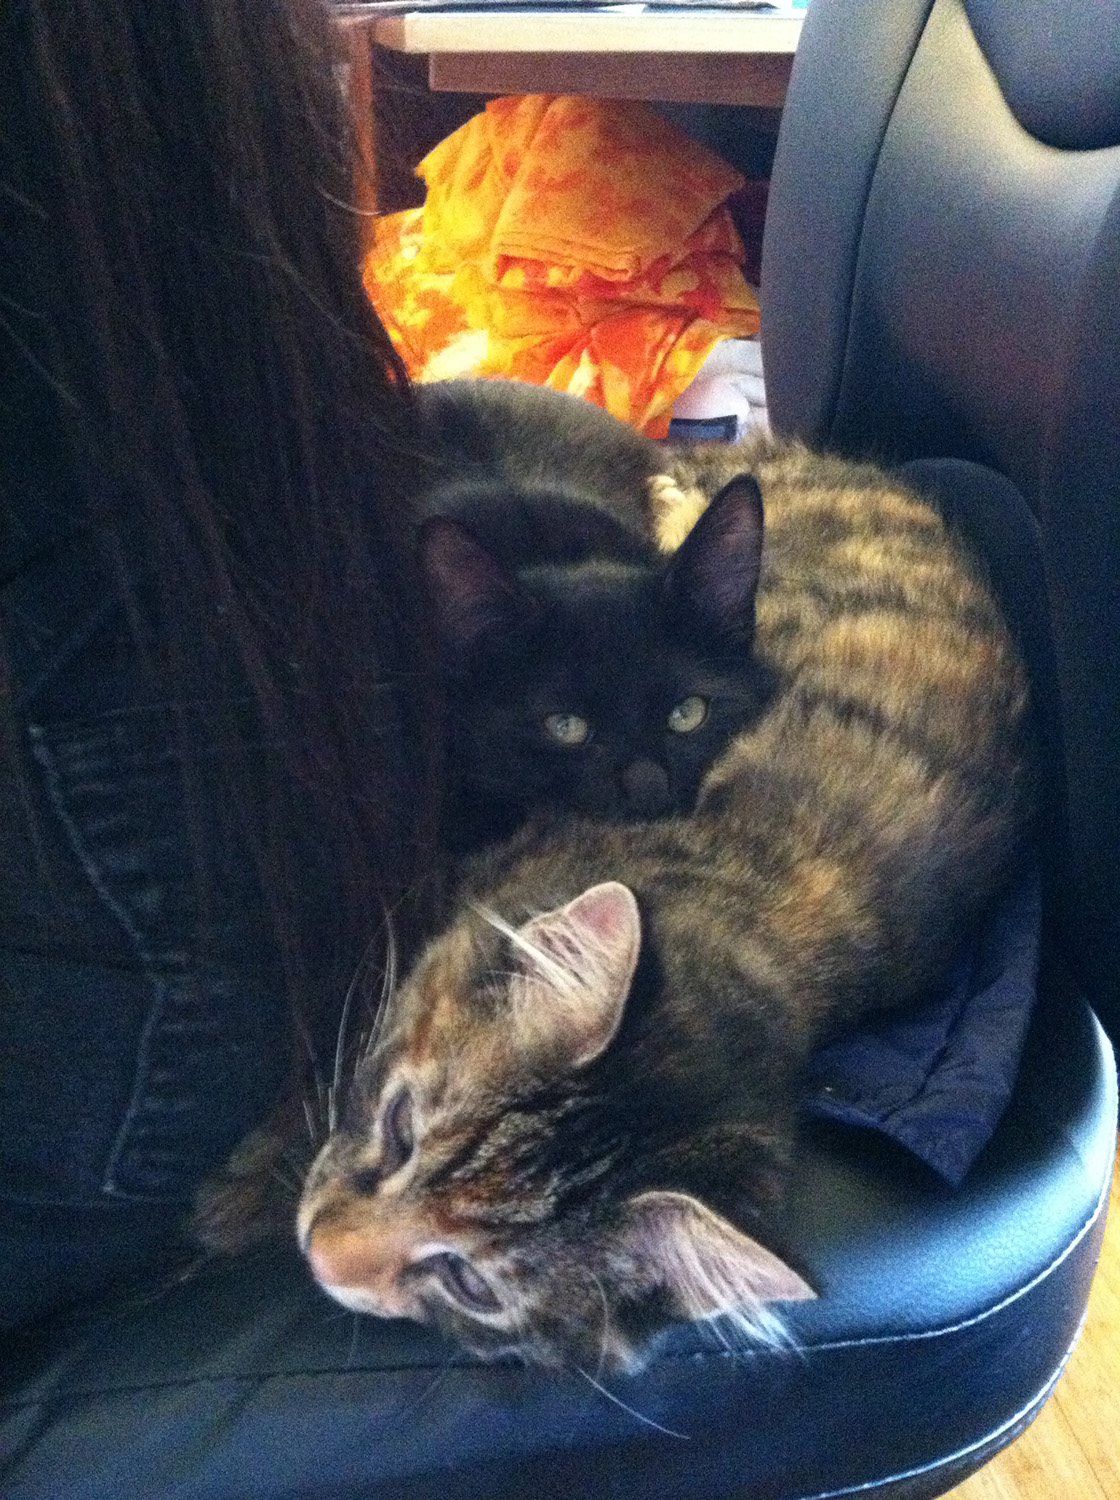
And here are Fritz and Tigress, gradually pushing me out of my chair:

Fritz and Tigress helping me work at the computer
Fritz and Tigress encouraging me to take a break (and give up the chair to them!)

Apparently I make a good kitten backrest. Who knew?

Filed Under: All blog posts, dyeing, textiles, weaving Tagged With: phoenix rising, phoenix rising yardage

  • « Previous Page
  • 1
  • …
  • 3
  • 4
  • 5
  • 6
  • 7
  • …
  • 27
  • Next Page »

Archives

Tags

aids lifecycle outfits autumn splendor book cashmere coat cats celtic braid coat color study cross dyeing design design class devore doubleweave doubleweave shawls drawing dye samples dye study group gradient colors house infinite warp jacquard loom katazome knitted blanks kodachrome jacket ma's memorial mohair coat network drafted jacket/shawl project network drafting painted warp phoenix rising phoenix rising dress phoenix rising kimono phoenix rising reloaded pre-weavolution project sea turtles taquete tie-dye tied weaves tomatoes velvet weaving drafts web design website redesign wedding wedding dress woven shibori

Categories

  • Africa
  • aids lifecycle
  • All blog posts
  • All travel posts
  • Asia
  • Bangkok
  • Belize
  • Cambodia
  • Central America
  • Chai Ya (Wat Suon Mok)
  • Chiang Mai
  • Chiang Rai (Akha)
  • China
  • chocolate
  • computer stuff
  • creating craft
  • Creative works
  • cycling
  • Delhi
  • Dharamsala
  • drawing
  • dyeing
  • Fiber Arts
  • finished
  • food
  • garden
  • Ghana
  • Guatemala
  • Hanoi
  • Ho Chi Minh City
  • Hoi An
  • India
  • Khao Lak
  • Knitting
  • knitting
  • Ko Chang
  • Laos
  • Luang Namtha
  • Luang Prabang
  • markleeville death ride
  • meditations on craft
  • mental illness
  • musings
  • Phnom Penh
  • powerlifting
  • Rewalsar (Tso Pema)
  • sewing
  • Siem Reap (Angkor Wat)
  • Southeast Asia
  • surface design
  • textiles
  • Thailand
  • travel
  • Vangvieng
  • Vientiane
  • Vietnam
  • Warp & Weave
  • Weaving
  • weaving
  • weavolution
  • writing

© Copyright 2025 Tien Chiu · All Rights Reserved ·

Loading Comments...