Tien Chiu

  • Home
  • About
    • Honors, Awards, and Publications
  • Online Teaching
  • Gallery
  • Essays
  • Book
  • Blog
  • Dye samples
You are here: Home / Archives for photoshop

July 19, 2014 by Tien Chiu

Jacquard adventures

The last few days have been an incredible adventure! I have been playing with Digital Weaving Norway’s TC-2 jacquard loom, and it is a beauty. I’ve mostly been applying the things I learned at Sandra’s place earlier, with some interesting twists. But today I’m going to be weaving up a more complicated test file – a double weave cloth, each side a tied weave with complex patterning in the ties. Oy vey! I spent three hours developing it in Photoshop last night, and didn’t finish until midnight – but I was so excited by the possibilities that I just couldn’t stop. It will be an interesting test both of what can be done with a jacquard loom and a test of my Photoshop design skills. I hope it works!

But I’m getting ahead of myself.

I arrived late Wednesday night, after a hectic day of travel in which I nearly wound up stranded in Newark. Fortunately, a very nice United Airlines customer service representative managed to rebook me to travel through Chicago instead of Newark, and all was well.

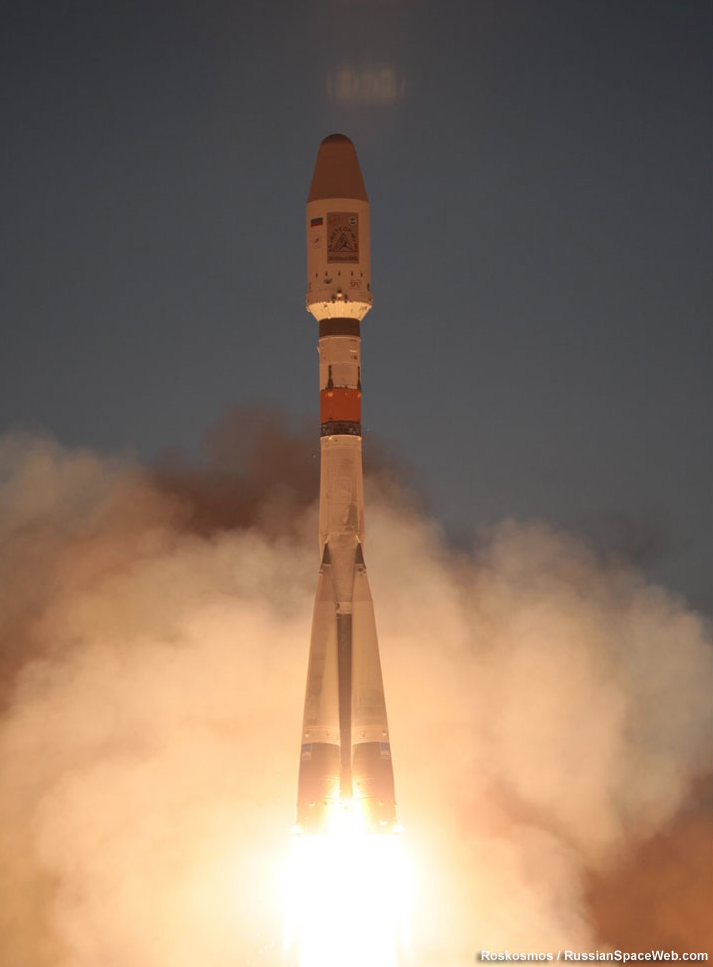
Thursday morning, promptly at 10am, I got to the Digital Weaving Norway booth. I spent my first few hours there developing another image file with help from Vibeke Vestby, who heads up Digital Weaving Norway. Here’s the image I started with, a photo of last week’s SkySat-2 launch released by Roscosmos (the Russian equivalent of NASA). It’s a Soyuz-Fregat rocket going up carrying SkySat-2:

SkySat-2's rocket launching from Baikonur. Photo provided by Roscosmos.
SkySat-2’s rocket launching from Baikonur. Photo provided by Roscosmos.

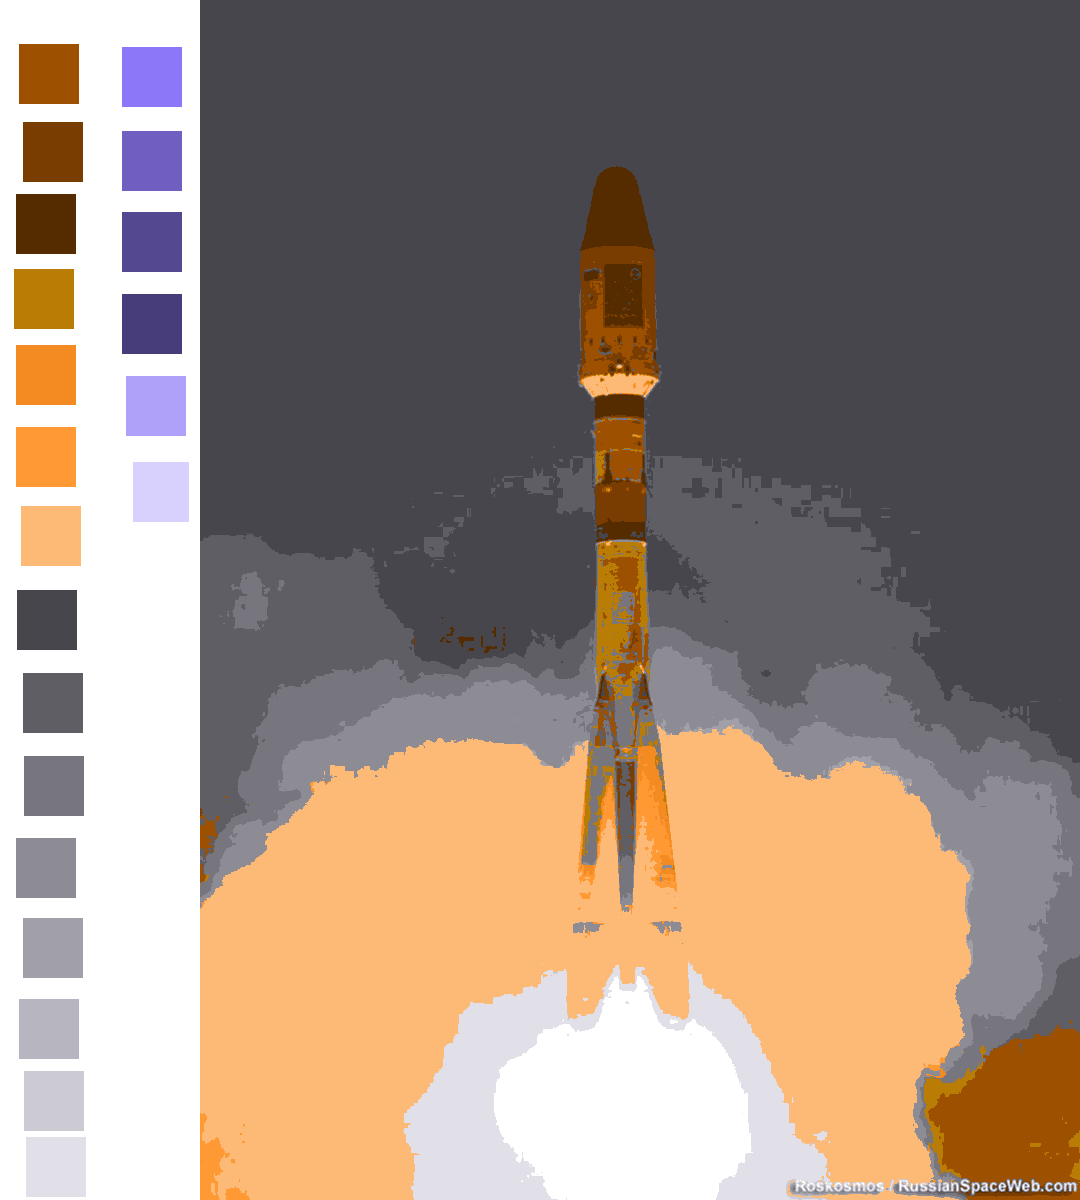
I wanted to use four wefts – blue, white, orange, and brown – in addition to the gray warp. So I indexed to 22 colors, various mixes of weft and warp colors, without dithering the image. Then I developed the rest of the file and wove it up:

SkySat-2 launch, undithered version

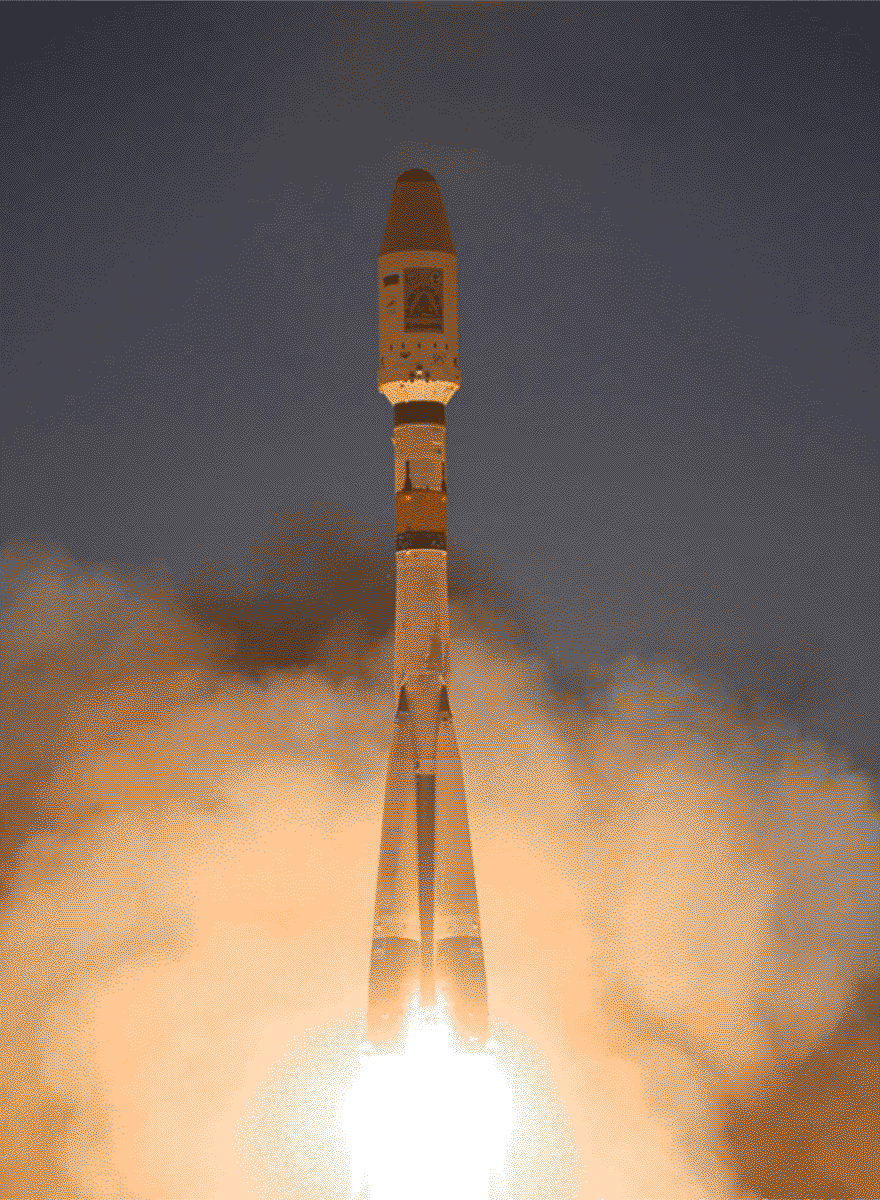
That, while lovely, looked a little cartoonish to me. So I developed a second version, with dithering. Here are the dithered and undithered image files that I developed – you can see a pretty clear difference in them:

Soyuz launch, reduced to 22 colors without dithering
Soyuz launch, reduced to the same set of colors with dithering

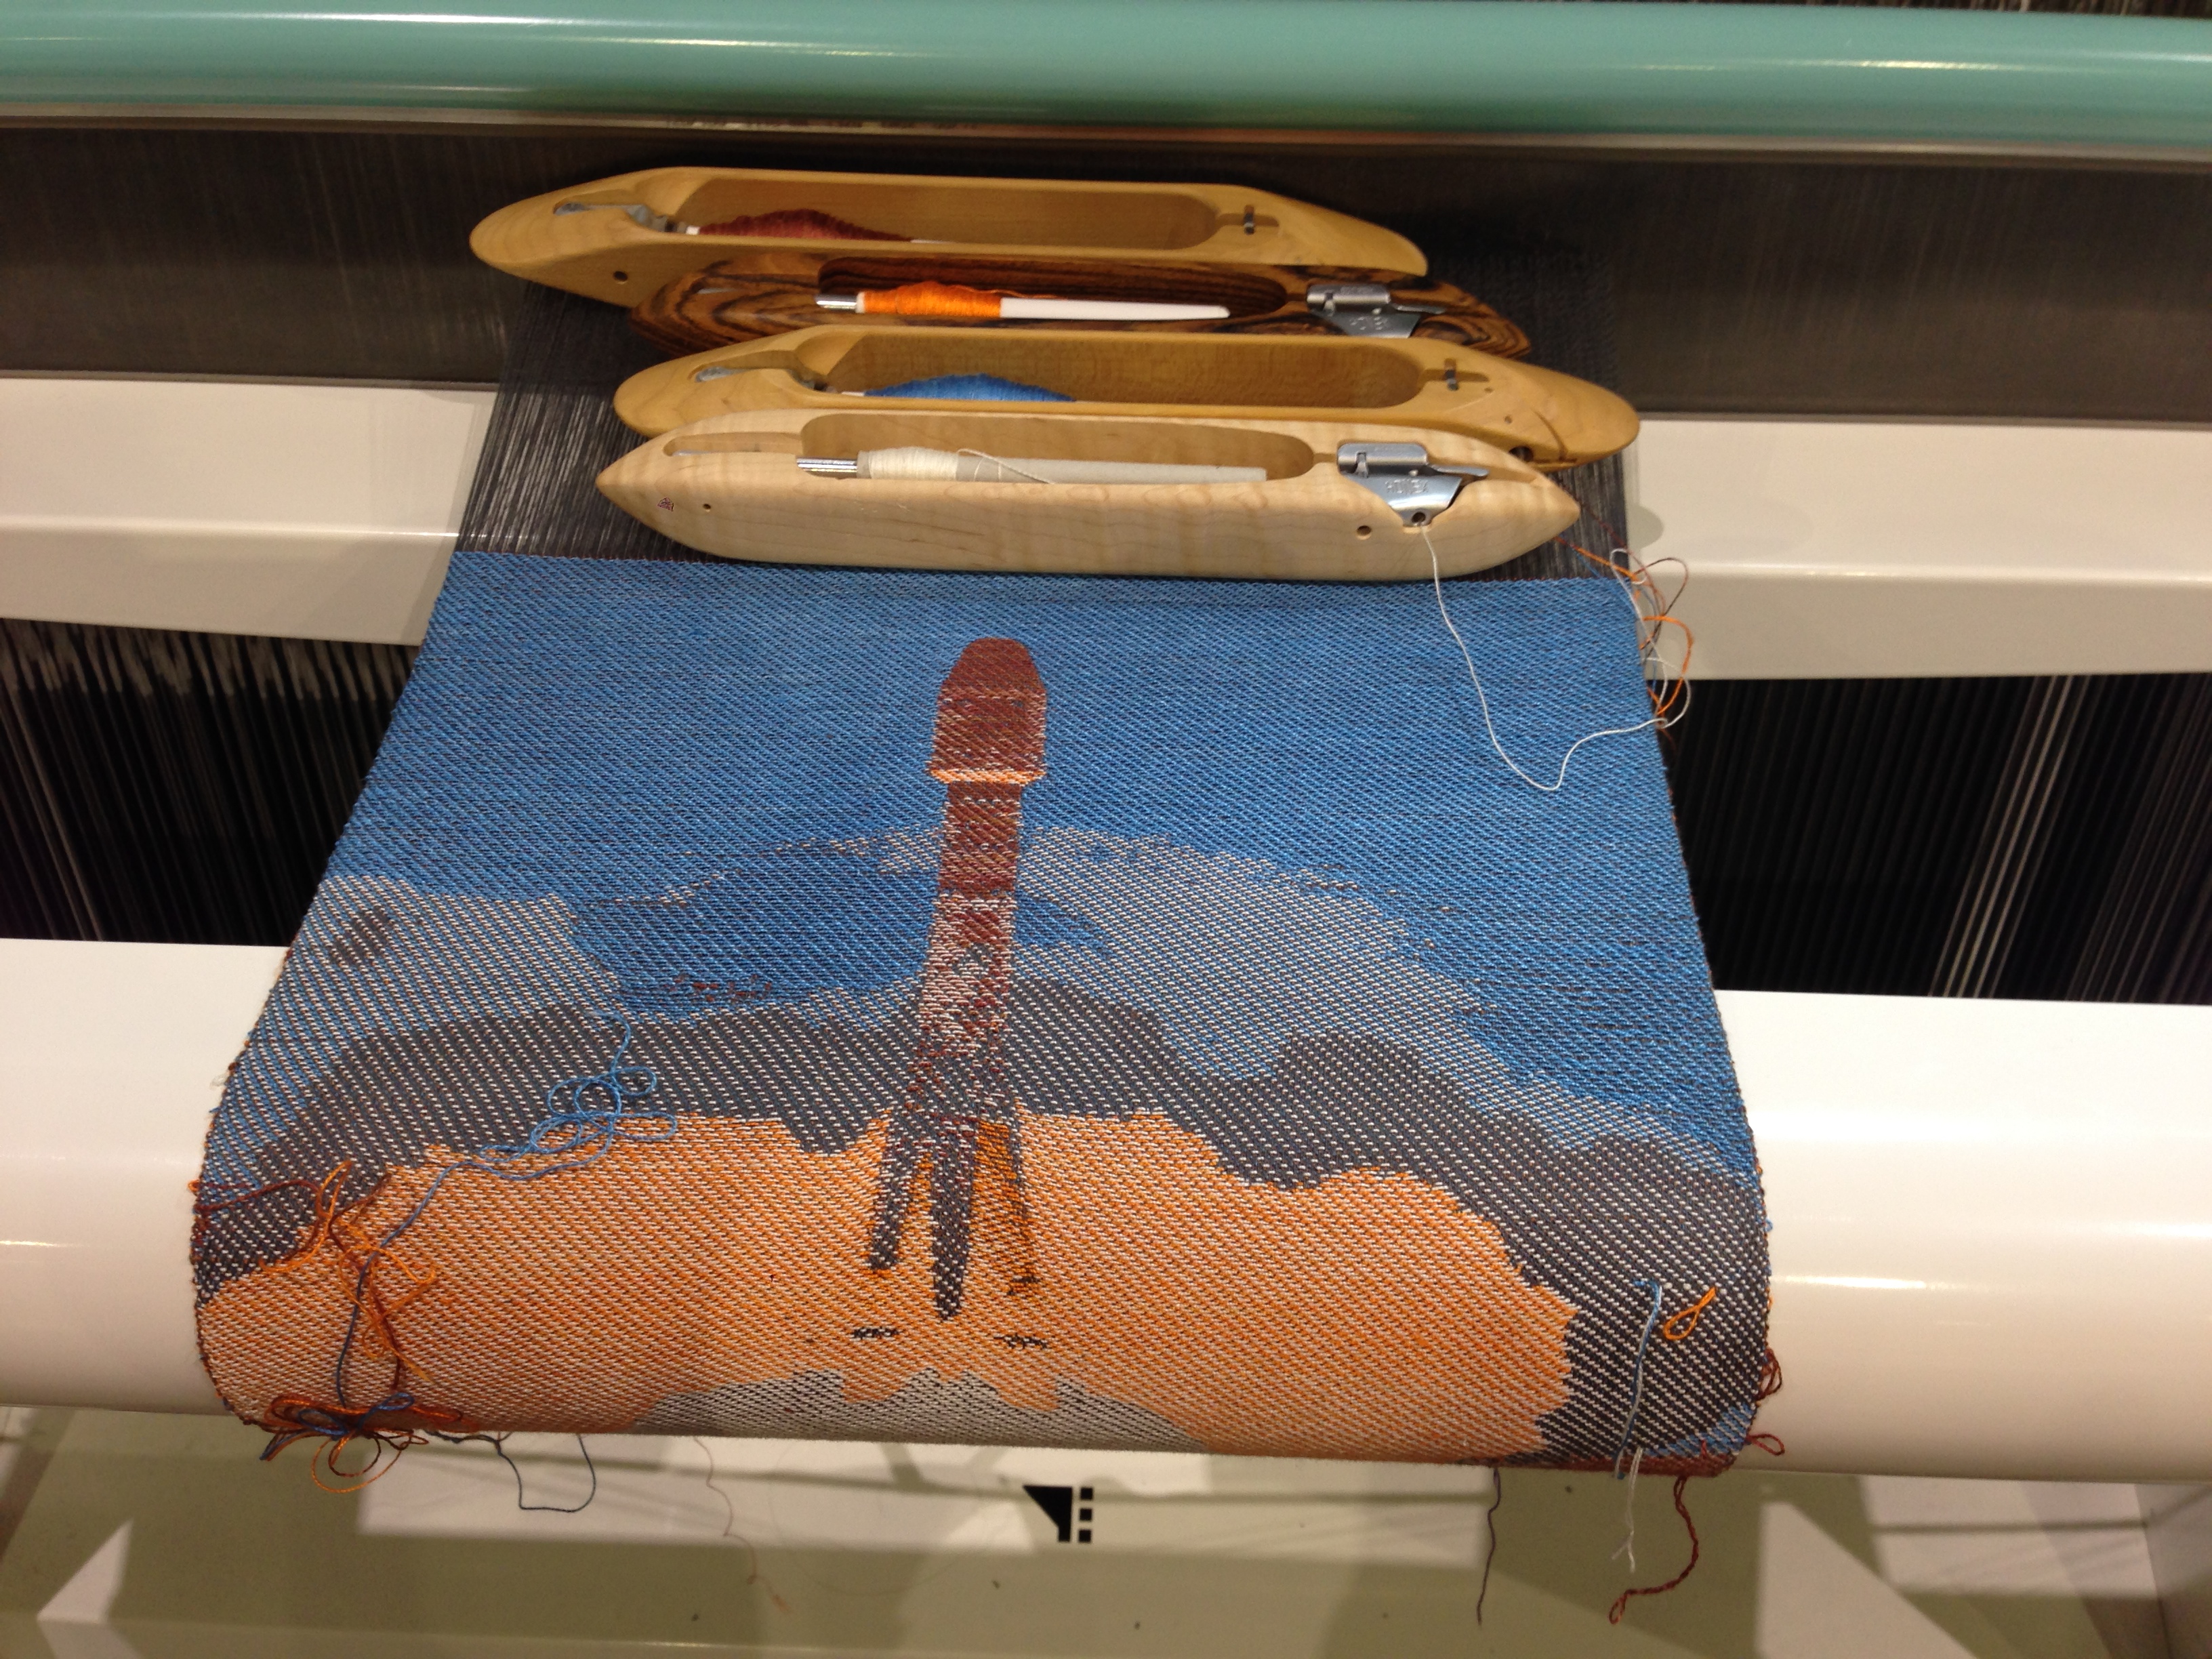
I had finished prepping the new file for weaving, when a new twist arrived! Laurie Carlson Steger, an amazing textile artist who works with fiber optic cable and light, had seen me weaving the rocket launch the previous day, and had come with seventy-five strands of fiber optic cable. Would I be interested in weaving them into my rocket launch photo? HELL YEAH!!! So I quickly revised the Photoshop file to include a strand of fiber optic cable every eight picks, and started weaving away. It turned into a five hour marathon session at the TC-2 – one hour in the morning, a break for lunch, and then four straight hours of weaving without a break in the afternoon. Yes, my feet hurt (the TC-2 was set up as a standing loom), but it was such fun to see the image developing that I couldn’t stop! And here is the freshly woven image:

SkySat-2 launch, with dithering, with fiber optic cable

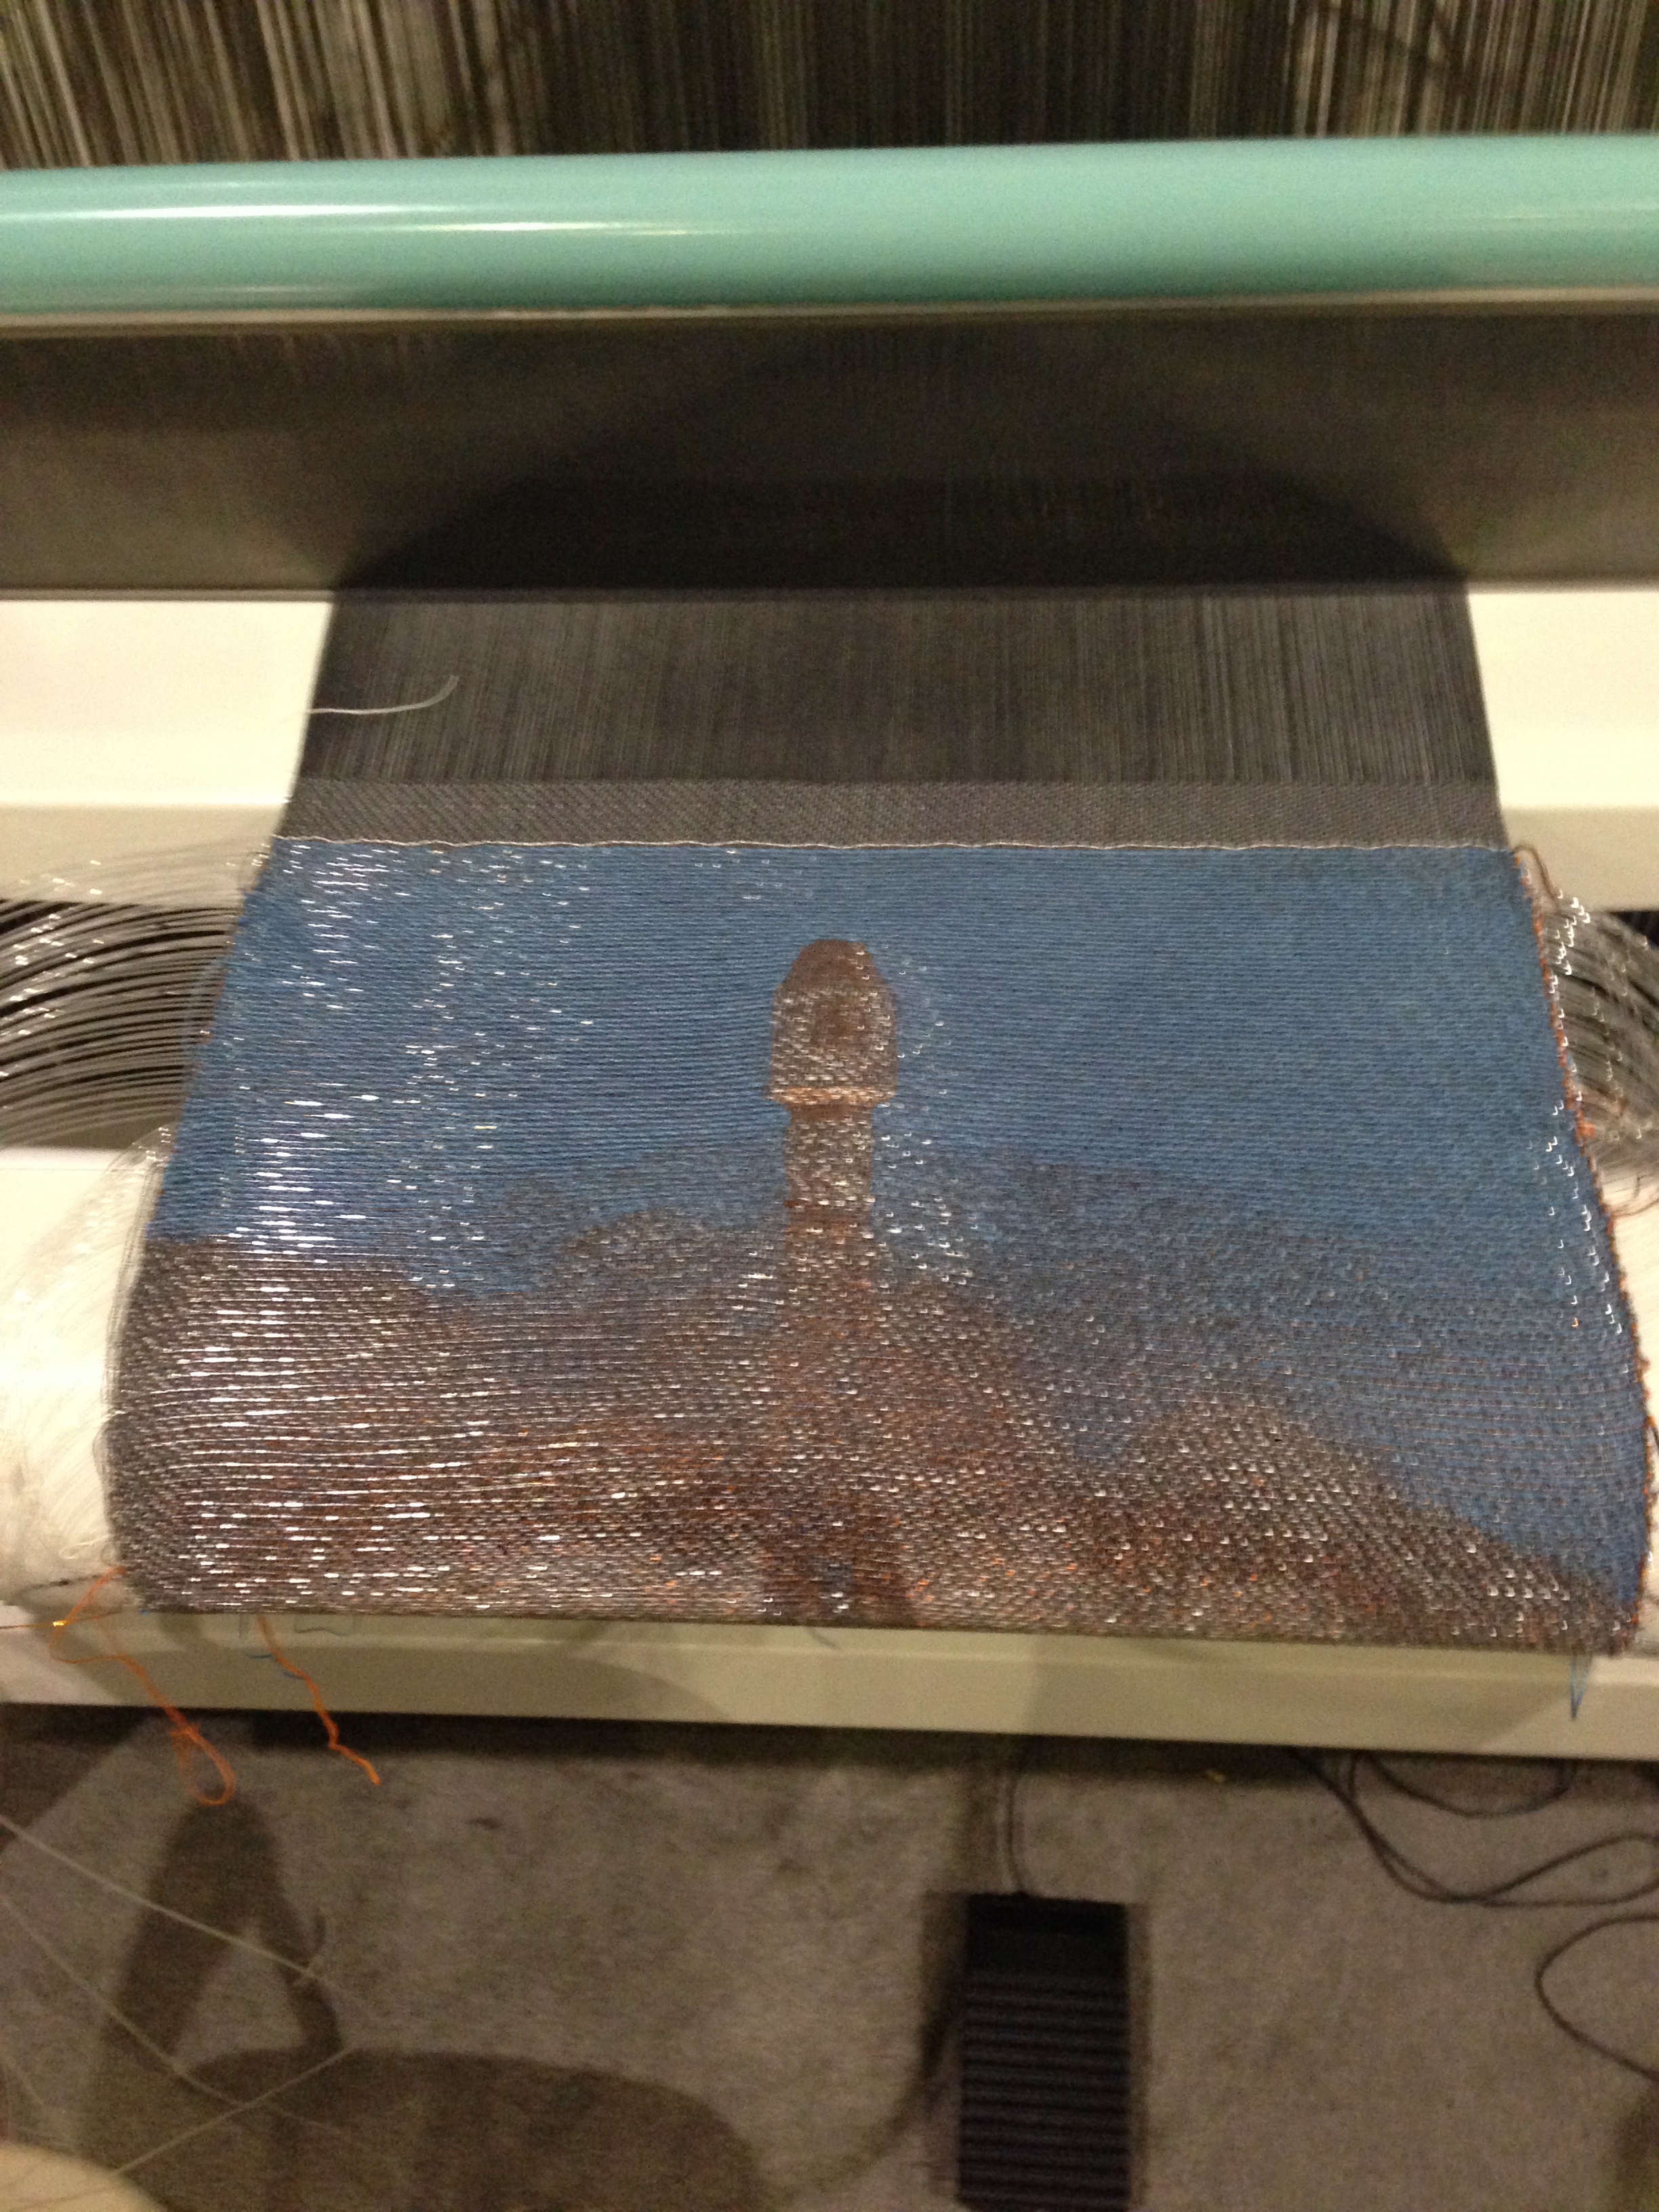
I like this version much better – while it is harder to make out the rocket, the image is much clearer and less cartoonish. And it has fiber optic cable! This morning Laurie is going to come by with an Exacto knife and very carefully nick the fiber optic cable in strategic places to let the light out. Fiber optic cable normally transmits light directly from one end to the other, with very little light visible in between – but if you nick it, the light shines out the side. So we can control where the light glows. I’m thinking some stars in the sky, and then lots of sparkles in the launch cloud, and maybe a few in the rocket. This is so exciting I can hardly wait! (I’ll post photos of the finished piece, of course.)

And what will I be weaving today? Well, I was up way too late last night developing this file:

phoenixes and turtles in tied weave with networked ties, woven doubleweave

As you can sorta see, it’s ripply lines with phoenixes (dark) and sea turtles (light). If I have constructed the file correctly, it will weave up as double weave, with the top layer a tied weave, sea turtles against a background of mixed 4-end twills in the ties. The phoenixes are on the bottom layer, also a tied weave with phoenixes against four-end twill pattern in the ties. Ground cloth in both cases is plain weave.

Here is the draft for each side, which shows the patterning a little more clearly:

sea turtles weaving draft, tied weave with 4-end twill patterning in the ties
phoenixes weaving draft, tied weave with 4-end twill patterning in the ties

I had to crop each file to 1/4 size to make it fit within the number of threads on the loom (880), so only a few phoenixes and sea turtles will show in the finished piece. The loom is warped up at 60 ends per inch, and the recommended sett for plain weave in 20/2 cotton is 30, so that makes the warp perfect for double weave. In theory, at least. We’ll see.

Anyway, this draft is not great art, but it’s a very interesting technical thought experiment to explore jacquard design. A jacquard loom “thinks” very differently from a shaft loom, and certain constructions are actually much easier to develop on a shaft loom (tied weaves being one of them!). So developing this draft was a bit of an adventure. I can’t wait to see how it turns out! The vendor hall opens in 2.5 hours…. 🙂

But I saved the most exciting part for last!! I finally got to meet my “weaving mom”. Here she is:

Nancy Tepas - my weaving mom
Nancy Tepas – my weaving mom!

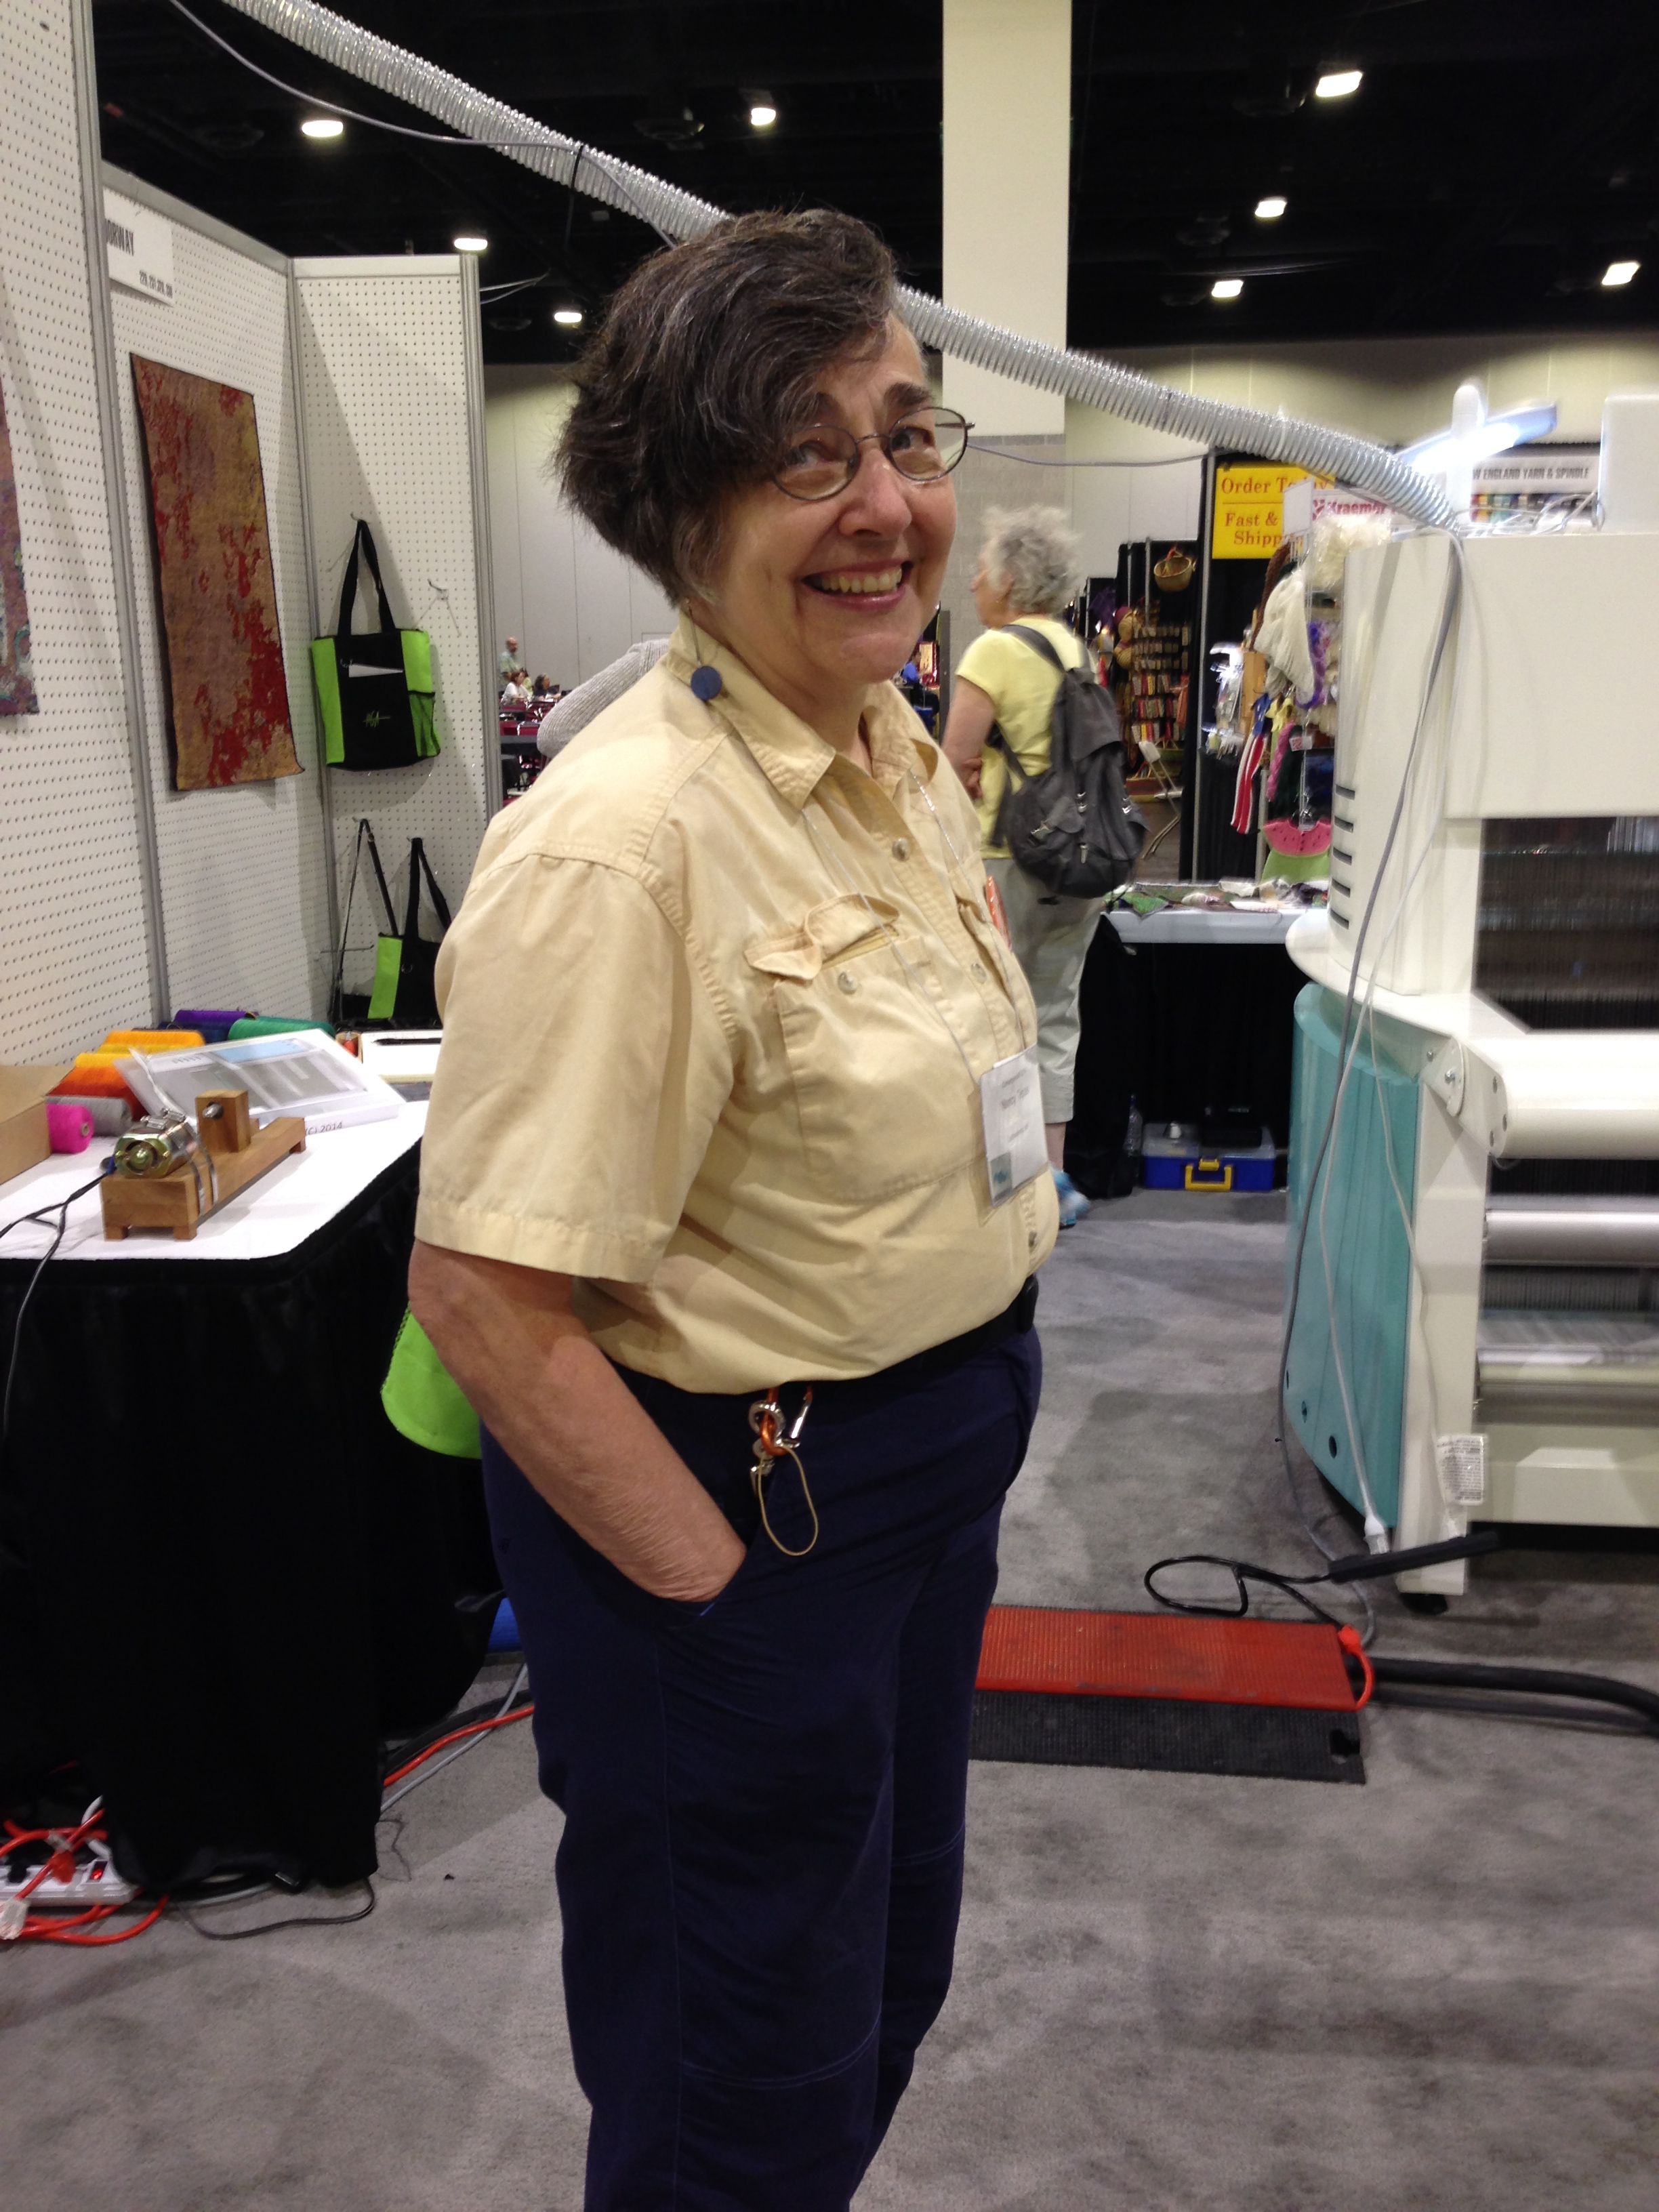
This is Nancy Tepas, a fiber artist and teacher. She’s the one who got me into weaving eight years ago – I was complaining that I was getting bored with spinning and knitting, and she wrote me and said weaving was the most intellectually interesting of all the fiber arts. So I bought an eight-shaft Baby Wolf, and the rest is history! I owe her an incredible debt for getting me started weaving. And I never thought I’d meet her, since she lives on the opposite side of the country, but there she was at Convergence! I am so excited (and honored) at finally having gotten to meet her in person.

And the cats? Well, Tigress has stopped growing at 8.5 pounds, but Fritz is growing into a big cat – eleven pounds so far and still growing! Alas, it means that some youthful endeavors are no longer possible. Here is Supercat trying (and failing) to climb the drapes as he did when he was a kitten. Somebody’s too big to climb the drapes now! Well, that’s a bit sad, but in the big picture, probably not a Bad Thing. For the drapes, anyway!

Fritz attempting to climb the drapes

Filed Under: All blog posts, textiles, weaving Tagged With: jacquard loom, photoshop

June 13, 2011 by Tien Chiu

Changing weave structures

(Warning: long and technical post.  If you aren’t into Photoshop liftplans, feel free to skip.)

I spent this morning fiddling with the weave structure for the sample.  What I wanted was a minor change that would put the gold threads on separate shafts, so I could separate them out easily from the painted warp when adjusting the warp between panels.  What I got was a complete revamp of the weave structure.  (It’s amazing how things can get out of hand!)

Here’s what I did:

I needed a minimum of 2 shafts for the interlacement of the gold threads (because the gold warp and gold weft need to interlace in plain weave).  I was going to use 2 shafts, to conserve shafts for the main pattern, but then realized that would leave me with 22 shafts, which is a difficult number to use with pattern overlays because it doesn’t divide evenly into much of anything (22 = 2 x 11, both rather extreme numbers for weaving).  I mulled over using two shafts to improve my selvages, then realized that the selvages in this piece don’t matter since it’s being cut up for clothing.  So I decided to spread out the gold threads over four shafts, and use 20 shafts for the tencel warp.  20 shafts = 4*5, which would allow me to do either a four-end broken twill overlay or a 5-end satin.  I debated awhile, but finally opted for a 5-end satin, with a gold warp thread between every four tencel threads.

Then I created the pattern in Photoshop.  The one I had originally was 24 pixels wide by 56 pixels long.  I needed something that would intersperse neatly with a five-end repeat and a four-end repeat (keeping my options open between a 4-end twill and a 5-end satin for the overlay).  I resized the image to 20 pixels wide (since I was using 20 shafts for the tencel pattern) by 40 pixels long, then fiddled with it until I arrived at a result I liked.

Here is the pattern image I started with:

Base for liftplan
Base for liftplan

Next, I added a 5-shaft satin “risers and sinkers” overlay, as documented by Alice Schlein in this blog entry:

20 shaft liftplan base, with risers and sinkers overlay

The purpose of this overlay is to ensure that no floats are longer than 4 shafts.  The black portions are 4/1 satin, the white portions 1/4 satin.

So far, so good.  But these were the tencel threads only; I needed to add the gold warp and weft.  How to do this in Photoshop?

Well, first I resized the image from 40 pixels to 50 pixels, using “nearest neighbor”.  This duplicates every 4th pixel, producing this:

Stretched version of basic liftplan.  Notice how every fourth pixel of the original is duplicated, starting with the third pixel from the top.
Stretched version of basic liftplan. Notice how every fourth pixel of the original is duplicated, starting with the third pixel from the top.

Having made space for the gold weft, I now needed to add the correct interlacements.  I decided I wanted the gold wefts to interlace with the tencel threads in a basketweave pattern – this would show the gold in short floats, but keep it relatively subtle.  (It would also provide a good structure of interlacements to tie down the burned-out ends post-devore.)  So I created an over-2, under-2 pattern for the gold weft threads on the 20 tencel-warp shafts:

gold weft interlacement with tencel threads

This was done using the paint bucket with pattern fill, something Alice Schlein and Bhakti Ziek covered in their book The Woven Pixel, and which is also covered in Alice Schlein’s The Liftplan Connection.

(The red is just a background so you can see the black and white pixels clearly.  In the real file they are transparent pixels.)

Next, I had to create the interlacement of gold warp with gold weft.  This would be plain weave:

gold warp (threaded 1-2-3-4) interlacing with gold weft, in plain weave

I could only have used two shafts for this, but since I had four shafts available, I decided to spread them over four shafts.

Finally, I created the interlacement of gold warp with tencel weft:

gold warp interlacing with tencel weft, over 2 - under 2

And put it all together:

final liftplan

Here’s the .psd file for the final liftplan, for those who want to look “under the hood”.

Then I cut and pasted the liftplan into Weavepoint, and added a threading with gold threads on shafts 1-4 alternating with tencel on shafts 5-24:

Final draft for new structure

(In this drawdown, the gold warp threads are yellow, and the gold weft threads are green.  Click to view the larger version – the white and yellow tend to merge in the smaller image.)

And voila!  A mere 2.5 hours of fiddling later, a “slightly modified” (aka totally revamped) draft for the sample.

I still need to figure out the correct sett for this draft – but I think 50 epi will work, at least for a starting point.  (That’s 40 epi for the tencel and 10 epi for the gold – basically setting it for a 5-shaft satin in tencel and ignoring the existence of the gold threads.)  I’ll adjust it up or down later, once I’ve woven a sample.

The warp is now rinsed, dried, and ready to put on the loom, so my next step will be winding the gold warp.  I’m hoping to get it beamed on today, and start threading tomorrow.

Filed Under: All blog posts, textiles, weaving Tagged With: autumn splendor, photoshop

April 28, 2011 by Tien Chiu

Risers and sinkers

Pretty pictures first:

devore samples - iridescent nylon
devore samples - gold embroidery thread

Those two I like a lot.  The polyester, however, didn’t thrill me at all:

devore samples - polyester

I am debating whether to use the nylon or the gold embroidery thread in the finished piece.  The nylon is much brighter and more glittery (which doesn’t show up well in the photo); the gold is more understated and elegant.

Since this is for a garment, which is typically viewed from several feet away (at least!), I think I will likely use the nylon.  If I were doing a smaller piece, for example for Small Expressions, I would use the gold – it’s pretty and would be best appreciated up close.

The polyester just doesn’t have any glitz, and I feel that glitz is important for this piece.  Not necessarily loud, but there should be some sparkle.

Now, the interesting technical stuff:

Some memory floating through the back of my head said that there must be an easier way to construct these drafts, and I was right!  I went back to Alice Schlein’s blog and found the entry on risers and sinkers, changed my pattern, and was off and running!

Here is the end result:

devore draft constructed using risers and sinkers.  Yellow and green threads indicate metallic thread carryalongs, red and white indicate tencel.
devore draft constructed using risers and sinkers. Yellow and green threads indicate metallic thread carryalongs, red and white indicate tencel only.

And, since this shows no evidence of how I constructed it, here is the .psd file.

After a false start or two, I have got the weave structure and the burnout weave structure to play nicely together, so I will be weaving up the samples for the Fine Threads Study Group over the next couple of days.

Filed Under: All blog posts, textiles, weaving Tagged With: devore, photoshop

May 25, 2010 by Tien Chiu

Designing doubleweave

I spent this morning playing with doubleweave design, and rapidly discovered that Fiberworks’ limitation of “only” 64 treadles was a serious limiting factor in what I wanted to do.  So I moved into Photoshop, and spent about an hour generating presets for doubleweave (thanks to Pat Stewart for showing me how!).  Then I started fiddling around with Photoshop.

(Warning: this is a long and fairly technical post.  If you aren’t into Photoshop design in weaving, feel free to skip it.)

Here’s what I did:

First, I took my profile draft and separated it into two layers, one for the white and one for the black.  I colored the white layer green for easier visibility:

Original profile draft
profile draft, separated into layers
profile draft, separated into layers (green layer, left; black layer, right)

Then I made layer 2 (the green layer) invisible, and selected a section in the black layer (figure 1).  I filled that section with the chosen preset (figure 2).  Then I made the green layer visible and the formerly-black layer invisible, and filled the green parts with the second preset (figures 3, 4).  Finally, I made both layers visible again (figure 5) to produce the finished liftplan.

the process of filling the layers

I did it this way because I wanted control over each section of the liftplan.  I wanted to be able to fill one section with 1/3 twills on top, one section with 2/2 twills on top, and one section with 3/1 twills on top.  Using layers rather than the magic wand enabled me to select each section separately, without a whole lot of fiddling.  Here’s a photo of the final result, which has three different patterns done up in sections:

1/3, 2/2, and 3/1 twills in sequence

The first section has 1/3 twill, warp A and weft C on top, alternating with warp B and weft D on top.  The second section is the same, but with 2/2 twills, and the third section is the same, but with 3/1 twills.  Totally different effects, same threading, same warp/weft combination.

I don’t think I’ll use this particular drawdown for my shawls since the changes are so dramatic (I was hoping for a subtler effect), but I think the method is interesting, which is why I’ve shared it here.

We have now received all the RSVPs for the wedding – it’s looking like it will be smaller than expected, about 57 people rather than 75.  We’re a bit disappointed that so many people can’t make it, especially the older relatives suffering from health problems, but on the plus side, we’ll get to spend more time with the people who are coming!  (And I have fewer bookmarks to make!)

Filed Under: All blog posts, textiles, weaving Tagged With: doubleweave, doubleweave shawls, photoshop, woven pixel

Subscribe to Blog via Email

Information resources

  • Dye samples
    • Procion MX fiber-reactive dye samples on cotton
    • How to "read" the dye sample sets
    • Dye sample strategy - the "Cube" method
  • How-Tos
    • Dyeing and surface design
    • Weaving
    • Designing handwoven cloth
    • Sewing

Blog posts

  • All blog posts
    • food
      • chocolate
    • musings
    • textiles
      • dyeing
      • knitting
      • sewing
      • surface design
      • weaving
    • writing

Archives

Photos from my travels

  • Dye samples
    • Procion MX fiber-reactive dye samples on cotton
    • How to "read" the dye sample sets
    • Dye sample strategy - the "Cube" method
  • Travels
    • Thailand
    • Cambodia
    • Vietnam
    • Laos
    • India
    • Ghana
    • China

Travel Blog

Entertaining miscellanies

© Copyright 2016 Tien Chiu · All Rights Reserved ·


Loading Comments...