Tien Chiu

  • Home
  • About Tien
    • Honors, Awards, and Publications
  • Online Teaching
  • Gallery
  • Essays
  • Book
  • Blog
  • Dye samples
You are here: Home / Archives for knitted blank

June 10, 2011 by Tien Chiu

Colors, colors

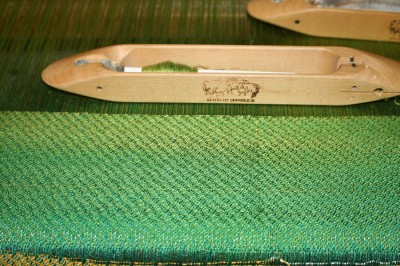
I finished the first sample panel:
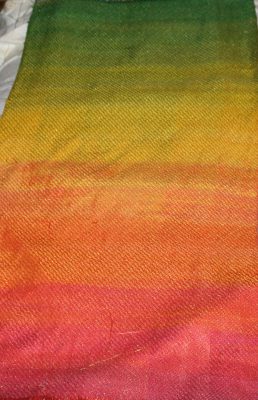
Completed panel, first sample

My conclusions:

  • I do need to mingle the bouts near the edges, as some striping is evident where the bouts got out of sync.  This is most obvious in the left-hand side of the yellow section, but is also visible in the lower right of the red section.  It’s much more obvious in person.
  • I need to fix some tension issues.  The warp was much looser on the side bouts than in the center, resulting in much more take-up – about 4″ over the first 24″ – which meant the bouts got out of sync.  I have some ideas of what is wrong and will take steps to fix it in the next set of samples.
  • I need to make the transitions between colors more gradual in the knitted blank.  There’s some pretty pronounced striping where the color changes happened too fast.
  • I’m not sure I like the effect of switching to the silk.  The fabric is heavier (at 7000 ypp, it’s nearly 20% heavier than the tencel) and as a result, does not drape as well.  Shorter floats may contribute to the effect.
  • And – and this is the kicker – I don’t like the colors.  They’re too bright; they make me think of summer flowers, not autumn leaves.  Compare it to the original sample in tencel:
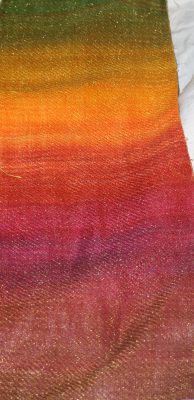
Tencel sample (original)

At this point I am not quite sure what to do next.  Do I continue on in silk, or switch back to tencel?  Do I try a sample in 60/2 silk (for a lighter fabric), using the old color set?  I am baffled by the options.  I am going to take a day or two to meditate on this, and meanwhile work on my Handwoven article.  But I have the feeling I will go back to the tencel, and weave (yet another) sample, in the original colors, this time at full width.
Filed Under: All blog posts, textiles, weaving Tagged With: autumn splendor, knitted blank, painted warp

June 9, 2011 by Tien Chiu

First panel

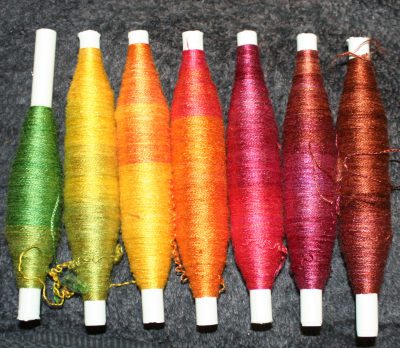
By working diligently (okay, obsessively 🙂 ), I have managed to get the first blank knitted, dyed, unraveled, and on the loom.  Here is a shot of the pirns – aren’t they pretty?

Pirns from a knitted blank

And here is the beginning of the weaving:

Painted warp, knitted blank
The weaving begins!

My only critique (so far) is that some of the color changes lo0k more abrupt than I’d like.  I will keep an eye on this as I weave it off, to see if I need to modify my painting technique for the next blank.

Filed Under: All blog posts, textiles, dyeing, weaving Tagged With: autumn splendor, knitted blank, painted warp

June 7, 2011 by Tien Chiu

The magic of sampling

I spent most of my play time today measuring and sampling.  First I measured the weft: I wove twenty picks in pattern, then laboriously unwove those twenty picks, measured the total length of those twenty weft shots, and divided by twenty to give the average length of a weft shot.  (Which happens to be 23.25″ on a fabric that is 22.75″ at the fell, and 23.5″ in the reed.  Only 2% weft take-up!)

Anyway: I then wove another 60 or so picks and used a linen tester to measure the picks per inch: about 39 to 39.5.  So I needed about 23.25″ x 39.25 = 912 inches of weft to weave up one inch of fabric, measured under tension on the loom.

Armed with that information, I started knitting up sample blanks.  I picked an arbitrary number of needles, started knitting, and then (after the knitting was fairly along), marked the yarn, knitted twenty rows, marked the yarn again, and knitted a couple more rows to stabilize the fabric before removing it from the machine.

Then (to mimic the dyeing process), I washed the swatch with hot soapy water and pressed it dry with a hot iron.  Unraveled the swatch and measured the yarn between the marks, and divided by twenty to get the average length of one row.  After five or six swatches, I determined that using 57 needles would give an average row length of 23.25″, so that forty rows (an easy number to measure) should give approximately one inch’s worth of finished weaving.

Then came the acid test: I knitted up 160 rows on the machine, using 57 needles, washed and dried the swatch, unraveled it, and wound the resulting pile of yarn onto a pirn.  Wove up the sample, and…ta-daa!

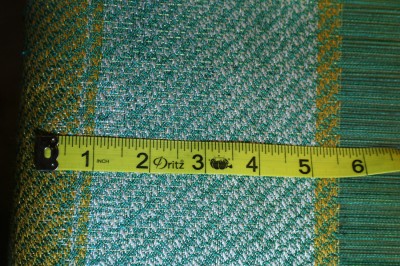
Four inches!
Four inches!

As you can see, my calculations were dead on the nose: 160 rows produces just a hair over 4″ of woven fabric.  I am smug.  🙂  All that tedious measurement and calculation paid off!

Anyway, after one or two more measurements, I am now armed with all the information I need to make my knitted blanks.  So today and tomorrow I will be knitting up blanks to dye for the sample warps.  I need three blanks, each 57 needles wide and (gulp) 2400 rows long.  I’m hoping to get the first one knitted and dyed over the next day or two.  That will let me get going on the first sample panel, and see how the colors blend in the weaving.

I can hardly wait!  This will be really neat to play with.

Filed Under: All blog posts, textiles, weaving Tagged With: autumn splendor, knitted blank

June 3, 2011 by Tien Chiu

The painted-warp puzzle

While I spent most of this week biting my nails and waiting by the phone (job interview nerves), I have wound and painted a new seven-yard sample warp, one which I hope will help me solve some of the process puzzles around making a painted warp (almost) precisely reproducible.

The problem is this: I need ten identical, or nearly-identical, painted warp/knitted-blank weft panels to make the jacket.  (Front, side front, back, side back, + sleeve = 5 panels x 2 sides = 10 panels.)  However, painted warps are notoriously difficult to reproduce precisely, especially when weaving multiple painted warp panels in a row.  Painted warps, in fact, tend to belong squarely to the improvisational weaver, not to inveterate planners like me.  Combine it with a knitted blank, which also tends to be imprecise, and making the panels match becomes that much harder.

So.  First, it is true that no two painted-warp panels will ever match precisely, because the dye flows differently, the warp shifts a little, etc.  That’s OK.  Mostly what I want is for the color changes to occur in about the same spot all the way up and down the garment, so they won’t be visually jarring.  That’s precise enough for me.

Second, the puzzle of how to make ten panels of painted warp match each other – especially difficult since warp bouts shift during painting, and while being beamed onto the loom.  The inaccuracies add up, and can easily amount to as much as 6 inches over the course of a 7-yard warp.  This is pretty simple to solve, though.  All you need is registration marks (so you can line up the bouts correctly when weaving a new panel) and a way to adjust the bouts individually.  The first is easily done by wrapping a tight choke tie around each warp bout at the start of each panel’s length of warp.  The choke tie resists the dye and results in a highly visible white spot on each bout; then all you have to do is line up the white spots, and you know the bouts are correctly arranged.  Adjusting the bouts is easy if you simply throw them off the back of the loom and weight them individually, rather than beaming onto a warp beam – then you can easily pull them forward/back as needed.  (I will use a trapeze for this, as I did with Kodachrome, so I can weave longer before having to adjust the weights.)

To make each panel match the others, simply paint next to a measuring tape – three inches of this color followed by three inches of that color, etc.  I used this technique quite effectively for my Kodachrome jacket.

Next is the puzzle of the knitted blank, which can be separated into three parts:

  • How do I paint a knitted warp so the color changes are consistent across 10 knitted blanks?
  • How do I know how long to make each section of color in the knitted blank? In this case the color changes in the knitted blank weft, once woven up, need to correspond to the color changes in the painted warp. This is decidedly nontrivial.
  • How do I know where on the warp to start weaving the knitted blank weft, so that the color changes line up correctly?

The first question is easy to answer: if you place marker rows in the knitted blank (as I showed a few blog posts ago), it’s easy to paint each section a different color and get precise color changes that way.

The second question is also relatively easy to answer.  Basically, you need to figure out how much weft yarn goes into an inch of fabric, and knit up your blank with markers every 1″ worth of weft.  To do this:

  1. Weave a short sample on the warp, and count the number of picks per inch.
  2. Unweave part of it – say, about 10 picks’ worth – and measure the unwoven weft to determine exactly how long an average weft shot is.
  3. This, in turn, tells you how much weft is required to weave one inch of fabric:  (Length of weft shot ) x (picks per inch) = (length of weft required to weave one inch of fabric).
  4. Knit a short sample on the knitting machine at a width you think is appropriate.  Unravel several rows and measure the yarn.  If you unravel four or five rows, you should get a pretty good idea of how many inches there are in a row of knitting.  Adjust the number of stitches up and down until you’re happy with the length of yarn in a row.  (For my sanity’s sake, I like to make one row of stitches equal in length to one or two shots of weft; that makes calculations easy.)
  5. Figure out how many rows are required to make one inch’s worth of weft.
  6. Knit up a short sample blank, putting in a marker row after every inch’s worth of weft.
  7. WEAVE A SAMPLE to make sure that all those wonderful calculations worked out more or less accurately, before committing to an entire knitted blank.  There are a lot of variables and opportunities for the yarn to shrink, especially when dealing with elastic fibers.  An inch’s worth of weft  should produce roughly an inch’s worth of fabric – plus or minus about 5%.
  8. Knit your blanks, dye them identically, and start weaving!

(I know that doesn’t sound like a very simple solution, but it’s the simplest I know of.)

The third question was the stickiest one for me.  The best solution I could think of was measuring: after all the registration marks are lined up, I will start weaving the knitted-blank weft at exactly 4″ past the registration mark.  This may not be perfect, but at least it will be consistent across each panel.  If the knitted blanks are painted consistently, and the warps are lined up and also painted fairly consistently, the result should be a relatively consistent panel.

One could ask whether I’m going too far out of my way to make sure that the panels match.  After all, part of the interest in painted warps is in the complexity of the natural color changes; why not let the panels be somewhat different from each other?  Won’t that just add to the color complexity/texture/interest of the garment?

Well, perhaps.  But there will be plenty of color complexity/texture/interest in the garment even if the panels all match.  I am not trying for complete uniformity – that is basically impossible because of the many variables involved – but I want to keep the variation between panels subtle, not jarring.  And to do this, I need greater control over the warp and weft colors than is typically attempted.  Thus, the calculations and the lengthy sampling process.

The painted warp is in the oven baking (to set the dyes) as I type; tomorrow morning I’ll rinse it out.  While it’s drying, I’ll wind and beam on the metallic gold warp, which goes onto the sectional beam.  Between that, a guild meeting, and a craft group meeting, I’ll be surprised if I get anything else done tomorrow.  But I think that will be enough!

Filed Under: All blog posts, textiles, dyeing, weaving Tagged With: autumn splendor, knitted blank, painted warp

September 2, 2009 by Tien Chiu

Ocean Sunset II

before-wet-finishing

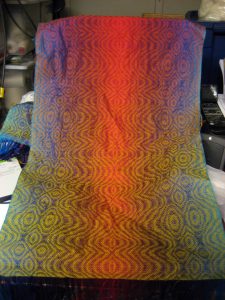
This was a variation on the Ocean Sunset shawl, except that I made it with a knitted blank!

Knitted blanks are an interesting concept taught to me by Nancy Roberts of Machine Knitting to Dye For.  You knit up a rectangular piece of fabric, dye it, and then unravel it and reuse the yarn.  Using this technique you can get gradual color changes WITHOUT having  to dye a zillion skeins, and you can get other effects as well (see the “Crazy Colors” shawl for an example).  In this case, I dyed a single blank a gradual change from yellow to red and back again to see what would happen when I wove it up!

I am of mixed minds about this shawl.  I don’t like the boldness of the lines near the bottom of the shawl, but I like the idea of the gradual color change.  I think I may try this idea again, but with a simpler pattern.

[Show as slideshow]
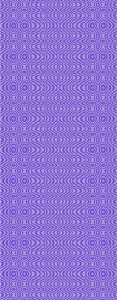
The pattern for Ocean Sunset II The pattern for Ocean Sunset II.
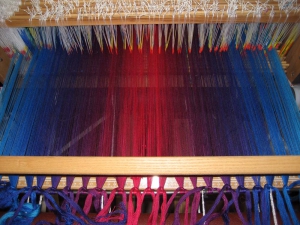
The wound warp for the Ocean Sunset II shawl The warp on the loom. Doesn't it look pretty?

Knitted blank for Ocean Sunset II This is the knitted blank. Notice how it shades gradually from gold to red.
Bobbins wound from knitted blank It's hard to see in the photo, but the bobbins gradually change color from start to finish. Beautiful!

View of the Ocean Sunset II shawl before wet-finishing The completed shawl before wet-finishing.

Filed Under: Creative works, finished, Weaving Tagged With: blue to fuchsia warp, gradient colors, knitted blank, network drafting

Subscribe to Blog via Email

Information resources

  • Dye samples
    • Procion MX fiber-reactive dye samples on cotton
    • How to "read" the dye sample sets
    • Dye sample strategy - the "Cube" method
  • How-Tos
    • Dyeing and surface design
    • Weaving
    • Designing handwoven cloth
    • Sewing

Blog posts

  • All blog posts
    • food
      • chocolate
    • musings
    • textiles
      • dyeing
      • knitting
      • sewing
      • surface design
      • weaving
    • writing

Archives

Photos from my travels

  • Dye samples
    • Procion MX fiber-reactive dye samples on cotton
    • How to "read" the dye sample sets
    • Dye sample strategy - the "Cube" method
  • Travels
    • Thailand
    • Cambodia
    • Vietnam
    • Laos
    • India
    • Ghana
    • China

Travel Blog

Entertaining miscellanies

© Copyright 2016 Tien Chiu · All Rights Reserved ·


Loading Comments...